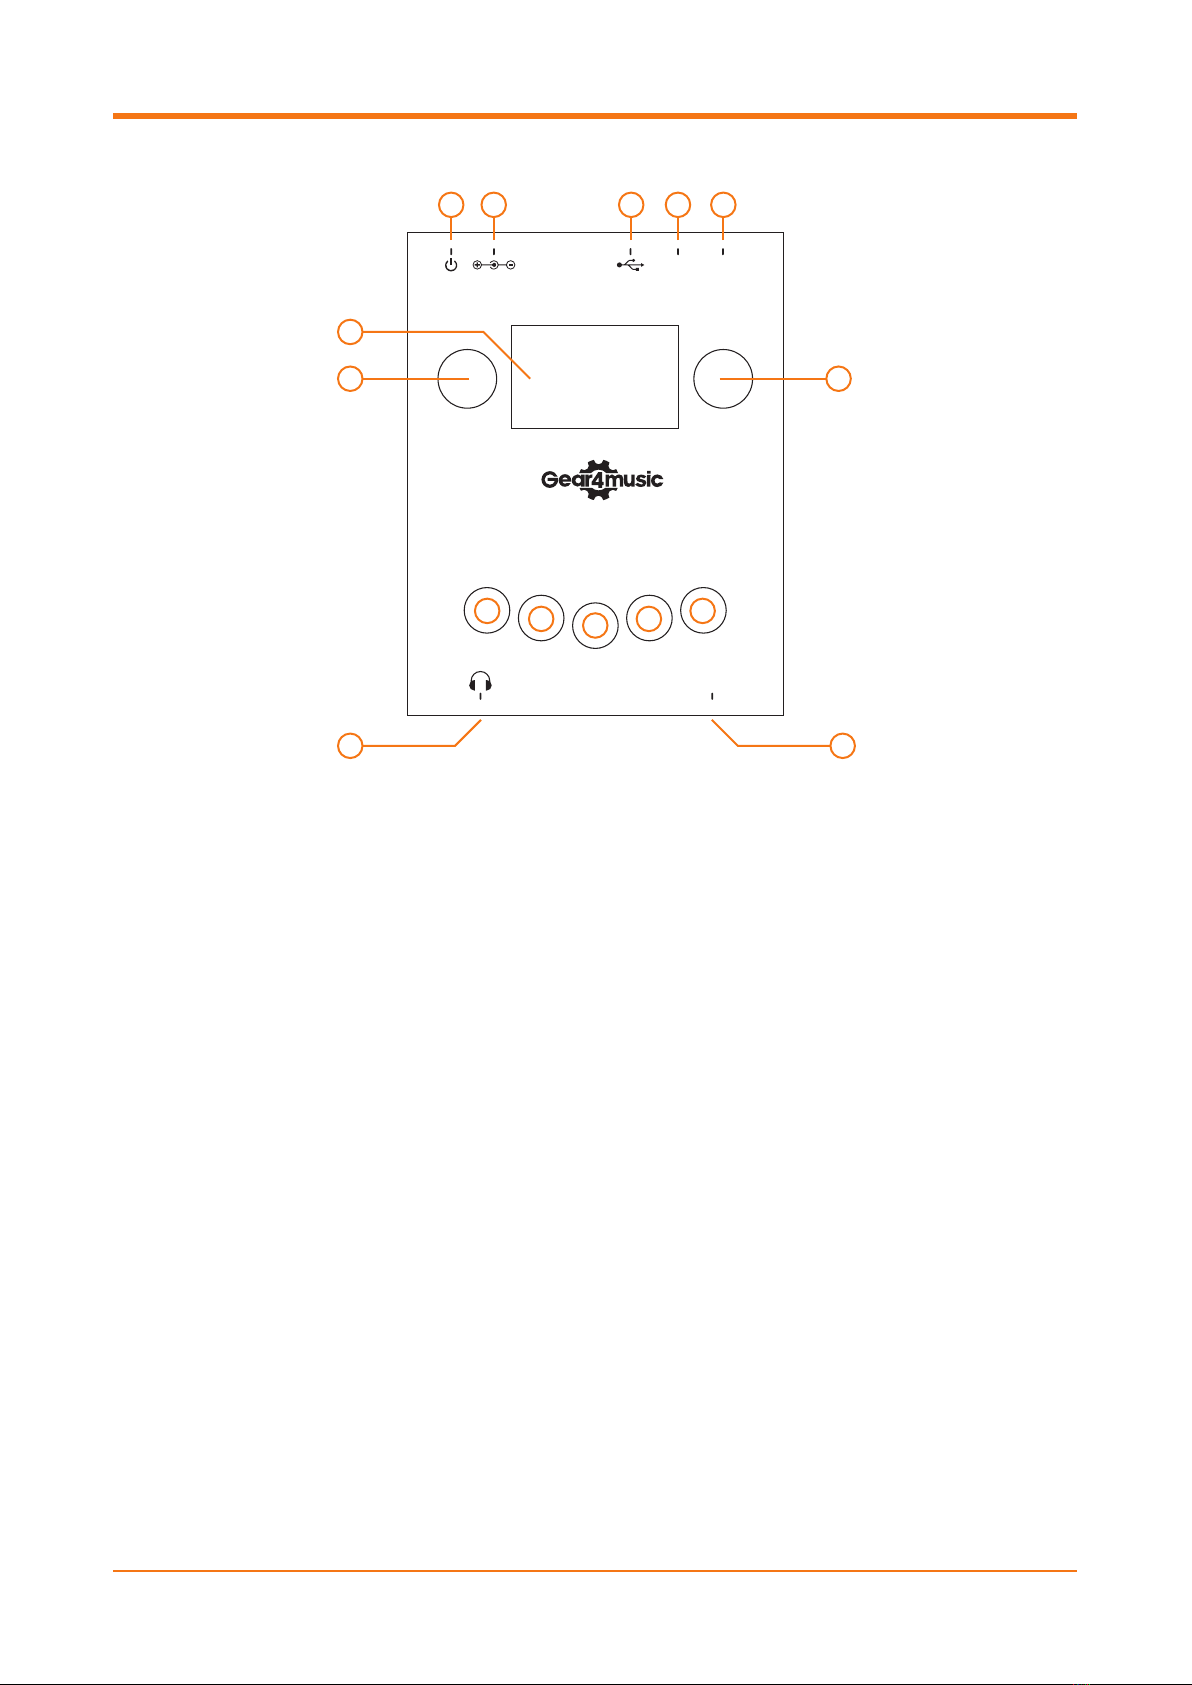
FUNCTIONS
1. POWER
Used the switch the JDD200 off or on. A power
supply needs to be connected to enable the
module to work. Use the switch to select OFF
or ON.
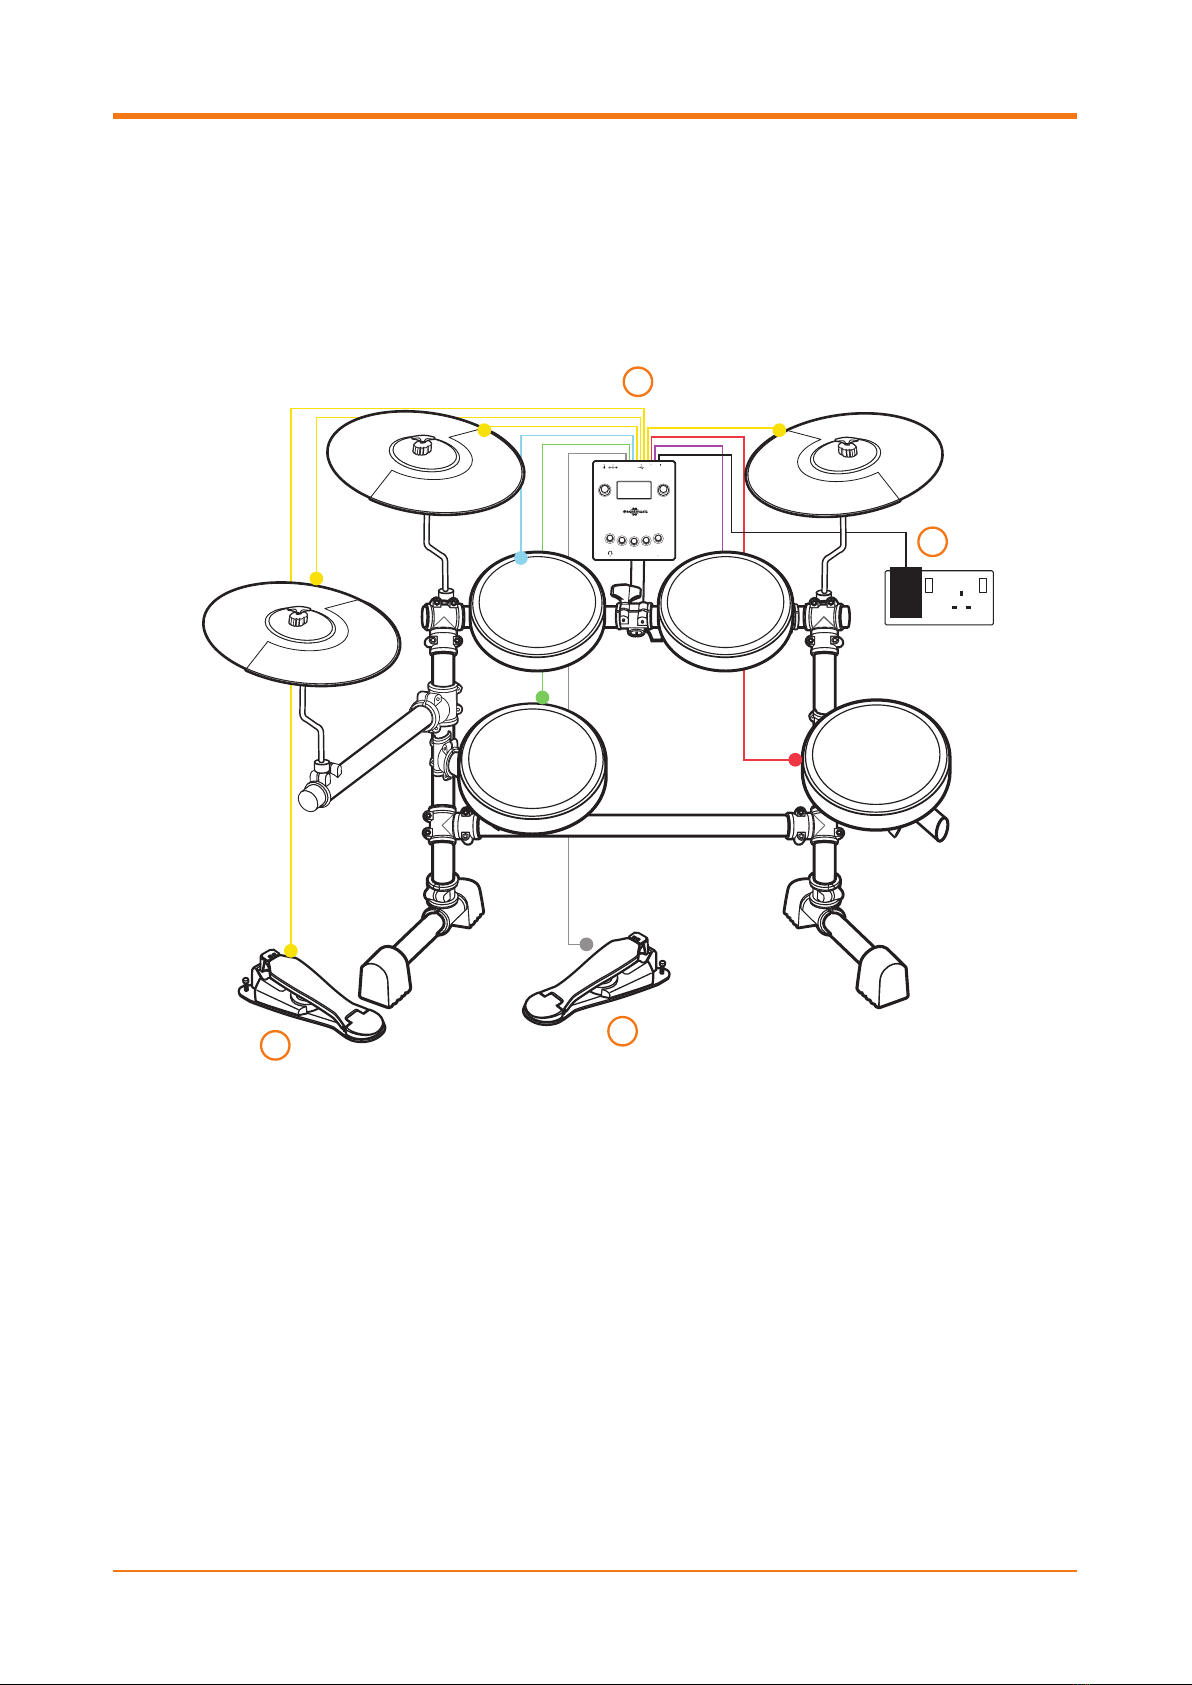
2. DC
Used to connect the included 9v power supply
for providing power to the module.
NOTE - only use the included power supply.
3. USB
Used for connecting to a computer for USB MIDI
connectivity.
4. L/MONO
Line out jack output, use a jack cable to connect
to an amplifier, drum monitor, interface or PA
system. Not suitable for headphones. Using one
jack cable only in this output creates a mono
output.
5. R
Line out jack output, when using two jack cables
for stereo output, this will carry the right sided
signal. Connect to a stereo amplifier, drum
monitor, interface or PA system.
6. VOLUME
Control for adjusting the volume on the
drum kit.
7. SCREEN
Used to display information from the module.
8. DATA
Used to adjust settings within the drum kit after
being selected by the individual buttons below.
9. KITS
Used to scroll through and choose which of
the 38 drum kit sounds you want to use. Press
the KITS button and rotate the DATA wheel to
select, the SCREEN will display which number
kit is currently active. The SCREEN will show
D.01 – D.38 to display this information.
10. SONG
Used to select one of the accompaniment
songs that are built in to the drum kit. Press
the SONG button to activate this mode, then
use the DATA wheel to scroll through the 44
choices. The SCREEN will show S.01 – S.44 to
display this information. Use the PLAY/STOP
button to start the song playing, pressing again
to stop the song. An index of songs is available
later in the manual.
5
VOLUME
KIT
LINE IN
PLAY/STOP
SONG TEMPO
CLICK
DATA
DC USB LINE OUT
L/MONO R
JDD200
14
8
910 11
1 2 3 4 5
7
12 13
15
6