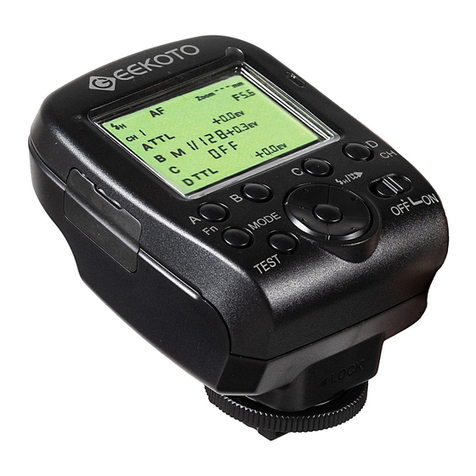
Geekoto C1 Technical manual

C1 (Commander) Flash Trigger
Operation instruction
Fit for Sony

Safety instructions
Function list
Components
LCD Screen
Power switch
Preparation
Functions
Customized function
Sync mode setting
Wireless channel setting
Assisted focusing light
Modes
Compatible devices
Technical Features
01
02
03
08
09
11
15
19
05
06
12
13
14
20

Please read this manual carefully before using the device.
1.Please turn off the trigger, the flash light and the camera
while connecting them with each other.
2. Do not let the product fall down and do not shake it as
this might cause damage to the product.
3. Please turn off the trigger and remove the batteries if
the device is not used for a long time.
4. Only use proper batteries. Please be aware that
reversed batteries might cause battery leaking or
explosion.
5. Do not put the device in high temperature environment
such as direct sunlight, dashboards and other.
6. Please keep it dry and do not use it with wet hands nor
immerse it in water or rain as this can lead to product
damage.
7. Do not use the device in flammable and explosive
situations, as this might cause explosion or fire.
8. This product involves batteries. Regarding the use of
batteries please follow strict relevant regulations.
Otherwise it might cause property damage or personal
injury.
1. Available modes:TTL, M and Multi
2. Front curtain sync/ rear curtain sync / high speed sync
(up to 1/8000s)
3. Exposure compensation (FEC)
4. Exposure Locked (FE LOCK)
5. Focusing assist (can be disabled)
6. Mixed flash mode
7. Auto save function
8. 4 groups with different power for each flash lighe output
01 02

03 04

Automatic focusing assist
High speed sync
Manual / strobe flash mode
Wireless channel
Flash parameter setting for A
Flash parameter setting for B
Flash parameter setting for C
Flash parameter setting for D
Focal distance
Aperture
Frequency
Times
05 06

07 08

09 10
After the transmitter has started, press the mode button
repeatedly to switch between the mixed mode and the
multi mode.
Mode options
Press the test button to check whether the flash units
with the same channel will flash with the desired mode
and parameters.
Note: Please note that the test button will only work if
the transmitter is not attached to the camera.
Test
Press any button to turn on the LCD backlight. If the
trigger is not used for about 10 seconds the LCD light
will automatically turn off.
LCD
Press the OK button for about 3 seconds and the trigger
will restore the factory settings.
Restore Factory settings

A B CD
Fn
TEST
CH
OFF ON
H
Press the group A button for about 2 seconds and the
transmitter will enter the customized function setting.
There you can turn on and off the function with the left
and right button.
11 12
Within the mixed mode press
the group C button for about 2
seconds and the sign for high
speed sync will be shown
on the display. If you press the
group C button again for about
2 seconds the high speed sync
mode will be turned off again
(no sign on the display).

Press the group D button for
about 2 seconds until the
channel number is highlighted.
Press the left and right button
to change the channel number
from 1 to 16.
If the settings are done press
the OK button to confirm the
value.
13 14
If the automatic focusing is enabled on the transmitter,
it will automatically help to focus in low light conditions.
To use the focusing light correctly, you need to set the
camera in the automatic mode. Turn on the auto focus
function on the camera lens. Turn on “focusing assist”
on the transmitter.

1) Press the mode button repeatedly to select the
transmitter mode as mixed mode (as shown in the
picture).
2) Press the group buttons (A,B,C,D) shortly to select
or exit the flash group setting. The group which can
be set is indicated by an arrow.
15 16
3) If you have selected a group and it is indicated with
the arrow, press the mode button to set the group in
the desired mode. This can be done for every group.
The modes are as follows:
TTL: Here the exposure compensation can
be adjusted from -3.0EV to +3.0EV(in total 22 levels).
M: The flash output range is from 1/128-1/1. Press
the left and right button to increase or decrease the
value in 0.3EV increments (22 levels).
OFF: That means this flash group is not engaged
and won’t flash.
4) After all the parameter settings are done, press the
group buttons (A,B,C,D) to exit and sent all the
information to the other flash units. Please note that
the flash units need to have the same channel as
the transmitter.

1) Press the mode button repeatedly to select the
transmitter mode as multi mode (as shown in the
picture). Under this mode the parameters of each
group is the same.
2) If you have chosen the multi mode press the left
and right button to adjust the flash power. The flash
output can be set from 1/4 to 1/128 (in total 6 levels).
17 18
3) Setting the frequency
Press the OK button repeatedly until the frequency
number is highlighted.
Press the left and right buttons to change the value
from 1-199Hz.
4) Number of flashes
Press the OK button repeatedly until the number of
flashes are highlighted.
Press the left and right buttons to change the value
from 1 to 40.

5) Flash group setting
Press the group buttons A, B, C, D shortly and the
arrow will indicate in which mode setting you are.
You can turn the groups individually on and off by
pressing the left and right button. You can also
press the mode button shortly to turn the group on
or off.
Alpha 77ll, Alpha 7Rll, Alpha 7R, Alpha 58, Alpha
99 and ILCE600L
19 20
Other manuals for C1
2
Table of contents
Other Geekoto Camera Accessories manuals