GeekPlus G34 User manual

G34
UserManual V1.0
Note
•This manual is mainly for Windows 10. There might be some slight differences if
you use other windows systems.
• This manual contains the common functions of most models. Maybe it does not
fit very well with your model for some functions, or maybe some of your model
functions are not contained in this manual.
• The illustrations in this manual may differ from the actual products. Please
prevail in kind.
■Before using the computer, please read the safety precautions and important
tips carefully and patiently first!

Content
Chapter 1 Know your computer..............................................................................................1
OverView...............................................................................................................................1
Connecting to Power........................................................................................................... 2
Power on System.................................................................................................................3
Chapter 2 Operating Windows 10........................................................................................... 3
Configuring the operating system in initial use............................................................... 3
Operating System Interface............................................................................................... 3
Keep the computer in sleep mode or shut down............................................................ 5
Connect to the wireless network....................................................................................... 7
Chapter 3 Troubleshooting.................................................................................................... 14
Common problems.............................................................................................................. 8

1
Chapter 1 Know your Product
OverView
1. Power Connector
2. USB 3.1 Gen1 Port*1
3. HDMI Ports
4. USB 3.1 Gen1 Port*4
5. Vent
6. MIC
7. Combo Audio Jack
8. R45 Jack
9. MicroSD
10.Power Indicator:Power on Blue
11.Power button
USB Port
You can connect a USB device to your computer by inserting its USB plug(Type A) into
the USB port on your desktop PC.
HDMI Port
You can connect to monitor by inserting a HDM Cable plug(Type A) into the HDMI Port
on your desktop PC.
6
7
8
9
10
11
5
1
2
3
4

2
Combo Audio Jack
1. The combo audio jack does not support a conventional microphone connection.
2. Due to differences in industry-standard, when third-party connects headphones or
headset microphone, recording functions may not be supported well.
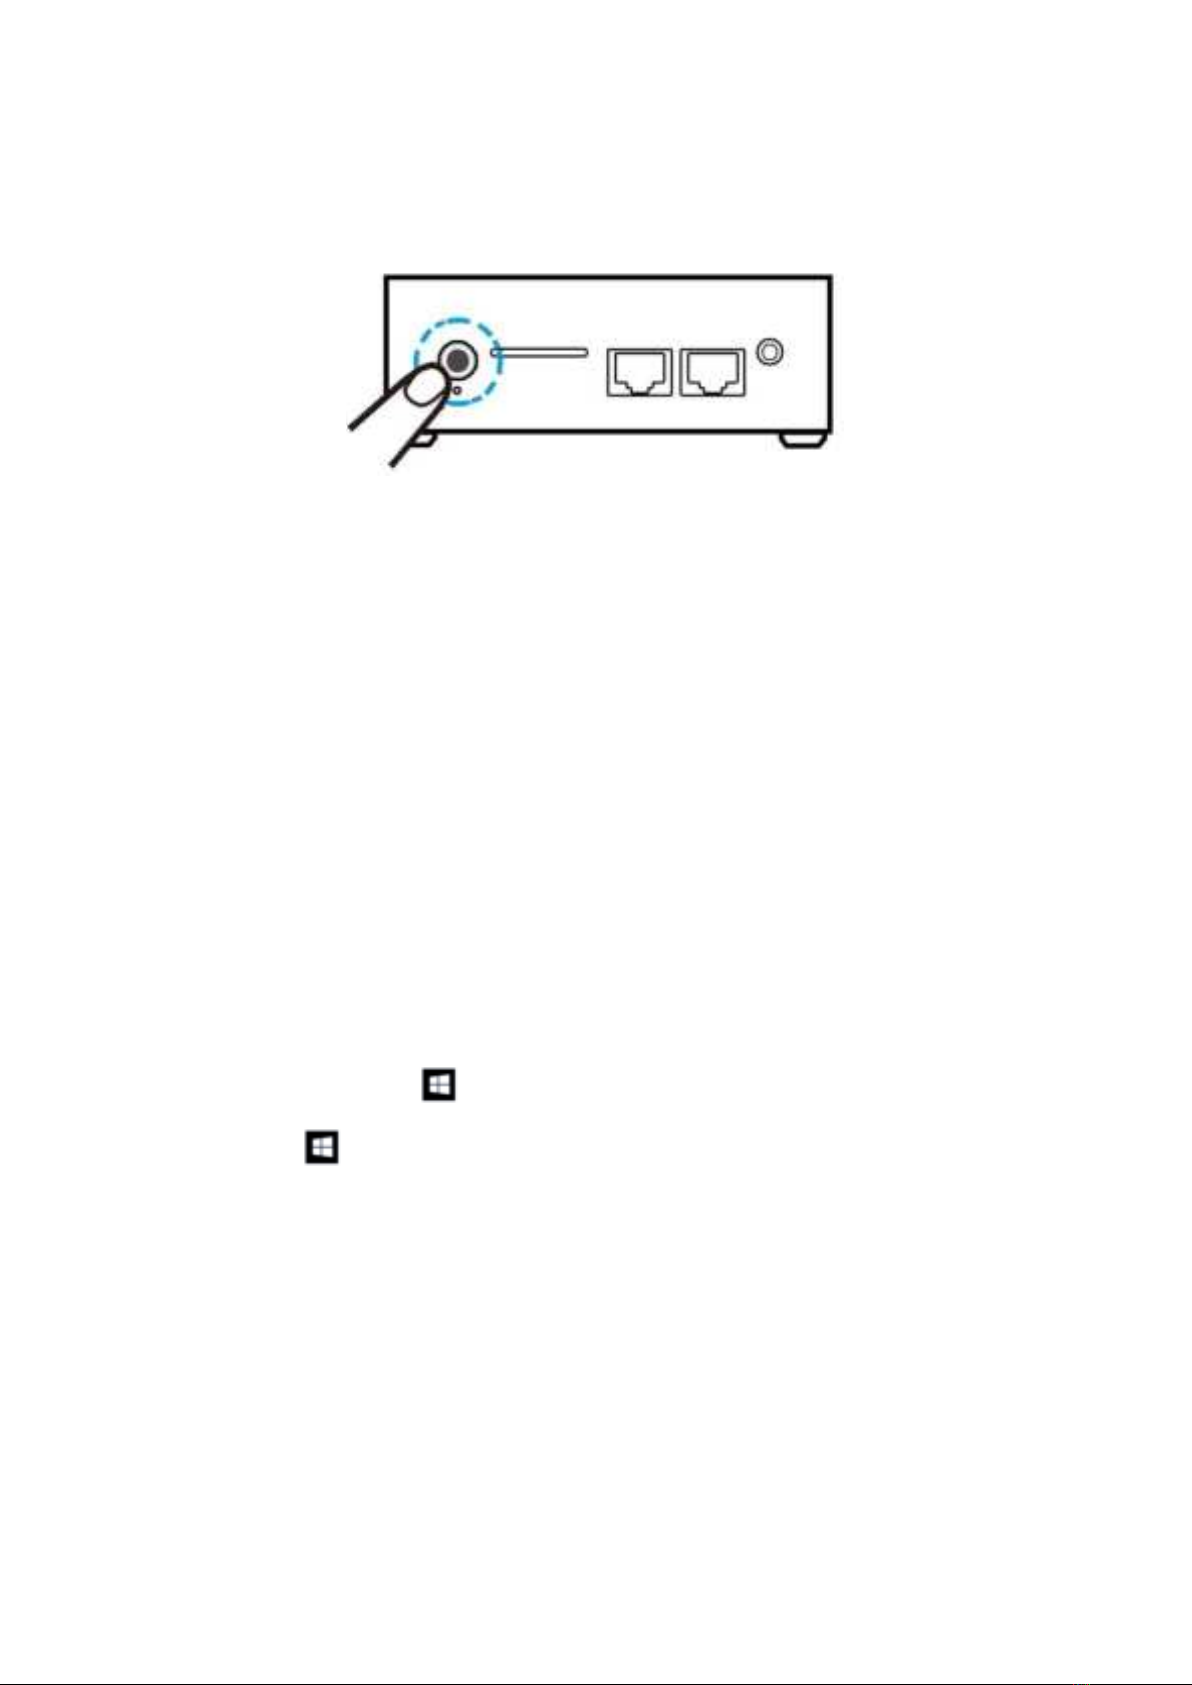
RJ45 Port
1. Wired connection is a reliable and safe way to connect computers to the Internet. You
can connect the network to the computer.
Consult your Internet service provider to get detailed information about configuring your
computer to access the Internet
Micro SD Card Slot
The computer supports the following types of memory cards:
• Micro Secure Digital (SD) card
• Micro Secure Digital High Capacity (SDHC) card
• Micro Secure Digital Extended Capacity (SDXC) card
Note:
1. You can only insert one memory card in the slot each time.
2. Please insert memory card until into the bottom of the slot.
3. Remove the memory card from the memory card slot and gently pull the memory card
out of the slot.
4. Before removing the memory card, safely remove hardware and eject media utility to
disable the card to avoid data corruption.
Chapter 1 Know your Product
■Connecting to Power
Plug the AC adapter cable into the DC power connector.Connect one end of the power
cable to the supplied power adapter,and the other end to a wall outlet.
Note that the AC adapter included in the package is approved for your desktop PC,using
other adapter model may damage either the desktop PC or other devices attached to it.

3
Power on System
Connecting monitor/keyboard/mouse/LAN and press power button to power on your
desktop PC.
Chapter 2 Operating Windows10
Configuring the operating system in initial use.
The first time you use, you need to configure the operating system. The configuration
process may include the following steps:
1. Accepting the End User License Agreement
2. Configuring the Internet connection
3. Registering the operating system
4. Creating a user account
Operating System Interface
Windows 10 comes with a powerful and useful start menu.
To open the start menu, do one of the following:
•Press the Windows key on the keyboard
• Select Start on the lower-left corner of the desktop

4
Settings Button
Settings let you perform basic tasks. You can also search for more settings with the
settings search box in the upper-right corner.
To open the settings, do the following: Open the Start menu and select Settings
Power Button
The power button is on the Start menu, click it you can choose to shut down or restart the
computer, or put the computer into sleep mode.
Start Button
Select the Start button on the taskbar, open the start menu.
Search Box
Search for anything, anywhere.
Start menu
You can personalize the start menu with your favorite apps.
To personalize the Start menu, do the following:
Right-click the application which you want to add to the Start menu, then select Pin to
Start menu.

5
Note:You can also drag apps from the most used or All apps columns to add them to the
start menu.
Chapter 2 Operating Windows10
Keep the computer in sleep mode or shut down
When you finish using your computer, you can turn the computer into sleep mode or shut
down.
Putting your computer to sleep
If you will be away from your computer for only a short time, put the computer to sleep.
When the computer is in sleep mode, you can quickly wake it to resume use, by passing
the startup process.
To turn the computer to sleep mode, do one of the following:
• Close the display lid.
• Press the Power button.
•Open the Start menu, and then select power -sleep
To wake the computer, do one of the following:
• Press any key on the keyboard. (Notebook only)
• Press the power button.
Turn off the computer
If you will not use your computer, please turn off the computer.
To shut down the computer, do one of the following:
• Open the Start menu, and then select power - shut down.

6
• Right-click the Start button on left bottom, and then select shut down or log off.
Tasks view
To open the task view, do one of the following:
• Select the task view button on the taskbar.
• Press the Windows + Tab key.
• Swipe from the left edge of the screen to the middle.

7
Chapter 2 Operating Windows10
Connect to the wireless network
Enabling wireless connection
To enable the wireless feature, do the following:
• Click the network menu on the right bottom of the taskbar , to open the Network
configuration page
Connect to a wireless network
• The computer will automatically scan for available wireless networks and list them in
the list when wireless is enabled.
• Click the network name in the list to choose, and click Connect.

8
Note:Some of the networks need to connect the network on basis of security key or
password. You need to enter a security key or password. To connect to such a network,
you need to ask your network administrator or Internet, and the service provider for
security key or password.
Chapter 3 Troubleshooting
Common problems
1. Display issues
When I turn on the computer, nothing appears on the screen.
•If the screen is blank, please make sure:
- The AC power adapter is connected to the computer, and plugged into a working electrical
outlet.
- The computer power is on. Press the power button again to confirm.
• If these items are properly set, and the screen remains blank, have the computer serviced.
The screen goes blank while the computer is on
•Your screen saver or power management may be enabled. Do one of the following to resume
from sleep mode:
- Press any key on the keyboard.
- Press the power button.
2. Sleep problems

9
If the system does not return from sleep mode, stops responding, or cannot be
turned off, reset the computer. Unsaved data may be lost. To reset the computer, press
and hold the Power button for eight seconds or more. If the computer is still not reset,
remove the AC power adapter.
3. Voice problems
Even turn up the volume, you still cannot hear any sound from the speaker.
Make sure that:
- Mute function is turned off.
- Do not use combo audio jack.
- The speakers are selected as a playback device.
4. Other problems
The computer is not responding
•To turn off your computer, press and hold the Power button for eight seconds or more. If the computer
still does not respond, remove the AC power adapter.
•Your computer might lock when it enters sleep mode during a communication operation. Disable the
sleep timer when you are working on the network.
The connected external device does not work
•Do not connect or disconnect the non-USB cable device in the boot state, otherwise you may damage
your computer.
•When using high power consumption external devices such as an external USB optical disk drive, use
an external device power adapter. Otherwise, the device may not be recognized, or the system may shut
down as a result.
NOTE: This equipment has been tested and found to comply with the limits
for a Class B digital device, pursuant to part 15 of the FCC Rules. These limits
are
designed to provide reasonable protection against harmful interference in a
residential installation. This equipment generates uses and can radiate radio
frequency energy and, if not installed and used in accordance with the
instructions, may cause harmful interference to radio communications.
However, there is no guarantee that interference will not occur in a particular
installation. If this equipment does cause harmful interference to radio or
television reception, which can be determined by turning the equipment off and
on, the user is encouraged to try to correct the interference by one or more of
the following measures:
- Reorient or relocate the receiving antenna.
- Increase the separation between the equipment and receiver.
-Connect the equipment into an outlet on a circuit different from that to which
the receiver is connected.
-Consult the dealer or an experienced radio/TV technician for help

10
Changes or modifications not expressly approved by the party responsible for
compliance could void the user's authority to operate the equipment.
This device complies with Part 15 of the FCC Rules. Operation is subject to the
following two conditions:
(1) this device may not cause harmful interference, and (2) this device must
accept any interference received, including interference that may cause
undesired operation.
RF Exposure Warning Statements:
This equipment complies with FCC radiation exposure limits set forth for an
uncontrolled environment. This equipment shall be installed and operated with
minimum distance 20cm between the radiator & body.
All transmission frequencies of U-NII-1 and U-NII-3 comply with 47 CFR FCC
Part15.407(g) and the manufacturer declares that their transmission is maintained
within the U-NII-1 and U-NII-3 bands.

11
Shenzhen Jiteng Network Technology Co., Ltd.
Add: Room No.1202,Bitian Pavilion,Bizhong Garden,No.10
Bibo First Street,Bibo Community,Huangbei Street,Luohu
District,Shenzhen China
After-Sales Service E-mail: support@geek-plus.com
Website: www.geek-plus.com
Facebook:www.facebook.com/geekplusoffical
Table of contents