Geermarc Ampli200+ User manual


2
DESCRIPTION 3
SETTING UP
- Connecting the telephone 4
- Alarm and ring options 4
- Ringer settings 4
- Tone/Pulse switch (T/P) 5
- Time break recall switch (600/100) 5
- Hotel message waiting switch 5
- Wall mounting 6
USING THE PHONE
- Answering incoming calls 7
- Volume and tone receiving 7
- Making a call 8
- Last number redial 9
- Recall, * & #buttons 9
- Mute button 9
- Storing telephone numbers 10
- Dialling stored numbers 11
REGULATORY COMPLIANCE 12
GUARANTEE 14
CONTENTS

3
Hotel message switch
Shaker socket (*)
Tone reception
adjustment
Clip for wall
mounting
Speaker
volume
adjustment
Volume
reception
adjustment
Speaker
Last number
redial
Time break
recall button
Memory
storing key
Flashing incom-
ing ring indicator
(strobe light)
Key to activate tone
and volume
adjustment function
Tone and volume
adjustment automatically
activated each time you
hang-up the phone
Hotel message
waiting LED
Handsfree /
Headset button
Ringer select
mode
Mute button
Direct memory
buttons
Ringer level
adjustment
3 priority numbers
Line socket
12 V DC adaptor socket
Micro
Headset socket (*)
(*) : For these optionals accessories, consult the retailer ( see contact details at the end of this
manual)
DESCRIPTION

4
1 - CONNECTING THE TELEPHONE
- Connect the handset cord
- Open the battery door by unscrewing the retaining screw. Insert 4 x
AAA alkaline batteries. Snap the battery door in place.
In case of power failure, batteries are required for the ring.
- Connect the line cord .
- Connect the PTT plug to the wall socket.
- Connect the 12V DC adaptor cord to the telephone.
- Connect the 12V DC adaptor to your wall socket (**).
(**) Classified “hazardous voltage” according to EN60950 standard.
2 - ALARM AND RINGER OPTIONS
A3 position switch located on the right side of the phone allows the settings
below:
-
0
: Only the ringer is activated.
-
: Ringer and shaker are activated.
-
: Ringer and strobe flash are activated.
3 - RINGER SETTINGS
A switch located on right side allows the ringer to be switched
HI,LOW,OFF:
: Off,
: Low, : Hi
Your phone comes with the ringer switched to «High» and the melody set
to «6».
SETTING UP

5
Low Middle High
Melody 1 1 2 3
Melody 2 4 5 6 (by default)
Melody 3 7 8 9
If you don’t like the ringer melody,you can choose a new one by changing
the settings as follow:
- Lift the handset.
- Press PROG button.
- Press #button.
- Press any button 1 to 9.
Ringer will be activated on next call.
4 - TONE/PULSE SWITCH (T/P)
The Tone/Pulse switch is factory pre-set to Tone position (T). In the US,all
telephone exchanges now use Tone dialling.If your phone does not dial out,
it is probably being used from an older private switch- board (PBX). In this
case,theTone/Pulse switch must be moved to Pulse.
5 - TIME BREAK RECALL SWITCH (600/100)
For the US, the TBR switch is factory pre-set to 600ms. It can be switched
to 100ms for other locations or PBX’s.
6 - HOTEL MESSAGE WAITING SWITCH
These are used with the new services provided on hotel network.
Aswitch located behind your phone allows to set ON the hotel message
waiting function.
When the switch is setting ON and when you receive a message, the red
light is lit to inform you that you have a message on phone .
SETTING UP

6
7 - WALL MOUNTING
To wall-mount your telephone,slide out the clip, turn around and slide back
into the wall mounting position (located in the base unit, just below the ear
piece).This will ensure that the handset stays firmly in position. Make 2
holes in the wall 80mm
apart,insertthewallplugsandthewallmountingscrews.Thescrewsshould
protrude from the wall by 6-7 mm. Place the phone onto the screw-heads
and slide down to secure.
If you are using this telephone with a hearing aid, set your hearing aid
to the “T” setting.
SETTING UP

7
1 - ANSWERING INCOMING CALL
Without headset:
- When an incoming call is received, the phone will ring, to answer the call
lift the andset and speak.
- On completion of the call, carefully replace the handset in the cradle to
release the line.
With headset (option):
- When an incoming call is received, and if you wish to answer the call with
the headset, press the SPKR
button and speak.
- On completion of the call, press the SPKR
button again to release the
line.
In handsfree mode:
- When an incoming call is received, the phone will ring, to answer the call
press the SPKR button.
- On completion of the call, press the SPKR button to release the line.
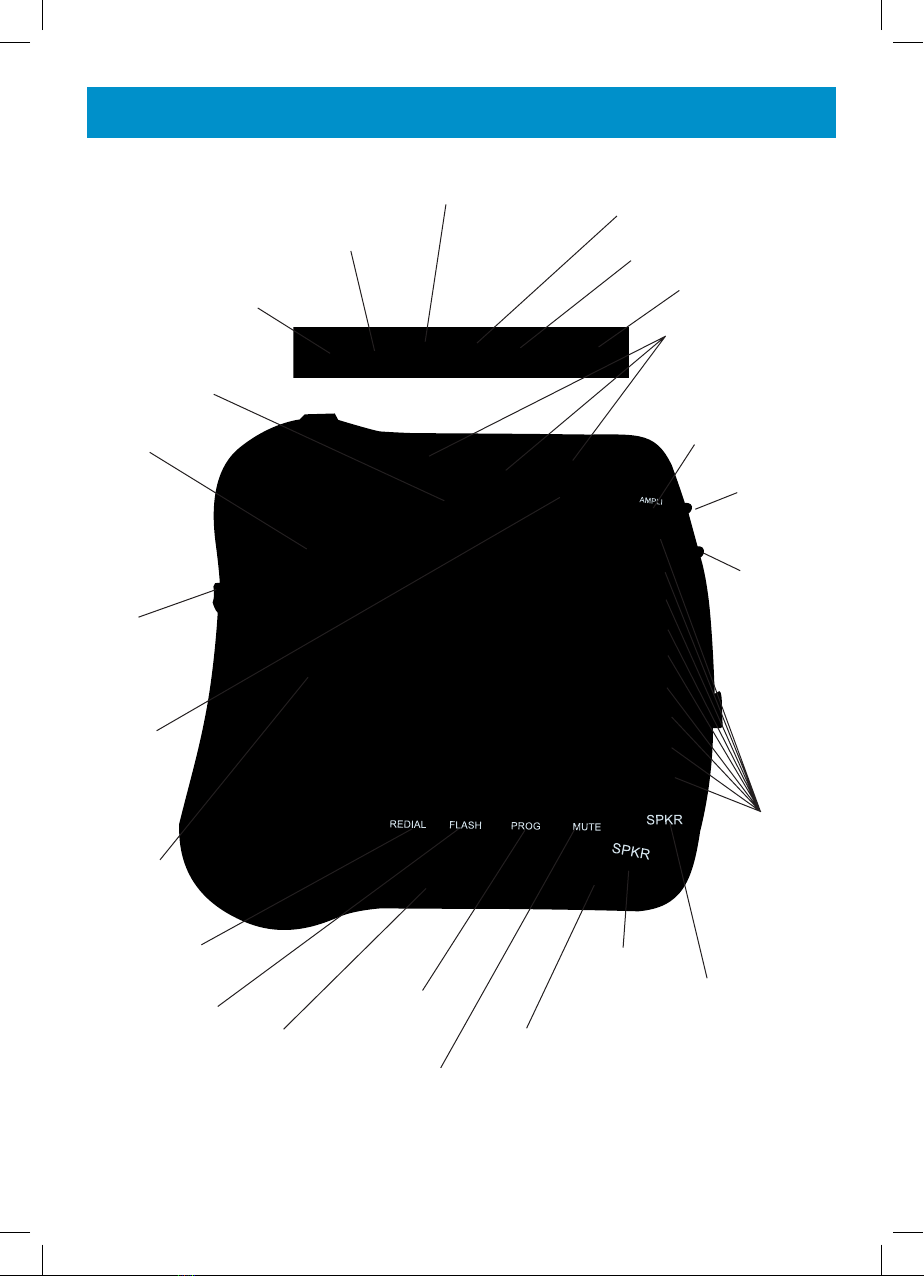
2 - VOLUME AND TONE RECEIVING ADJUSTMENT
You can increase the volume and adjust the receiving tone according to
your own hearing requirements.The button AMPLI allows extrareceiving
and tone functions to be activated or not during the conversation. When
the function is activated, the red light of extra receiving and tone function
located near the button AMPLI is lit. Adjust the TONE and VOLUME but-
tons to remove the level according to your own hearing requirements.
Note:
When the switch AMPLI located behind the phone is ON, the extra-receiv-
ing and tone functions are automatically activated each time you use the
phone.When the switch AMPLI is switched OFF, you will need to activate
the function by pressing the button AMPLI. Tone and volume adjustment
(15dB to 30dB) is only activated when the button is set to ON. When this
button is set to OFF only the volume can be adjusted from 0dB to 15dB
USING THE PHONE

8
3 - MAKING A CALL
Without headset:
- Lift the handset.
- Await the dial tone and dial required number.
- On completion of the call,carefully replace the handset in the cradle.
With headset (option):
- Press the SPKR
button.
- Await the dial tone and dial required number.
- On completion of the call, press the SPKR button again to clear the line.
TONE
Bass
+10dB max
Treble
+10dB max
Normal
Volume
+20dB max
Normal
0dB
15dB 15dB
OFF
35dB
ON
USING THE PHONE

9
In handsfree mode
- Press the SPKR button.
- Await the dial tone and dial required number.
- On completion of the call, press the SPKR button to release the line.
- If your correspondent doesn’t answer your call, press the SPKR button
again to release the line.
Note:
- To deactivate the handsfree function during a call, lift the handset.
To activatethe handsfreefunction duringa call,press theSPKR button and
place the handset on the cradle.
- During a call in handsfree, you can adjust the speaker volume to a desir
able level.
Simply use the slide control VOLUME located on the left of the unit.
4 - LAST NUMBER REDIAL
- Lift the handset.
- Await the dial tone and press REDIAL button.
-The previously dialled number will be automatically redialled (not in use for
memory numbers).
5 - FLASH, * & # BUTTONS
These are used with the new services provided on digital exchanges.For
details please contact your network operator.
6 - MUTE BUTTON
If you wish to speak privately to someone else in the room without your
caller overhearing, press and hold the button MUTE.You will still be able
to hear the callers but they cannot hear you during the mute operation.To
resume normal conversation, release the MUTE button.
USING THE PHONE

10
7 - STORING TELEPHONE NUMBER
Your phone can store12 direct memories including 3 priorities numbers (21
digits maximum for each memory).
For example, the 3 priority P1, P2, P3 memories allow you to store the 3
numbers below:
- Local,Police station,
- Your doctor
- Family
To store a number please follow instructions below:
- Lift the handset.
- Press PROG button .
- Press M1, M2, ..., or M9 or one of 3 priorities numbers to store
your number.
- Dial the number.
- Press button again.
Numberswillbelostafterafewhoursifyoudisconnectyourphone.Entering
a new number in memory will automatically erase the previous number.
It is recommended to
store these numbers
during installation
USING THE PHONE

11
8 - DIALLING STORED NUMBER
- Lift the handset and await the dial tone.
- Press appropriate button M1, M2, ..., or M9 or one of the 3 priorities
P1, P2, P3 numbers , the stored number will be dialled automati
cally.
To register your stored phone numbers,use the index card located under
the base.
Use this table below to prepare the phone book:
example
USING THE PHONE

12
Part 68 of FCC rules information
- This equipment complies with Part 68 of the FCC rules and the requirements
adopted by the ACTA. On the bottom of this equipment is a label that contains,
among other information, a product identifier in the format US:AAAEQ##TXXXX.
If requested, this number must be provided to the telephone company.
- All applicable certification jacks Universal Service Order Codes (USOC) for the
equipment is provided (i.e. RJ11C) in the package with each piece of approved
terminal equipment.
- A plug and jack used to connect this equipment to the premises wiring and tele-
phonenetworkmustcomplywiththeapplicableFCCPart68rulesandrequirement
adopted by the ACTA. A compliant telephone cord and modular plug is provided
with this product. It is designed to be connected to a compatible modular jack that
is also compliant. See installation instructions for details.
- The Ringer Equivalence Number (REN) is an indication of the maximum number
of terminals allowed to be connected to a telephone interface. The termination on
an interface may consist of any combination of devices subject only to the require-
ment that the sum of the Ringer Equivalence Numbers of all the devices does not
exceed five (5). To be certain of the number of devices that may be connected
to a line, as determined by the total RENs, contact the local telephonecompany.
For products approved after July 23, 2001, the REN for this product is part of the
product identifier that has the format US:AAAEQ##TXXXX. The digits represented
by ## are the REN without a decimal point (e.g., 03 is a REN of 0.3).
For earlier products, the REN is separately shown on the label.
- If this equipment causes harm to the telephone network, the telephone com-
pany will notify you in advance that temporary discontinuance of service may be
required. But if advance notice isn’t practical, the telephone company will notify
the customer as soon as possible. Also, you will be advised of your rights to file a
complaint with the FCC if you believe it is necessary.
- The telephone company may make changes in its facilities, equipment, operation
or procedures that could affect the operation of the equipment. If this happens the
telephone company will provide advance notice in order for you to make neces-
sary modifications to maintain uninterrupted service.
- If trouble is experienced with this equipment, for repair or warranty information,
please contact our customer service staff at: 248-577-5400
Ifthe equipmentiscausingharm tothetelephonenetwork, thetelephonecompany
may request that you disconnect the equipment until the problem is resolved.
- Please follow instructions for repairing if any; otherwise do not alter or repair any
part of device except as specified.
REGULATORY COMPLIANCE

13
Opening the equipment or any attempt to perform repairs will void the war-
ranty. For service or repairs, call 248-577-5400
- Connection to party line service is subject to state tariffs. Contact the state public
utility commission, public service commission or corporation for information.
If your home has specially wired alarm equipment connected to the telephone line,
ensure the installation of this telephone equipment does not disable your alarm
equipment. If you have questions about what will disable alarm equipment, consult
your telephone company or a qualified installer.
- This equipment is hearing aid compatible.
-
This product meets the applicable Industry Canada technical specifications
.
REGULATORY COMPLIANCE

14
GUARANTEE
SonicAlert warrants the phone against any defect in materials or workman-
ship for the period of one year from the date of purchase.
Should you experience a problem, contact our customer service depart-
ment.
Be sure to save your sales receipt as proof of purchase date should you
need warranty service.
Within a period of one year from purchase date, Sonic Alert will repair or
replace (our discretion) your phone at no cost, if a defect in materials or
workmanship is found. If we elect to replace your phone, we may replace it
with a new or reconditioned product of the same or similar design.
Repair or replacement will be warranted for a period of 90 days or the
original time on the original warranty, whichever is longer.
The warranty does not cover accidents, negligence or breakage to any
parts. This includes shipping damage, failure to follow instructions, misuse,
fire, floods, use of incompatible accessories, Acts of God or failure in your
phone service carrier’s line service. The product must not be tampered with
or taken apart by anyone who is not an authorized
SonicAlert representative. Tampering with the phone will void ant written or
implied warranties
SonicAlert shall not be responsible for loss of time, inconvenience, property
damage caused by your phone or any other accidental or consequential
damages
Warranty service is available only with proof of purchase.

15
UgAMpli200+_En _Ed01
GUARANTEE
Simply send the Ampli200+ (postpaid) and a copy of your sales slip as
proof of purchase to:
Sonic Alert Inc., 1050 E. Maple Road, Troy MI 48083
IMPORTANT : YOUR RECEIPT IS PART OF YOUR WARRANTY AND
MUSTBERETAINEDANDPRODUCEDINTHEEVENTOFAWARRANTY
CLAIM
1050 East Maple Rd.
Troy, MI 48083
Ph: 248577 5400
Fax: 248-577-5433
www.sonicalert.com
Table of contents