geo-FENNEL FGS Lite User manual

www.geo-fennel.de
www.geo-fennel.com
www.geo-fennel.fr
EN
geo-FENNEL GNSS-Antenna FGS Lite
OPERATORS MANUAL

DE
2
DE
10
EN
Dear Customer,
Thank you for your confidence in us, having purchased a geo-FENNEL instrument.
For the optimum performance of the instrument, please read this manual carefully and keep it in
a convenient place for future reference. This manual contains important safety information that
should be read and understood before use.
Technical specification and design are subject to change without notification.
geo-FENNEL
Precision by tradition.
Content
A
Supplied with
A
B
Components
B
C
Operation
C
D
Power supply
D
E
geo-FENNEL Survey Software
E
F
Safety notes and technical data
F
ASUPPLIED WITH – FGS LITE-SET Art.No. 740100
•1 x FGS Lite GNSS Receiver
•1 x GAT 300 GNSS Antenna
•1 x Battery for FGS Lite
•1 x Connection cable for FGS Lite
•1 x Clamp for FGS Lite
•1 x Antenna cable for FGS Lite
•1 x Clamp for Controller/Mobile device
•1 x Container
•1x Survey Software
ASUPPLIED WITH – FGS LITE-SET Art.No. 740110
•1 x FGS Lite GNSS Receiver
•1 x GAT 300 GNSS Antenna
•1 x Controller FAC 1
•1 x Battery for FGS Lite
•1 x Connection cable for FGS Lite
•1 x Clamp for FGS Lite
•1 x Antenna cable for FGS Lite
•1 x Clamp for Controller/Mobile device
•1 x Container
•1 x Survey Software

COMPONENTS B
kljf
3
FGS Lite GNSS Receiver
FAC 1 from
FGS Lite SET
Art.No. 740110
Your Android
mobile device
(Controller,
Tablet, Mobile
phone)
FGS Lite SET
Art.No. 740100
O
R

EN
OPERATION
Indication
Status
Meaning
1.
Operation LED
Illuminated
FGS Lite switched on
2.
Satellite LED
Extinguishing or flasching once
Searching satellites
per 5 seconds
Flashes N times per 5 seconds
Receiving N satellites
3.
Bluetooth® LED
Flashing
Mobile device connected
4.
ON – OFF switch
5.
Battery status
Battery status LED 1 – 4
indication
Charge battery when LED 1 is flashing
DPOWER SUPPLY
Open battery compartment cover and insert Li-Ion Battery; close cover and screw it.
4
For charging connect a.m. cable (left pic.)
with FGS Lite.
Also connect power supply with 2. socket at
a.m. cable.
Charging time for full capacity ca. 4 hours.

EN
GEO-FENNEL SURVEY SOFTWARE E
1. Introduction
1.1 Installation
1.2 User Interface
1.2.1 Project Interface
1.2.2 Device Interface
1.2.3 Survey Interface
1.2.4 Me Interface
1.2.5 Drop Zone
1.3 Workflow
2. Wizard function
3. Create a new project
4. Bluetooth connection
5. Receiver Settings
5.1 Start receiver as a base
5.1.1 Internal radio mode
5.1.2 External radio mode
5.1.3 Internal GSM Mode
5.2 Start receiver as a rover
5.2.1 Internal radio mode
5.2.2 Internal GSM/PDA CORS mode
6. Survey
6.1 Topo survey
6.1.1 Use TILT correction of FGS 100
6.2 Auto survey/area survey
6.3 Stake point/line
6.3.1 Stake points
6.3.2 Stake lines
6.4 Settings for survey/stakeout
7. PPK and static survey
7.1. static survey
7.2 PPK
8. Data Import/Export
8.1 Import points data
8.2 Export points data
8.3 Import DXF
8.4 Export Result
9 Frequently used functions
9.1 Login/Register
9.1.1 Login and Register
9.1.2 Upload/Download in a cloud
9.1.3 Remote assistance
9.1.4 FTP for data management
9.2 Device Information
9.3 Site calibration
9.4 Grid Shift
9.5 COGO
9.6 NEMA Output
9.7 Register receiver
9.7.1 Register menu
9.7.2 H-terminal

Introduction
The geo-FENNEL Survey Software is a professional Android-based surveying software developed by geo-
FENNEL GmbH. The setup Wizard makes you easily configure the GNSS, and with the User-friendly
interface with smart menus, objects and graphics you can collect field data through Topo survey/Auto
survey/Area Survey, Static and PPK, also stake points/lines. Moreover, geo-FENNEL Survey provides a
convenient way to import/export surveying data.
1.1 Installation
Open the Google PlayStore with your account on your mobile or controller. For payment terms use the
delivered promotion code from geo-FENNEL GmbH. Start downloading the software and follow up the
process. Please allow the software to use your mobile to avoid any trouble during your work on site.
The self-installation file will be copied to the controller. After installation you will find the Icon on the device
interface, click to open the application.
The geo-FENNEL Survey can only run in Android operating system, and the android device specification
should be at least or better than the ones listed below:
CPU: core 2.1GHz(currently support ARM cortex only)
Android System version: ≥4.2
Screen: 4.5 inches
Screen resolution: 960*640
Hardware: Bluetooth, Wi-Fi/GPRS
1.2 User interface
The geo-FENNEL Survey Software has user-friendly interfaces, which provides you a convenient and
effective surveying experience.
1.2.1 Projekt interface
The interface mainly includes Project, Coordinate system, Import/Export and coordinate compute.

Project:
•Wizard: guide the whole workflow
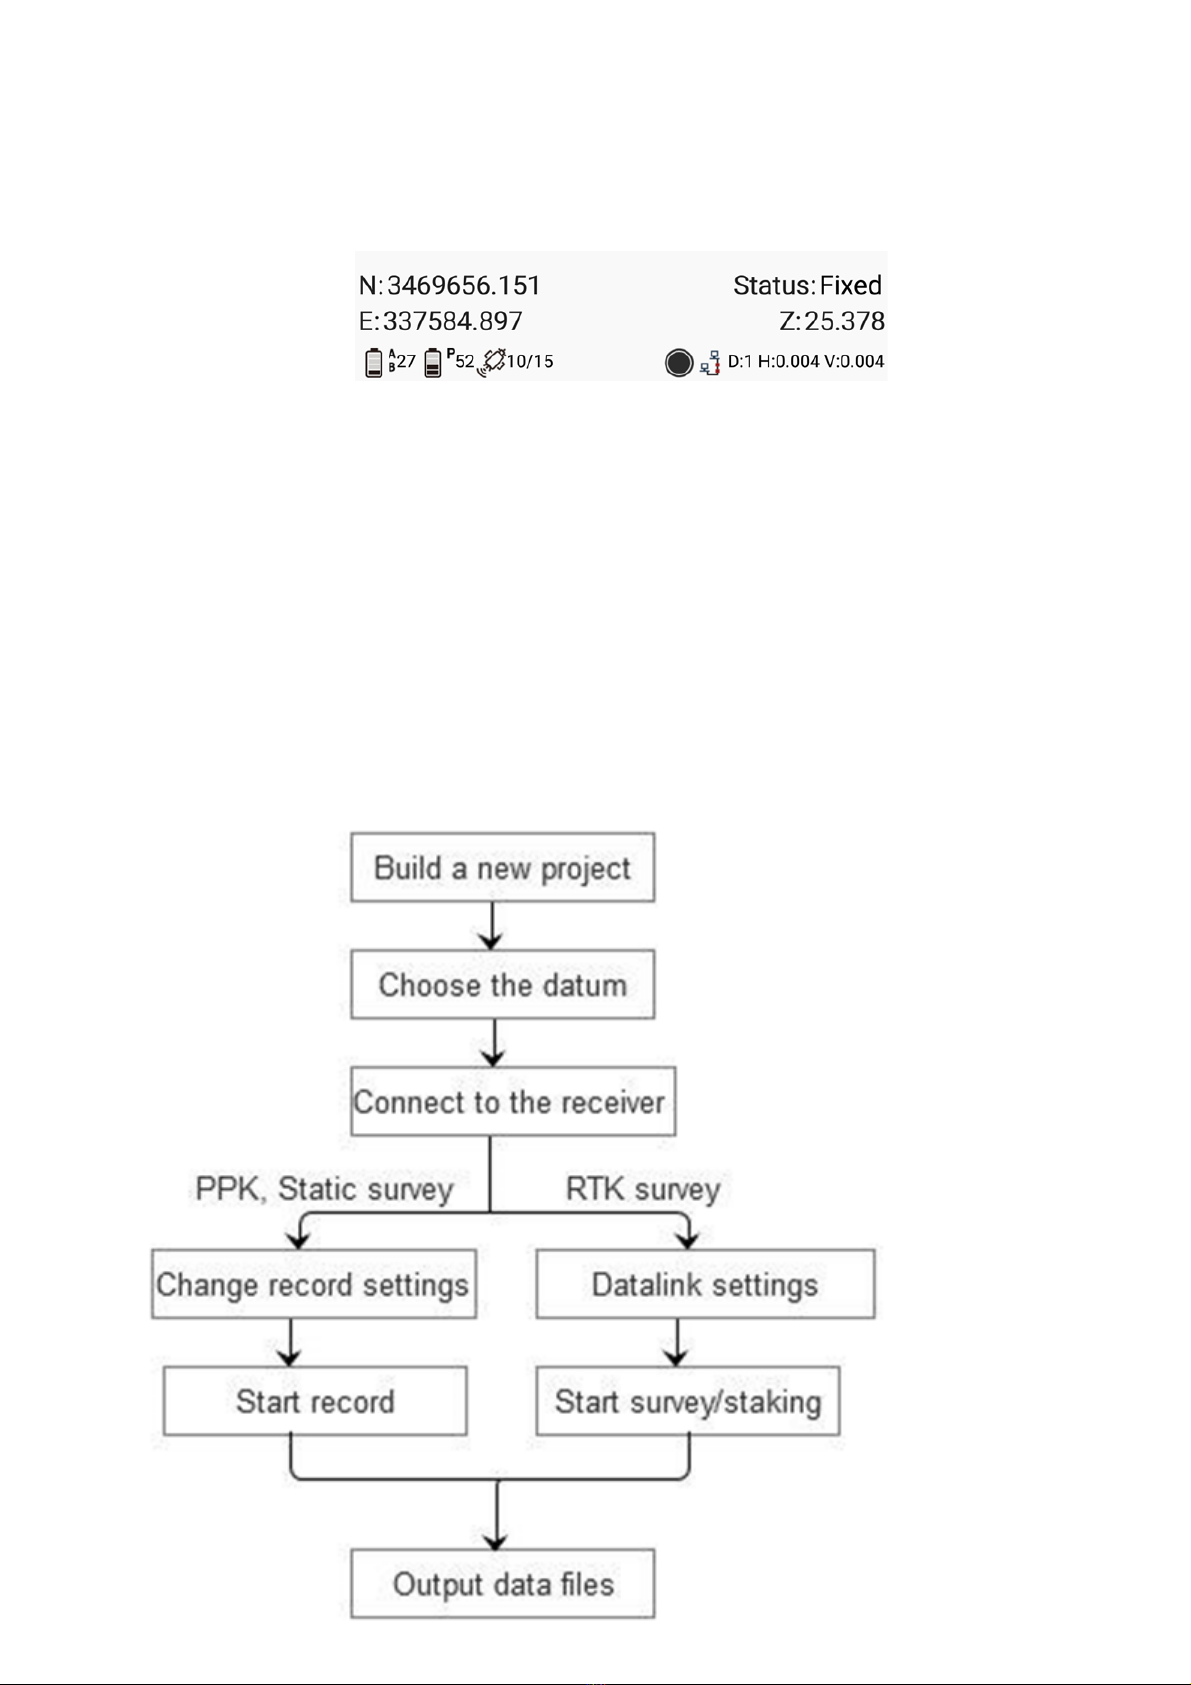
•Project: Build/Open/Delete a project
•Datum: select and manage the datum
•Element: points manage; check points measured, key in known points and other function.
•Code: Management codes in list and nine panels.
•DXF: Import DXF file as Basemap.
•Import: import points file (including CASS,CSV,TXT and DAT formats)
•Export: export Grid Coordinates and Geodetic coordinates (based on WGS84 or Local)
•Export Result: export stake points/lines and detailed survey points, you can also export DXF and
KML format.
Compute:
•Site Calibration: transfer the WGS84 coordinates to local grid coordinates
•Grid Shift: once change Base coordinate during one project, need do this.
•Area calc: used for calculate polygon area by measured points.
•COGO: calculate points/lines/angle
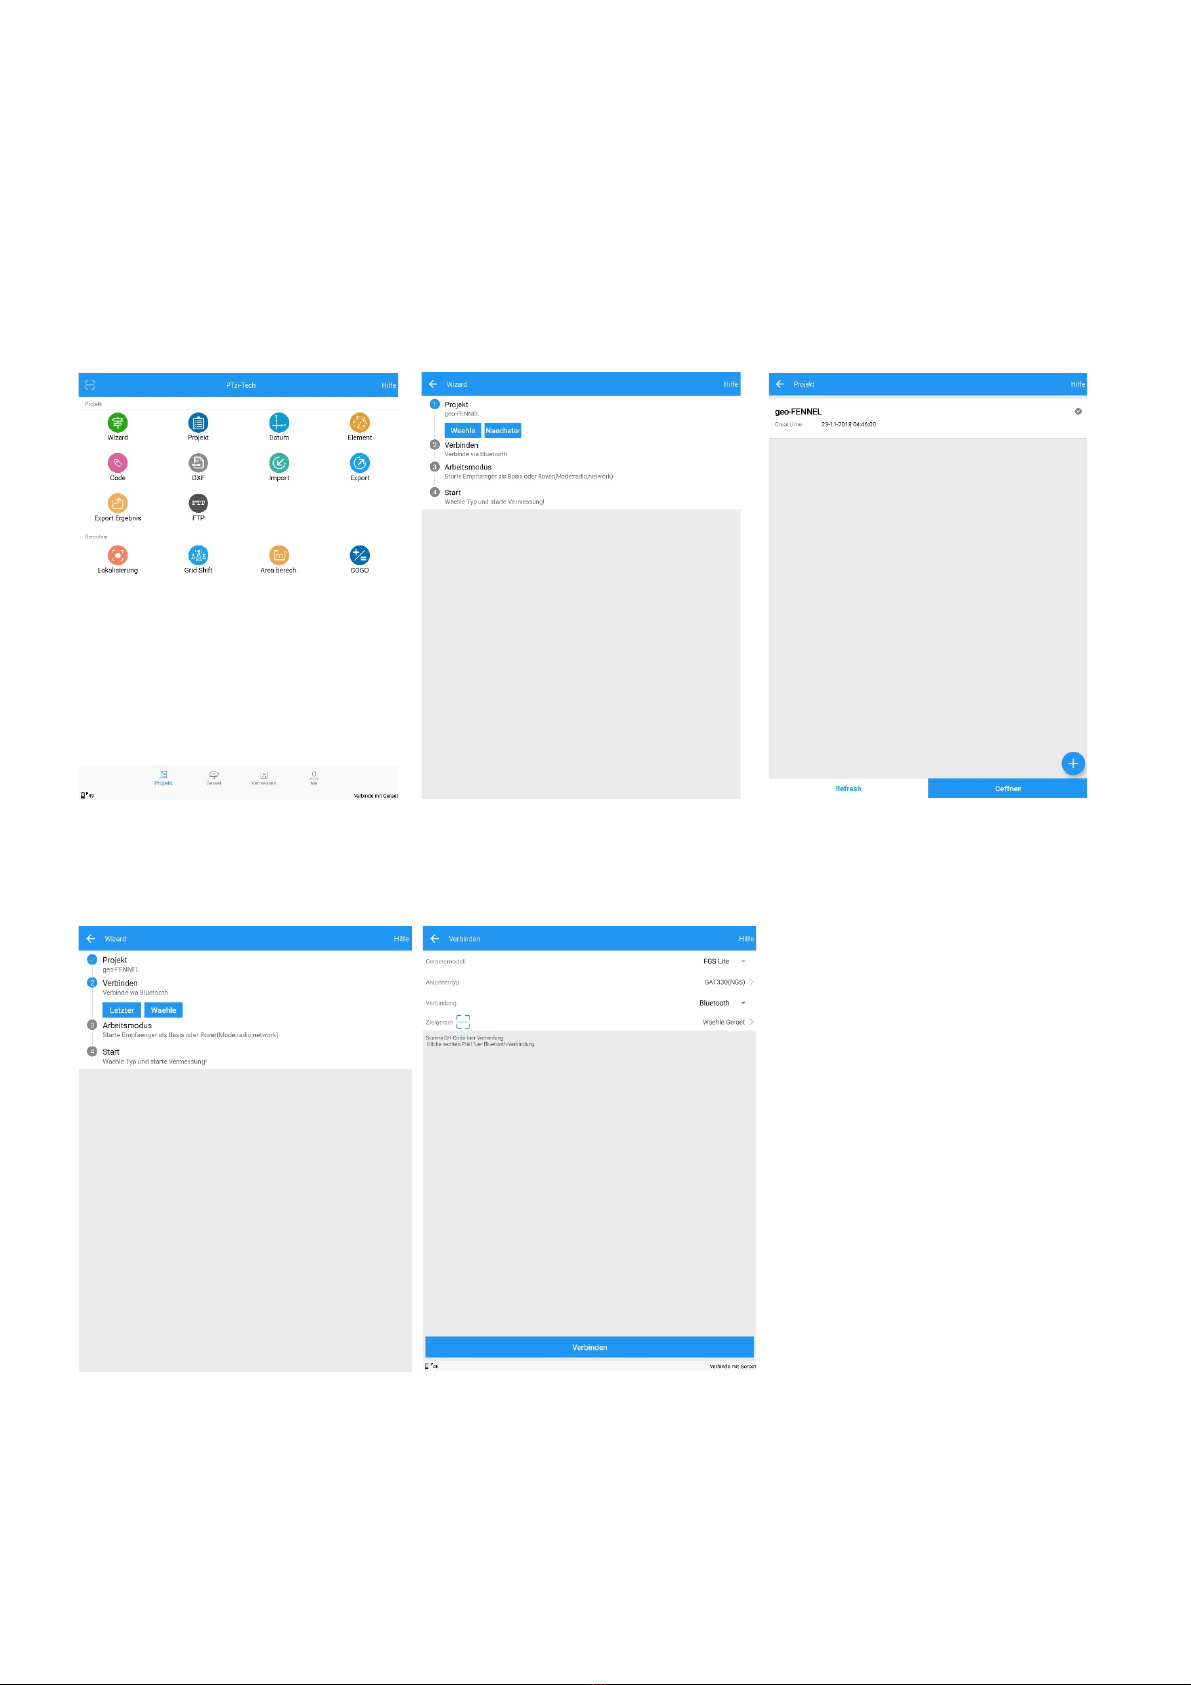
1.2.2 Device interface
This interface is related to setup the GNSS in RTK mode, and check the receiver information.
Device Setting:
•Connection: Connect receiver
•QuickSetup: Select/add work mode to start Base/Rover
•Antenna: Configure antenna
•0183 Output: Output NMEA data via com port or BT
Device Info:
•Satellites: show the satellite information, including the sky view, SNR (signal noise to ratio) , and list
of the satellites
•Device info: show the receiver’s information and register information
•Position info: show the current position information (N, E, h coordinate, rtk solution, RMS, DOP)
•Nav. to Base: show the information of rover and base.
•Register: Check register status and register receiver
•H-Terminal: Send commands to receiver
•Debug data: Save data output from BT
1.2.3 Survey interface
This interface contains all survey modes, such as the most used function Topo survey and stake out, also
include survey modes like Static and PPK.
•Topo survey: Data collection
•Auto survey: Automatic measure by time or distance
•Area survey: Get area result after survey
•Static: Log raw data for post processing
•PPK: Dynamic data collection
•Stake point: Stake out points
•Stake line: Stake out lines
1.2.4 Me Interface
•The interface mainly includes user login and general settings.
•Login/Register: User login/register

•Remote assistance: Ask for remote help
•Settings: General settings
1.2.5 Drop zone
The dropzone is showing the receiver
1. Current coordinate: Press to show BLH
2. Receiver status: Single/Float/Fixed/Base
3. Diff delay; H RMS; V RMS: Press to check position info
4. Press to go QuickSetup
5. Used/track satellites: press to go sky view
6. Controller Battery
7. Receiver Battery
1.3 Workflow
This figure shows the workflow of your survey through geo-FENNEL Survey.

2. Wizard funktion
Follow the Wizard, you can quickly learn the general workflow of Geo-FENNEL Survey, also you can quick
start your survey by this function no matter you are experienced one or new user.
In Project menu, tap Wizard.
First step is for
Project
, click
Select
to go into Project interface to create or select a project.
For detailed information, you can refer to chapter 3.
Second step is for
Bluetooth connection
, click
Select
to go into Bluetooth connection interface.
For detailed information, you can refer to chapter 4.
Third step is for
Work mode
set up, click
Select
to go into QuickSetup interface to start your receiver as
Base/Rover. For detailed information, you can refer to chapter 5.
If you start your receiver as Rover, then you can start work directly of Topo survey or Stake out.
If you start your receiver as Base, after Disconnect with Base, there will be a Prompt.
YES: will guide you to set up Rover in Wizard interface;
NO: will exit Wizard.

3. Start new project
Click
Project
, select
Predefined
or
User defined
coordinate system. Also you can use the same Datum
with an existing project or scan QR code from other controller to add Datum. For sharing project with
cloud, go chapter 9.1 see more information.
Predefine: You can select the coordinate system directly. Geo-FENNEL Survey currently has 35
countries coordinate systems in the list and will add more afterwards.
User defined: If you cannot find the coordinate system you want in predefined, follow instructions
below to add a datum.
Enter Name—select an existing
Ellipsoid
--select a proper
Projection
and input the corresponding
parameters.

You can enter three or seven parameters.
If asked username and password, enter
admin
,
admin
For H.RMS and V.RMS, it will be shown after
Site Calibration
Share Datum via QR code.
After you build a project, press the project name, it will generate a QR code. Users can use the Scan
function in the main interface to access the coordinate system.
4. Bluetooth Funktion
After building a new project, switch to
Device
interface, tap
Connection
to go into Device connection
interface. Now geo-FENNEL Survey supports connect with geo-FENNEL FGS 1 receiver/FGS 100
receiver/FGS Lite receiver, also Controller GNSS and NMEA Device. Make sure you connect with the right
option.
•FGS 1/FGS 100/FGS Lite: Some functions are only available for the specified device. Here shows the
process of connect FGS 1, FGS 100 and FGS Lite is similar.

Press SETTING button after Bluetooth connected, you can access to the QuickSetup interface for start Base
or Rover.
•Simulated Device: You will simulate connecting Geo-FENNEL Survey to a receiver. You can select
where the simulated receiver located. With this mode, the Geo-FENNEL Survey some functions will
not work.

•Controller GNSS: Survey Master can use the controller internal GNSS, which is a good choice for
GIS data collection
.
•NMEA Device: Any receivers which can output NMEA data can connect with Survey Master.

Modify antenna parameters for receiver. Connect BT
5. Receiver Settings
In Survey Master, you need only one step to start your receiver:
Choose work mode-> Apply
.
There are some default work modes, three for Base and two for Rover. Choose one mode and long press,
you can check the detailed information. If the default work mode suits for you, you can just click Apply to
start your receiver. Usually, you need Add one mode yourself.
•
Upload/Download
: need login in Survey Master firstly, to upload the work modes to cloud, and
users who share the account can download it from cloud.
5.1. Start your receiver as Base
5.1.1. Internal Radio mode
This mode uses internal radio to transmit the correction data from Base to Rover. You need set Base and
Rover with same protocol and frequency.
The following steps show an example of internal radio transmission.

•
Protocol
: Select Transparent or TT450s for Base transmission
•
Auto base
: Once you start the Base, the receiver will automatically get current coordinates and
broadcast correction data.
•
Fix position
: Once you start the Base, you need enter or choose known coordinate or get a current
coordinate.

•
Library choose
: Select a known point from library (Element)
•
Get
: Get a point with GNSS
5.1.2. External Radio mode
This mode uses external radio to transmit the correction data from Base to Rover. You need set Base and
Rover with same protocol and frequency.
The steps to start external radio mode is similar with internal radio mode, but you need select the protocol
and frequency on the external radio, not on Survey Master.

5.1.3. Internal GSM mode
This mode uses GPRS (internet data) to transmit the correction data from Base to Rover. You need insert a
SIM card to Base, set the Base to log on server (with static IP address), and the Rover receive the
correction data by Ntrip protocol.
The following figures show an example of Base configuration with internal GSM transmission.


Tip: geo-FENNEL GmbH provides a free static server address 211.144.120.104:8888, anyone can
upload CORS data as long as abide by the agreement.
5.2 Start your receiver as Rover
This chapter shows how to start receiver as rover with internal radio, internal GSM and PDA CORS mode.
5.2.1. Internal Radio mode
Select the same protocol and frequency with Base receiver, then the receiver status will turn single to fixed
result.
The following steps show an example of internal radio.

5.2.2. Internal GSM/PDA CORS mode
For internal GSM need insert a SIM card to receiver, for PDA CORS need make sure controller can access to
Internet.
You should enter the server
IP
and
Port
. In addition, enter
User
(login name) and
Password
to get
Source List
.
Server: Name of the NTRIP Provider
DNS/IP: address: IP-Number or URL of the NTRIP-Caster
Port: Port-Number of the NTRIP-Caster
Source List: Press the black down arrow to download the mountpoints, choose the right mountpoint
User: Enter user-name for the NTRIP-Provider
Password: Enter the password which belongs to the user-name
RTCM-Format: Switch on all RTCM Messages incase you are working with online transformation
VRS: Switch on for single VRS or NTRIP-Caster
Table of contents
Popular Antenna manuals by other brands

DX Antenna
DX Antenna DTA5000 instruction manual

Shakespeare Electronic
Shakespeare Electronic PHASE III 6235-R manual

ESTeem
ESTeem 195E Assembling

RFID
RFID 4000 Series Installation and operating manual

KVH Industries
KVH Industries TracVision HDTV Converter user guide

Infinite
Infinite Radio Waves SP Series Mounting instructions

Sirio Antenne
Sirio Antenne SUPER 9 Blue Line installation manual

Televes
Televes TForce INNOVA BOSS MIX quick start guide

Thrane&Thrane
Thrane&Thrane SAILOR 900 VSAT System quick guide

Directive Systems & Engineering
Directive Systems & Engineering DSE2314LYRM quick guide

INAC
INAC AH-376 instructions

Winegard
Winegard SK-7003 Mount Operation manual