manuals.online logo
Brands
  1. Home
  2. •
  3. Brands
  4. •
  5. HP
  6. •
  7. Antenna
  8. •
  9. HP J8999A User manual

HP J8999A User manual

GROUNDING
System grounding and lightning protection are essential, especially for
exterior-mounted antennas exposed to the elements. Never install an
antenna where it may fall and contact electrical lines (refer to the
National Electrical Code).
SPECIFICATIONS
HP WARRANTY INFORMATION
See the Customer Support/Warranty booklet included with this product. A copy
of the specific warranty terms applicable to your ProCurve products and replace-
ment parts can be obtained from your HP Sales and Service Office or authorized
dealer.
SUPPORT
Hewlett-Packard offers support 24 hours day, seven days a week through the
use of a number of automated electronic services. See the Customer Support
Warranty booklet that came with your product for information on how to use
these services to get technical support. You can also get up-to-date support
information from the ProCurve Web site: www.procurve.com
Additionally, your HP-authorized network reseller can provide you with assis-
tance, both with services that they offer and with services offered by ProCurve.
©Copyright 2006, Hewlett-Packard Company, LP
The information contained herein is subject to
change without notice.
Part Number: 5991-3838
*5991-3838*
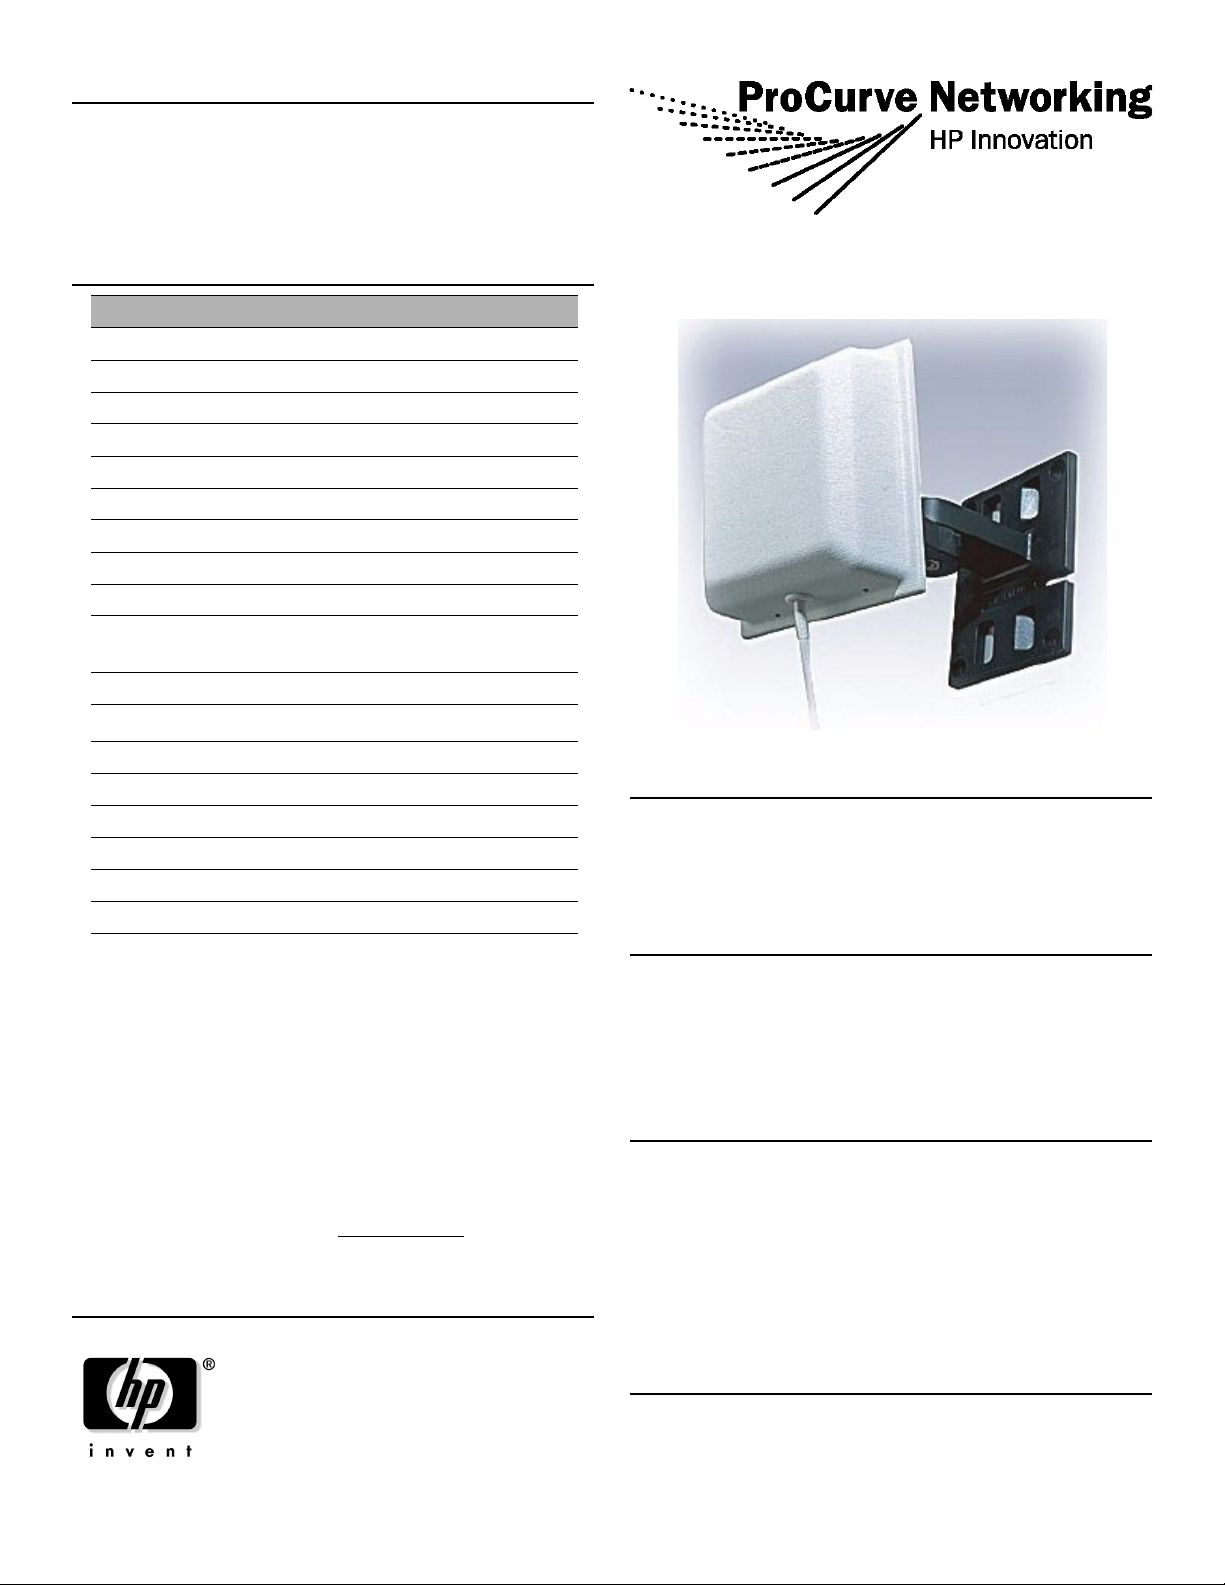
ProCurve 7 dBi Dual Band Directional antenna
J8999A
APPLICATION
Designed for wireless LAN service, the ProCurve J8999A is a directional
patch array enclosed in a UV-stable weatherproof radome. The focused
radiation pattern may be used to extend point-to-point link coverage or
to provide targeted sector coverage in the 2.4 and 5 Ghz band.
SAFETY
The ProCurve J8999A and all associated equipment should be installed
in accordance with applicable local and national electrical code guide-
lines to ensure safe operation.
Please read all instructions carefully before attempting to install
and use this product.
ANTENNA LOCATION
The J8999A may be mounted at interior or exterior locations. A line-of-
sight signal path works best for point-to-point links. Although 5 Ghz
signals penetrate cubical dividers and interior partitions with little
attenuation, reinforced block walls, banks of metal cabinets, or steel
shelving may attenuate signals or cause multipath, a condition where
reflected signals interfere with the primary signal. Because antenna
beamwidth is narrow, it is important to aim the antenna accurately dur-
ing installation, in order to provide optimum gain and best performance.
MOUNTING
The J8999A is supplied with a universal articulating mount that accepts
mast diameters up to 2 inches (5.1cm) or mounts to any flat vertical
surface. This mount is especially designed to provide wide-range articu-
lation in both the azimuth and elevation planes.
Model J8999A
Frequency, MHz 2400-2500 & 4900-5990
Gain with specified cable (dBi): 6.9 / 7.7
VSWR max. 2.0:1
E-Plane (3 dB beamwidth): 66°/60°
H-Plane (3 dB beamwidth): 68°/52°
Polarization: Linear, (Vertical)
Impedance (Ohms) 50
Front to back ratio (dB) 10 / 15
Weight lb. (kg) 0.5 (0.225)
Dimensions, in.
(cm):
5.156 x 5.156 x 1.375
(13.1 x 13.1 x 3.49)
Mounting Style Flush wall mount
Wind Surface Area ft2(m2)0.12 (0.0006)
Wind Survival mph (km/hr) 120 (193)
Enclosure PVC/Acrylic
RF Connector: Reverse SMA (male)
Cable 33-inch CMP Plenum
Storage Temperature (min/max) -40° / +65°C
Operating Temperature (min/max) -30° / +55°C)
ProCurve Networking by HP Prod. J8999A
ASSEMBLY
Install the articulating mount to the antenna back plane, as
shown in Figure-1:
1. Find the molded antenna mount (3) and four 8-32 nylon lock nuts (4).
Use the nuts to attach the mount to the exposed studs on the back of
the antenna.
2. Find the molded articulating arm (2). Also, find a 1/4"-20 x 1-1/4"
machine screw (5), 1/4" lock washer (6), 1/4" flat washer (7), and 1/
4"-20 hex nut (8). Use hardware to secure the molded arm to the
antenna mount as shown in Figure-1.
3. For installation on flat surfaces, find the molded wall/mast mount (1)
and use it as a drill template to mark hole locations. Drill four 3/16"
diameter pilot holes and install wall anchors (9). Install the mount
using four 8-18 x 3/4" self-tapping screws (10).
4. For pole or mast installations, find two worm clamps (11) and install
as shown on the molded wall-mast mount (1). Encircle pole with each
band and tighten.
5. To attach the antenna assembly to the wall/mast mount, find a 1/4" x
1-1/4" machine screw (5) and install a 1/4" lock washer (6) and a 1/
4"- flat washer (7) as shown. Use the screw to attach the free end of
the articulating arm to the mount, securing in place with a 1/4"-20
nut (8).
6. Loosen 1/4"pivot screws as needed to position antenna for desired
azimuth and elevation steering. When antenna is in adjusted, tighten
all hardware securely.
Hardware for MountingAntenna J8999A
ProCurve Networking by HP Prod. J8999A
J8999A Radiation Plots, E Plane 2.4–2.5 GHz Band
ProCurve Networking by HP Prod. J8999A
J8999A Radiation Plots, H Plane 2.4–2.5 GHz Band
ProCurve Networking by HP Prod. J8999A
J8999A Radiation Plots, E Plane 4.9–5.99 GHz Band
ProCurve Networking by HP Prod. J8999A
J8999A Radiation Plots, H Plane 4.9–5.99 GHz Band
H Plane 5.99 GHz

Other HP Antenna manuals

HP ProCurve J9169A User manual

HP

HP ProCurve J9169A User manual

HP ProCurve J8441A User manual

HP

HP ProCurve J8441A User manual

HP ProCurve J8444A User manual

HP

HP ProCurve J8444A User manual

HP J8134A Assembly instructions

HP

HP J8134A Assembly instructions

HP J9659A User manual

HP

HP J9659A User manual

HP J9170A User manual

HP

HP J9170A User manual

HP 8445B Operation manual

HP

HP 8445B Operation manual

HP J9659A User manual

HP

HP J9659A User manual

HP ProCurve Networking J9000A User manual

HP

HP ProCurve Networking J9000A User manual

HP ProCurve 2 dBi Assembly instructions

HP

HP ProCurve 2 dBi Assembly instructions

HP J9720A User manual

HP

HP J9720A User manual

HP ProCurve J8445A User manual

HP

HP ProCurve J8445A User manual

Popular Antenna manuals by other brands

CommScope CMAX-OMF3-43-UWI53 Installation instruction

CommScope

CommScope CMAX-OMF3-43-UWI53 Installation instruction

Radio Shack VU-210XR owner's manual

Radio Shack

Radio Shack VU-210XR owner's manual

Racelogic VBSS100SL quick start guide

Racelogic

Racelogic VBSS100SL quick start guide

Siemens SIMATIC NET ANT897-5FF Compact operating instructions

Siemens

Siemens SIMATIC NET ANT897-5FF Compact operating instructions

Televes Vzenit quick start guide

Televes

Televes Vzenit quick start guide

THOMSON ANT1438 operating instructions

THOMSON

THOMSON ANT1438 operating instructions

Spectracom 8230AJ installation guide

Spectracom

Spectracom 8230AJ installation guide

Inverto OneNet IDLP-5GAO1-DANOO-OPN quick start guide

Inverto

Inverto OneNet IDLP-5GAO1-DANOO-OPN quick start guide

Cisco AIR-ANT2566P4W-R manual

Cisco

Cisco AIR-ANT2566P4W-R manual

Beam Iridium RST706B installation manual

Beam

Beam Iridium RST706B installation manual

Parsec Technologies Beagle PRO5B2L2WG-G Installation and operation manual

Parsec Technologies

Parsec Technologies Beagle PRO5B2L2WG-G Installation and operation manual

RCA ANT1650F user guide

RCA

RCA ANT1650F user guide

AKG SRA 1 User instructions

AKG

AKG SRA 1 User instructions

Televes evoca 130990 Assembly / operation instructions / parts

Televes

Televes evoca 130990 Assembly / operation instructions / parts

Mohu flow 40 instruction manual

Mohu

Mohu flow 40 instruction manual

OmniMetrix TrueGuard-PRO Basler DGC2020 installation guide

OmniMetrix

OmniMetrix TrueGuard-PRO Basler DGC2020 installation guide

Siemens ANT792-8DR operating instructions

Siemens

Siemens ANT792-8DR operating instructions

Maxview MNISAT MXL001 Installation & user's instructions

Maxview

Maxview MNISAT MXL001 Installation & user's instructions

manuals.online logo
manuals.online logoBrands
  • About & Mission
  • Contact us
  • Privacy Policy
  • Terms and Conditions

Copyright 2025 Manuals.Online. All Rights Reserved.