10
Video resolution
1920 x 1080, 60fps, 16:9 - 1920 x 1080, 48fps, 16:9 - 1920 x 1080, 30fps, 16:9
1920 x 1080, 24fps, 16:9 - 1280 x 960, 60fps, 4:3 - 1280 x 960, 48fps, 4:3
1280 x 720, 120fps, 16:9 - 1280 x 720, 60fps, 16:9
IMPORTANT: the number of frames per second (fps) can change depending on
the TV standard selected. The information given here is for an NTSC standard.
E.g. if the PAL standard is selected, 60fps will become 50fps.
Camera angle
Gives a choice of camera angle from 4 options: wide, medium, narrow, small.
Important, some camera angle options may be unavailable depending on the
video resolution settings.
1080p, wide = 134° - 1080p, medium = 122° - 1080p, narrow = 101°
1080p, small = 83° - 960p, wide = 145° - 720p, wide = 150°
Video bitrate
Choose high or normal video bitrate.
A high video bitrate will give better colour denition but will use more memory
space.
Continuous recording
Activer/Désactiver l'enregistrement en boucle.
Lorsque la carte mémoire est pleine, la caméra ecrase le chier le plus ancien
pour continuer d'enregistrer.
ATTENTION : fonction indisponible avec les mode d'enregistrement "audio
uniquement", "Time-lapse vidéo"
Self-righting image
Enable/Disable continuous recording.
When the memory card is full, the camera overwrites the oldest le in order to
continue recording.
IMPORTANT: this function is not available with the “audio only’ and “time-lapse
video” recording modes
Insertion of the date
Enable/Disable insertion of the date into the video.
IMPORTANT: this function is not available with the “1280 x 720, 120fps”
resolution mode
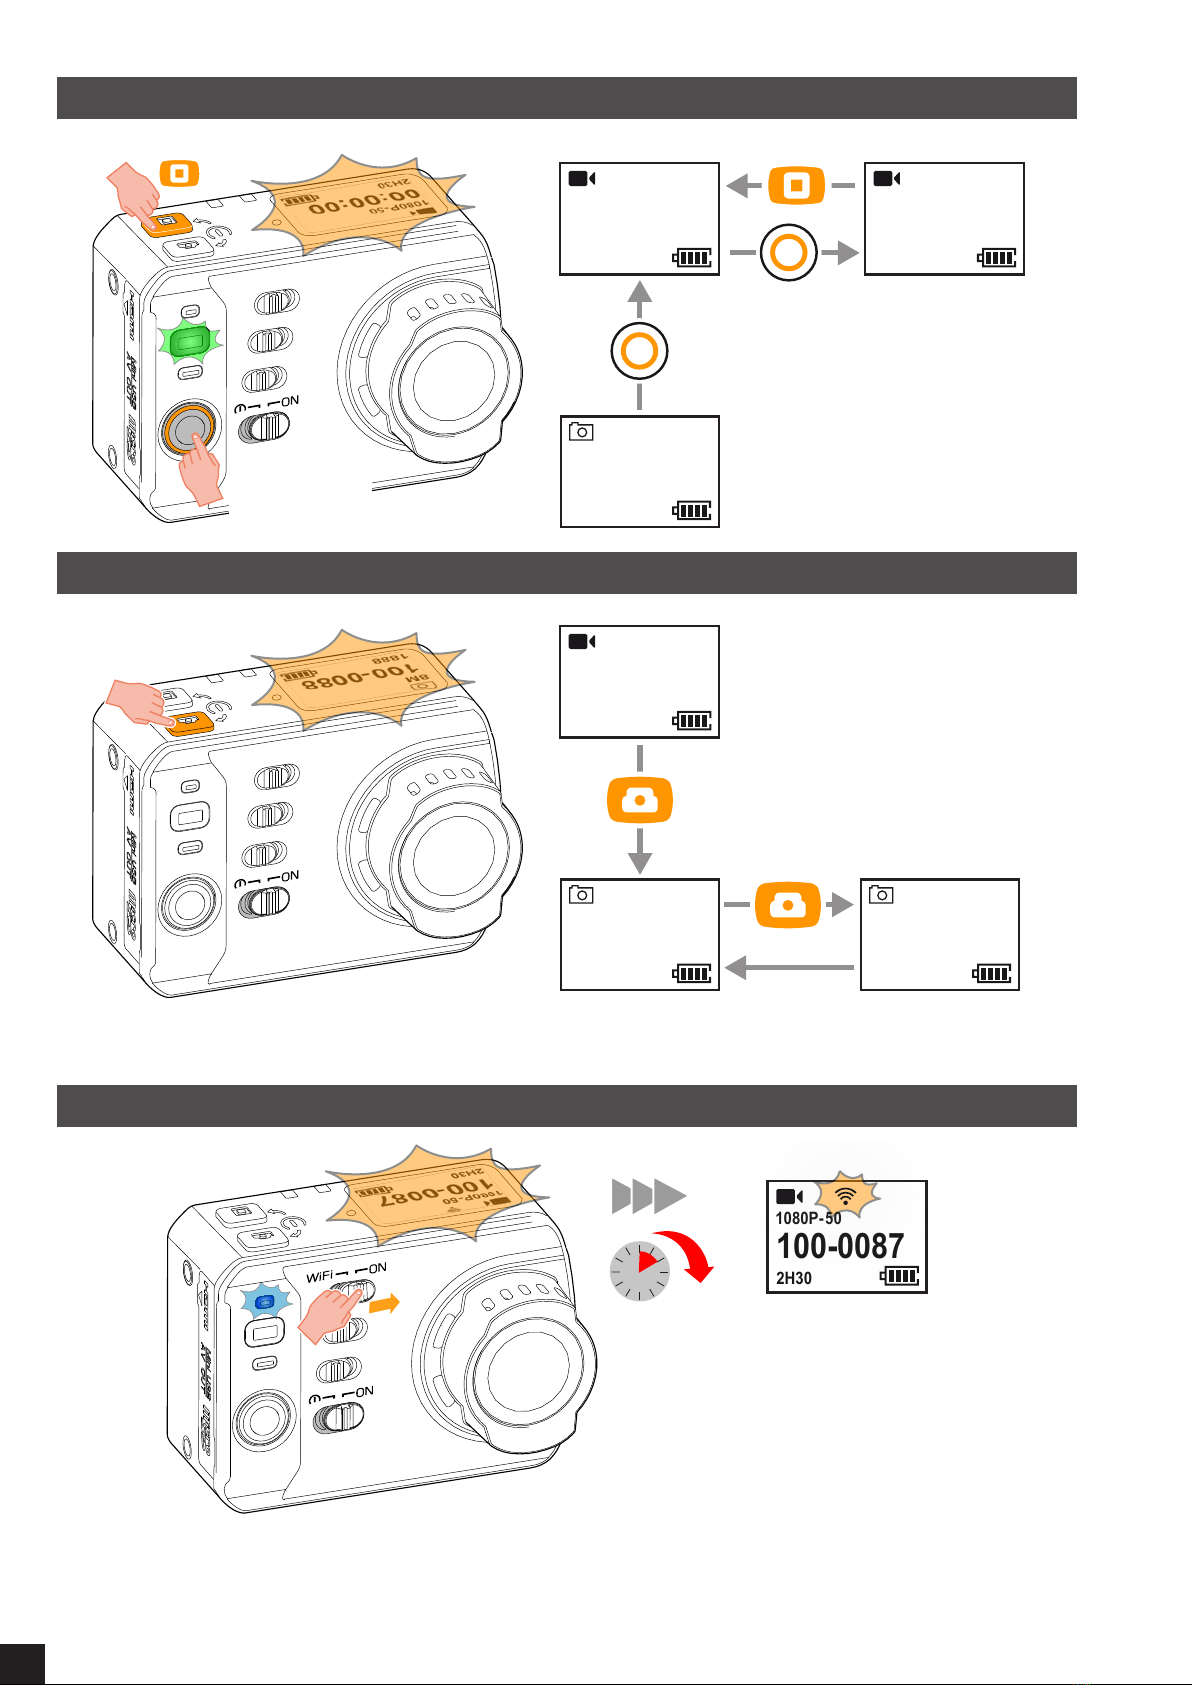
PHOTO SETTINGS
Press and
hold
Press
once
Mode photo
100-0088
1888
8M
M
Photo mode
Single shot mode
"Burst mode.
Options possible: 3/s, 5/s, 8/s"
"Time-lapse photo capture (generates one le in .JPG format per photo).
Takes a photo at regular intervals.
Interval options: 0,5s / 1s / 2s / 3s / 5s / 10s / 20s / 30s"