INSTALLATION INSTRUCTIONS # 69524
SUGGESTED TOOLS: ½”, 9 /16” 15 mm Wrench & Socket, WD-40, Hacksaw, Jack Stand
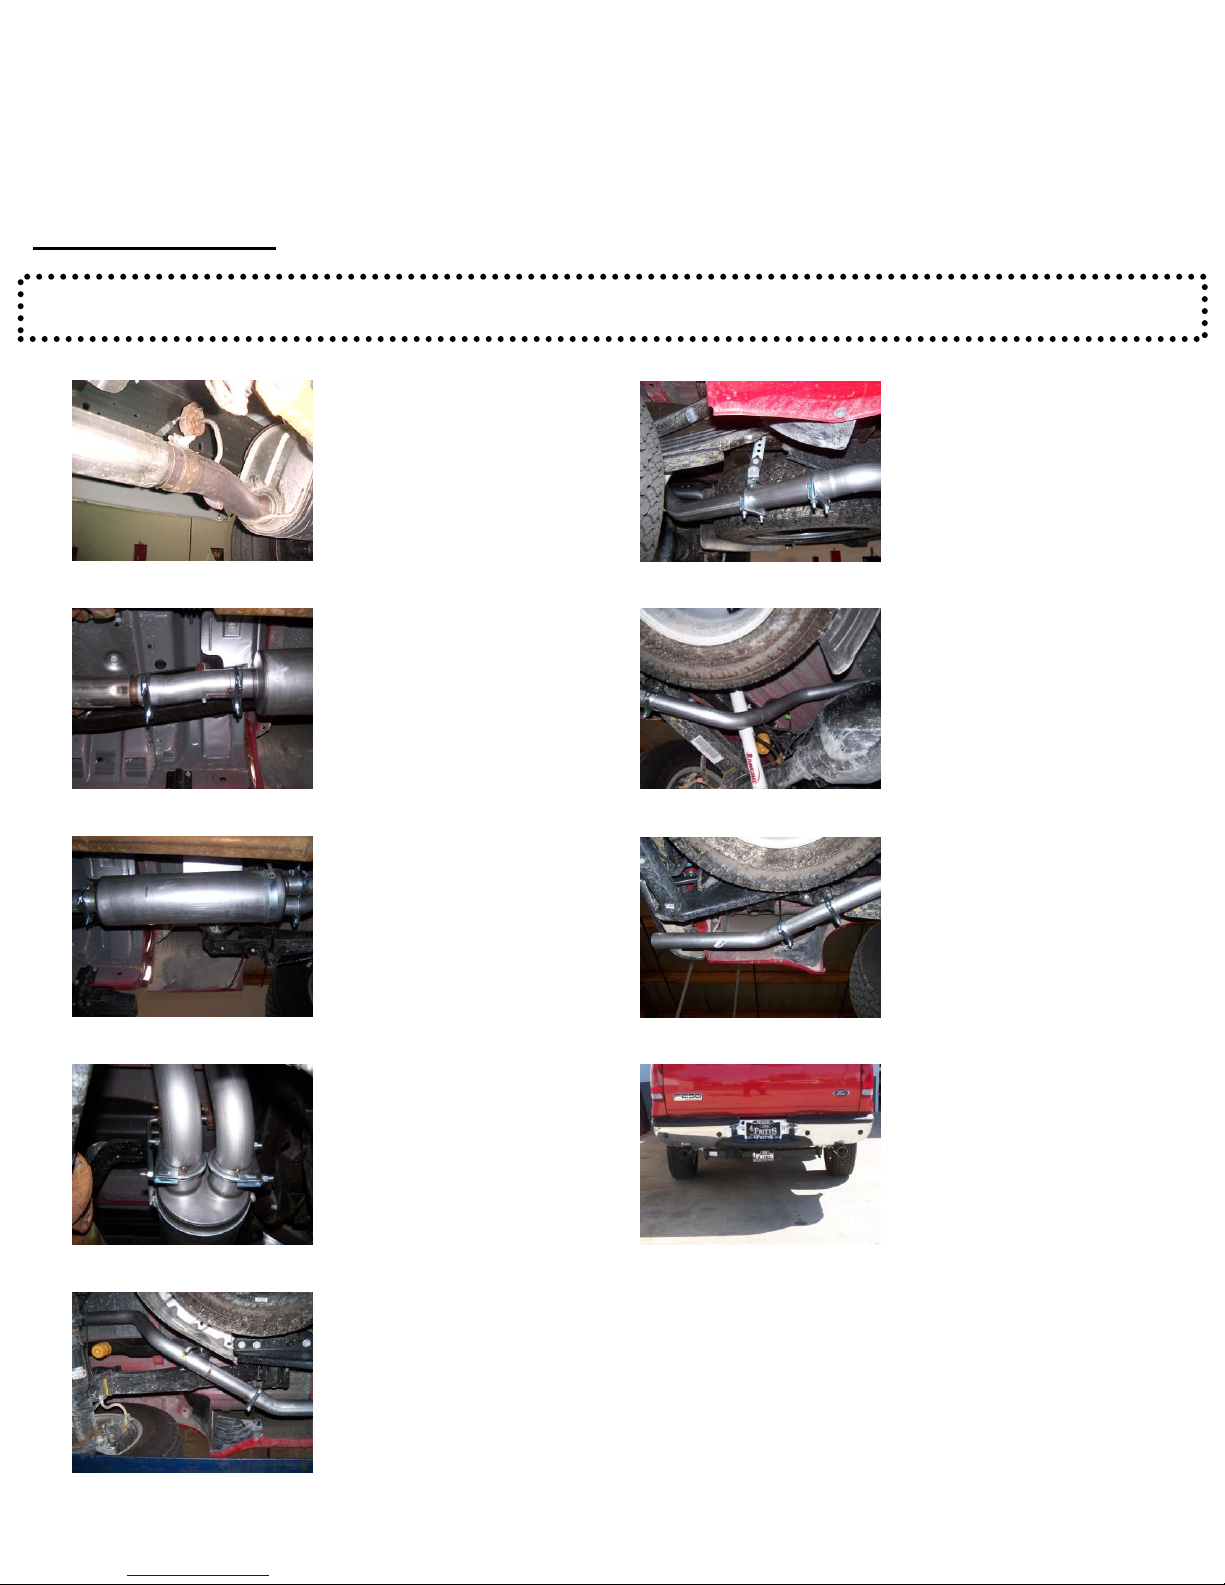
5. Install the passenger side
overaxle tailpipe #C into the
muffler 1½”-2”. Use clamp #H
to secure tailpipe to muffler. DO
NOT TIGHTEN. Insert hanger into
rubber grommet.
3. Install muffler #B onto head
pipe #A 1½”-2” with the louvers
facing towards the converter. Use
a jack stand to support the
muffler. Use clamp #G to secure
the muffler to the headpipe. Do
not tighten. Muffler inlet is looking
into the louvers.
9. Install stainless steel tips. Clamp
down. When you have everything in
place, firmly tighten all bolts and
clamps down securely. Use stainless
steel cleaner and a Scotch Brite pad
weekly to prevent tip from
discoloration.
Inspect all fasteners after 25-50
miles of operation and re-tighten as
necessary
2. Install head pipe #A onto your
existing stock front pipe and
attach with clamp #G. Use a jack
stand to support the converter.
Insert welded hanger into rubber
grommet.
4. Install band clamp hanger #K
onto muffler, insert hanger into
rubber grommet. Use bolt kit #L to
secure band clamp. DO NOT
TIGHTEN.
6. Install metal hanger #I into hole
located approximately 19” from the
rear of the frame in the second
hole from top. Use bolt kit #J to
secure. DO NOT TIGHTEN.
7. Install the driverside overaxle
tailpipe #D into the muffler 1½-
2”. Use clamp #H to secure. DO
NOT TIGHTEN. Rotate until it
meets with metal hanger, use
clamp #H to hold pipe. DO NOT
TIGHTEN.
8. Next install the exit pipes #E.
Use clamp #H to secure. DO NOT
TIGHTEN.
1. To remove the stock exhaust
remove it from the clamp located
in front of the stock muffler.
Disengage the welded hangers
using WD-40 from the OEM rubber
grommets. Do not damage or
remove the rubber grommets as
you will re-use them to mount your
new system. Now, cut off tailpipe
and remove exhaust.
CAREFULLY READ INSTRUCTIONS BEFORE STARTING INSTALLATION.
When installing this exhaust system make sure to use proper safety precautions. Use jack stands when working under
the vehicle, set parking brake, block tires and use safety glasses and gloves. Allow exhaust to cool before attempting
installation. Severe injury or burns could occur if safety measures are not taken.
SUGGESTED TOOLS: 1/2”, 9/16” 15mm wrenches & sockets, WD-40, hacksaw, jack stands.
Disconnect the negative battery cable before removal of OEM exhaust. This will allow the computer to reset and recognize the
new exhaust.
Lay out the exhaust on the floor so it looks like the drawing and compare parts with
manual.
GIBSON PERFORMANCE EXHAUST EXHAUST SYSTEMS


