SAVETHESEINSTRUCTIONS
support.gigiseasons.com|support@gigiseasons.com|(800)819‐0560Ext800
Fig1
Fig2
Fig4
Fig5
Fig3
ARTIFICIALTREEASSEMBLYINSTRUCTIONS
NOTE:Thoughthelightstringsareratedforindoororoutdooruse,thecompletetreeisforindooruseonly.
Style#10408‐75‐600C
7.5‐footPre‐LitSnowValley
PackagingContents:Eachpackageshouldincludethefollowingitems:
Toptreesection(Fig1,SectionC)
Middletreesection(Fig1,SectionB)
Bottomtreesection(Fig1,SectionA)
Foldingmetaltreestand(Fig2)
Packageofsparelightbulbsandplugfuses
1. Unpack:
Carefullyunpackalltreecomponentsfromthecartonandkeepthecartonfor
futurestorage.(Somesectionsofthetreemaybeheavy).Besuretountangle
anywiresthatmaybecaughtwithotheritems.(PleaseDONOTforciblyremove
anycontents).Removeanyouterwrappingfromtreebranches.
2. BasicAssemblySteps:
(CAUTION):Twopeoplemaybeneededtobalanceandassembleuppersection
oftree.Pleaseusealadder,ifneeded,andfollowallladdersafetyinstructions.
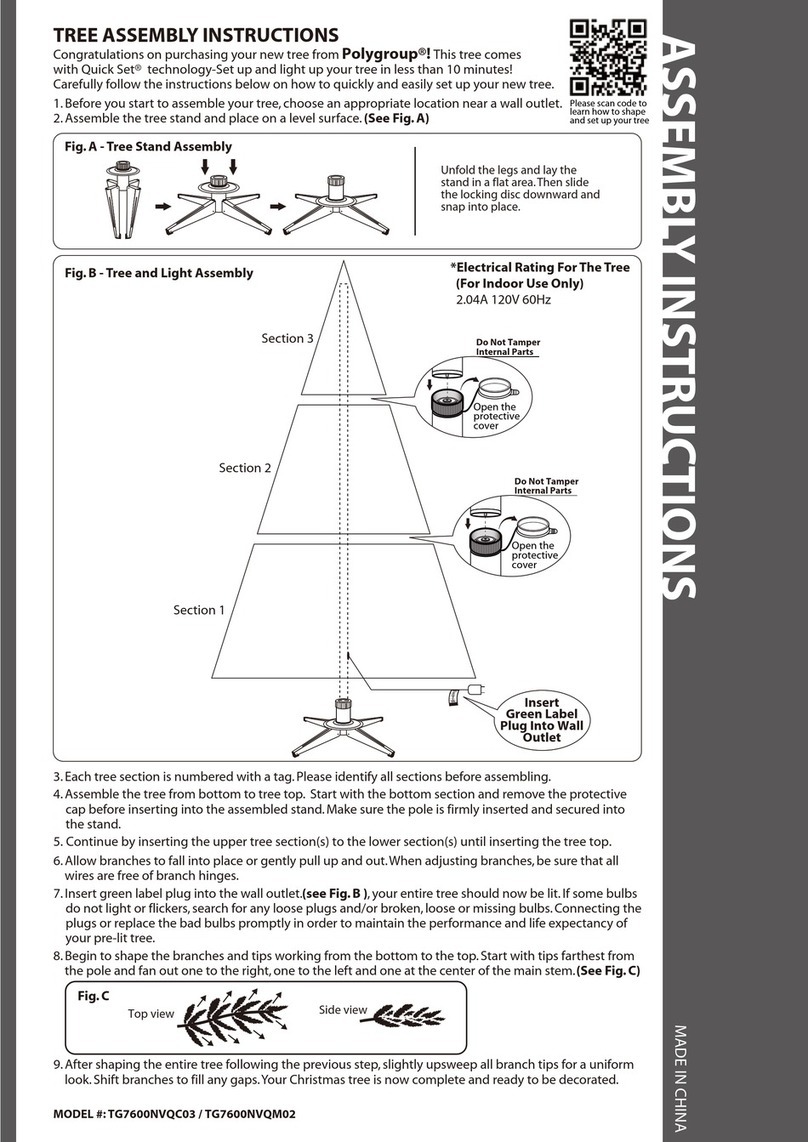
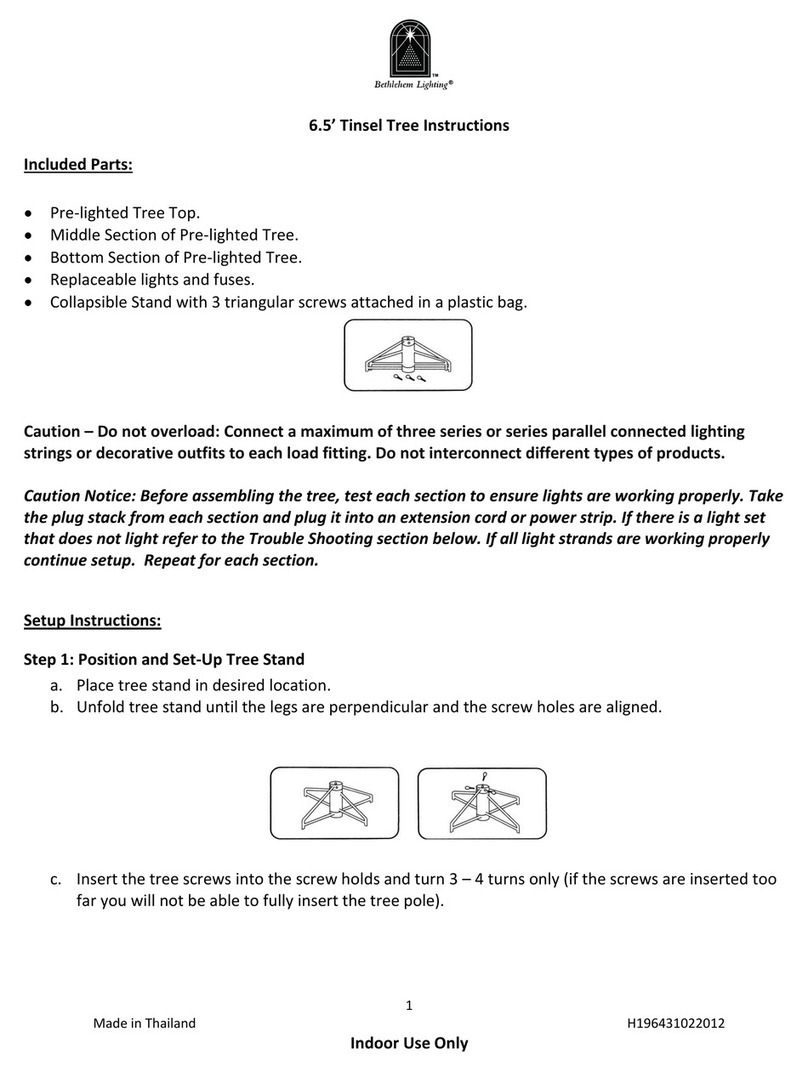
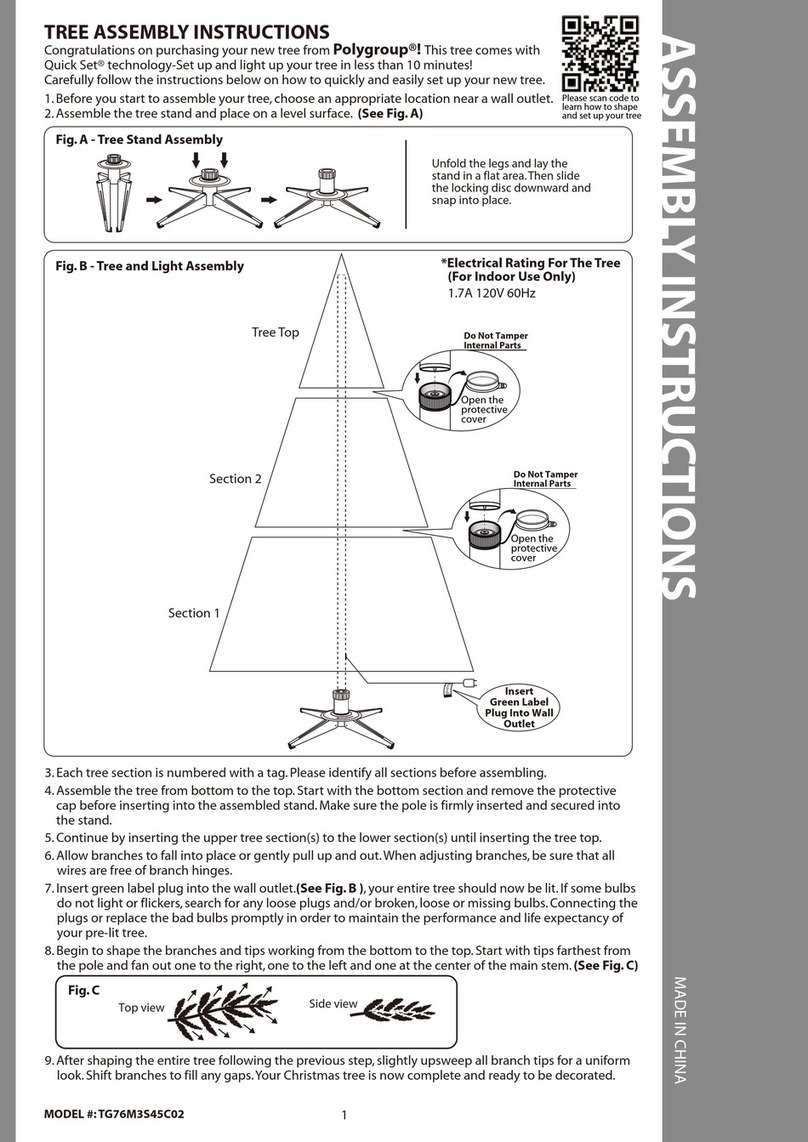
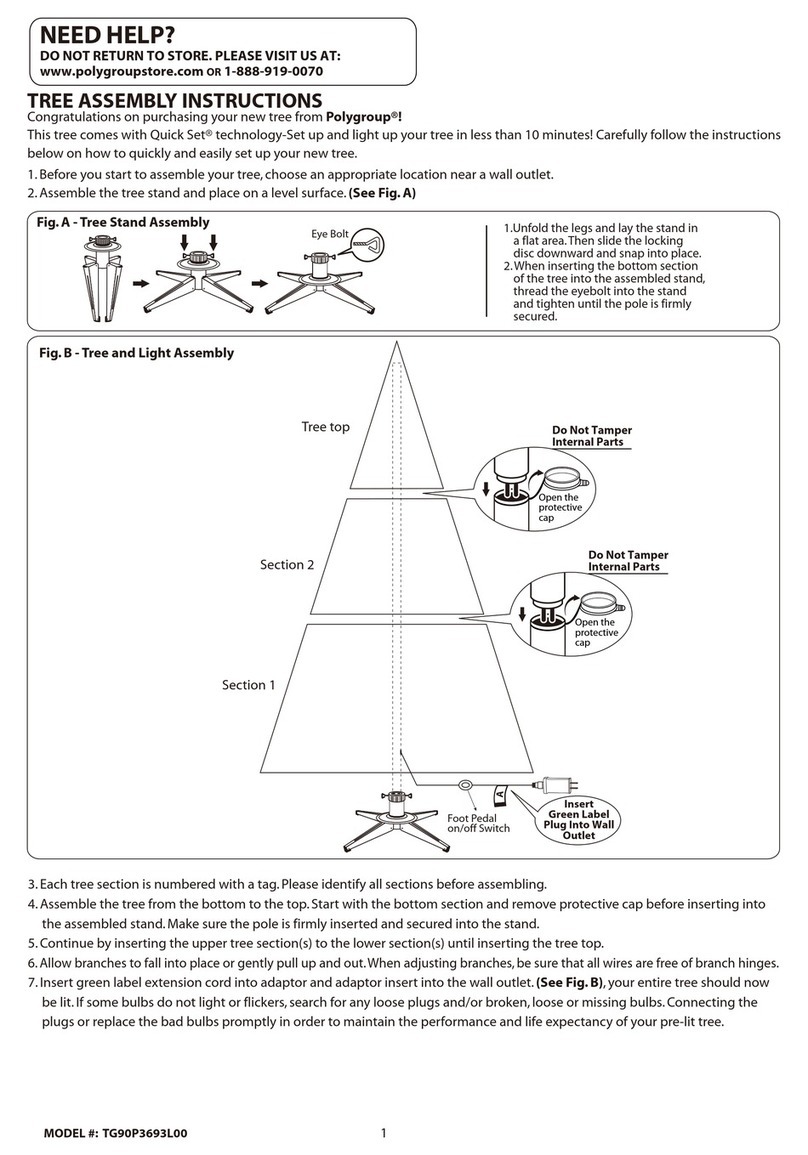
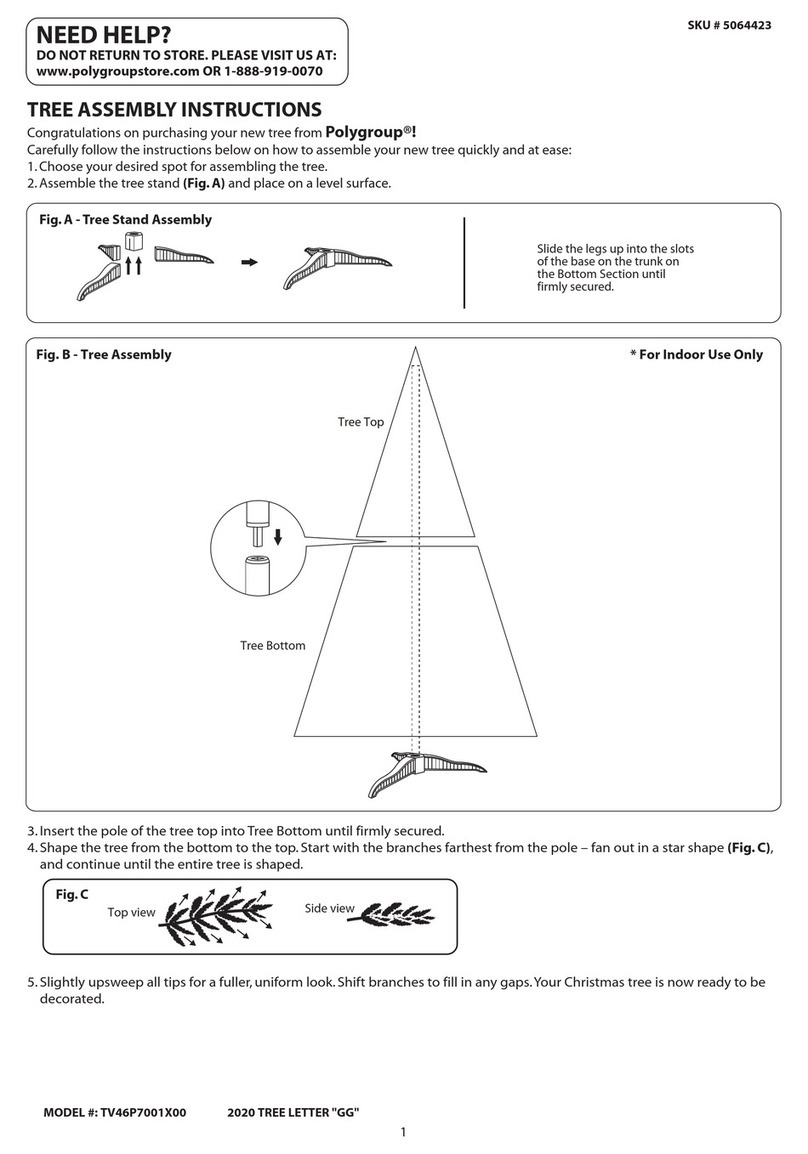
1) Removethetreestandfromtheplasticbagandseparatethelegsofthestandtoforman“X”.Aligntheholes
fortheinsertionoftheeyebolts.Inserttheeyeboltsandbeginthreadinginaclockwisedirectionforacouple
ofrotationsonly;leaveenoughroomforthetree’spolefromsection“A”tobeinsertedintheassembledtree
stand.
2) Placethetreestandinitsdesiredlocationonalevelsurface.Oncethetreeisfullyassembled,itmaybetoo
difficulttomoveandrelocate.
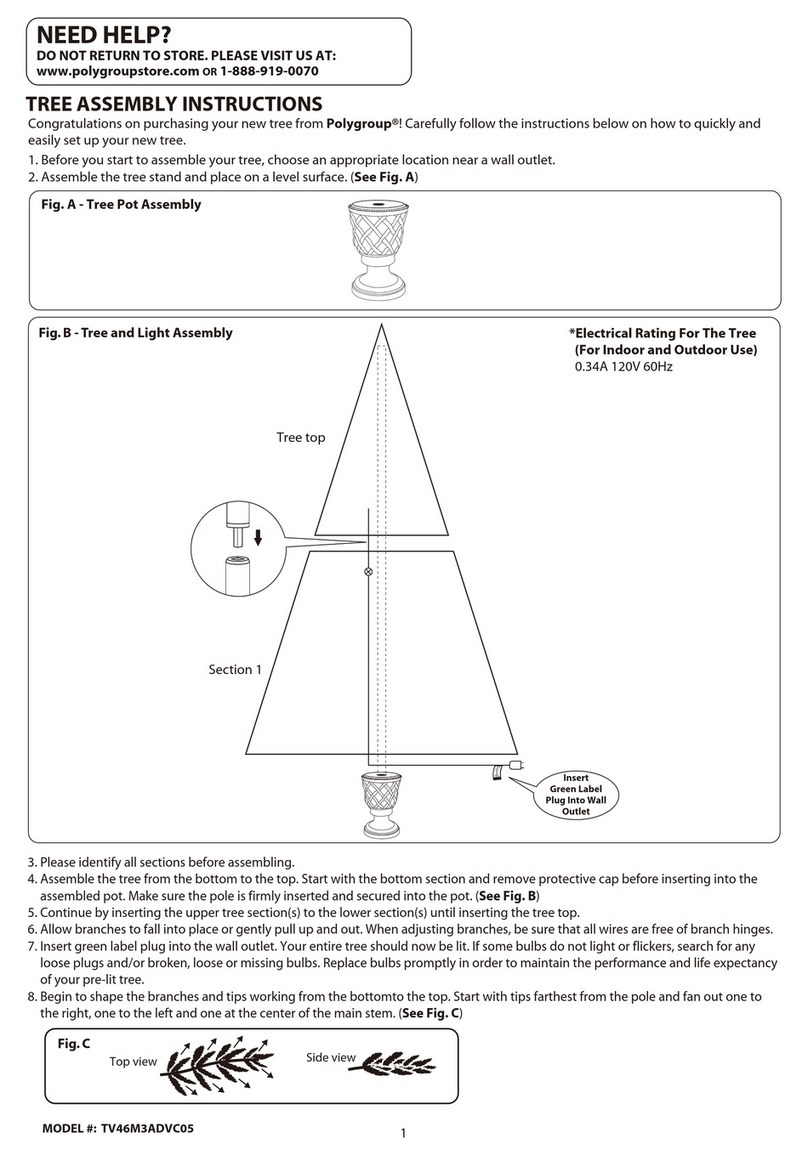
3) Locatebottomsection“A”,removetheprotectiveplasticcapfromtheendofthepoleandplacethatendinto
thetreestand.Besurethatthepointedendofthepoleextendstothebottomofthestand.Standthetreeup
andstraightenbyadjustingeyeboltsinoroutthentighteneyebolts.
4) Locatesection“B”,removeprotectiveplasticcapfromtheendofthepoleandinstertthatendintothepole
fromsection“A”untilitisfullyseated.
5) Locatetopsection“C”andinsertintothemiddlesection“B”.
6) Allowthebranchestofallintoplaceorgentlypullupandout(Fig3).ImportantNote:Whenloweringthe
branchesbeextremelycarefulnottotanglewiresinthegapbetweenthebranchandthebracket(Fig5).
7) Connecttheplug(s)securelyasshowninFig1.Plugthepowercordintoastandardelectricalwalloutletor
otherpowersource.Yourentiretreeshouldnowbelit.Ifsomebulbsdonotlight,searchforanylooseplugs,
broken,looseormissingbulbs.(SeeTROUBLESHOOTINGonnextpage.)
Tofullyenjoyyourpre‐lightedtree,andtomakeitlookitsbest,followtheshapinginstructionsbelow.(Wesuggest
unpluggingthetreeandwearingprotectivegloves.)
8) Begintoshapethebranchesfromthebottomtothetop.Eachbranchcanbeshapedtoanaturalpositionby
spreadingouttheleftandrighttipsawayfromthecentertip(Fig4).Tipsshouldthenbebentslightlyupward
toaddamorenaturallookingappearance.
9) Repeattheprocessoneachbranch,allthewaytothetop.Aftershapingthewholetree,stepbackandtakean
overalllook.Shiftbranchestofillanygaps.Yourtreeisnowreadytodecorateandenjoy.
3. Storage:
1) Unplugtreefrompoweroutletorextensioncordandremoveallornamentsanddecorations.
2) Unplugeachsectionandmakesuretokeepeachstackoflightsconnectedtogether.
3) Gentlyliftofftopandmiddlesectionsandremovethebottomsectionfromthetreestand.Turnupsidedown
andcarefullypressbranchestowardcenterpoleforeasierplacementintothestoragebox.Carefullyplacethe
treeinitsboxandtapeitshut.DONOTSTORETREEINADAMPAREAORINANAREAWHERETHE
TEMPERATUREEXCEEDS100ºF.
