Global Point Products X Games Clipster User manual

User Manual
Clipster Digital Camera

Micro Digital Camera
PROFILE OVERVIEW
SYSTEM REQUIREMENT
- Microsoft win98/2000/NT/ME/XP operation system
- 125MB or above free hard disk space, 32MB or more ROM
- Usable USB interface and CD-ROM
- Color Monitor with at least 800 x600 24 net character or above
GETTING STARTED
This camera is equipped with standard accessories including instruction CD
and USB cable. The following sections explain how to use them on the camera.
POWER SUPPLY
1 AAA Alkaline battery.
Precautions
AUTOMATIC SHUT OFF FEATURE
To save battery power, the camera will automatically shut off when not used after 30 seconds.
INSTALLATION OF DRIVER
2. Installation of Driver
Thank you for purchasing the CLIPSTER digital camera. This camera takes still, video, and
acts as a PC Webcam This camera is equipped with a 4M*16b built-in SDRAM. Through the
USB Cable provided, you can download the captured images to your computer, or use the
camera as a webcam for face-to-face online chat with your friends the internet.
2. When using the PC Camera function it is not necessary to use the battery as the computer will provide
the required power through the USB cable.
Click <Install Camera Drive> and follow the step-by-step instructions to complete installation. After
successful installation of driver, restart your computer. A "Precision 801 V4" folder will appear on your
desktop.
1. Always download the images from camera before the battery discharged, otherwise, the images will be
deleted automatically.
1. Make sure the camera is not connected to your computer. Load the software CD to your PC.
Before using this function, download the images from the camera before you discharge the battery or the
images will be deleted automatically.
Note: Do not mix old and new batteries or of different type and brand.

TAKING PHOTOGRAPHS
Install one AAA Alkaline Battery.
1.To turn on the camera, press the mode button on the back. The LCD data screen will appear.
2.Center your subject in the viewfinder.
3.Hold the camera steady, and press the shutter button to take photos;
4.When you hear the buzzer beep once, this indicates you have taken a photo.
Note:
1. When taking photos, the louder sound indicates a successful shot.
A faint beep will indicate a failed shot.
2. The digital camera is capable of storing over 99 images, however, the LCD can only display up to 99.
TURNING OFF CAMERA
1.Press MODE button until the data LCD displays "
o
ff".
2.Press the "Shutter" button within 5 seconds to turn off the camera swiftly.
SELF-PORTRAIT FEATURE
1. On the front of the camera adjacent to the lens is a small aiming mirror.
2. Hold camera at arms length and use mirror to center your portrait.
3. Press the "Shutter" button to take image.
SELF TIMER MODE
1.Press MODE button until the data LCD displays .
3.After 10 seconds, the camera will take the picture.
Note:
VIDEO MODE
1.Press the mode button until the data LCD displays
2.Press and hold the "Shutter" button within 5 seconds, for continuous video capture.
3. To stop the video capture, release the shutter button.
Note:
When the memory is full, the operation will stop and the "FL" symbol will appear.
CONTINUOUS CAPTURE
1.Press MODE button until the data LCD displays
2.Press the "Shutter" button within 5 seconds to take three photos continuously.
5. When the maximum number of photos have been taken, the buzzer will sound continuously indicating
no additional images can be shot.
2.Press"Shutter"button within 5 seconds to enter the 10 second time set. The digital camera will beep for
every second.
This function will not operate when the memory is full and the maximum number of pictures have been
taken.

DELETE ALL PHOTOS
1.Press MODE button until the data LCD displays
2.Press "Shutter" button twice to delete all images.
DELETE LAST PHOTO
1.Press MODE button until the data LCD displays
2.Press the "Shutter" button within 5 seconds to delete the last photo.
HI RESOLUTION/LO RESOLUTION
The resolution governs how much detail is captured in each picture. The default resolution is Hi.
1. To select the "Lo" resolution setting, press MODE button until the data LCD displays
2.Press the "Shutter" button within 5 seconds to change resolution.
IMAGE COMPRESSION
1.Press the MODE button until the data LCD displays the following default compression mode;
2.Press the "Shutter" button within 5 seconds to change to "Lo" compression.
FREQUENCY SELECTION
1.Press MODE button until the LCD displays
2.Press the "Shutter" button within 5 seconds to shift to 50Hz power supply.
DOWNLOAD, SAVING, TRANSFERRING & ADJUSTING IMAGES
When the photo memory is full, the operation will stop and the "FL" symbol will appear.
To save your images, you'll need to download or transmit them to your computer.
3.Click the icon of a pink camera on the bottom left to download your images.
USING THE DIGITAL CAMERA AS PC CAMERA
In order to better utilize the built-in memory, the CLIPSTER carries a File Compression function. When the
digital camera is set to compress the files, more images or increased length of video can be stored. The
default non-compression mode is "Hd".
1.Use the USB cable to connect the computer with the digital camera. You will hear a "beep" sound
indicating a successful connection.
2.Select the folder "My DSC" on your computer desktop or under the Program Menu. Click on the
"MYDSC2" icon to open program.
1. Click on the "Precision 801 V4" folder on your computer desktop or under the Program Menu. Click on
the "PC Cam" icon to open program.
In most American and Asian countries, the frequency is generally 60Hz; UK, Japan, and European
countries generally use 50Hz. The correct frequency should be selected in conformity to the local AC
power supply to avoid banding effect. Please check with the local Electrical Power Supplier to verify the
correct power supply for your country/area.
Note: After downloading the files from your camera, thumbnails of the images will be shown on the twelve
boxes of the program screen. Video images will be marked with an "AVI" logo on the upper left-hand
corner of the thumbnails.
If the Digital Camera does not start preview automatically, go to "Options" on the menu bar and choose
"Preview" to activate.

3. A pop-up menu will appear requesting for the desired disk space to set aside for captured file. The
default is set at 1MB. Click OK. (There is no need to enlarge the disk space set aside because the program
will automatically adjust when insufficient.
4. Go to "Options" on the menu bar and choose "Video Capture Filter…" for image setting. Choose the
desired level of "Brightness", "Contrast", "Saturation", "Sharpness", and "White Balance". Click to exit. To
return to default image setting, click "Default" and then "OK" or "Apply".
2. Go to "File" on the menu bar and choose "Set Capture File" for choosing the default location for saving.
Choose the desired location and name the file (be sure to include "avi" after the file name) then click
"Open". The video recorded will be saved to this location automatically.

6. Go to "Capture" on the menu bar and choose "Set Frame Rate" to set the desired "Frame per Second"
for the video that will be captured. Make sure the checkbox for the "Use Frame Rate" is checked and enter
desired Frame Rate per second. Click "OK" to confirm, click "Cancel" to discontinue the setting.
7. Go to "Capture" on the menu bar and choose "Set Time Limit" to set time limit for the video that will be
captured. Make sure the checkbox for the "Use Time Limit" is checked and enter the desired Time Limit.
Click "OK" to confirm, click "Cancel" to discontinue the setting.
8. Go to "Capture" on the menu bar and choose "Start Capture" (the default saving location must be set). A
pop-up window will appear requesting confirmation to proceed while showing the default saving location.
Click "OK" to begin video capturing.
9. The Digital Camera will begin capturing video with the timer on the bottom of the program screen. When
finished, go to "Capture" and choose "Stop Capture" to stop video capturing.
5. Go to "Options" on the menu bar and choose "Video Capture Pin…" to choose the resolution of the
video that will be captured. Choose the desired
"Frame Rate" and the desired "Color Space/Compression" and "Output Size". Click "OK" or "Apply" to
confirm setting. Otherwise, click "Cancel" to exit.

USING THE DIGITAL CAMERA AS A WEB CAM
a. For Windows®
Xp
Click on the "Start" button on the computer desktop.
Click "Run".
When the "Run" window appears, type "conf" and click "Confirm".
The Microsoft®
Netmeeting®
Program installation will start automatically.
Follow the on-screen instruction to complete the installation.
b. For Windows®
98 & Me & 2000
Go to the Microsoft®
Official Netmeeting®
website to download the latest Netmeeting®
program.
http://www.microsoft.com/windows/netmeeting/default.asp
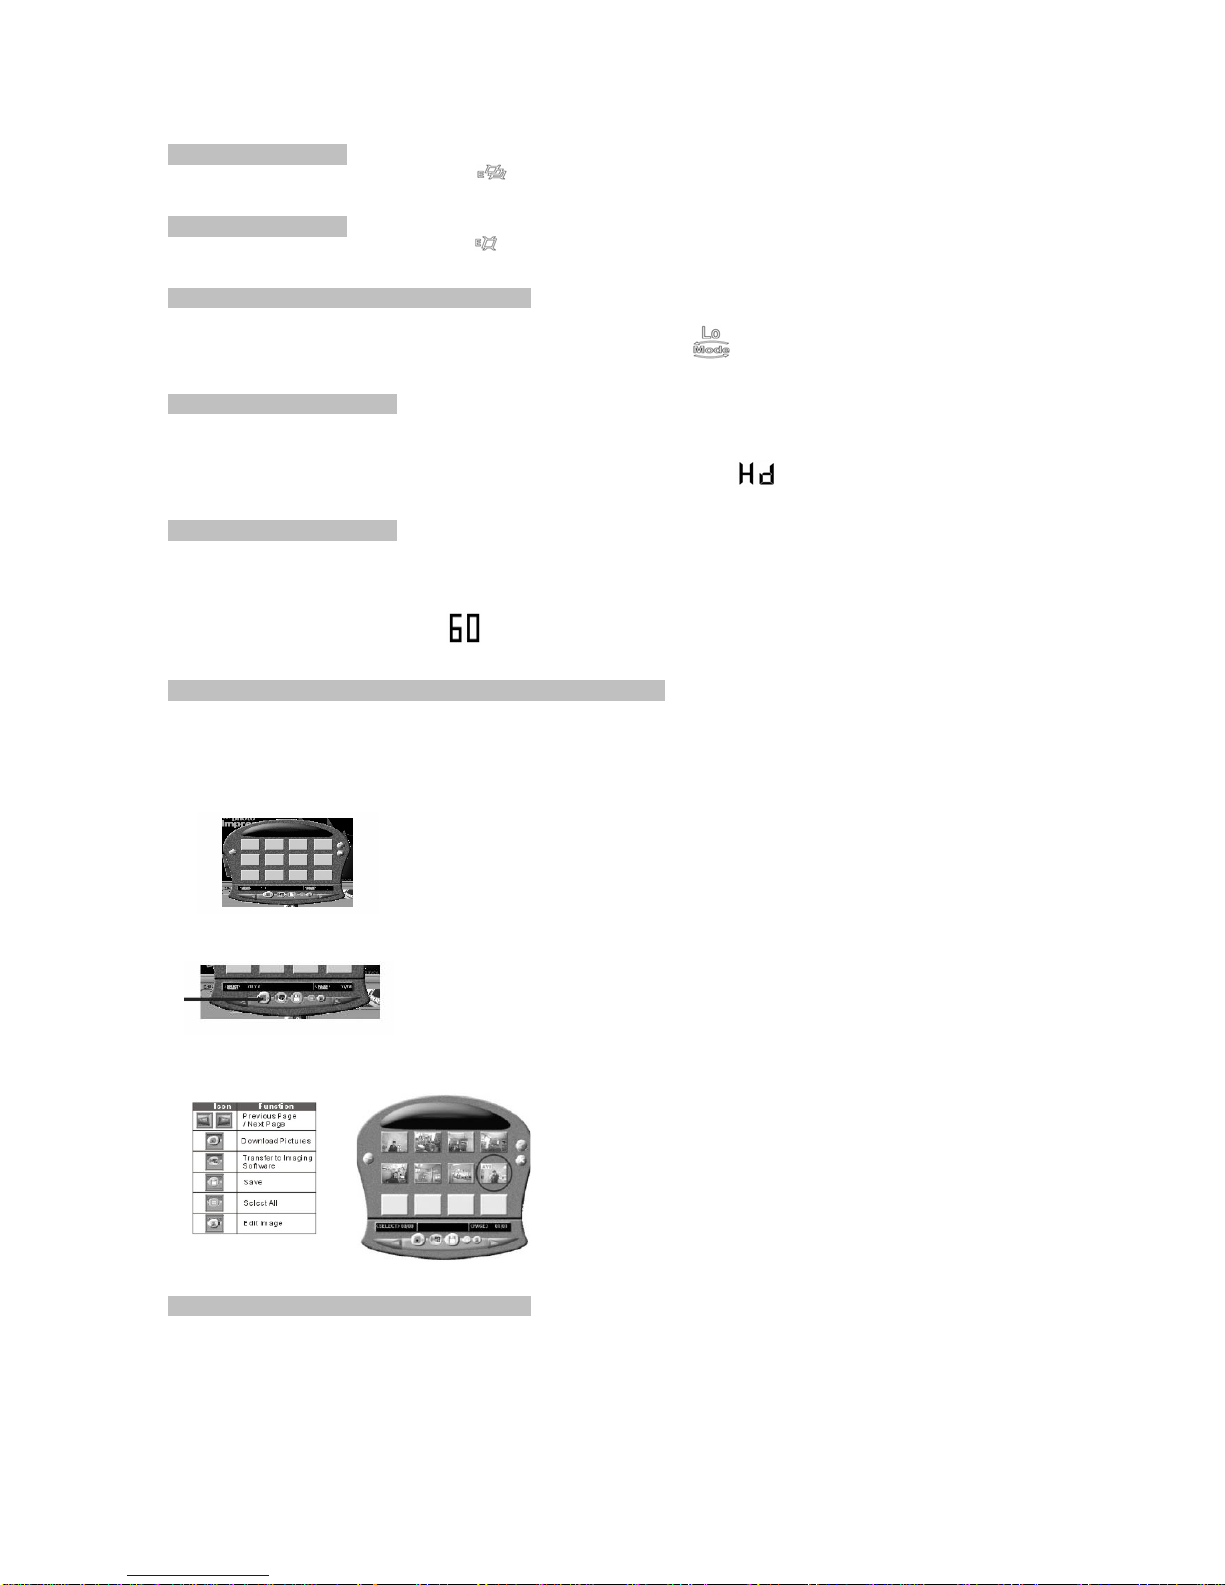
CAMERA SPECIFICATIONS
Image Sensor: 300K Pixel CMOS sensor
Internal Memory: 2MB built-in SDRAM
Modes: digital video recording (no sound) - still photos - PC Camera
Resolution: 640x480(VGA) -320x240(QVGA)
File Formats: 24-bit JPEG/AVl
Storage Capacity:-VGA 26 images 52 compressed
-QVGA 104 images 208 compressed
-AVI ~20 seconds
Status display: Two Digit"88" Monochrome LCD Display
Interface: USB 1.0
Video Frame Rate: 5-10 fps(VGA) 10-12 fps(QVGA)
Lens: Fixed; f=6.00mm
Focus: settings 30cm~infinity (Normal)
Aperture: F2.8
Power source: 1 AAA (Not included)
Power control: Auto power off after 30 seconds without operation
Self timer: 10 seconds
Viewfinder: Built-in
Auto off system time:30seconds
Low voltage alarm: Auto
Dimensions: 3.58mm(L) x 2.12mm(W) x 1.02 mm(H)
Weight: .71 oz (without battery)
FCC LABELING AND INSTRUCTION MANUAL REQUIREMENTS
This device complies with Part 15 of the FCC Rules. Operation is subject
to the following two conditions:(1)this is device may not cause harmful
interference,and(2)this device must accept any interference received,
including interference that may cause undesired operation.
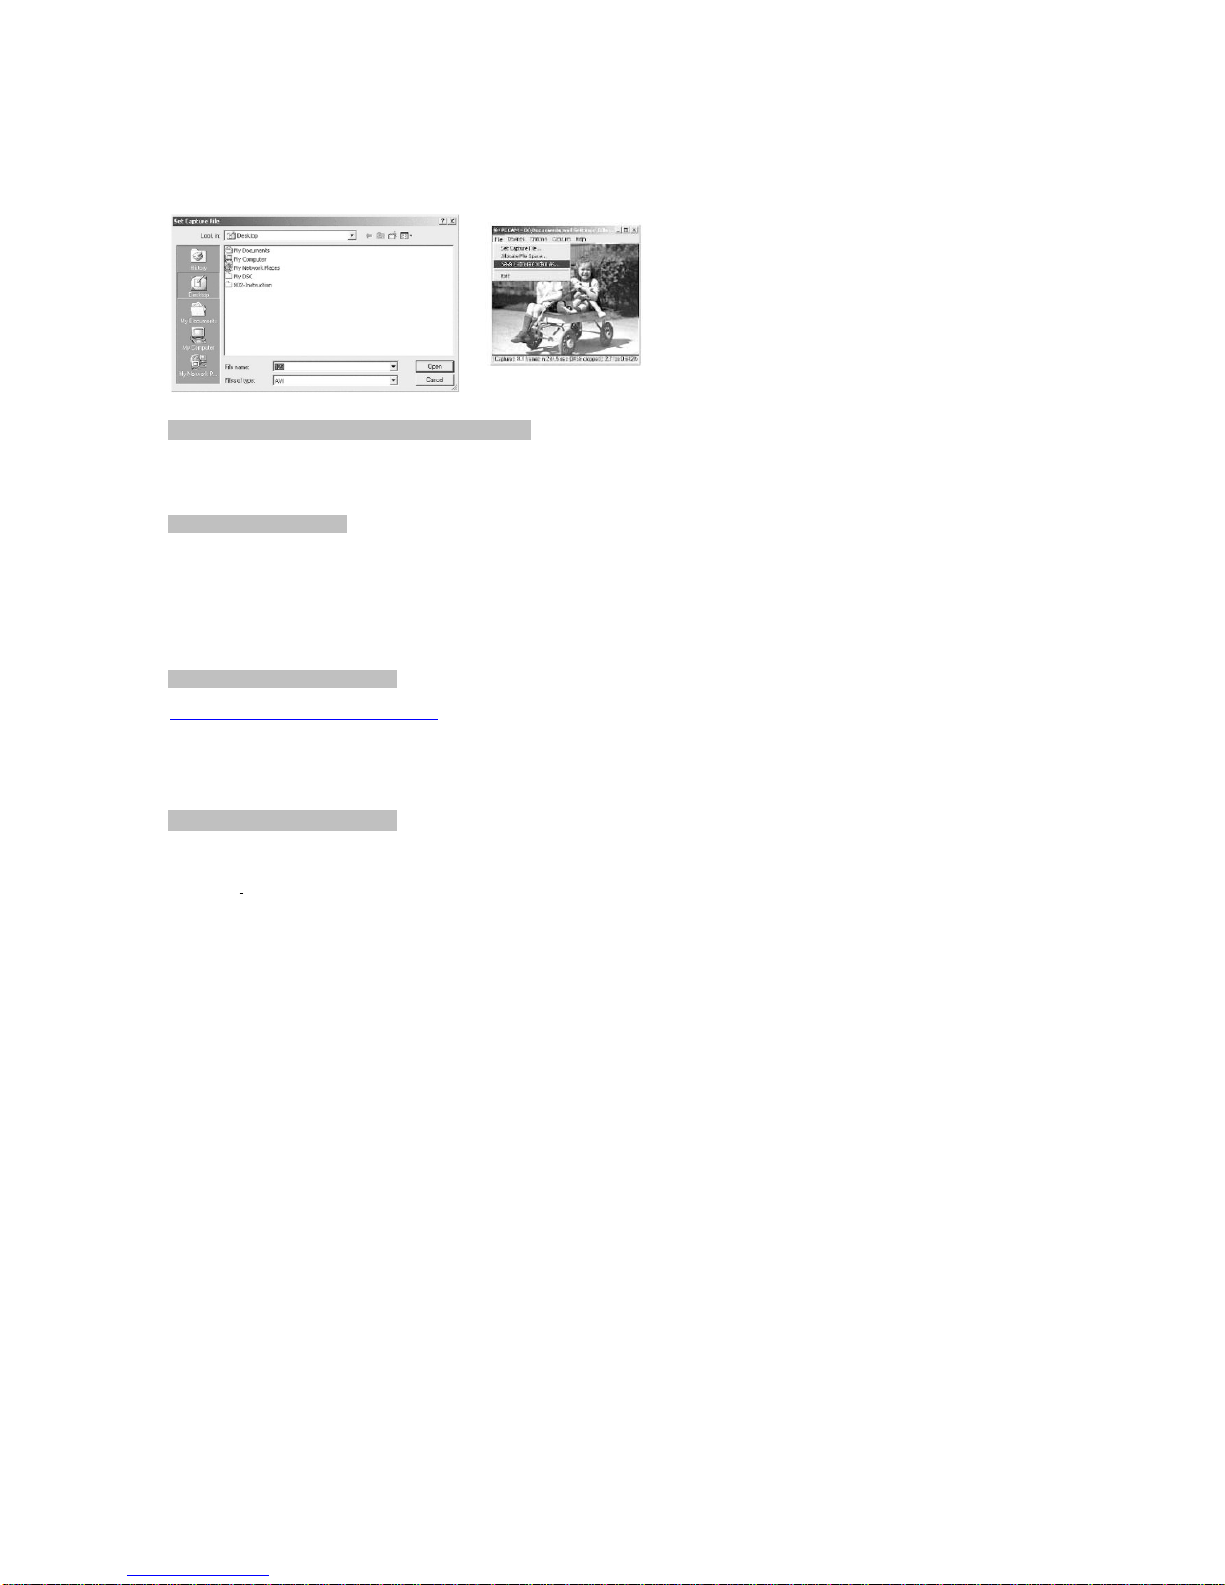
10. To save the file in location other than the default location, go to "File" on the menu bar and choose
"Save Captured Video As…". Choose the desired location and rename if necessary (be sure to include
"avi" after the file name), then click "Open"
The digital camera supports most WebCam software applications such as Microsoft®
,
Yahoo Messenger®
etc. Used with these software applications, the digital camera functions as a Web Cam. Below are the
detailed instructions to obtain Microsoft®
Netmeeting®
program:
Once the installation is completed, open the program. When your digital camera is connected to your
computer, click the "play" icon to activate the digital camera as Web Cam
Once the program is installed, open the program. When your digital camera is connected to your computer,
click the "Play" icon to activate the digital camera as Web Cam.

Warning: changes or modifications to this unit not expressly approved by
the party responsible for compliance could void the user' s authority to
operate the equipment.
NOTE: This equipment has been tested and found to comply with the limits
for a class Digital device, pursuant to Part 15 of the FCC Rules. These
limits are designed to provide reasonable protection against harmful
interference in a residential installation. This equipment generates, uses,
and can radiate radio frequency energy and, if not installed and used in
accordance with the instructions, may cause harmful interference to radio
communications. However, there is no guarantee that interference will not
occur in a particular installation. Lf the equipment does cause harmfu
l
interference to radio or television reception, which can be determined b
y
turning the equipment off and on, the user is encouraged to try to correct
the interference by one or more of the following measure.
Reorient or relocate the receiving antenna.
increase the separation between the equipment and receiver.
to which the receiver is connected.
Consult the dealer or an experienced radio TV technician for help.
Shielded cables must be used with this unit to ensure compliance with the
Class B FCC limits.
IMPORTANT NOTICE:
Monday - Friday / 10am-4pm EST.
WARRANTY:
If you have a problem, DO NOT RETURN THIS UNIT TO THE RETAILER. Contact our customer service
department for immediate assistance at (800) 367-0732 ext. #27.
This product has been thoroughly tested and inspected before shipment. Purchased from an authorized
dealer, it is guaranteed from defects in material and workmanship from the date of purchase for 1 year.
Under the limited guarantee we agree to replace or repair free of charge any part or parts which have been
found to be defective in original material or workmanship. Should you require in-guarantee service, send
your product and proof of purchase directly to Global Point Products, 5815 County Rd. 41, Farmington, NY
14425 U.S.A. Enclose a check or money order for $5.00 to cover handling charges and postage. Pack the
product well and insure it.
This manual suits for next models
1
Table of contents
Other Global Point Products Digital Camera manuals
Popular Digital Camera manuals by other brands

National Geographic
National Geographic EXPLORER 6 operating instructions

Canon
Canon PowerShot SX730 HS user guide

Pyramid Imaging
Pyramid Imaging RIC10 quick start guide

Panasonic
Panasonic DMC-SZ9 Basic operating instructions

FujiFilm
FujiFilm FinePix 6800 Zoom owner's manual

Sony
Sony DSC-RX100M2 Specifications