manuals.online logo
Brands
  1. Home
  2. •
  3. Brands
  4. •
  5. Globo
  6. •
  7. Plumbing Product
  8. •
  9. Globo PA009.BI User manual

Globo PA009.BI User manual

ISTRUZIONI DI MONTAGGIO / ASSEMBLY INSTRUCTIONS
INSTRUCTIONS DE MONTAGE / INSTRUCCIONES PARA EL
MONTAJE / MONTAGEANLEITUNG
BIDET DISTANZIATI DA PARETE / WALL SPACED
BIDETS LOIN DU MUR / BIDÉ SEPARADO DE LA PARED
NICHT WANDBÜNDIGES BIDET
codice
code
code
código
code
quote fissaggi e raccordi
xing and connection measures
dimensions des xations et des raccords
medidas para jaciones y racores
Abmessungen der Befestigungen und Anschlüsse
A B
PA009.BI 335 195
PA060.BI 335 195
GR009.BI 265 115
GR010.BI 265 115
A5009.BI 365 165
DA009.BI 260 155
A5N09.BI 325 135
A
B
2_Montare rubinetteria e sifone (attenzione
la cannuccia di scarico di quest’ultimo deve
fuoriuscire dalla ceramica la misura neces-
saria ad innestarsi allo scarico sulla parete)
posizionare il bidet sopra i fissaggi tenen-
dolo distaccato dalla parete. Collegare i due
flessibili del rubinetto quindi far scivolare il
sanitario fino alla parete, facendo attenzione
che lo scarico del sifone si innesti al raccor-
do sulla parete (attenzione per agevolare
l’nnesto si consiglia di lubrificare entrambe
le parti).
Assemble the taps and the siphon paying at-
tention: to the draining pipe which must come
out from the ceramic as much as it needs to be
connected to the wall draining. Place the bidet
on the xings detached from the wall. Connect
the two exibles of the tap and then let the bi-
det slide to the wall taking care of the siphon
draining which must be engaged to the con-
nection on the wall (attention: to make the
cluching easy we suggest to lubricate both
sides).
A
B
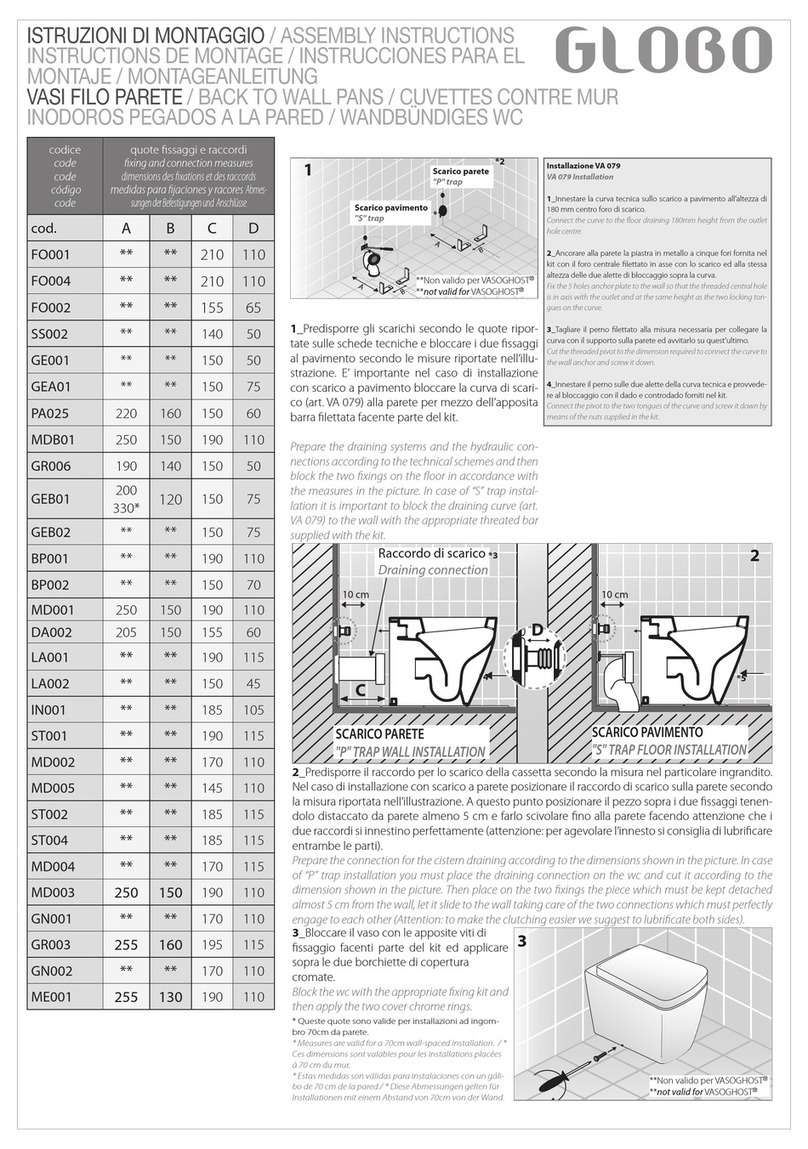
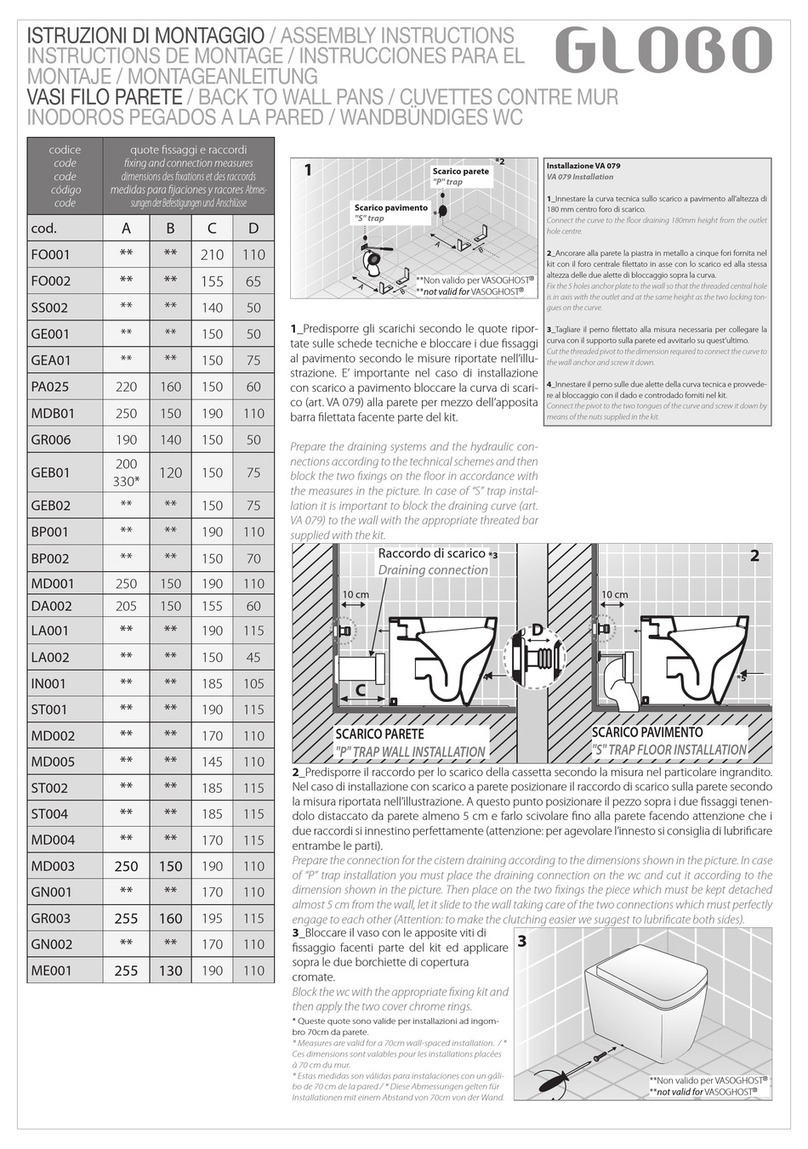
1_Predisporre scarichi ed allacci idraulici se-
condo le quote riportate sulle schede tecni-
che e bloccare i due fissaggi al pavimento
alle misure riportate nell’illustrazione.
Prepare the draining systems and thehydraulic
connections according to the technical sche-
mes and then block the two xings on the oor
in accordance with the measures in the picture.
A
B
1
2
3
3_Bloccare il bidet con le apposite viti di fis-
sagio facenti parte del kit ed applicare sopra
le due borchiette di copertura cromate.
Block the bidet with the appropriate xing kit
and then apply the two cover chrome rings.
1_Prédisposer les évacuations et les raccorde-
ments à l’eau en respectant les dimensions indi-
quées dans les ches techniques. Bloquer les deux
xations au sol aux dimensions indiquées dans
l’illustration.
1_Preparar los desagües y las tomas hidráulicas
respetando las medidas indicadas en las chas
técnicas y bloquear las dos jaciones al suelo re-
spetando las medidas indicadas en la gura.
1_Bereiten Sie die Wasserabüsse und -anschlüsse
gemäß den auf den Datenblättern angegebenen
Abmessungen vor und blockieren Sie die beiden
Befestigungen in Übereinstimmung mit den in
der Zeichnung wiedergegebene Maßen auf dem
Boden.
2_Monter le robinet et le siphon (attention: le tu-
yau d’évacuation de ce dernier doit saillir susam-
ment de la céramique pour xer l’évacuation au
mur). Placer le bidet sur les xations en l’éloignant
du mur. Raccorder les deux tuyaux du robinet puis
faire glisser le sanitaire jusqu’au mur, en faisant
attention à ce que l’évacuation du siphon s’enclen-
che dans le raccord mural (attention: pour faciliter
le raccord, nous conseillons de lubrier les deux
pièces).
2_Montar los grifos y el sifón (cuidado, el tubo
de descarga de este último tiene que salir de la
cerámica lo necesario para que se pueda empal-
mar al desagüe en la pared), colocar el bidé por
encima de las jaciones manteniéndolo separado
de la pared. Empalmar las dos tuberías exibles
del grifo y deslizar el bidé hasta la pared, tenien-
do cuidado de que el tubo de descarga del sifón se
empalme al racor que está en la pared (atención,
para facilitar el empalme, se aconseja lubricar am-
bas partes).
2_Montieren Sie die Armaturen und den Siphon
(achten Sie darauf, dass das Abussrohr von
letzterem soweit wie nötig aus der Sanitärkeramik
heraustritt, um es an den Abuss in der Wand an-
zuschließen), positionieren Sie das Bidet oberhalb
der Befestigungen. Halten Sie dabei einen Wan-
dabstand ein. Schließen Sie die beiden Schläuche
des Hahns an und schieben Sie anschließend das
Bidet bis zur Wand. Achten Sie dabei darauf, dass
der Abuss des Siphons in den Wandanschluss
greift (Achtung, um den Anschluss zu erleichtern,
wird empfohlen, beide Teile zu schmieren).
3_Bloquer le bidet à l’aide des vis de xation
prévues à cet eet et fournies dans le kit puis appli-
quer dessus les deux caches chromés.
3_Bloquear el bidé con los tornillos de jación
indicados que se han suministrado con el juego y
colocar las dos placas redondas cromadas.
3_Blockieren Sie das Bidet mit den entsprechen-
den Befestigungsschrauben, die Teil des Sets sind
und bringen Sie sie dann die beiden Abdeckringe
aus Chrom an.
INSTRUCTIONS DE MONTAGE / INSTRUCCIONES PARA EL
MONTAJE / MONTAGEANLEITUNG
BIDETS LOIN DU MUR / BIDÉ SEPARADO DE LA PARED /
NICHT WANDBÜNDIGES BIDET

This manual suits for next models

6

Other Globo Plumbing Product manuals

Globo OP007P Series User manual

Globo

Globo OP007P Series User manual

Globo LA002.BI User manual

Globo

Globo LA002.BI User manual

Globo GR003 User manual

Globo

Globo GR003 User manual

Globo FO001.BI User manual

Globo

Globo FO001.BI User manual

Globo FO001 User manual

Globo

Globo FO001 User manual

Popular Plumbing Product manuals by other brands

JADO GLANCE 831/075/000/000 installation instructions

JADO

JADO GLANCE 831/075/000/000 installation instructions

Flushmate M-101526-F3B OWNER'S OPERATION AND INSTALLATION MANUAL

Flushmate

Flushmate M-101526-F3B OWNER'S OPERATION AND INSTALLATION MANUAL

Gurari SABIA 5523 Installation and maintenance  instruction

Gurari

Gurari SABIA 5523 Installation and maintenance instruction

Zenith HydroTap G5 UltraCare BCU 40 user guide

Zenith

Zenith HydroTap G5 UltraCare BCU 40 user guide

Lefroy Brooks C1-4715 installation instructions

Lefroy Brooks

Lefroy Brooks C1-4715 installation instructions

Geberit HyTronic 115.869.SN.5 Installation

Geberit

Geberit HyTronic 115.869.SN.5 Installation

Rubineta Kubo Consealed Plastic Series installation manual

Rubineta

Rubineta Kubo Consealed Plastic Series installation manual

OBI 411 722 manual

OBI

OBI 411 722 manual

MRdirect 710 installation guide

MRdirect

MRdirect 710 installation guide

American Standard Pressure Balance Bath/Shower 4501 installation instructions

American Standard

American Standard Pressure Balance Bath/Shower 4501 installation instructions

IKEA RÄNNILEN manual

IKEA

IKEA RÄNNILEN manual

Symmons Duro SLS-3612-1.5 Operation & maintenance manual

Symmons

Symmons Duro SLS-3612-1.5 Operation & maintenance manual

Pressure Products Foot Faucet quick start guide

Pressure Products

Pressure Products Foot Faucet quick start guide

SUMERAIN S1357CM user manual

SUMERAIN

SUMERAIN S1357CM user manual

Sanela SLS 02B Instructions for use

Sanela

Sanela SLS 02B Instructions for use

Belanger 43CT PRODUCT CARE

Belanger

Belanger 43CT PRODUCT CARE

Fleurco ADT4836-L2 installation manual

Fleurco

Fleurco ADT4836-L2 installation manual

Glacier bay HD67816W-5010H Installation and care guide

Glacier bay

Glacier bay HD67816W-5010H Installation and care guide

manuals.online logo
manuals.online logoBrands
  • About & Mission
  • Contact us
  • Privacy Policy
  • Terms and Conditions

Copyright 2025 Manuals.Online. All Rights Reserved.