GLUCKSTEINHOME TG70M3BACL00 User manual

2.1 m (7 ft/pi)
NATURAL JERSEY FLOCKED FIR TREE
SAPIN ENNEIGÉ D’ASPECT NATUREL JERSEY
ASSEMBLY INSTRUCTIONS
INSTRUCTIONS D’ASSEMBLAGE
SKU# / N° DE RÉF. : 91540370
VPN / NPF : TG70M3BACL00
SAVE THESE INSTRUCTIONS
CONSERVER CES INSTRUCTIONS
MADE IN CHINA / FABRIQUÉ EN CHINE
IMPORTED BY HUDSON’S BAY COMPANY
IMPORTÉ PAR LA COMPAGNIE DE LA BAIE D’HUDSON
TORONTO, ON M5H 2Y4
SAKS & COMPANY LLC
225 LIBERTY STREET, NEW YORK, NY 10281 · D# 2056326

2
ASSEMBLY
INSTRUCTIONS INSTRUCTIONS
D’ASSEMBLAGE
IMPORTANT SAFETY INSTRUCTIONS
WHEN USING ELECTRICAL PRODUCTS, BASIC
PRECAUTIONS SHOULD ALWAYS BE FOLLOWED
INCLUDING THE FOLLOWING :
READ AND FOLLOW ALL SAFETY INSTRUCTIONS
1. DO NOT USE SEASONAL PRODUCTS OUTDOORS
UNLESS RATED SUITABLE FOR OUTDOOR USE. WHEN
PRODUCTS ARE USED IN OUTDOOR APPLICATIONS,
CONNECT THE PRODUCT TO A GROUND FAULT
CIRCUIT INTERRUPTER (GFCI) OUTLET. IF ONE IS NOT
PROVIDED, CONTACT A QUALIFIED ELECTRICIAN FOR
PROPER INSTALLATION.
2. THIS SEASONAL USE PRODUCT IS NOT INTENDED FOR
PERMANENT INSTALLATION OR USE.
3. DO NOT MOUNT OR PLACE NEAR GAS OR ELECTRIC
HEATERS, FIREPLACE, CANDLES OR OTHER SIMILAR
SOURCES OF HEAT.
4. DO NOT SECURE THE WIRING OF THIS PRODUCT WITH
STAPLES OR NAILS OR PLACE ON SHARP HOOKS OR
NAILS.
5. DO NOT ALTER THE CONSTRUCTION OF THE WIRING IN
ANY WAY.
6. DO NOT LET LAMPS REST ON THE SUPPLY CORD OR
ON ANY WIRE.
7. UNPLUG THE PRODUCT WHEN LEAVING THE HOUSE,
RETIRING FOR THE NIGHT, OR IF LEFT UNATTENDED.
8. THIS IS AN ELECTRIC PRODUCT-NOT A TOY! TO AVOID
THE RISK OF BURNS, PERSONAL INJURY AND
ELECTRIC SHOCK IT SHOULD NOT BE PLAYED WITH
OR PLACED WHERE SMALL CHILDREN CAN REACH IT.
9. DO NOT USE THIS PRODUCT FOR ANYTHING OTHER
THAN ITS INTENDED USE.
10.DO NOT HANG ORNAMENTS OR OTHER OBJECTS
FROM THE CORD, WIRE OR LIGHT STRING.
11.DO NOT CLOSE DOORS OR WINDOWS ON THE
PRODUCT OR EXTENSION CORDS AS THIS MAY
DAMAGE THE WIRE INSULATION.
12.DO NOT COVER THE PRODUCT WITH CLOTH, PAPER
OR ANY MATERIAL NOT PART OF THE PRODUCT WHEN
IN USE.
13.DO NOT MOUNT OR SUPPORT STRINGS IN A MANNER
THAT CAN CUT OR DAMAGE THE WIRE INSULATION.
14.THIS PRODUCT IS EQUIPPED WITH PUSH-IN TYPE
LAMPS. DO NOT TWIST LAMPS.
15.READ AND FOLLOW ALL INSTRUCTIONS THAT ARE ON
THE PRODUCT OR PROVIDED WITH THE PRODUCT.
SAVE THESE INSTRUCTIONS
CONSIGNES DE SÉCURITÉ IMPORTANTES
LORSQU’ON UTILISE DES PRODUITS ÉLECTRIQUES,
IL EST IMPORTANT DE PRENDRE DES PRÉCAUTIONS,
DONT LES SUIVANTES :
PRIÈRE DE LIRE ET DE RESPECTER TOUTES CES CONSIGNES
DE SÉCURITÉ.
1. NE PAS UTILISER DE PRODUITS SAISONNIERS À
L’EXTÉRIEUR, À MOINS QU'ILS NE SOIENT CONÇUS À CET
EFFET. TOUT PRODUIT UTILISÉ À L'EXTÉRIEUR DOIT ÊTRE
BRANCHÉ SUR UNE PRISE AVEC DISJONCTEUR DE FUITE À
LA TERRE. AU BESOIN, COMMUNIQUER AVEC UN
ÉLECTRICIEN POUR EN FAIRE INSTALLER UNE.
2. CE PRODUIT EST DESTINÉ À UN USAGE SAISONNIER.
IL N’EST PAS CONÇU POUR ÊTRE INSTALLÉ OU UTILISÉ
DE FAÇON PERMANENTE.
3. NE PAS PLACER CE PRODUIT PRÈS D’UN APPAREIL DE
CHAUFFAGE AU GAZ OU ÉLECTRIQUE, D’UN FOYER, DE
BOUGIES OU DE TOUTE SOURCE DE CHALEUR SIMILAIRE.
4. NE PAS CLOUER OU AGRAFER LE CÂBLAGE DE CE PRODUIT
NI LE SUSPENDRE À DES CLOUS OU DES CROCHETS
ACÉRÉS.
5. NE PAS TENTER DE MODIFIER LA STRUCTURE DU CÂBLAGE.
6. NE PAS LAISSER D’AMPOULES REPOSER SUR LE CORDON
D'ALIMENTATION NI SUR AUCUN AUTRE CORDON
ÉLECTRIQUE.
7. DÉBRANCHER LE PRODUIT AVANT DE QUITTER LA MAISON
ET AU COUCHER; NE JAMAIS LE LAISSER BRANCHÉ SANS
SURVEILLANCE.
8. CE PRODUIT ÉLECTRIQUE N'EST PAS UN JOUET! POUR
ÉVITER TOUT RISQUE DE BRÛLURE, DE BLESSURE ET DE
CHOC ÉLECTRIQUE, NE PAS JOUER AVEC CE PRODUIT ET
LE GARDER HORS DE LA PORTÉE DES JEUNES ENFANTS.
9. NE PAS UTILISER CE PRODUIT À D’AUTRES FINS QUE CELLES
POUR LESQUELLES IL A ÉTÉ CONÇU.
10. NE PAS SUSPENDRE DE DÉCORATIONS NI AUCUN AUTRE
OBJET SUR UN CORDON ÉLECTRIQUE NI SUR UN JEU DE
LUMIÈRES.
11. NE PAS FERMER UNE PORTE OU UNE FENÊTRE SUR
UN JEU DE LUMIÈRES OU UNE RALLONGE, AFIN D’ÉVITER
D’ENDOMMAGER L’ISOLANT DES CORDONS ÉLECTRIQUES.
12. NE PAS COUVRIR LE PRODUIT DE TISSU, DE PAPIER NI
D’AUCUN AUTRE MATÉRIAU QUAND IL EST BRANCHÉ.
13. NE PAS FIXER LE JEU DE LUMIÈRES DE FAÇON
QUE L’ISOLANT DES CORDONS ÉLECTRIQUES SOIT
SUSCEPTIBLE D’ÊTRE COUPÉ OU ENDOMMAGÉ.
14. CE PRODUIT COMPREND DES AMPOULES À ENFONCER.
NE PAS LES VISSER.
15. PRIÈRE DE LIRE ET DE RESPECTER TOUTES
LES CONSIGNES PRÉSENTES SUR CE PRODUIT
OU FOURNIES AVEC CE DERNIER.
CONSERVER CES INSTRUCTIONS
3
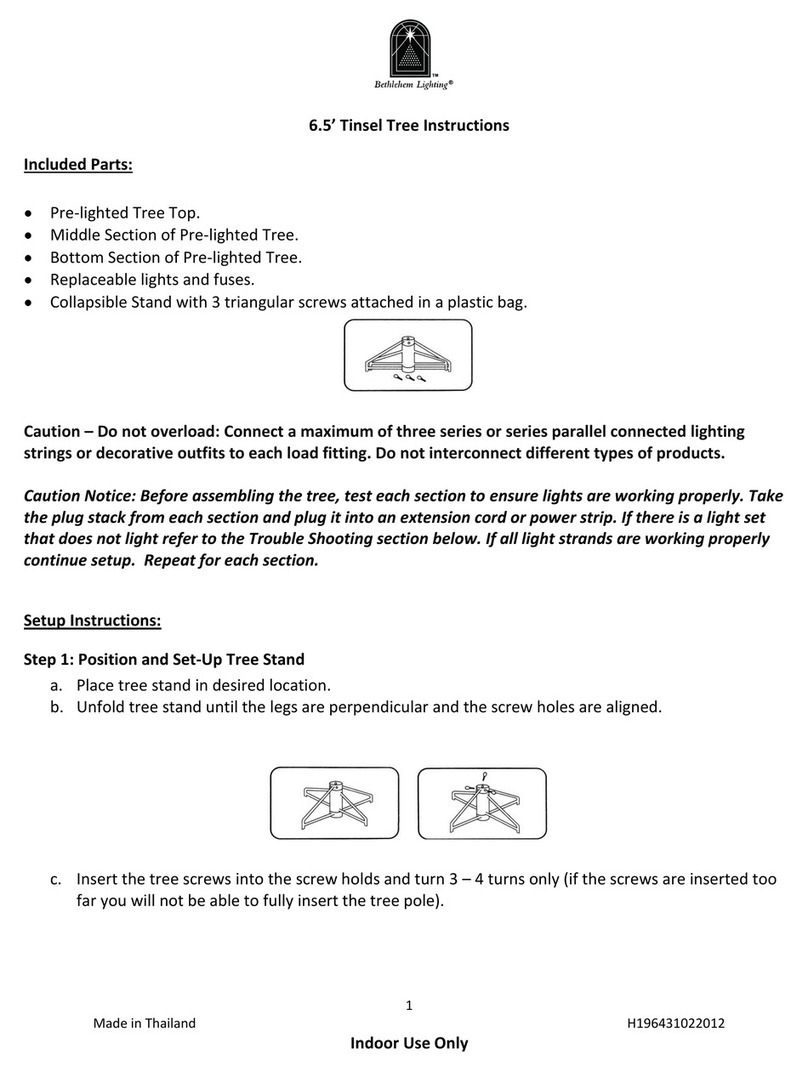
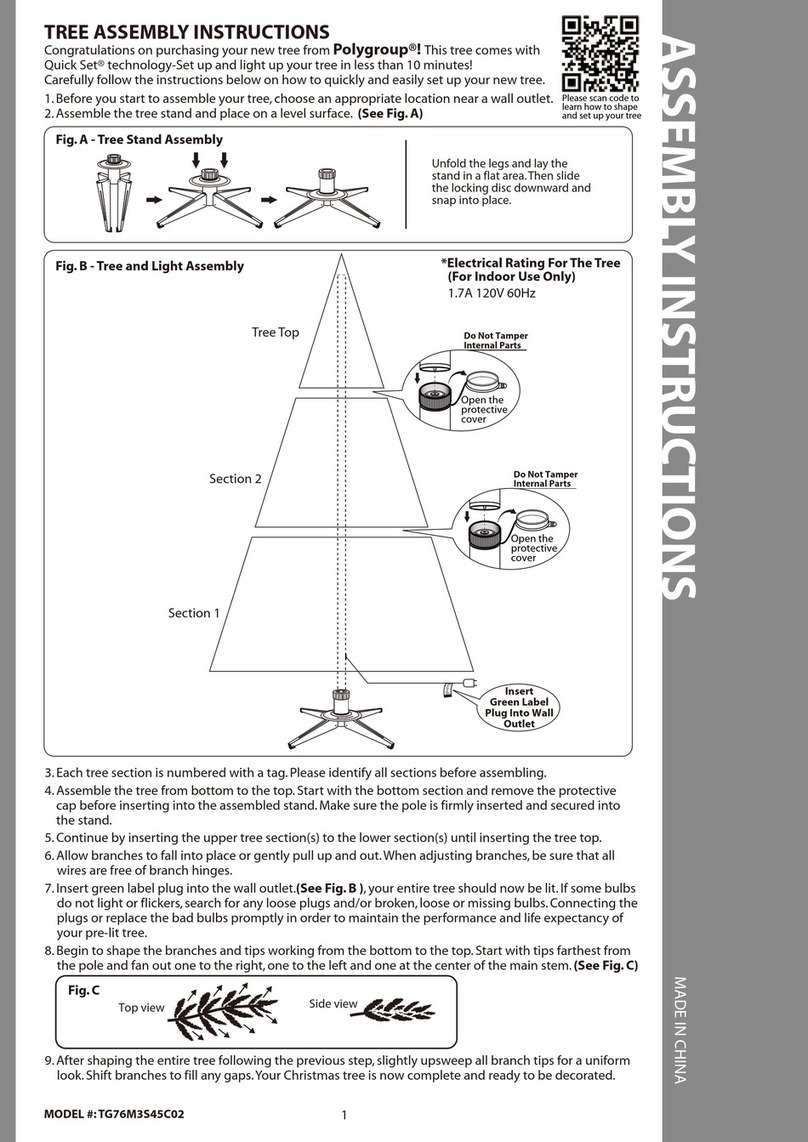
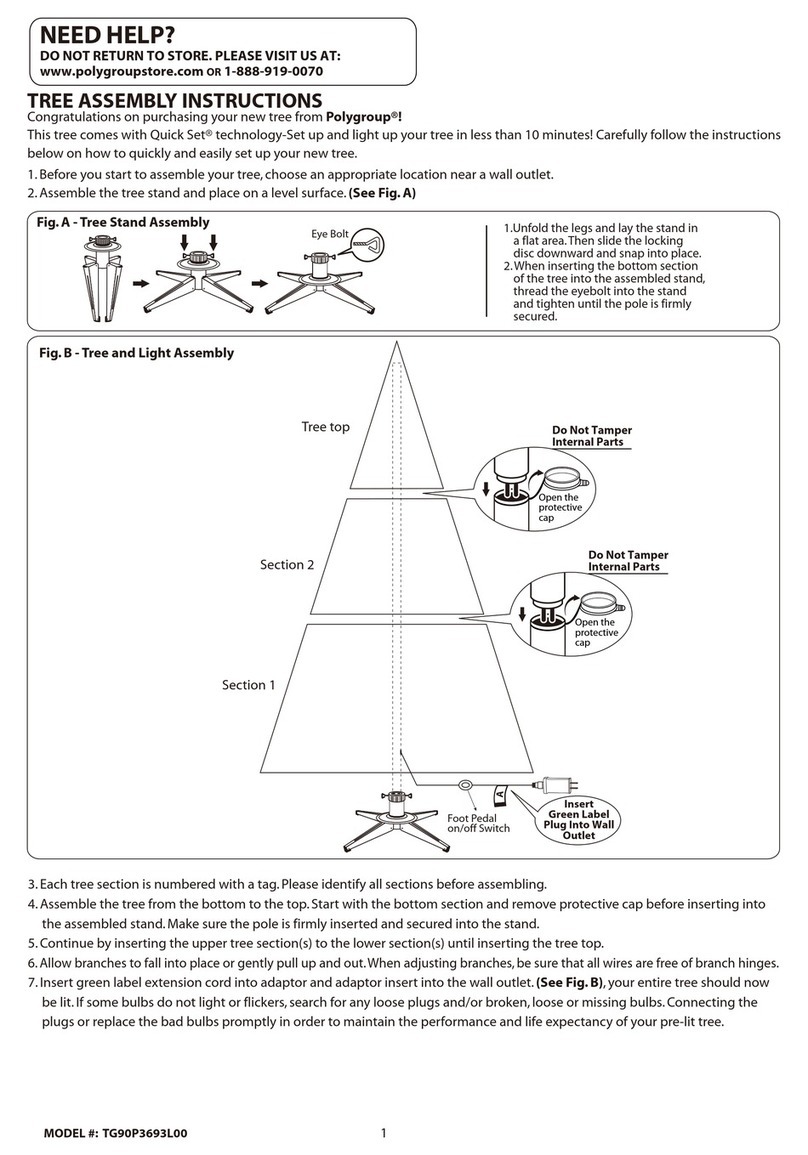
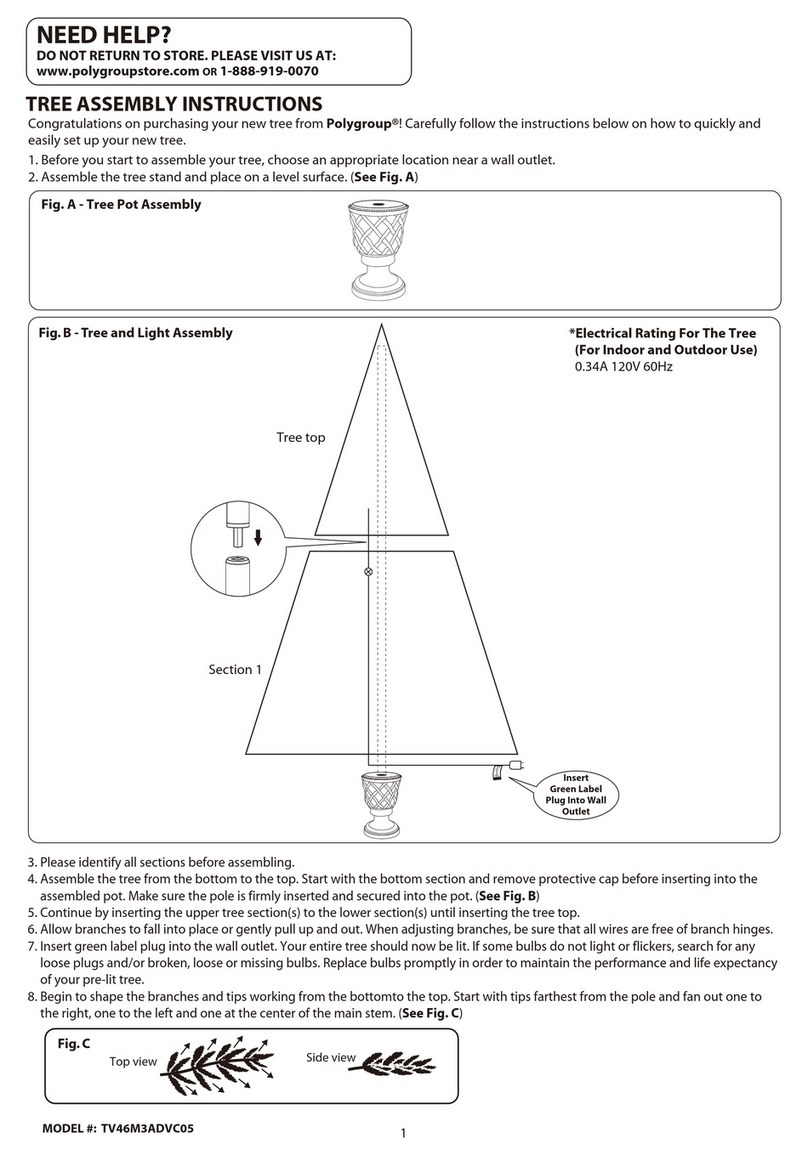
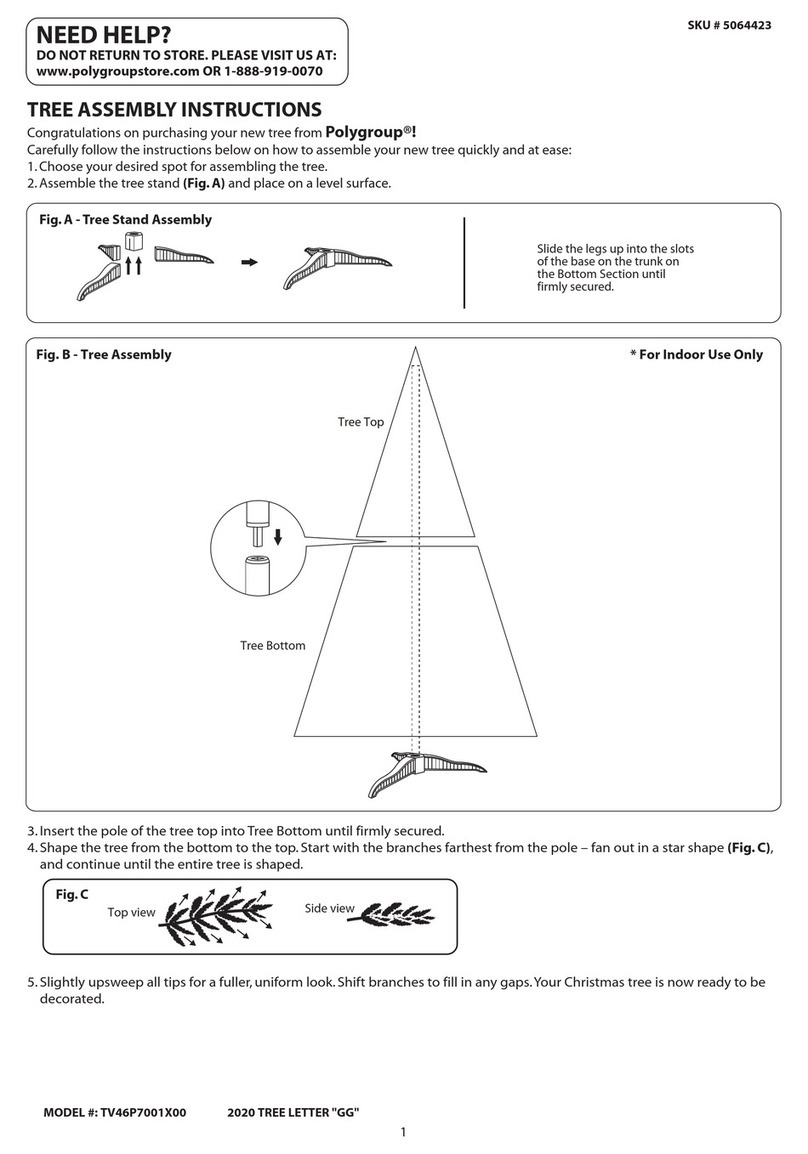
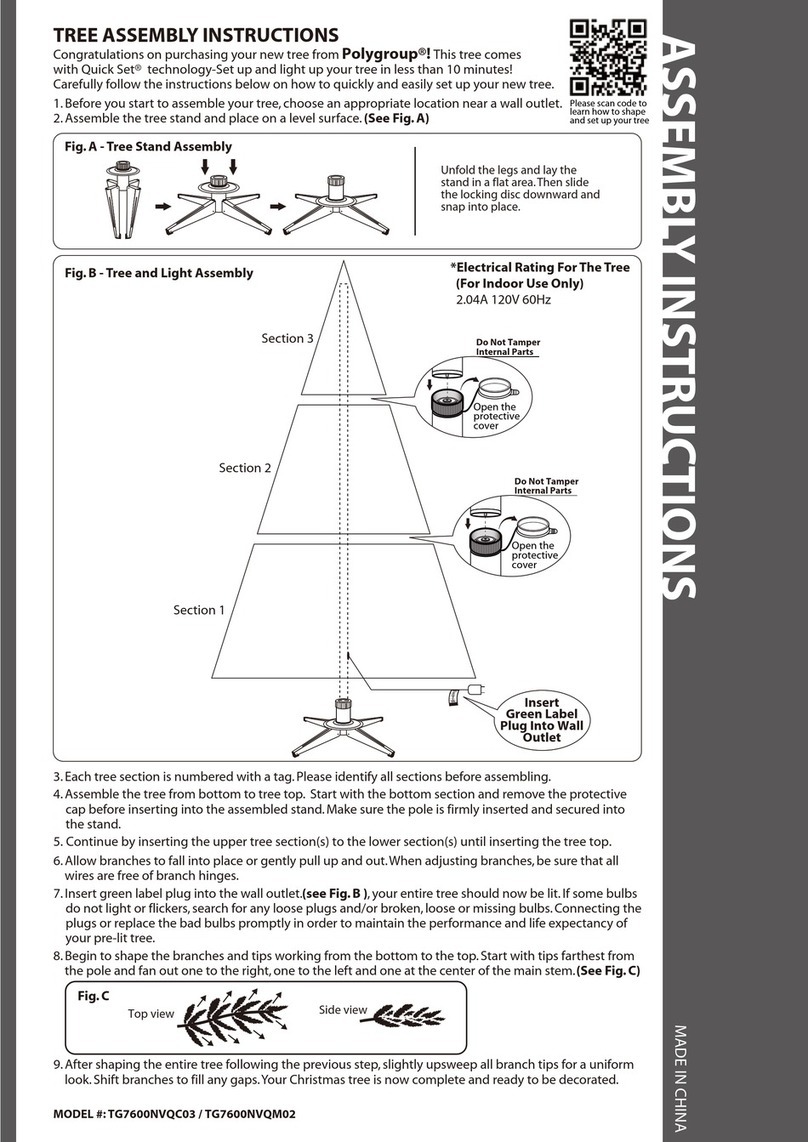
1. Before you start to assemble your tree, choose an appropriate location near a wall outlet.
2. Assemble the tree stand and place on a level surface. (See Fig. A)
Carefully follow the instructions below on how to quickly and easily set up your new tree.
TREE ASSEMBLY INSTRUCTIONS
3. Each tree section is numbered with a tag. Please identify all sections before assembling.
4. Assemble the tree from bottom to top. Start with the bottom section and remove the protective cap before inserting it into the
assembled stand. Make sure the pole is firmly inserted and secured into the stand.
5. Continue by inserting the upper tree section(s) to the lower section(s) until inserting the tree top.
6. Allow branches to fall into place or gently pull up and out. When adjusting branches, be sure that all branch hinges are free of wires.
7. Insert the plugs into the extension cord as per colour labels indicated.(see Fig. B ), Then turn to lock in place. Plug the Adaptor,
connected with the Green labeled extension cord, into the wall outlet. Your entire tree should now be lit. If some bulbs do not light or
flicker, search for any loose plugs and/or broken, loose or missing bulbs. Connecting the plugs or replacing the bad bulbs promptly
helps to maintain the performance and life expectancy of your pre-lit tree.
8. Begin to shape the branches and tips working from the bottom to the top. Start with tips farthest from
the pole and fan out one to the right, one to the left and one at the centre of the main stem. (See Fig. C)
9. After shaping the entire tree by following the previous steps, lightly upsweep all branch tips for a uniform look. Shift branches to fill
any gaps. Your Christmas tree is now complete and ready to be decorated.
Top view Side view
Fig. C
MODEL #: TG70M3BACL00
*Electrical Rating For The Tree
(For Indoor Use Only)
Input: 120V, 60Hz, 0.16A
Output: 28V DC 0.28A
Adaptor Model Number: TS-8W28V
FIG. B
Tree and Light
Assembly
Tree Top
Section 2
Section 1
FIG. A
Tree Stand
Assembly Pull apart the legs of the stand so that they are
snapped into an x-shape,
place the tree stand on a level surface.
To close the stand,
press the metal button and fold the
legs together.
Click
Adaptor
To Be Plugged
Into Wall
Outlet
Insert GREEN Label
Plug into Adaptor Adaptor
Model Number:
TS-8W28V
Insert Red Label Plugs
Into Red Labeled Extension Cord

4
1. Remove all ornaments and decorations. For pre-lit trees, first unplug adapter from the
wall outlet and then disconnect light extension cord between each section of the tree.
2. Disassemble the tree from the top to the bottom. Start with the tree top and gently lift
straight up to remove from section below and fold all branches toward the pole.
3. In case of difficulty separating the tree pole (trunk), apply a small amount of lubricant at
the joint and rotate the upper pole in both directions. Lift up the upper pole again.
4. Continue by gently lifting straight up each section(s) from the section below and fold all
branches toward the pole until the bottom section is removed from the tree stand.
5. Carefully place all tree sections into shipping box and tape it shut.
6. When not in use, please store your tree in a cool, dry place away from sunlight.
Exposing your tree to excessive heat or humidity may damage your tree.
STORAGE INSTRUCTIONS
For Pre-lit Trees, If The Tree Does Not Illuminate
1. Please check to make sure that all plugs are properly connected and power cord is plugged into
the wall outlet. (If the tree comes with a foot pedal, try stepping on the on/off button).
2. Turning the poles gently to make sure pole to pole are connected into place.
3. Please check for loose, broken or missing light bulbs and replace as needed.
Loose Hinge Pin
1. Extra hinge pins are included for repairing the hinges. Place the branch into the slot of the bracket.
2. Insert a new hinge pin through the hole and secure using the retainer washer. (See Fig. D)
TROUBLE SHOOTING TIPS
Fig. D
MODEL #: TG70M3BACL00
WARNING
1. To reduce the risk of fire and electric shock:
a) Use only the power supply that was provided with this product;
b) Do not install on trees having needles, leaves or branch covering of metal or materials which look like metal;
c) Do not mount or support strings in a manner that can cut or damage wire insulation.
2. Use only the adaptor supplied with this product. Using a different adaptor will damage the lights
and may cause fire,or electrical shock hazards.
3. For Indoor Use Only.
4. The external flexible cable or cord of this tree cannot be replaced. If the cord is damaged, the luminaire should be destroyed.
Each tree includes hinge pins/washers, spare bulbs are included for pre-lit trees.
If extra parts are needed, please contact our customer service center at: 1-800-521-2364
SPARE PARTS

5
1. Avant de commencer, choisir un emplacement approprié près d’une prise murale.
2. Déplier le socle de l’arbre et le poser sur une surface de niveau (fig. A.
Suivre attentivement les instructions ci-dessous pour assembler rapidement et facilement l’arbre.
ASSEMBLAGE DE L’ARBRE
3. Chaque section de l’arbre porte une étiquette numérotée. Repérer toutes les sections avant de commencer l’assemblage.
4. Assembler l’arbre en commençant par le bas. Retirer le capuchon protecteur, puis insérer la section inférieure dans le socle assemblé.
S’assurer que le tronc est bien inséré dans le socle.
5. Insérer ensuite les autres sections après avoir retiré leur capuchon protecteur.
6. Laisser les branches tomber en place ou les arranger délicatement.
7. Brancher les fiches sur la rallonge selon le code de couleurs (fig. B) et les tourner pour les verrouiller. Brancher la fiche avec l’étiquette
verte sur l’adaptateur, puis l’adaptateur sur une prise murale. L’arbre devrait s’illuminer entièrement. Si certaines ampoules restent
éteintes ou clignotent, il se peut qu’elles soient défectueuses ou mal enfoncées, qu’une fiche soit mal enfoncée ou qu’une ampoule soit
manquante. Remplacer immédiatement les ampoules défectueuses afin de prolonger la durée de vie de l’arbre.
8. Façonner les branches et les rameaux en commençant par le bas. Commencer par les rameaux les plus éloignés du tronc.
En placer un à droite, un à gauche et un au centre de la tige principale (fig. C).
9. Une fois l’arbre assemblé selon les instructions ci-dessus, disposer les branches de façon à remplir les espaces vides et relever la pointe des
rameaux. L’arbre est maintenant prêt à être décoré.
N° DE MODÈLE : TG70M3BACL00
Vue du dessus Vue de côté
Fig. C
FIG. A
Assemblage
du socle Déplier les pieds de façon qu’ils forment un X
et émettent un clic. Pour démonter le socle, appuyer sur le
bouton de métal et replier les pieds.
Clic
Caractéristiques électriques de l’arbre
(Pour usage à l'intérieur seulement)
Entrée : 120 V, 60 Hz, 0,16 A
Sortie : CC 28 V, 0,28 A
N° de modèle de l’adaptateur
TS-8W28V
FIG. B
Assemblage de l’arbre
et des jeux de lumières
Cime
Section 2
Section 1
N° de modèle
de l’adaptateur :
TS-8W28V
Fiche avec étiquette
verte à brancher
sur l’adaptateur.
Adaptateur
à brancher
sur une prise
murale
Brancher les fiches avec une
étiquette rouge sur la rallonge
avec une étiquette rouge.

6
1. Enlever toutes les décorations. Pour les arbres illuminés, débrancher d’abord l’adaptateur de la
prise murale, puis débrancher les cordons électriques reliant chaque section de l’arbre.
2. Démonter l’arbre en commençant par le haut. Soulever délicatement la cime à la verticale pour la
détacher de la section suivante, puis replier toutes les branches vers le tronc.
3. Si une section du tronc s’avère difficile à retirer, appliquer un peu de lubrifiant sur le joint et tourner
la section des deux côtés. La tirer ensuite vers le haut.
4. Procéder ainsi pour détacher chaque section, jusqu’à ce que la base de l’arbre soit sortie du socle.
5. Ranger les différentes sections dans la boîte, puis fermer celle-ci avec du ruban adhésif.
6. Ranger l’arbre dans un endroit frais, sec et sombre. La chaleur ou l’humidité pourraient
endommager l’arbre.
INSTRUCTIONS DE RANGEMENT
DÉPANNAGE
Fig. D
N° DE MODÈLE : TG70M3BACL00
L’arbre ne s’illumine pas.
1. Vérifier que l’adaptateur est bien branché sur une prise murale et que la fiche est bien branchée sur l’adaptateur.
(Si l’arbre est accompagné d’un interrupteur à pédale, actionner celui-ci.)
2. S’assurer que le jeu de lumières, l’adaptateur et les rallonges (le cas échéant) sont raccordés correctement.
3. Vérifier si des ampoules sont mal enfoncées, défectueuses ou manquantes et les remplacer au besoin.
Les charnières des branches ne tiennent pas en place.
1. Des chevilles supplémentaires sont incluses pour les réparations. Insérer la branche dans la fente du support.
2. Passer une nouvelle cheville d’articulation dans le trou et la fixer à l’aide de la rondelle de retenue (fig. D).
1. Pour réduire les risques d’incendie ou de choc électrique :
a) N’utiliser que le bloc d’alimentation fourni avec ce produit.
b) Ne pas installer ce produit sur des arbres comportant des aiguilles, des feuilles ou des branches
recouvertes de métal ou d’un matériau qui ressemble à du métal.
c) Ne pas fixer le jeu de lumières de façon que le cordon électrique puisse être coupé ou endommagé.
2. Utiliser uniquement l’adaptateur fourni avec ce produit. Le non-respect de cette consigne pourrait endommager les ampoules
et causer un incendie ou un choc électrique.
3. Pour usage à l’intérieur seulement.
4. Le cordon d’alimentation de ce produit ne peut être remplacé. S’il est endommagé, jeter le produit.
MISES EN GARDE
PIÈCES DE RECHANGE
Chaque arbre est accompagné de chevilles et de rondelles de rechange et, dans le cas des arbres illuminés, d’ampoules de
rechange. Pour obtenir des pièces supplémentaires, contacter notre Service à la clientèle au 1-800-521-2364.

7
MODEL # / N° DE MODÈLE : TG70M3BACL00
USE AND CARE INSTRUCTIONS
A) Before using or reusing, inspect product carefully. Discard any products that have cut, damaged or frayed wire insulation
or cords, cracks in the lampholders or enclosures, loose connections, or exposed copper wire.
B) This product must be fully disassembled for storage to avoid undue strain or stress on conductors, connections and wires.
Do not leave any parts of the product (including tree sections and the tree stand) connected when not in use.
C) The LED lamp has polarity. Do not deliberately change the direction of the LED lamp in the lampholder.
D) When storing the product, carefully remove the product from wherever it is placed, including tree branches
or bushes, to avoid any undue strain or stress on the product conductors, connections and wires.
USER SERVICING INSTRUCTIONS
LAMP REPLACEMENT
Step 1) Disconnect the Adaptor from power source.
Do not unplug by pulling on cord.
Step 2) Lift up lamp lock tab,
then pull the lamp and
plastic lamp base straight
out of the lamp-holder.
CAUTION
Risk of Fire. This product does not contain lamp shunts, in order to allow the product to operate if one lamp burns out.
Do not replace lamps with other than the spare lamps provided with this product.
INSTRUCTIONS D’ENTRETIEN
A) Inspecter attentivement le produit avant de l’utiliser. Le jeter si le cordon électrique est coupé, abîmé ou usé,
si une douille est craquée, si des connexions sont lâches ou si le conducteur de cuivre est exposé.
B) Démonter entièrement le produit avant de le ranger pour éviter d’endommager les conducteurs, les connexions et les fils.
C) Les ampoules à DEL sont polarisées. Ne pas changer leur position dans la douille.
D) Pour éviter d’endommager les conducteurs, les connexions et les fils en rangeant le produit, démonter celui-ci délicatement.
REMPLACEMENT D’UNE AMPOULE
Étape 1 Débrancher le produit en tirant sur l’adaptateur.
Ne jamais tirer sur le cordon.
Étape 2 Lever le crochet de blocage,
puis sortir l'ampoule et sa
base en plastique de la
douille d’un coup sec.
AVERTISSEMENTS
Risque d’incendie. Les ampoules de ce produit ne sont pas munies de shunts, afin de permettre aux lumières de rester
allumées lorsque l’une d’entre elles grille. Utiliser seulement les ampoules de rechange fournies avec ce produit.
Step 3) Replace with a new
spare LED lamp provided
with this product.
Étape 3 N’utiliser que des
ampoules de rechange
à DEL fournies
avec ce produit.
(For reference only)
(Pour référence seulement)
This manual suits for next models
1
Table of contents
Languages:
Other GLUCKSTEINHOME Artificial Pine Tree manuals
Popular Artificial Pine Tree manuals by other brands

Polytree
Polytree TGC0M2251X01 Assembly instructions

DS Produkte
DS Produkte LK20135 instructions

Martha Stewart Living
Martha Stewart Living TG90M3ACDL07 quick start guide

Willis Electric
Willis Electric HAPEVILLE TREE WIFI VOICE C6 196 LED manual

WoodLandCut
WoodLandCut 769839-132 manual

Polygroup
Polygroup TG50P4B42K05 Assembly instructions