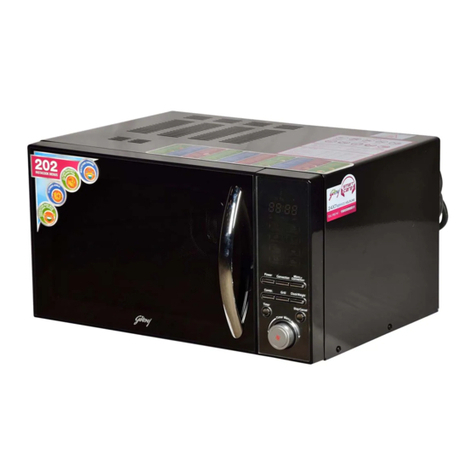
Godrej Appliances GMX 23CA3 PLM User manual


230V~/50Hz, 1300 (Microwave)
Power Consumption:
SPECIFICATION - 23CA3
Operation Frequency:
Product Dimensions:
Oven Capacity:
Cooking Uniformity:
Net Weight:
Rated Microwave Output:
1200W (Grill)
1200W (Convection)
800W
2450MHz
23 Litres
Turntable System
Approx. 14.0 Kg
26.3 cm(H) x 48.0 cm(W) x 34.5 cm(D)

85
86
87
IMPORTANT SAFETY INSTRUCTIONS
14
15

IMPORTANT SAFETY INSTRUCTIONS
READ CAREFULLY AND KEEP FOR FUTURE USE
When the appliance is operated in the
combination mode, children should only
use the oven under adult supervision due to
the temperatures generated.
5.
To avoid a fire hazard do not severely
overcook food. Severely overcooked foods
can start a fire in the oven.
6.
When heating food in plastic or paper
containers, keep an eye on the oven due to
the possibility of ignition.
7.
8.
9.
Do not use this oven for commercial
purposes. This appliances is intended to
be used in household and similar
application such as:
- Staff Kitchen areas in shops, offices
and other working environments;
- Farm Houses;
- By clients in hotels, motels and
other residential environments;
- Bed and breakfast type
environments.
10.

Microwave oven is intended for heating
food and beverages. Drying of food or
clothing and heating of warming pads,
slippers, sponges, damp cloth and similar
may lead to risk of injury, ignition or fire.
Microwave heating of beverages can
result in delayed eruptive boiling, therefore
care must be taken when handling the
container.
Details for cleaning door seals, cavities
and adjacent parts are given on page
CLEANING AND CARE.
No temperature sensing probe to be
inserted into the food placed inside the
cavity of this oven by user, during
switched ON state.
A temperature probe may be placed on
the food once the food is taken outside
the oven.
The microwave is intended to be used
31.
freestanding.
11.
23.
24.
25.
26.
27.
28.
29.
30.
12.
13.
14.
15.
16.
17.
18.
19.
20.
21.
22.

UTENSIL GUIDE
1. The ideal material for a microwave utensil
is transparent to microwave, it allows
energy to pass through the container and
heat the food
2. Microwave cannot penetrate metal, so
metal utensils or dishes with metallic trim
should not be used
3. Do not use recycled paper products when
microwave cooking, as they may contain
small metal fragments which may cause
sparks and/or fires
4. Round/oval dishes rather than
square/oblong ones are recommend, as
food in corners tends to overcook.
5. Narrow strips of aluminum foil may be used
to prevent overcooking of exposed areas.
But be careful don't use too much and
keep a distance of 1 inch (2.54cm)
between foil and cavity.
The list below is a general guide to help you select the correct utensils.
Cookware
Microwave
Grill
Convection
Combination*
Heat-Resistant Glass
Yes Yes Yes Yes
Non Heat-Resistant Glass
No No No No
Heat-Resistant Ceramics
Yes Yes Yes Yes
Microwave-Safe Plastic Dish
Yes No No No
Kitchen Paper
Yes No No No
Metal Tray
No Yes Yes No
Metal Rack
No Yes Yes No
Aluminum Foil & Foil Container
No Yes Yes No
Cotton Cloth, Wood
Yes** No No No
Melamine
No No No No
*Combination: applicable for both "microwave+grill", and "microwave+convection" cooking.
**Only for short time reheating.
5

INSTALLATION INFORMATION
1) Select a level surface that provides enough
open space for the intake and/or outlet
vents
7'&»~E
k "
W\ jj"
A minimum clearance of 7.5 cm is required
between the oven and any adjacent walls. One
side must be open.
a) Leave a minimum clearance of 30 cm
above the oven
b) Do not remove the legs from the bottom of
the oven
C) Blocking the intake and/or outlet openings
can damage the oven
d) Place the oven as far away from radios and
TV as possible
2) Plug your oven into a standard household
outlet. Be sure the voltage and frequency is
the same as the voltage and the frequency
on the rating label at the back of the
microwave oven.
3) Do not operate the oven without glass tray,
roller support and shaft in their proper
positions (applicable for microwave ovens
with turn tables)
WARNING: Do not install oven over a range
cooktop or other heat-producing appliance. If
installed near or over a heat source, the oven
could damage and the warranty would be
void.
^ The accessible surface may be hot
/.xs.\ during operation.
GROUNDING INSTRUCTIONS
This appliance must be grounded. This oven is
equipped with a cord having a grounding wire
with a grounding plug. It must be plugged into
a wall receptacle that is properly installed and
grounded. In the event of an electrical short
circuit, grounding reduces risk of electric
shock by providing an escape wire for the
electric current. It is recommended that a
separate circuit serving only the oven be
provided. Using a high voltage is dangerous
and may result in a fire or other accident
causing oven damage.
WARNING Improper use of the grounding plug
can result in a risk of electric shock.
Note:
1) If you have any questions about the
grounding or electrical instructions, consult
a qualified electrician or service person
2) Neither the manufacturer nor the dealer
can accept any liability for damage to the
oven or personal injury resulting from
failure to observe the electrical connection
procedures
The wires in this mains cable are coloured in
accordance with the following code:
Green and/or Yellow = EARTH
Blue and/or Black = NEUTRAL
Brown and/or Red = LIVE
ELECTRICAL REQUIREMENTS
The oven is designed to operate on a standard
230V/50HZ household outlet. Be sure the
circuit is at least 15A or 20A and the
microwave oven is the only appliance on the
circuit.
6
RADIO INTERFERENCE
Operation of the microwave oven can cause
interference to your radio, TV, or similar
equipment. When there is interference, it may
be reduced or eliminated by taking the
following measures:
1. Clean door and sealing surface of the
oven
2. Reorient the receiving antenna of radio or
television
3. Relocate the microwave oven with respect
to the receiver
4. Move the microwave oven away from the
receiver
5. Plug the microwave oven into a different
outlet so that microwave oven and receiver
are on different branch circuits
EXTENSION CORD INFORMATION
1. A short power supply cord is provided to
reduce the risks resulting from becoming
entangled in or tripping over a longer cord
2. DO NOT USE AN EXTENTION CORD
PART AND ACCESSORIES NAME
Glass tray
1 a
Turntable ring assembly
1 \_
Instruction manual
1F
()/
~
g
A) ,Control panel
11
B) Turntable shaft
a c tR
C) Turntable ring assembly
D) Glass tray
0
E) Observation window
11 lj
F) Door assembly
Grill rack
G) Safety interlock system
7

Example: If you want to use 80% microwave power to cook for 10 minutes, you can
operate the oven as the following steps.
When the microwave oven is electrified,the oven will display "0:00", buzzer will ring once.
OPERATION INSTRUCTION
2. Microwave Cooking
Select different microwave power level and set cooking time as you wish. There are five
power levels available for choosing. Keep on pressing "MICROWAVE" to choose the power.
4) Press "START/+30SEC." to start cooking, ":" will light.
1) Press "MICROWAVE" once, the oven will display "P100".
Presses
Instructions Microwave
Power
Display
1
2
3
4
5
100%
80%
50%
30%
10%
2) Press "MICROWAVE" once again to choose 80% power, the oven will display "P80".
3) Press the number buttons of "1","0","0","0" in order, the oven will display "10:00"
The input time should be within 0:00--23:59(24 Hour).
Example: To set 12:12 .
(1) Press " CLOCK/KITCHEN TIMER ""00:00" displays.
(2) Press the number buttons of "1","2","1","2" in order.
(3) Press " CLOCK/KITCHEN TIMER " to finish clock setting. ":" will flash, and the time will
light.
Note: 1) The clock will not work if it is not set when powered.
2) During the process of clock setting, if you press "STOP/CLEAR" or if no
operation in minute , the oven will go back to the previous status automatically.
P100
P 80
P 50
P 30
P 10
1.Clock Setting
Note: "MICROWAVE" Pad presses instructions
8
5 s
.
Once

4. Grill Cooking
Example: If you want to use 100% to cooking for 35 minutes, you can operate
the oven as the following steps.
5. Convection Cooking(With preheating function)
1) Press the "GRILL" key , the oven will display " G-1 ".
2) Press the number buttons of "3","5","0","0" in order, the oven will display "35:00"
3) Press the "START/+30SEC." key to start cooking.
1) Press the "CONVEC." key several times, the oven will display "180".
(Press the "CONVEC." key several times to select the temperature.)
2) Press the "START/+30SEC." key to start cooking. The temperature figure will flash
when reach to the temperature in advance and buzzer will ring twice to remind you
to put the food into the oven.
3) Press the number buttons of "4","0","0","0" in order, the oven will display "40:00"
4) Press the "START/+30SEC." key to start cooking.
3. Kitchen Timer
(1) Press " CLOCK/KITCHEN TIMER " twice, LED will display 00:00.
(2) Press the number keys and enter the correct time.(The maximum cooking time is
99 minutes and 99 seconds.)
(3) Press " START/+30SEC. " to confirm setting, clock indicator will be lit.
(4) When the kitchen time is reached, the buzzer will ring 5 times. Then turn back to waiting
state. If the clock has been set (24-hour system), LED will display the current time.
Note: 1) The kitchen Time is different from 24-hour system. Kitchen Timer is a timer.
2) During kitchen timer, any program cannot be set.
The convection cooking can let you to cook the food as a traditional oven. Microwave is not
used. It is recommended that you should preheat the oven to the appropriate temperature
before placing the food in the oven.
Note: a. Cooking time cannot be input until the preheating temperature arrives.
If the temperature arrives, door must be opened to input the cooking time.
b. If the time not input in 5 minutes, the oven will stop preheating. The buzzer sound
five times and turn back to waiting states.
9
Note: If half the grill time passes, the oven will sound twice to tell you to turn the food
over. You can just leave it continue cooking. But in order to have a better effect of
grilling food, you should turn the food over, close the door, and then press
"START/+30SEC." to continue cooking.

7. Combination Cooking
Example: If you want to use combination to cook (C-1) for 40 minutes, you can
operate the oven as per the following steps.
6. Convection Cooking(Without preheating function)
3
4
5
6
7
8
9
10
1) Press the "COMBI." key once, the oven will display "C-1".
2) Press the number buttons of "4", "0", "0", "0" in order, the oven will display "40:00".
3) Press the "START/+30SEC." key to start cooking.
1) Press the "CONVEC." key once, the oven will display "1
(Press the "CONVEC." key several times to select the temperature.)
2) Press the number buttons of "4", "0", "0", "0" in order, the oven will display "40:00".
3) Press the "START/+30SEC." key to start cooking.
1
2
Presses
Instructions Display Convection
Note: "CONVEC." Pad presses instructions
10
10".
200 C
0
190 C
0
0
180 C
0
170 C
0
160 C
150 C
0
140 C
0
130 C
0
120 C
0
110 C
0

Presses
Instructions Microwave
Power
Display Convection
Power
1
2
3
4
Grill
Power
C-1
C-2
C-3
C-4
Note: "COMBI." Pad presses instructions
11
8. Defrost By time
1) Press "DEFROST" once, the oven will display "d-1".
3) Press "START/+30SEC." key to start defrosting.
2) Input the figure of the time of cooking.
(The maximum cooking time is 99 minutes and 99 seconds.)
9. Defrost By weight
1) Press "DEFROST" pad twice, the oven will display "d-2".
3) Press "START/+30SEC." key to start defrosting.
2) Input the figure of the weight of food.
(The input figure of the weight should be within 100--2000g ).
10. Defrost Groud meat
1) Press "DEFROST" pad thrice, the oven will display "d-3".
2) Input the figure of the weight of food.
(The input figure of the weight should be within 100—2000g)
2) Input the figure of the weight of food.
(The input figure of the weight should be within 100—2000g)
3) Press "START/+30SEC." key to start defrosting.
11. Defrost Sea food
1) Press "DEFROST" pad 4 times, the oven will display "d-4".
3) Press "START/+30SEC." key to start defrosting.

13.Multi-Stage Cooking
Two stages of cooking can be maximumly set. If one of the stages is defrosting, it should
be put in the first stage, and auto menu should not be set here. The buzzer will ring once
after each stage and the next stage will begin.
12.MEMORY
14. EXPRESS COOKING
Example: If you want to cook the food with 100% microwave power for 10 minutes+ 80%
microwave power for 15 minutes. Do it as following:
1) Press "MICROWAVE" once to choose 100% microwave power;
2) Press number keys "1","0","0","0" in order to adjust the cooking time;
3) Press "MICROWAVE" twice to choose 80% microwave power;
4) Press number keys "1","5","0","0" in order to adjust the cooking time;
5) Press "START/+30SEC. " to start cooking.
When the oven is in the waiting states, press "START/+30SEC." key to start
cooking with full microwave power for 30 seconds.(The maximum setting is 99 minutes and
99 senonds.)
When the oven is in the grill, convection and combination cooking states, press
"START/+30SEC." key to add 30 seconds cooking time.
1) Press "MEMORY" key one to three times to set "memory 1", "memory 2" or "memory 3"
program, and the oven will display "1", "2" or "3".
2) Set one or two stages program you want.
Example:a) Press "MICROWAVE" once to choose 100% microwave power;
b) Press number keys "1","0","0","0" in order to adjust the cooking time;
3) Press "MEMORY" key to save the memory program setted, or press
"START/+30SEC." to start cooking and save the program automatically.
4) Next time when you want to cook with the memory program which has been set, you
just only need to press "MEMORY" key to choose the program wanted and then press
"START/+30SEC." to start cooking.
Note: 1) If the electricity is cut off, the procedure that has been saved will be cancelled.
12
2) Preheating, defrosting and auto menu cooking cannot be set here.
.

13
15. Lock-out Function for Children
Lock: In waiting state, press "STOP/CLEAR" for 3 seconds, there will be a long "beep"
denoting entering into the children-lock state and a key " " will light. The oven
will
display "0:00" or current time.
Lock quitting: In locked state, press "STOP/CLEAR" for 3 seconds, there will be a long "beep"
denoting that the lock is released and "
" will go out.
16. Display Specification
(1) When cooking finishes, buzzer sounds five times to alert user that the cooking finishes.
(2) If the oven door is open, the lamp will turn off automatically after ten minutes.
(3) During setting the program, the oven will turn back to waiting state after five minutes.
17. Inquiring Function
In cooking state, press “COMBI”, “MICROWAVE”, “GRILL” or “CONVEC”, and the current
power level will be displayed for 2-3 seconds.
18. InstaCook Menus
Press number keys to access InstaCook Menus. Eg To access menu for DHOKLA which
is number 89- Press the number keys directly i.e. “8” “9”, display will show “A089”.
Press “Start” to start the cooking process.
The InstaCook menus are given from A001- A090

14

A001 Recipe code -1 Ingredients: 250g
Vegetable Biryani rice 1½ cup
ghee 1tbsp
carrot chopped ¼ cup
French beans chopped ¼ cup
green peas ¼ cup
red chili powder ½ tsp
garam masala ¾ tsp
garlic paste ¼ tsp
ginger paste ¼ tsp
green chilies chopped ¼ tbsp
onion chopped 1
tomato chopped 1
cinnamon ½ inch
cloves 4
cardamom 4
coconut milk 1cup
cashew nuts few
mint leaves few
coriander leaves few
lemon juice ½ tsp
salt to taste
water as required
Method of preparation
Take a MWO safe bowl, add all ingredients and place the bowl in the microwave oven, select recipe code 1, and press start. (Stir twice in-between).serve
hot.
A001 Recipe code-1 Ingredients: 250g
Zafrani Pulao basmati rice 2 cup
water 2½ cup
sugar 4 tbsp
milk 2 cup
cashews 1 cup
cardamoms 6
cloves few
cinnamon, broken few
almonds, blanched and cut 1 cup
saron strands, soaked in hot milk 2 tsp
ghee as required
Method of preparation:
Take a microwave oven safe bowl, Add all ingredients, mix well and select recipe code 1, enter weight and press start. Serve hot.
INSTACOOK MENUS
15

A002 Recipe
code -2
Ingredients 250 gms 500 gms
Baingan
Masala
brinjal (Baingan), cut into half 1½ cup 2½ cup
tomatoes, chopped 1 cup 1½ cup
onions, chopped 2 2
methi leaves (fenugreek) ¾ cup 1 cup
garlic paste ¾ tsp 1 tsp
cumin seeds 1½ tsp 2 tsp
curry leaves few few
turmeric powder ¼ tsp ½ tsp
red chili powder 2 tsp 3 tsp
oil as required
coriander for garnish
salt & pepper to taste
Method of preparation:
Select recipe code 23 and press start to prepare tadka in a microwave oven safe bowl with all the ingredients other than tomato, methi leaves, vinegar,
salt and pepper. Aer beep, Remove, add the remaining ingredients and mix well. Place the bowl in the microwave oven, select recipe code 2, and press
start. Remove, garnish with coriander and serve.
A002 Recipe
code -2
Ingredients 250 gms 500 gms
Lauki
Curry
bottle gourd cut into cubes 250 gms 500 gms
onion chopped 2 3
green chilies chopped 3 4
tomato puree 1 cup 1½ cup
garlic paste ½ tsp 1 tsp
ginger paste ½ tsp 1 tsp
red chili powder 1 tsp 1½ tsp
turmeric powder ¼ tsp ½ tsp
coriander leaves ½ tsp 1 tsp
oil ½ tbsp 1 tbsp
salt to taste
Method of preparation:
Select recipe code 23 and press start to prepare tadka in a microwave oven safe bowl with all the ingredients other than bottle gourd and tomato puree;
mix well. Remove, add the remaining ingredients and mix well. Place the bowl in the microwave oven select recipe code 4, enter weight and press start.
Remove and serve.
A003 Recipe code- 3 Ingredients 250gms
Potato Curry potatoes, peeled and cubed 1½ cup
tomatoes, chopped 1 cup
onion, chopped 1 cup
garlic, ginger paste ½ tsp
chili powder 1 tsp
coriander powder 1 tsp
cumin seeds 1 tsp
turmeric powder ¼ tsp
ghee
Method of preparation:
Select recipe code 23 and press start to prepare tadka in a microwave oven safe bowl with all the ingredients other than potato and tomatoes. Aer beep,
remove, add the all remaining ingredients and mix well. Place the bowl in the microwave oven select recipe code 3, press start. Remove and serve hot.
16

A003 Recipe code-6 Ingredients 250gms
Vegetable Mix Mix chopped veggies–cauliower, carrots,
potatoes, French beans, capsicum, peas.
2 cup
onion chopped nely 1 cup
green chili chopped ½ tsp
ginger-garlic paste ½ tsp
coriander powder ½ tsp
turmeric powder ¼ tsp
chili powder 1 tsp
garam masala powder ½ tsp
cumin seeds ½ tsp
oil as required
water as required
salt as per taste
coriander leaves for garnish
Method of preparation:
Take a microwave oven safe bowl, Add all ingredients other than water, coriander leaves, mix well and select recipe code 23, enter weight and press start.
Aer beep, remove and add water, mix well and select recipe code 3, enter weight and press start. Garnish with coriander leaves. Serve hot.
A004 Recipe code -4 Ingredients 250gms
Fish Kurma sh ( cut into large pieces)
onion paste 250gms
green chili 1½ cup
ginger paste 3
garlic paste ½ tsp
coriander paste ½ tsp
cardamom 1tsp
Cinnamon sticks 4
lemon juice 2
curd 1tbsp
oil as required ¾ cup
salt to taste
water as required
Method of preparation:
Select recipe code 23 and press start to prepare tadka in a microwave oven safe bowl with all the ingredients other than sh, lemon juice, curd and water.
Aer beep, remove, add the all remaining ingredients and mix smoothly. Place the bowl in the microwave oven select recipe code 4, press start. Remove
and serve hot.
17

A004 Recipe code - 4 Ingredients 250gms
Mache Besara sh (rohu or any fresh water sh) 250gms
potato (cut into cubes) 1
curd 1cup
green chilies paste 4
mustard paste 1tbsp
garlic cloves paste 2
turmeric powder ¼ tsp
cumin seeds 1 tsp
mustard seeds 1 tbsp
fennel seeds 1 tsp
fenugreek seeds 1 tsp
kale jeera seeds 1 tsp
oil as required
salt to taste
coriander leaves for garnish
Method of preparation:
Select recipe code 23 and press start to prepare tadka in a microwave oven safe bowl with all the ingredients other than sh, curd and coriander leaves.
Aer beep, remove; add all the ingredients other than coriander leaves and mix smoothly. Place the bowl in the microwave oven select recipe code 4,
press start. Remove, garnish with coriander leaves and serve hot.
A005 Recipe code - 5 Ingredients 250gms
Ya m Mas a l a Yam, cut into pieces
Tomato puree 2 cup
Onion, chopped 1½ cup
Garlic paste 2½
Ginger paste ¾ tsp
Turmeric powder ¾ tsp
Red chili powder ¼ tsp
Mustard seeds 1½ tsp
Curry leaves ¼ tsp
Oil as required few
Salt to taste
Method of preparation:
Select recipe code 23 and press start to prepare tadka in a microwave oven safe bowl with all the ingredients other than tomato puree and salt. Remove.
Add the remaining ingredients, mix well. Place the bowl in the microwave oven, select recipe code 5, and press start.
18

A005 Recipe code -5 Ingredients 250gms
Mustard Fish hilsa sh (cut into medium size pieces) 250 gms
turmeric powder ½ tsp
mustard oil 2 tbsp
mustard seeds 1 tsp
salt to taste
Water as required
coriander leaves, green chilies for garnish
For Mustard Curry Paste:
mustard seeds 2 tbsp
chopped green chilies 1 tsp
poppy seeds 2 tsp
Method of preparation:
Marinade sh with turmeric powder and salt. Set aside for ½ hour. To make Mustard Curry paste grind mustard seeds, green chilies & poppy seeds. Set
aside. Apply oil to the sh pieces and place in a microwave oven safe bowl and shallow fry the same in under tadka option in recipe code 23. Remove and
add all the ingredients and mustard curry paste mix well. Place the bowl in the microwave oven, select recipe code 5, Remove and garnish with coriander
and green chilies. Serve hot.
A006 Recipe code - 6 Ingredients: 200gms
Kadhi yogurt 200gms
besan 6 tsp
grated ginger 1 tsp
turmeric powder ½ tsp
ghee 1 tbsp
dry red chilies 4
curry leaves few
chopped green chilies 3
hing a pinch
sugar 2 tsp
cumin seeds 1 tsp
mustard seeds 1 tsp
salt to taste
chopped coriander leaves for garnish
Water as required
Method of preparation:
Beat the yogurt, water & besan in a vessel so that no lumps are formed. Pprepare tadka in a microwave oven safe bowl as explained in recipe code 23, with
all the ingredients other than yogurt, besan, water mixture. Remove, add the remaining ingredients and mix well. Place the bowl in the microwave oven,
select recipe code 6, and press start. Remove and garnish with coriander leaves and serve.
19
Table of contents
Other Godrej Appliances Microwave Oven manuals

Godrej Appliances
Godrej Appliances GMX 20 CA6 PLZ User manual

Godrej Appliances
Godrej Appliances GMX 20CA7 PLM User manual

Godrej Appliances
Godrej Appliances GMX 25CA1 MIZ User manual

Godrej Appliances
Godrej Appliances GME 30CR1 BIM User manual

Godrej Appliances
Godrej Appliances GMX 20CA2 FIZ User manual

Godrej Appliances
Godrej Appliances GMX 25CA2 FIZ User manual

Godrej Appliances
Godrej Appliances GMX 28CA3 MKM User manual