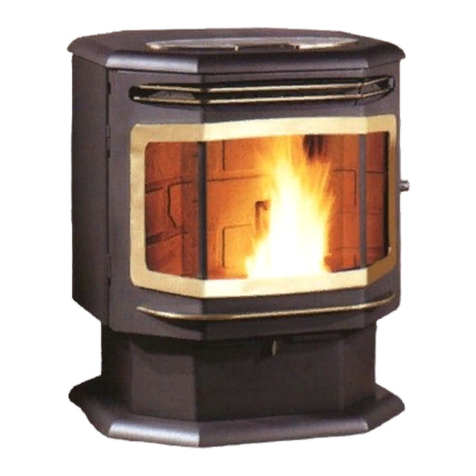
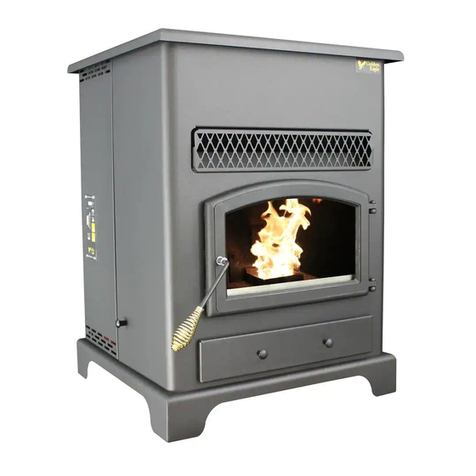
Golden Eagle Talon Manual

GoldenEagleStoveCompany
05/09
THE TALON
WOOD PELLET STOVE
BY
Operating & Installation Manual
Manufacturedby:
NationalSteelcraftersofTexas,LLC.
Arlington,TX
www.goldeneaglestoves.com
PROFESIONALINSTALLATIONISHIGHLYRECOMMENDED
SAFETYINFORMATION
IFYOURAPPLIANCEISNOTPROPERLYINSTALLED
AHOUSEFIREMAYRESULT.FORYOURSAFETY,
FOLLOWTHEINSTALLATIONDIRECTIONS.
CONTACTLOCALBUILDINGORFIREOFFICIALS
ABOUTRESTRICTIONSANDINSTALLATION
INSPECTIONREQUIREMENTSINYOURAREA.
PLEASEREADTHISENTIREMANUALBEFORE
INSTALLATIONANDUSEOFTHISPELLETFUEL‐
BURNINGROOMHEATER.FAILURETOFOLLOW
THESEINSTRUCTIONSCOULDRESULTIN
PROPERTYDAMAGE,BODILYINJURY,OREVEN
DEATH.
SAVETHISMANUALFORFUTUREREFERENCE

TableofContents
WARNINGSANDSAFETYPRECAUTIONS.......................................................................................................3
Symbols.....................................................................................................................................................3
SafetyPrecautions....................................................................................................................................4
INTRODUCTION.............................................................................................................................................5
VENTING........................................................................................................................................................6
EquivalentVentLength(EVL)....................................................................................................................6
HorizontalPipe..........................................................................................................................................7
MultipleElbows........................................................................................................................................7
VentTerminations....................................................................................................................................7
INSTALLATION...............................................................................................................................................8
Preparation...............................................................................................................................................8
Specifications............................................................................................................................................9
Clearances.................................................................................................................................................9
FloorProtection........................................................................................................................................9
CombustionAirSupply............................................................................................................................10
ElectricalInstallation...............................................................................................................................10
SpecialMobileHomeRequirements......................................................................................................11
ExampleInstallations..............................................................................................................................12
OPERATION.................................................................................................................................................16
ButtonControls.......................................................................................................................................16
ProperFuel..............................................................................................................................................18
Pre‐Start‐UpCheck..................................................................................................................................18
BuildingaFire..........................................................................................................................................19
DamperControl......................................................................................................................................19
OptionalThermostat...............................................................................................................................22
OperatingSafetyPrecautions.................................................................................................................23
MAINTENANCE............................................................................................................................................24
AshRemoval............................................................................................................................................24
Cleaning...................................................................................................................................................26
Blowers...................................................................................................................................................27
ChimneyCleaning...............................................................................................................................28
TROUBLESHOOTINGGUIDE........................................................................................................................29
ElectricalDiagram...................................................................................................................................34

WARNINGSANDSAFETYPRECAUTIONS
SYMBOLS
Throughoutthemanualyouwillfindsymbolsusedinordertohighlightanimportantpieceof
information.Belowyouwillseeanexampleofthosesymbolsandadefinitionoftheirmeaning.
IMPORTANTSAFETYNOTE
Readcarefullyandbesuretofollowalldirections
SAFETYNOTE
Importantinformationtoavoiddamagetotheunitorpotentialsafetyconcern.
Readcarefullyandbesureyoufullyunderstandintentandmeaning.
DANGEROFELECTRICALSHOCK
Whileperformingthisactionthereisthepossibilityofelectricalshock.Besure
thattheunitisdisconnectedfrompowerwhileperformingthisaction.
IMPORTANTPIECEOFINFORMATION
Readcarefullyandbesureyoufullyunderstandthemeaningandintent
THISISANACTIONTHATSHOULDBEAVOIDED
ReadcarefullyanddoNOTdothis.
THISISSOMETHINGTHATSHOULDBECHECKED
Readcarefullyandbesuretofollowtheinstructionsprovided.

SAFETYPRECAUTIONS
Donotoperateyourstoveifyousmellsmokecoming
fromit.Turnitoff,monitorit,andcallyourdealer.
Nevertrytorepairorreplaceanypartofthestoveunless
instructionsareprovided.Atrainedtechnicianshoulddo
allotherwork.
Neverusegasoline,gasoline‐typelanternfuel,
kerosene,charcoallighterfluid,orsimilarliquidstostart
or“freshenup”afireinthisstove.Keepallsuchliquids
wellawayfromthestovewhileinuse.
Donotthrowthismanualaway.Thismanualhas
importantoperatingandmaintenanceinstructionsthat
youwillneedatalatertime.Alwaysfollowthe
instructionsinthismanual.Readthemanualthoroughly.
Neverblockfreeairflowthroughtheopenventsofthe
stove.
Donotplaceclothingorotherflammableitemsonor
nearthestove.
Keepforeignobjectsoutofthehopper.Besurethat
whenyouaddfueltothehopper,thepelletsorcorn
thatyouareusingisfreeofforeignmaterial.
Theviewingdoormustbeclosedandlatchedduring
normaloperation.
Thestovewillnotoperateduringapoweroutage.Ifan
outagedoesoccur,keepthestovedoorclosed,and
openawindowifanysmokespillsintotheroom.
Adequateverticalventpipeontheexhaustwillprevent
smokefromenteringthehome.
Donotoperatethestoveiftheflamebecomesdarkand
sootyoriftheburnpotoverfillswithfuel.Turnthestove
off,inspectit,andcallyourdealeroraqualified,trained
technician.
Disconnectthepowercordbeforeperformingany
maintenanceorrepairsonthestove.NOTE:Turning
thestove“off”doesnotdisconnectallpowerfromthe
stove.
CAUTION:Hotwhileinoperation.Keepchildren,clothing,
andfurnitureaway.Contactmaycauseskinburns.
Educateallchildrenofthedangerofahightemperature
stove.Youngchildrenshouldbesupervisedwhentheyare
inthesameroomasthestove.
DONOTopentheviewingdoorduringthestartup
period.
Ifthestoveisinstalledinaroomwithoutairconditioning,
orinanareawheredirectsunlightcanshineontheunit,
itispossiblethiscancausethetemperatureofthestove
torisetooperationallevels;oneofthesensorscouldthen
makethestovestartonitsown.Itisrecommendedthat
thestovebeunpluggedwhennotinuseforextended
amountsoftime(i.e.duringthesummermonths).
Donotunplugthestoveifyoususpectamalfunction.
Turnthestoveoff,inspectit,andcallyourdealeror
qualified,trainedtechnician.
Donotuseanadapterplugorseverthegroundingplug.
DonotuseaGFCIplugorcircuit.Donotroutethe
electricalcordunderneath,infrontof,oroverthestove.
Contactyourlocalbuildingofficialstoobtainapermit
andinformationonanyinstallationrestrictionsor
inspectionrequirementsinyourarea.Notifyyour
insurancecompanyofthisstoveaswell.
Theexhaustsystemmustbecompletelyairtightand
properlyinstalled.Theexhaustventjointsmustbesealed
withRTV500°F(260°C)siliconesealant,andwithUL‐181‐
APfoiltape.
Thisunitmustbeproperlyinstalledtopreventthe
possibilityofahousefire.Theinstructionsmustbe
strictlyadheredto.Donotusemakeshiftmethodsor
compromiseintheinstallation.
Allowthestovetocoolbeforecarryingoutany
maintenanceorcleaning.Ashesmustbedisposedina
metalcontainerwithatightlidandplacedonanon‐
combustiblesurfacewellawayfromthehomestructure.
Yourstoverequiresperiodicmaintenanceandcleaning.
Failuretomaintainyourstovemayleadtosmoke
spillageinyourhome,orevenamoredangerous
situation.RefertotheMAINTENANCESECTIONofthis
manualorourwebsiteforspecificmaintenance
instructions.
Thisstoveisdesignedandapprovedforpelletizedwood
fuelandcornonly.Anyothertypeoffuelburnedinthis
heaterwillvoidthewarrantyandsafetylisting,andmay
resultinahazardouscondition.
Thisstovemustbeconnectedtoastandard3prong120
V.,60Hzgroundedelectricaloutlet.
Wheninstalledinamobilehome,thestovemustbe
boltedtothefloor,haveoutsideairconnected(seepage
3),andNOTBEINSTALLEDINABEDROOM(PerH.U.D.
requirements).Theintegrityofthefloorandceilingmust
bemaintained.Checkwithlocalbuildingofficials.
Theexhaustsystemshouldbecheckedregularly.Itis
recommendedthattheexhaustsystembeinspected
onceamonth,orforeverytonofpelletsburned.Ata
minimum,evenifburninglessthanatonperyear,the
exhaustshouldbecheckedtwiceaburningseason.
GoldenEagleStovesgrantsnowarranty,impliedor
stated,fortheinstallationormaintenanceofyourstove,
andassumesnoresponsibilityofanyconsequential
damage(s).

INTRODUCTION
ThankyouforpurchasingtheTalonwoodpelletstovebyGoldenEagleStoves.Youarenowpreparedtoburnwoodinthe
mostefficient,convenientwaypossible.Toachievethesafest,mostefficientandmostenjoyableperformancefromyour
stove,youmustdothreethings:1)Installitproperly;2)Operateitcorrectly;and3)Maintainitregularly.Thepurposeof
thismanualistohelpyoudoallthree.
ThisstovehasbeenindependentlytestedtoASTME1509‐04StandardSpecificationforRoomHeaters,PelletFuelBurning
Type1,ULC/ORD1482‐90StandardforSolidFuelRoomHeaters,andOregonAdministrativeRulesforMobileHomes(814‐
23‐900through814‐23‐909)andInstallationasaStoveHeater.
Thisapplianceisdesignedspecificallyforuseonlywithpelletizedwood.Itisdesignedforresidentialinstallationaccording
tocurrentnationalandlocalbuildingcodesasafreestandingroomheater.Itisalsoapprovedasamobilehomeheater
whichisdesignedforconnectiontoanoutsidecombustionairsource.
Thisstoveisdesignedtoprovidetheoptimumproportionsoffuelandairtothefireinordertoburnalmostfreeofsmoke
andsoot.Anyblockageoftheairsupplytoorfromthestovewillseriouslydegradeitsperformanceandwillbeevidenced
byasmokingexhaustandasootingwindow.Forbestoperationtheashcontentofthepelletfuelshouldbelessthan1%
andthecalorificvalueapproximately8200BTU/LB.Avoidhighashcontentfuelsbecausethiswillrapidlyfilluptheburnpot
andeventuallycutoffthecombustionairsupply.
PLEASEREADTHISENTIREMANUALBEFOREINSTALLATIONANDUSEOFTHISPELLETFUEL‐
BURNINGROOMHEATER.FAILURETOFOLLOWTHESEINSTRUCTIONSCOULDRESULTIN
PROPERTYDAMAGE,BODILYINJURYOREVENDEATH.
Keepthismanualhandyforfuturereference.
THISPELLETSTOVE,WHENINSTALLED,MUSTBEELECTRICALLYGROUNDEDINACCORDANCE
WITHLOCALCODES,ORINTHEABSENCEOFLOCALCODES,WITHTHENATIONALELECTRICAL
CODE,ANSI/NFPA70.
Theauthorityhavingjurisdiction(suchasmunicipalbuildingdepartment,firedepartment,fire
preventionbureau,etc.)shouldbeconsultedbeforeinstallationtodeterminetheneedto
obtainapermit.
THESTOVEWILLNOTOPERATEUSINGNATURALDRAFTORWITHOUTAPOWERSOURCEFOR
THEBLOWERSYSTEMSANDFUELFEEDSYSTEMANDMUSTNOTBEBURNEDWITHANYTYPE
OFFUELBESIDESWOODPELLETS.
COMMERCIALANDINDUSTRIALINSTALLATIONSOFPELLETSTOVESSHOULDNOTBEUSED
SINCEOPERATIONALCONTROLISOFTENNOTWELLMANAGEDINTHESESETTINGS.
WARRANTYREGISTRATION
Toreceivefullwarrantycoverage,youwillneedtoshowevidenceofthedateyoupurchasedyourstove.Wesuggestthat
youmakeacopyandattachyoursalesinvoicetothismanual,sothatyouwillhavealltheinformationyouneedinone
placeshouldtheneedforserviceorinformationoccur.Alsobesuretocompletethewarrantyregistrationformonour
webpage(preferredmethod)ormailintheonethatcamewiththestove.Whenregisteringyourstoveforwarrantya
copyofthesalesinvoicemustbeincludedeitherinelectronicformatifregisteredviatheinternet,oralegiblecopyifyou
mailinthewarrantyregistrationcardthatcamewithyourstove.

VENTING
Thechoicesyoumakewhendetermininghowyourventpipeisconfiguredisveryimportantandwill
haveanimpactontheperformanceofyourunit.Inordertogetthebestperformancefromyour
stovewehighlyencourageyoutofollowallinstallationdirectionsinthismanual.Itwillsaveyoua
greatdealoftimeandtroubleifyouproperlyventyourunit.
TheTaloniscertifiedforusewithlistedTYPEL‐Vent,3”or4”diameterinsize.Thestovewastested
withSimpsonDuraventbrand.Class“A”chimneyisnotrequired.Refertotheinstructionsprovided
bytheventmanufacturer,especiallywhenpassingthroughawall,ceilingorroof.
THISISAPRESSURIZEDEXHAUSTSYSTEM.ALLVENTCONNECTORJOINTSMUSTBE
SEALEDWITH500F(260C)RTVSILICONESEALANTTOENSURECONSISTENT
PERFORMANCEANDAVOIDSMOKESPILLAGE.ALLHORIZONTALCONNECTORJOINTS
MUSTBESEALEDWITHUL‐181‐APFOILTAPE.
DONOTCONNECTTHISUNITTOACHIMNEYFLUESERVINGANOTHERAPPLIANCE.
DONOTINSTALLAFLUEDAMPERINTHEEXHAUSTVENTINGSYSTEMOFTHISUNIT.
INSTALLVENTATCLEARANCESSPECIFIEDBYTHEVENTMANUFACTURER.
EquivalentVentLength(EVL)
Priortopurchasingyourpelletventpipe(typeL)youshouldplanyourventingscenariointo
determinethediameterofventpipeyoushoulduse.Pelletventpipecomesin3"and4"diameter.
Inordertodetermineifyoucanuse3"diameterpipe,youneedtocalculateyourEVL(Equivalent
VentLength).ToproperlycalculateyourEVLyoushouldmakeasimplesketchofyourplanned
installation.ThenusethefiguresbelowtodetermineyourEVL:
90degreeelbowsorcleanoutteescountas5'ofpipe
45degreeelbowscountas3'ofpipe
Piperunninghorizontallycountsas1'ofpipefor1'ofpipe
Piperunningverticallycountsas1/2'ofpipefor1'ofpipe
UsetheabovefigurestocalculatewhatyourplannedEVLwillbe.IfyourEVLislessthan15'youcan
use3"diameterpipe.IfyourEVLis15'ormoreyoushoulduse4"diameterpipe.Ifyouneedtouse
4"pipeyoushouldhavea3"to4"transitionrightoffthebackoftheunitandthenuse4"diameter
pipethroughouttheentireexhaustsystem.
Ifabove3,000'inelevation,youshoulduseonly4"diameterpipe.Inaddition,ifinstalling
theunitinacornerandgoingoutasidewall,wehighlyrecommendthatyouuse4"pipe
regardlessofyourEVLorelevation.

HorizontalPipe
Youshoulddoeverythingpossibletoreducetheamountofhorizontalpipeyouhaveinyourexhaust
configuration.Themorehorizontalpipethatyouhavetheharderyourcombustionblowerwillhave
towork.Youwillalsoneedtocleanyourexhaustpipemorefrequently,andinsomecasesyourunit
willfunctionverypoorlyifatall.
Itisbesttoalwayshaveverticalpipefollowinghorizontalpipe.Thiswillhelptooffsettherestriction
createdwiththehorizontalpipe.Ideallyanyhorizontalpipeinyourventingconfigurationwillbe
rightoffthebackoftheunit.Thiswouldthenbefollowedbyseveralfeetofverticalpipe.We
recommend7'ormoreofverticalpipeforallinstallations.
Youshouldneverhavemorethan5’ofhorizontalpipeonanyinstallation.Havingmore
than5’ofhorizontalpipewillpotentiallycauseseriousperformanceandefficiency
deficits.
MultipleElbows
Acommonmistakemadebypeopleistousetoomanyelbowsintheexhaustsystem.Younever
wanttohavemorethantwoelbowsinanexhaustifitcanbeavoided.Dependinguponyourexact
exhaustconfigurationyoumaybeabletousethreeelbows.Youshouldalwaysavoidusingfouror
moreelbows.
Youalsowanttoavoidhavingelbowstooclosetogether.Ideallyanyelbowsintheexhaust
configurationwillbeseparatedby3'ormoreofstraightpipe.Iftheelbowscannotbespacedatleast
3'apartyoushoulduse4"diameterpipetohelpreducesomeoftherestrictioncreatedbyhaving
elbowsspacedsoclosely.Theincreasedpipediameterwillnoteliminatealloftherestrictionthough,
andyoushouldexpectyourunittoburnlessefficientlythannormalifyoudothis.
YoushouldALWAYSavoidhavingtwo90degreeelbowsrightnexttoeachother.Having
two90degreeelbowsrightnexttoeachotherwillcreatean"S"curvethatcreatesa
tremendousamountofrestrictioninyourexhaustsystemresultinginextremelypoor
stoveperformance.
VentTerminations
Yourventingendcaporterminationmustconformtothefollowingregulationsandmustbeloacated
insuchamannerastoconformto:
A. Notlessthen3feetaboveanyforcedairinletlocatedwithin10feet.
B. Notlessthan4feetbeloworhorizontallyfrom,oronefootabove,anydoor,window
orgravityairinletintoanybuilding
C. Notlessthantwofeetfromanadjacentbuilding
D. Notlessthan7feetabovegradewhenlocatedadjacenttoapublicwalkway
E. Mobilehomeinstallationsmustuseasparkarrester.

INSTALLATION
Installationofyourpelletstoveisextremelyimportant.Installationoftheunitwillnotonlyhavean
effectuponthesafetyofyourstove,butalsoontheperformanceandefficiencyofthestove,and
alsoontheamountofmaintenanceyoumustperform.Forallofthesereasonsyouwanttomake
surethatyourstoveisproperlyinstalled.
Wheninstallingyourpelletstovethereareseveralthingsthatyoushouldkeepinmindandconsider
beforeyouactuallybegintheinstallation.Takingcaretoinstallyourpelletstovecorrectlywillensure
thatyou,yourfamily,andyourhomearesafe,andthatyourunitsperformsatpeakefficiency.
Keepthefollowingthingsinmindwhenyouplanyourinstallation:
1. Itisalwaysbesttohaveaminimumof5'ofverticalpipe,andweactually
recommend7'ormore.
2. Checkwithlocalbuildingorfireofficialsforanyadditionalinstallationorpermitting
requirements.
3. Useonlyqualitymaterialsfromknownmanufacturersanddistributors.
4. Itisbesttohavetheunitventedonthelowpressuresideofthehouse.Thisistheside
oppositeofprevailingwinds.
5. Flexpipeisonlyapprovedforuseinsideofamasonryfireplace.
6. Eliminateasmuchhorizontalpipeandelbowsaspossible.
7. Usethesamesizepipediameterforyourentireexhaustsystem.
8. DoNOTplugthestoveintoaGFCIsocketorcircuit.
9. Alwaysuseaqualitysurgeprotector.
Preparation
Factorypackagingmustberemoved,andsomeminorassemblyworkisrequiredpriortoinstallation.
Accesstotherearofthestoveisnecessary.
Planyourinstallationpriortoactuallyinstallingtheunit.Itisagoodideatomakeasketchofyour
proposedinstallation.CalculatetheEVL(EquivalentVentLength)priortopurchasingyourventpipe
toensurethatyouhavethecorrectdiameter(seeVENTINGformoredetails).
Makesurethatyourplannedinstallationwillallowproperclearancetobemaintainedon
allsidesofthestoveandtheexhaustflue.
DONOTUSEMAKESHIFTMATERIALSORCOMPROMISESINTHEINSTALLATIONOFTHIS
UNIT.

Specifications
Width:25¾”
Height:325/8”
Depth:237/8”
Weight:275lbs.
Fluesize:3”or4”
HopperCapacity:Upto140lbs.
(Thiscanvarywidelydependingonpelletsize,
length,anddiameter)
EPAstatus:ExemptBurntime:1lb.to5.5lbs.perhour
BTUrange:8,200to48,000
Approvedinstallations:mobilehome,alcove,conventional
Clearances
TheTalonwoodpelletstovehasbeenindependentlytestedandlistedforusewiththefollowing
clearancerequirements.Allclearancesaremeasuredininchesfromthesides,rear,andface(door
opening)orstovebody.
FloorProtection
Freestandinginstallationsrequireaminimum30”wide
by32”deepfloorprotection.Thestovemustbeplaced
onacontinuous(groutedjoints)noncombustible
materialsuchasceramictile,cementboard,brick,3/8”
millboardorequivalent,orotherapprovedorlisted
materialsuitedforfloorprotection.
THEMATERIAL(S)USEDMUSTHAVE,OR
COMBINETOHAVE,AMINIMUM
INSULATIVERATINGOF‘R1’.
Ceramictile,oranytile,requiresacontinuoussheetbeneathtopreventthepossibilityof
embersfallingthroughtothecombustiblefloorifcracksorseparationshouldoccurinthe
finishedsurface,thiswouldincludefloorprotectionforBuilt‐inraisedhearths.Check
localcodesforapprovedalternatives.
Figure1
Figure2

CombustionAirSupply
A2”insidediametermetallicpipe,eitherflexibleor
rigid,maybeattachedtotheinletatthestove’srear
(refertofigure3).Arodentguard(minimum¼”wire
mesh)/windhoodmustbeusedattheterminus(refer
tofigure4).Allconnectionsmustbesecuredand
airtightbyeitherusingtheappropriatelysizedhose
clampand/orUL‐181‐APfoiltape.
Formobilehomeinstallationsonly:2”inside
diameterpipemaybeusedforthefirst5feetof
combustionairsupplyrun;from5to10feetuse2¾”
orlargerinsidediameterpipe.
SourcesofOutsideCombustionAir
1. Infireplaces
Chimneytop.
Ashcleanoutdoor.
2. Forfreestandinginstallations
Aholeinfloornearstoverearterminatingonlyinaventilatedcrawlspace.
Aholeinthewallbehindthestove.
Ifoutsideairisnotused,itisimportantthat
combustionairiseasilyavailabletotheair
inlet.Acloseableoutsideairregistercanbe
usedintightlyinsulatedhomes.
FORAMOBILEHOMEINSTALLATIONTHE
STOVEMUSTBECONNECTEDTOANOUTSIDE
SOURCEOFCOMBUSTIONAIR.
FORMOBILEHOMEINSTALLATIONSNO
COMBUSTIONAIRSUPPLYMAYEXCEED10
FEET.
ElectricalInstallation
Voltagevariationscanleadtoseriousperformanceproblems.Theelectricalsystemisdesignedfor
120VACwithnomorethan5%variation.GoldenEagleStoveCompanycannotacceptresponsibility
forpoorperformanceordamageduetoinadequatevoltage.Ifconnectedtoanoldertwo‐prong
outlet,aseparategroundwireshouldberuntoaproperground(referthistoaqualifiedtechnician).
Alwaysroutetheelectricalcordsothatitwillnotcomeintocontactwithanyhotpartofthestove.
DONOTCONNECTTHEUNITTOAGFCISOCKETORCIRCUIT.
Werecommendconnectingtoagoodqualitysurgeprotectorthatispluggedintoa
standardthree‐prong,120V,60Hzelectricaloutlet.
Figure3
Figure4

SpecialMobileHomeRequirements
Thestovemustbegroundedtothesteelchassisofthehomewith8Ga.Copperwireusingaserrated
orstarwashertopenetratepaintorprotectivecoatingtoensurepropergrounding.
Thestovemustbesecurelyfastenedtothefloorofthemobilehomethroughthetwoholesinthe
rearofthestoveusingtwo¼”lagboltsthatarelongenoughtogothroughbothahearth(ifused)
andthefloorofthehome.(Seefigure5).
Figure5
THESTRUCTURALINTEGRITYOFTHEMOBILEHOMEFLOOR,WALL,ANDCELINING/ROOFMUST
BEMAINTAINED.
INSTALLATIONSHOULDBEINACCORDANCEWITHTHEMANUFACTUREDHOMEANDSAFETY
STANDARD(HUD),CFR3280,PART24.
DONOTINSTALLINASLEEPINGROOM.
Bolt Hole
Bolt Hole

ExampleInstallations
Therearemanywaysthatastovecanbeproperlyinstalled.Thepotentialvariablesinanyinstallation
canvarygreatlydependinguponwhereyouplaceyourstove,yourplannedexhaustconfiguration,
andotherfactors.Forthatreasonwecannotshoweverypossibleinstallation.However,belowyou
willfindseveralexamplesofthepreferredinstallationsthatwerecommend.Ifyouinstallyournew
stoveinthesamemannerastheseexampleinstallationsyouwillgetthebestperformancefromyour
unit.
HORIZONTALLYTHROUGHWALL
Thisinstallation(refertoFigure6)istheidealwaytoventyourstove.Youshouldmakeevery
attempttoventyourunitasshowninthisexampleasitwillprovideyouwiththegreatestefficiency
andperformanceofyourunit.Inaddition,thisinstallationwillhelptoensurethatyouhaveaclean
andefficientburnsolongasyouareusingaqualityfuelandproperdampercontrol.
Thefurtheryoudeviatefromthisrecommendedinstallation,thelessefficientlyyourunit
willfunction.
NOTE:FollowL‐Ventchimneymanufacturer’sinstructions.
1. Positionstove,adheringtoclearancesshown
inFigure1.
2. Locatepositionofholeinwall;directly
behindstoveexhaustvent(refertofigure3).
3. Alwaysmaintain3”clearancefrom
combustiblematerials.
4. InstallL‐VentwallthimbleperL‐Vent
manufacturer’sinstructions.
5. Attachenoughpipingtopenetrateand
extendatleast6”beyondexteriorwalls.An
8‐footverticalpiperunissuggestedwhere
possibletoreducethepossibilityofsmoke
spillageintheeventofalossofnegative
pressure.
6. Attachcapandsealoutsidewallthimbles
withnon‐hardeningwaterproofmastic.
7. Terminationshouldnotbelocatedsothat
hotexhaustgasescanignitetrees,shrubs,or
grassesorbeahazardtochildren.Exhaust
gasescanreachtemperaturesof500ºFandcauseseriousburnsiftouched.
FOLLOWYOURVENTPIPEMANUFACTURERSINSTRUCTIONSREGARDINGALLASPECTS
OFVENTINSTALLATIONANDCLEARANCES.
Figure6

VERTICALLYWITHNEWCHIMNEYSYSTEM
(RefertoFigure7)
OPTION:Toachieveacenterverticalinstallationa
45ºelbowandaclean‐outteecanbeusedtooffset
thepipefromtheexhaustoutlettotherearcenterof
thestove.
OPTION:InstallL‐Ventelbowinplaceofclean‐out
tee.Locatestove.Dropplumbbobtocenteroftee
outlet,markpointonceiling.Installceilingsupport
andL‐VentpipeperL‐Ventmanufacturer’s
instructions.
1. Alwaysmaintain3”clearancefromcombustible
materials.Whenpassingthroughadditionalfloors
orceilings,alwaysinstallfirestopspacer.
2. Afterliningupforholeinroof,cuteitheraround
orsquareholeinroof,always3”largeralltheway
aroundpipe.Installupperedgeandsidesof
flashingunderroofingmaterials,nailtotheroofalongupperedge.Donotnailloweredge.Seal
nailheadswithnon‐hardeningwaterproofmastic.
3. Applynon‐hardening,waterproofmasticwherethestormcollarwillmeettheventandflashing.
Slidestormcollardownuntilitsitsontheflashing.Sealandinstallcap.Mobilehomeinstallations
mustuseasparkarrester.
VERTICALLYINTOEXISTINGCHIMNEYSYSTEM
Ifyouhaveandexistingchimneysystemyoucanrunyournew
L‐Ventpipeupthroughthecenterofyourexistingchimney
system.(refertofigure8)
Followguidelinesforequivalentventlength.
FOLLOWYOURVENTPIPEMANUFACTURERS
INSTRUCTIONSREGARDINGALLASPECTSOFVENT
INSTALLATIONANDCLEARANCES.
Figure7
Figure8

VERTICALLYINTOEXISTINGMASONRYFIREPLACE
(Refertofigure9)
1. Havethemasonrychimneyinspected
byaqualifiedchimneysweepor
installertodetermineitsstructural
condition.
2. Youwillneedapipelengthequalto
thechimneyheightfromthehearth.If
outsidecombustionairistobeused,
youwillneedapipelengthequalto
thechimneyheightplus18inches.
3. Installablankingplateandthe
chimneypipe,andifusedtheoutside
airpipe,asshowninFigure9.
4. AttachtheL‐ventadapter,asectionof
pipeandcleanouttee,makingsure
thecleanoutteeiscenteredinthe
chimneyfluearea.UseRTV,metallic
tape,andaminimumofthreeself‐
tapingscrewsatalljointconnections
toensureatightseal.
5. Positionthestove,adheringtothe
clearancesinFigure1.
6. Measureandbuildchimneytopplate.
Cutoutholesforchimneypipe,andif
usedtheoutsideairpipe.Installand
sealwithnon‐hardeningmastictopreventwaterleakage.Installventcap.
FOLLOWYOURVENTPIPEMANUFACTURERSINSTRUCTIONSREGARDINGALLASPECTS
OFVENTINSTALLATIONANDCLEARANCES.
Followguidelinesforequivalentventlength.
Figure9

INSTALLATIONTHROUGHSIDEOFMASONRYCHIMNEY
(Refertofigure10)
1. Positionthestove,adheringtothe
clearancesinFigure1.Markthe
centeroftheholewherethepipe
istopiercethemasonrychimney.
2. Itwillbenecessarytobreakout
themasonryaroundthelocation
ofthepipecentermark.Usea4‐
inchdiameterholefor3‐inchpipe
and5‐inchdiameterholefor4‐
inchpipe.
3. Measureandbuildchimneytop
plate.Cutoutholesforchimney
pipe,andifusedtheoutsideair
pipe.
4. Installtheteeonthebottomof
theverticalpipesystemandlower
itdownthechimneyuntilthe
centerbranchoftheteeislevel
withthecenteroftheholeinthe
masonry,asshowninFigure10.
5. Installandsealthetopplatefrom
step3withnon‐hardeningmastic.
Slipthestormcollaroverthepipe,
andwhileholdingthepipeattheproperelevation,affixthecollarwithaminimumofthree¼”
stainlesssteelsheetmetalscrews.Sealalljointsandseamsaroundthecollar.
6. Connectthehorizontalpipebypushingitthroughtheholeinthemasonryandliningitupwith
thebranchinthetee.Pushthepipeintotheteewhiletwistingittolockitintothetee.
7. Ifdesired,oncethehorizontalpipeisinplace,thespacebetweenthepipeandmasonrymaybe
filledwithhigh‐temperaturegrout.
8. Installthetrimcollar.Anadjustablepipelengthandadaptermaybeneededtofinishthe
connectiontothestove.
FOLLOWYOURVENTPIPEMANUFACTURERSINSTRUCTIONSREGARDINGALLASPECTS
OFVENTINSTALLATIONANDCLEARANCES.
Followguidelinesforequivalentventlength.
Figure10

OPERATION
Theblowersandautomaticfuelsupplyarecontrolledfromapanelontheleft‐handsideofthestove.
Thecontrolpanelfunctionsareasfollows.
ButtonControls
ON/OFFSWITCH
Whenpushedthestovewillautomaticallyignite.Noother
firestarterisnecessary.Theigniterwillstayonforatleast10and
upto15minutes,dependingonwhenProofofFireisreached.
Thefireshouldstartinabout5minutes.
ThegreenlightlocatedabovetheOn/Offbutton(inthe
On/Offbox)willflashduringtheignitionstart‐upperiod.(See
figure12)
TheHeatLevelAdvanceisinoperableduringtheignitionstart
period.WhenthegreenlightcontinuouslystaysontheHeatLevel
Advancecanbeadjustedtoachievethedesiredheatoutput.
Ifthestovehasbeenshutoff,andyouwanttore‐start
itwhileitisstillwarm,the“on/off”buttonmustbeheld
downfor2seconds.
FUELFEEDBUTTON
Whenthe“FuelFeed”buttonispushedandhelddownthe
stovewillfeedpelletscontinuouslyintotheburnpot.
Whilethestove’saugersystemisfeedingpelletsthegreen
light(inthe“FuelFeed”box)willbeon.(Seefigure11)
DONOTUSETHEFUELFEEDBUTTONDURINGNORMALOPERATIONBECAUSEIT
COULDSMOTHERTHEFIREANDLEADTOADANGEROUSSITUATION.
HIGHFANSWITCH
Theroomairfanspeedvariesdirectlywiththefeedrate.The“HIGHFAN”switchoverridesthis
variablespeedfunction.Itwillsettheroomairblowerspeedtohighatanyfeedratesetting.
Whenthe“HIGHFAN”buttonispushedtheroomairfanwillswitchtoitshighestsetting.
Whenthisbuttonispushedagaintheroomairfanwillreturntoitsoriginalsettingbasedonthe
HeatLevelAdvancesetting.
Figure11

LOWFEEDADJUSTMENT
TheLowFeedAdjustmentbuttonisanoptionalfuelfeedcontrolthatmostpeoplewillneverneedto
use.TheLowFeedAdjustmentbuttonwillslightlychangethefeedrateofthenumberoneheatlevel
setting.Ithasnoaffectonanyoftheotherheatlevels.
Differentsizeandqualitypelletfuelmayrequireadjustmentofthe“1”feedsettingontheHeatLevel
Advancebargraph.Thisisusuallyaone‐timeadjustmentbasedonthefuelyouareusing.The“LOW
FEEDADJUSTMENT”buttonwhenadjustedwillallowfor3differentfeedratesettingsforthe#1feed
settingonly.Toadjustsimplypushthe“LOWFEEDADJUSTMENT”buttonwhilethestoveis
operatingatsetting“1”andwatchthebargraph.
Whenthe“1”&“3”lightsareilluminatedonthebargraphthelowfeedrateisatits“lowest”
setting.
Whenthe“1”lightisilluminatedonthebargraphthelowfeedrateisatits“normal”setting.
Whenthe“1”&“4”lightsareilluminatedonthebargraphthelowfeedrateisatits“highest”
setting.
YoushouldonlyusetheLowFeedAdjustmentbuttonunderlimitedcircumstances.Ifyouareunable
tokeepafiregoingonthenumberoneheatlevelsettingwiththedampercompletelyclosedthen
youshouldusetheLowFeedAdjustmentbuttonsothatwhentheunitisonthenumberoneheat
levelsettingthe#1and#4lightsareon.Thiswillfeedjustalittlebitmorefueltothefire.You
shouldalsodothisifyouareusingtheunitwithathermostatintheHigh/Lowthermostatmode.
TheLowFeedAdjustmentbuttononlychangesthefuelfeedrateforthe#1setting.Ithas
noeffectontheotherheatlevelsettings.
Whenthestoveisseton“1”the“LowFeedAdjustment”valueswillbeshownontheHeat
LevelAdvancebargraph.ForexampleiftheLowFeedAdjustmentissettoitslowest
settingeverytimethestoveissettolowthe“1”and“3”lightswillbeilluminatedonthe
bargraph.
WhenusingthestoveintheHigh/Lowthermostatmodewerecommendthatyouusethe
LowFeedAdjustmentbuttonsothatthe#1and#4lightsaredisplayedwhenonthelowest
setting.
HEATLEVELADVANCE
Thisbuttonwhenpushedwillsetthepelletfeedrate,hencetheheatoutputofyourstove.The
levelsofheatoutputwillincrementallychangeonthebargraphstartingfromlevel“1”to“5”.
WHENDROPPING3ORMOREHEATLEVELSETTINGS(4TO1,OR5TO2OR1)PUSHTHE
‘HIGHFAN’BUTTONANDALLOWTHEROOMAIRFANTORUNATTHATSETTINGFORAT
LEAST5MINUTESTOPREVENTTHESTOVEFROMTRIPPINGTHEHIGHTEMP
THERMODISK.

ProperFuel
Usingtheproperfuelwillhaveatremendousimpactoftheperformanceofyour
stove.WehighlyrecommendthatyouonlyusePFI(PelletFuelsInstitute)
approvedpellets.IfapellethasbeenPFIapprovedyouwillseethePFIlogo
prominentlydisplayeduponthebag.
Factory‐approvedpelletsarethose¼”or5/16”indiameterandnotover1”long.
Longerorthickerpelletssometimesbridgetheaugerflights,whichpreventsproper
pelletfeed.Thedesignofthestoveincorporatesautomaticfeedofthepelletfuelintothefireata
carefullyprescribedrate.Thestove’sperformancedependsheavilyonthequalityofyourpelletfuel.
Avoidpelletbrandsthatdisplaythesecharacteristics:
a. ExcessFines–“Fines”isatermdescribingcrushedpelletsorloosematerialthatlookslike
sawdustorsand.Pelletscanbescreenedbeforebeingplacedinhoppertoremovemostfines.
b. Binders–Somepelletsareproducedwithmaterialstoholdthetogether,or“bind”them.
c. Highashcontent–Poorqualitypelletswilloftencreatesmokeanddirtyglass.Theywillcreatea
needformorefrequentmaintenance.Youwillhavetoemptytheburnpotplusvacuumtheentire
systemmoreoften.Poorqualitypelletscoulddamagetheauger.GoldenEaglecannotaccept
responsibilityfordamageduetopoorqualitypellets.Yourdealercanrecommendagoodquality
pelletdealerinyourarea.
THISSTOVEISAPPROVEDFORBURNINGPELLETIZEDWOODFUELONLY!
BURNINGWOODINFORMSOTHERTHANPELLETSISNOTPERMITTED.ITWILLVIOLATE
THEBUILDINGCODESFORWHICHTHESTOVEHASBEENAPPROVEDANDWILLVOIDALL
WARRANTIES.
DONOTBURNWETPELLETS.
ANYADDITIONALFUELINTRODUCEDBYHANDWILLNOTINCREASEHEATOUTPUTBUT
MAYSERIOUSLYIMPAIRTHESTOVESPERFORMANCEBYGENERATINGCONSIDERABLE
SMOKE.
PreStartUpCheck
Removeburnpot,makingsureitiscleanandnoneoftheairholesareplugged.Cleanthefirebox,and
thenreinstallburnpot.Cleandoorglassifnecessary(adryclothorpapertowelisusuallysufficient).
Neveruseabrasivecleanersontheglassordoor.Checkfuelinthehopper,andrefillifnecessary.
PFILogo

BuildingaFire
Inordertostartafire,simplycompletethepre‐start‐upcheck,closetheviewingdoor,andpressthe
On/Offbutton.Theunitwillenterapre‐programmedstart‐upcycleandyouwillhaveafireinabout
5minutesorso.
NEVERUSEAGRATEOROTHERMEANSOFSUPPORTINGTHEFUEL.USEONLYTHE
GOLDENEAGLEAPPROVEDBURNPOT.
Duringthestartupperiod:
1)DONOTopentheviewingdoor.
2)DONOTopenthedampermorethan¼”.
3)DONOTaddpelletstotheburnpotbyhand.
4)DONOTusetheFuelFeedbutton(unlessyouareprimingtheaugerafterrunning
outofpellets).Adangerousconditioncouldresult.
Duringthefirstfewfires,yourstovewillemitanodorasthehightemperaturepaintcures
orbecomesseasonedtothemetal.Maintainingsmallerfireswillminimizethis.Avoid
placingitemsonstovetopduringthisperiodbecausepaintcouldbeaffected.
THEHOTRODAUTOMATICFIRESTARTER
a. Fillhopperandcleanburnpot.
b. Press“On/Off”button.Makesurelightison.
c. Thedampershouldbecompletelyclosedoropennomorethan¼”duringstart‐up.Thiswillvary
dependingonyourinstallationandelevation.Oncefireisestablishedadjustfordesiredflame
increasingtheamountthedamperisopenastheheatsettingisincreased.(See“DAMPER
CONTROL”)
d. Adjustfeedratetodesiredsettingbypressing“HeatLevelAdvance”button.
Iffiredoesn’tstartin15minutes,press“On/Off”,waitafewminutes,cleartheburnpot,
andstartprocedureagain.
DamperControl
Thedampercontrolrodonthestove’slowerleftsideadjuststhecombustionair.Thiscontrolis
necessaryduetothevariedburncharacteristicsofindividualinstallations,differentpelletbrandsand
pelletfeedrates.Itallowsyoutoimprovetheefficiencyofyourstove.Providingcorrectcombustion
airwillreducethefrequencyofcleaningyourglassdoorandpreventtherapidbuildupofcreosote
insideyourstoveandchimney.
Youshouldadjustthedamperbasedonthefire’sappearance.Alow,reddish,dirtyfirecanbe
improvedbypullingthedamperoutslightly.A“blowtorch”firecanbeimprovedbypushingthe
damperinabit.

Asageneralrule,onlowerfeedratesettings,thedampershouldbeinfarther.Onhigherfeedrates,
thedampershouldbemoreopen.Throughtrialanderror,youwillfindthebestsetting.
NOTE:On“1”,dampershouldbeeithercompletelyclosedoroutapproximately⅛”to¼”.Ifdamper
isouttoofar,itcancausethefiretogoout.
OPENINGDOOR
Ifthedoorisopenedwhilethestoveisinoperationitmustbeclosedwithin30secondsorthestove
willshutdown.Ifthestoveshutsdownpushthe“On/Off”buttontore‐startyourstove.
ROOMAIRFAN
WhenstartingyourstovetheRoomAirFanwillnotcomeonuntilthestove’sheatexchangerwarms
up.Thisusuallytakesabout10minutesfromstart‐up.
RESTARTINGAWARMSTOVE
Ifthestovehasbeenshutoff,andyouwanttore‐startitwhileitisstillwarm,the“on/off”button
mustbehelddownfor2seconds.
IFSTOVERUNSOUTOFPELLETS
Thefiregoesoutandtheaugermotorandblowerswillrununtilthestovecools.Thiswilltake30to
45minutes.Afterthestovecomponentsstoprunningthe“On/Off”andtheBARGRAPHlightsstay
onfor10minutes.Afterthe10minutesthe“3”lightonthebargraphwillflashandthe“On/Off”
lightwillgooff.Torestart,refillhopperandpress“FuelFeed”buttonuntilpelletsbegintofallinto
burnpot.Press“On/Off”button.
REFUELING
Werecommendthatyounotletthehopperdropbelow¼full.
KEEPHOPPERLIDCLOSEDATALLTIMESEXCEPTWHENREFILLING.DONOTOVERFILL
HOPPER.
STOVEMAINTENANCETOOL
Atoolhasbeenprovidedtohelpwiththefollowingfunctions:
a. Stirringpelletsinhopper–unlikeliquidsinatank,pelletsdo
notdrainevenlyintotheauger.Bridgingacrosstheopening
canoccur.Pelletscanhanguponthesidesofthehopper.
Occasionally“stirring”thehoppercanhelp.
b. Scrapeashesfromburnpot.
This manual suits for next models
1
Table of contents
Other Golden Eagle Pellet Stove manuals
Popular Pellet Stove manuals by other brands

St. Croix
St. Croix AFTON BAY installation manual

EasyFire
EasyFire EF5001C-AL Installation & operating instructions

Breckwell
Breckwell Tradition P23I owner's manual

EKOGREN
EKOGREN EG MULTIFUEL 30 kW Technical and commissioning documentation

Quadra-Fire
Quadra-Fire CLASSIC BAY 1200 owner's manual

EasyFire
EasyFire EF3801B Repair manual