RE – 6143W
Installation & Operation Instructions for Australia & New Zealand
goldenHOOD
®
Rangehoods
Style RE-137 === Model RE9137, RE8137, RE7137
Style RE-139 === Model RE9139, RE7139, RE6139
Style RE-142 === Model RE9142, RE7142, RE6142
Style RE-143 === Model RE9143, RE7143, RE6143
Style RE-242 === Model RE9242
Warning! Read this instruction before installation and operation.
Under certain circumstances domestic appliances may be dangerous.
•The minimum distance between the cooker hob surface and the lowest part of the range hood is 650mm,
and the maximum is 750mm, or follow your local building code and the AGA specifications.
•Exhaust air should not be discharged into any chimney or flue, which may carry combustible products from
other sources. In addition, exhaust air should not be discharged into the wall cavity or into the roof space
unless designed for the purpose. All other regulations concerning the discharge of exhaust air have to be
fulfilled.
•There shall be adequate ventilation of the room when the range hood is used at the same time as
appliances burning gas or other fuels. Do not flambé under the range hood.
•You must read the details concerning the method and frequency of cleaning. There is a fire risk if cleaning
is not carried out in accordance with the instructions.
•This appliance is not intended for use by persons (including children) with reduced physical, sensory or
mental capabilities, or lack of experience and knowledge, unless they have been given supervision or
instruction concerning use of the appliance by a person responsible for their safety.
•Young children or infirm persons without supervision do not intend to use this appliance.
•Young children should be supervised to ensure that they do not play with the appliance.
•If the supply cord is damaged, it must be only replaced by an authorized or qualified person.
•Accessible parts may become hot when used with cooking appliances.
•Any repairing works of this appliance can only be carried out by an authorized or qualified person.
•Disconnect the electricity before repair, replace or cleaning to this appliance.
•Do not touch the lamps or lamps covers after the appliance just has been used.
•Do not remove filters with the range hood in operation.
•This appliance is designed for domestic use only, do not use for commercial or industrial purpose.
The manufacturers refuse to accept any responsibility for eventual damages, because of failure to
observe the instructions.
Installation
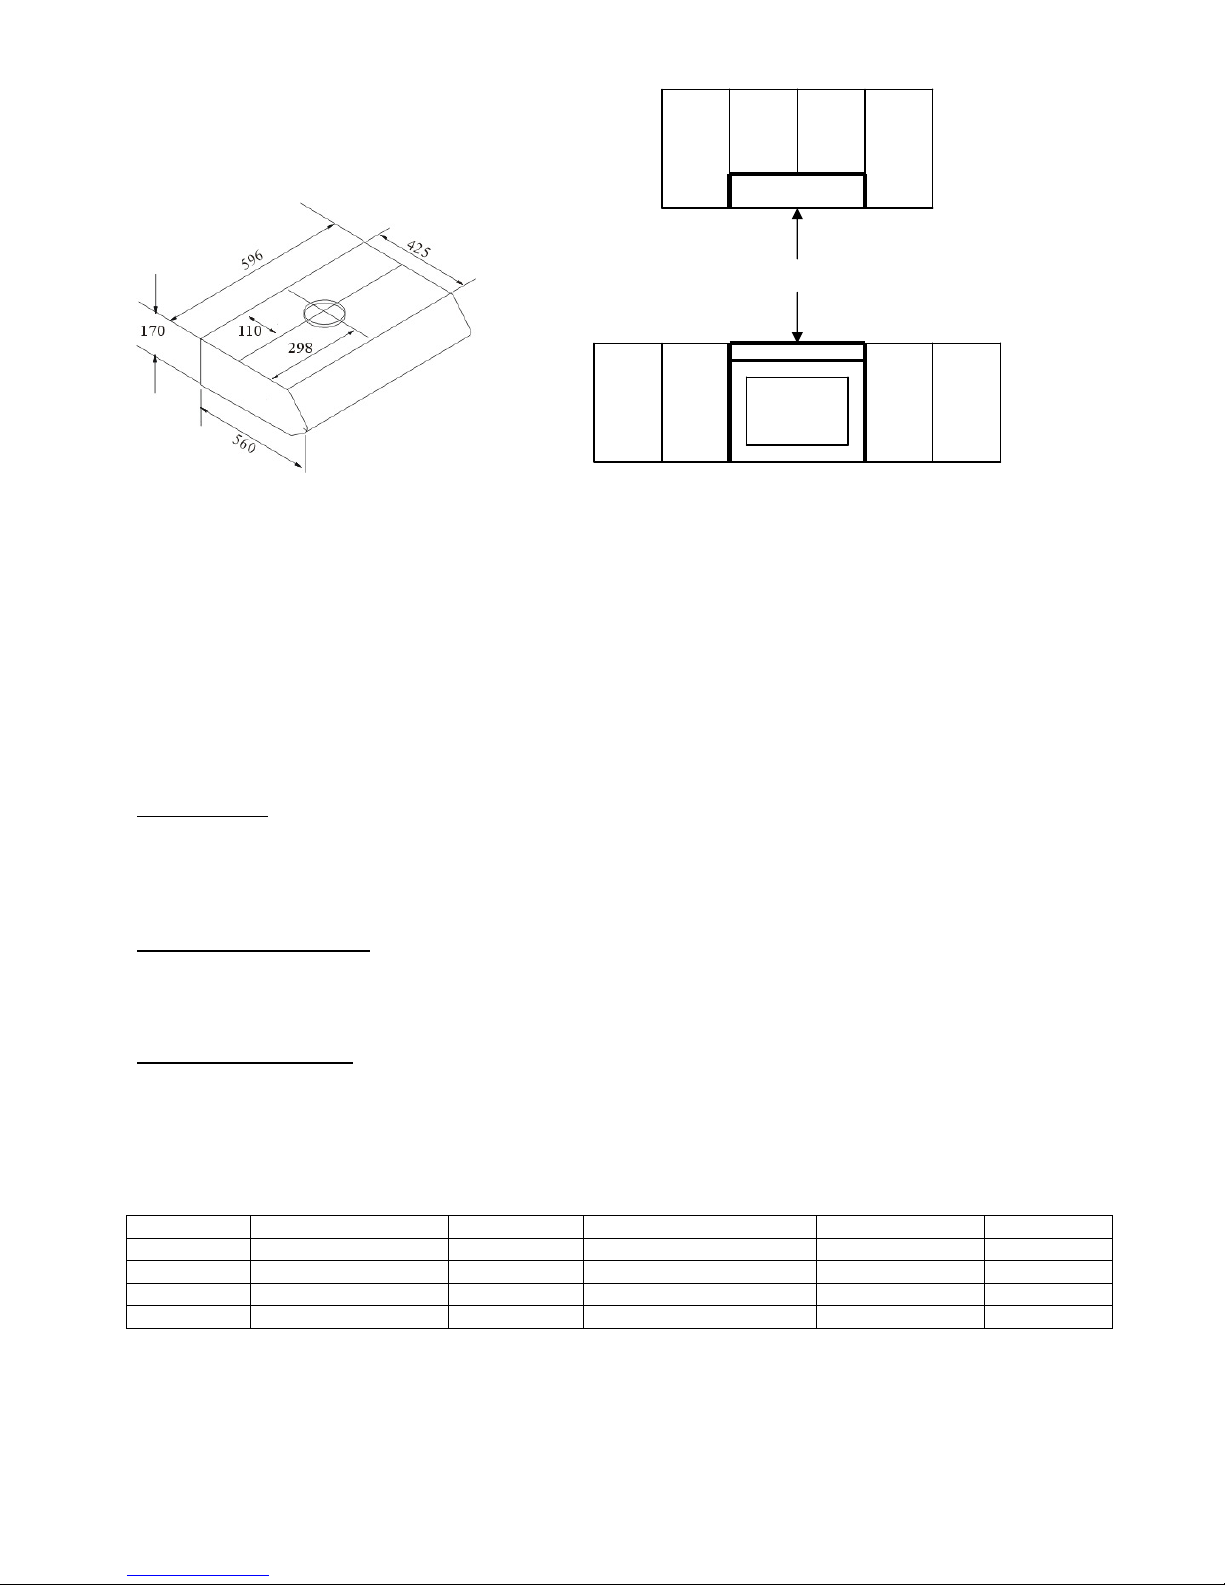
Built-in installation.
Note: Remove the wall mounting brackets on the hood before installation.
To be installed under an over-head cabinet. Cut a ∅170-180mm hole on the bottom panel of cabinet according to
the position of air vent on the hood. And cut another ∅40mm hole for power plug to go through. If you have a built-in
space, pre-drill 2 ∅4mm holes on each side panel of the hood, then fasten the screws from inside the hood to the
cabinet. Alternatively, pre-drill a ∅4mm hole at each top corner of the hood, then fasten the hood to the bottom
panel of the cabinet. A car jack with a piece of timber board is an idea to hold the hood while fastening. Make sure
the front of the hood is slightly tilted up to allow the cooking grease to flow into the grease collectors, which at the
back of the hood. And then install the ducting flue.
Warning: Failure to install the screws or fixing device in accordance with these instructions may result in electrical
hazards, and it may cause personal injured.
Electrical connection
The hood is fitted with molded power cord and plug. A 10amp power point is required for plug-in connection.