Warning and Cautions
WARNING
RISK OF ELECTRICSHOCK
DO NOT OPEN
Power supply
There is a AC-DCadapter with the set that transform AC to DC power.
and the power value supplied to the adapter is marked on the label on the adapter.
Only DC powercan be input into the setand AC power must notbe input.
And the outputpower value of the AC-DCadapter is on the label onthe back
cover of theset.
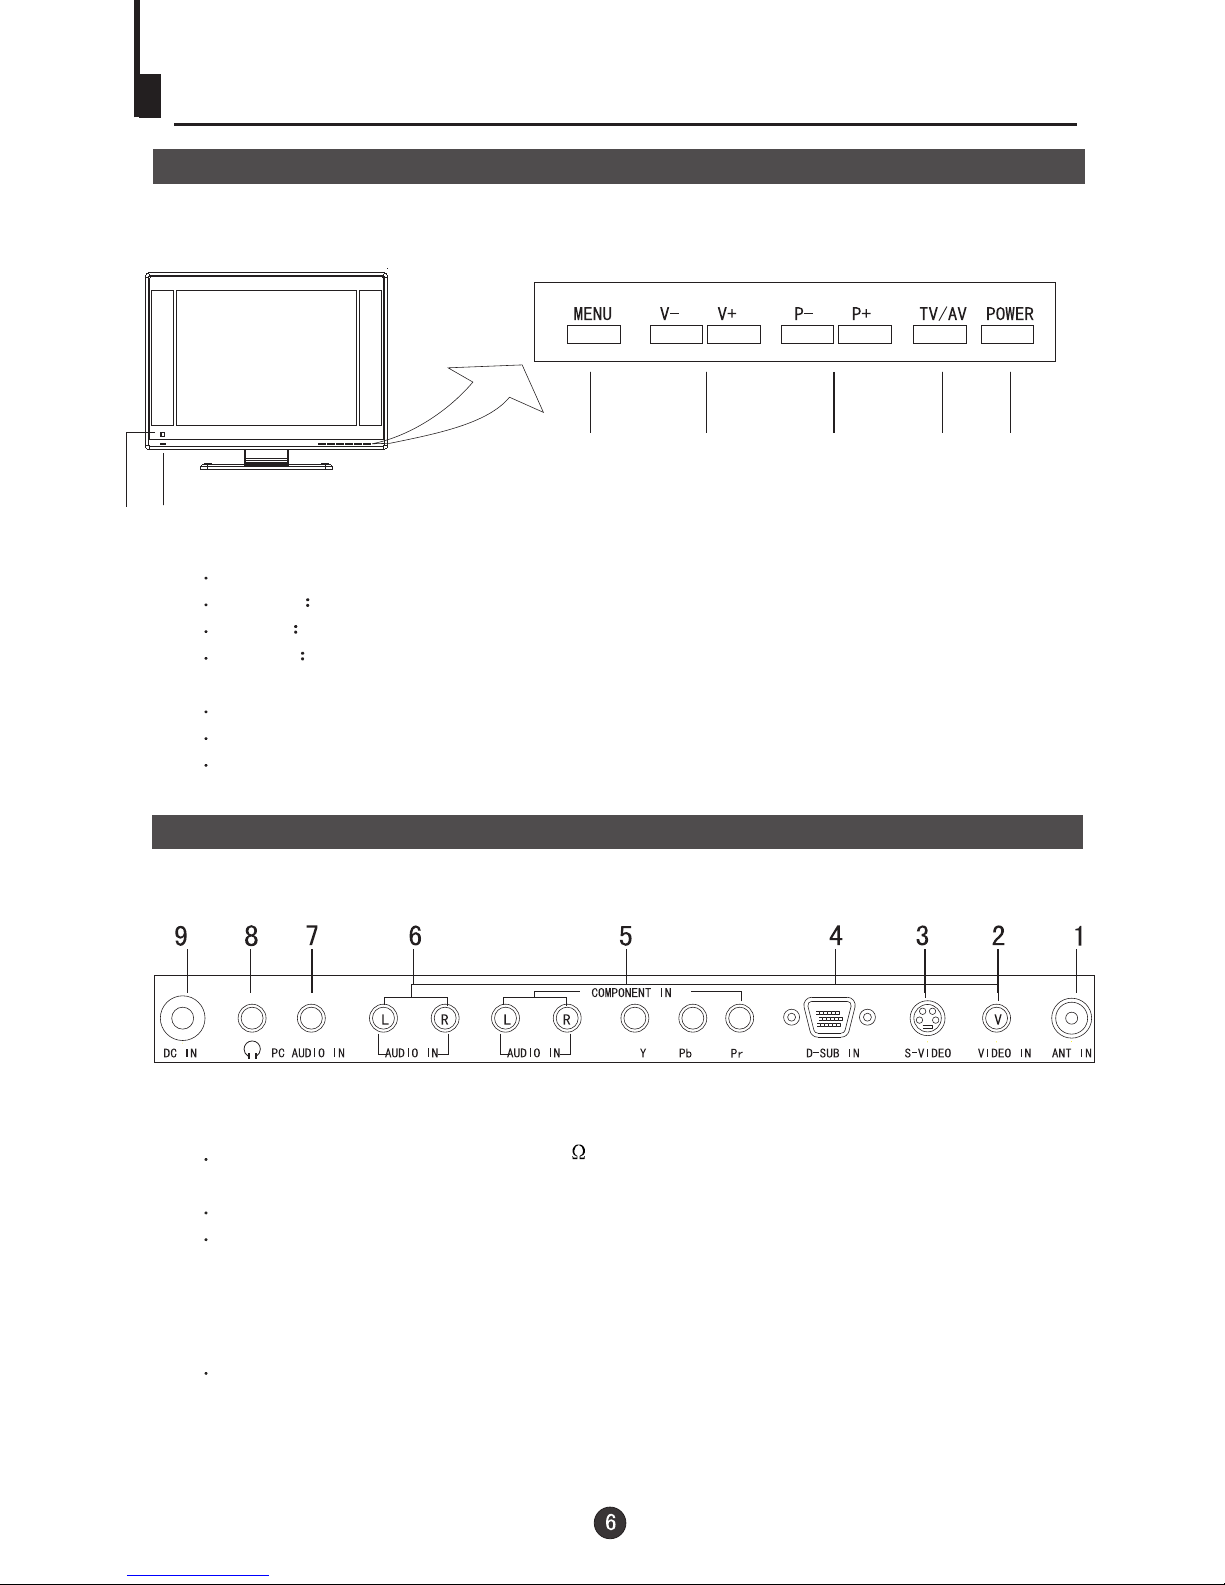
Power connection:
A. Connect theoutput pin (12V)of the adapter to the DC INport of the TV set;
B. Connect the AC power cable to the composite port of the adapter;
C. Connect theother side of the AC power cable to the AC power socket.
Cleaning:
Make sure that the power cable is removed from the socket before cleaning the
product. When thescreen is seriously contaminated, use a clean soft cloth
moistened to clean the display. Wring the water while clean the display and
then use a dry cloth to clean it .
Never use any liquid or inhalator cleanser.
CAUTION:
TO REDUCE THE RISK OF ELECTRIC SHOCK, DO NOT REMOVE COVER
(OR BACK). NO USER SERVICEABLE PARTS INSIDE. FOR ANY
PROBLEM, REFER SERVICING TO QUALIFIED SERVICE PERSONNEL.
THERE IS ALIGHTNING ARROW SYMBOL IN THE TRIANGLE:
THIS SYMBOL INDICATES HIGH VOLTAGE IS PRESENT INSIDE.
IT IS DANGEROUS TO MAKE ANYKIND OF CONTACT WITH ANY
INSIDE PART OF THIS PRODUCT.
THERE IS MARK IN THE TRIANGLE: THIS SYMBOL
ALERTS YOU THAT IMPORTANTLITERATURE
AND MAINTENANCEHAS BEEN INCLUDED WITH THIS
PRODUCT.
AN EXCLAMATION
CONCERNING
OPERATION
CAUTION:
TO REDUCE THE RISK OF ELECTRIC SHOCK AND FIRE,
DO NOT PUT THE TV SET NEAR SOURCES OF HUMIDITY.
DO NOT USE ANY ABRASIVE CLEANSERS WHICH MAY
SCRATCH OR DAMAGE THE LCD SCREEN. AVOID CONTACT
WITH OBJECTS THAT MAY SCRATCH THE LCD SCREEN.
NOTE: SERVICING THE UNIT YOURSELF IS UNAUTHORIZED
AND COULD LEAD TO INJURY OR PRODUCT DAMAGE.