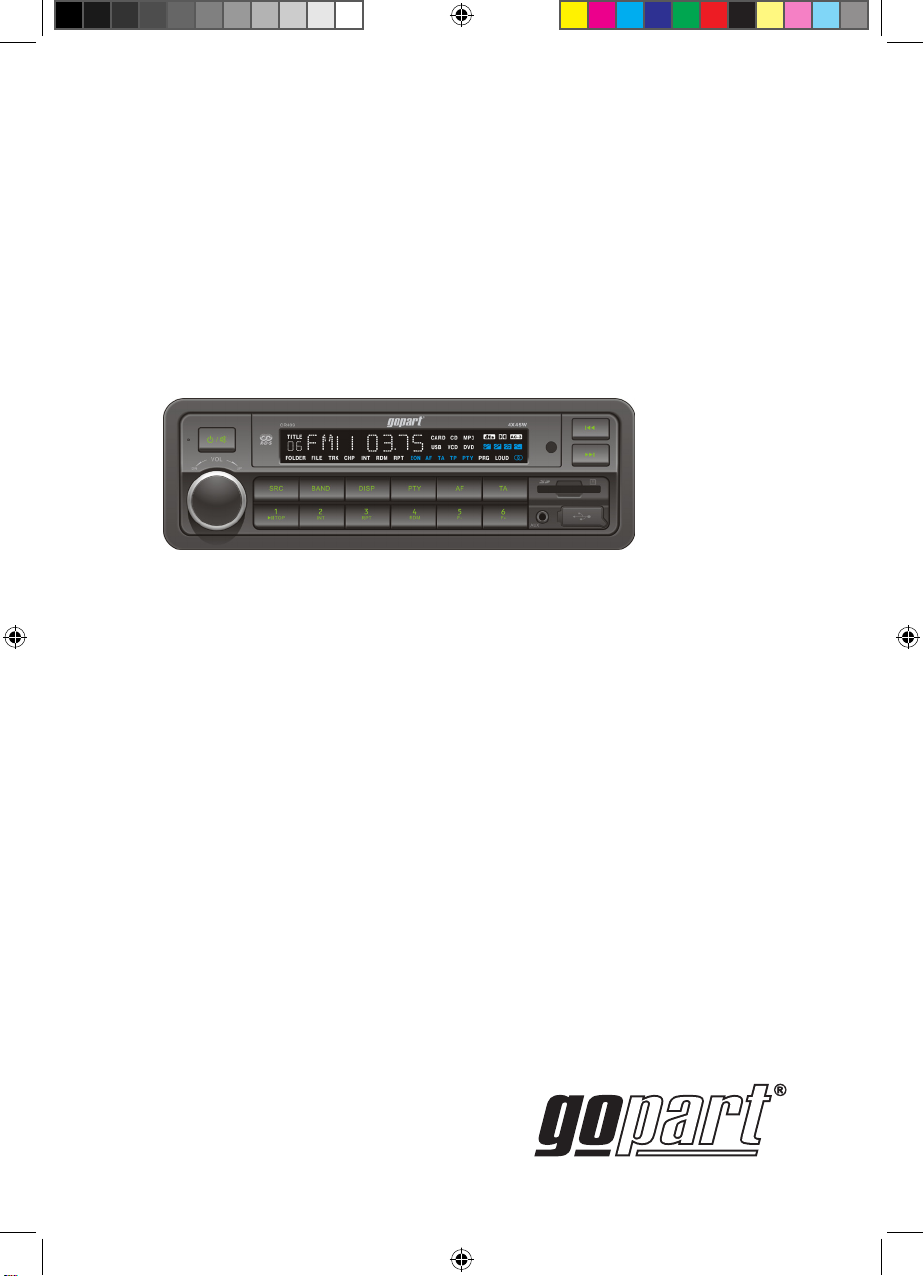
gopart CR110GP User manual

USB/SD/MMC Player with FM/MW Tuner
USB/SD/MMC-Player mit FM/MW-Tuner
Lecteur USB/SD/MMC avec tuner FM/MW
USB/SD /MMC-speler met FM/MW-tuner
Reproductor USB/SD/MMC con sintonizador de FM/AM
Přehrávač zařízení USB akaret SD aMMC stunerem FM/AM
CR110GP
Operating Instructions
Bedienungsanleitung
Mode d’emploi
Bedieningsinstructies
Instrucciones de funcionamiento
Návod kobsluze
1820111_CR110GP_manual UK_DE_FR 1.indd 1 1/18/11 9:05 AM

CONTENTS
UK
Safety Information 4
Panel Controls 5
General Operation 6
USB/SD/MMC Instructions 7
Tuner Instructions 8
RDS (Radio Data System 9
MP3/WMA Instructions 10
Menu Function 11
Electrical Connections 12
Installation Guide 13
Remove the unit 13
Troubleshooting 14
Specifications 15
DE
Sicherheitshinweise 18
Elemente des Bedienteils 19
Allgemeiner Betrieb 20
Hinweise zum USB/SD/MMC-Betrieb 21
Hinweise für den Tuner-Betrieb 22
RDS (Radio Data System 23
Hinweise zum MP3/WMA-Betrieb 24
Menü-Funktion 25
Elektrische Anschlüsse 26
Einbauanleitung 27
Das Gerät ausbauen 27
Fehlerbehebung 28
Technische Daten 29
FR
Informations de sécurité 32
Commandes de la façade 33
Fonctionnement général 34
Instructions USB/SD/MMC 35
Instructions de tuner 36
RDS (Radio Data System) 37
Instructions MP3/WMA 38
Fonctionnement du menu 39
Branchements électriques 40
Guide d’installation 41
Dépose de l’appareil 41
Dépannage 42
Spécifications 43
NL
Veiligheidsinformatie 46
Onderdelen bedieningspaneel 47
Algemene bediening 48
USB/SD/MMC-instructies 49
Tuner-instructies 50
RDS (Radiodatasysteem) 51
MP3/WMA-instructies 52
Menufuncties 53
Elektrische aansluitingen 54
Installatiehandleiding 55
De autoradio verwijderen 55
Problemen oplossen 56
Specificaties 57
ES
Información de seguridad 60
Controles del panel 61
Funcionamiento general 62
Instrucciones de USB/SD/MMC 63
Instrucciones del sintonizador 64
RDS (Radio Data System) 65
Instrucciones de MP3/WMA 66
Funciones del menú 67
Conexiones eléctricas 68
Guía de instalación 69
Extracción de la unidad 69
Resolución de problemas 70
Especificaciones 71
CZ
Bezpečnostní informace 74
Ovládací prvky na panelu 75
Obecná obsluha 76
Pokyny kpoužití zařízení USB akaret SD aMMC 77
Pokyny kobsluze tuneru 78
Systém RDS (Radio Data System) 79
Pokyny kpoužití souborů MP3 aWMA 80
Funkce nabídek 81
Elektrická připojení 82
Návod kinstalaci 83
Demontáž jednotky 83
Řešení potíží 84
Technické údaje 85
2CR110GP
1820111_CR110GP_manual UK_DE_FR 1.indd 2 1/18/11 9:05 AM

3
UK
CR110GP
WELCOME
Thank you for purchasing this product.
Please read through these operating instructions so you will know how to operate your model properly.
After you have finished reading the instructions, keep this manual in a safe place for future reference.
1820111_CR110GP_manual UK_DE_FR 1.indd 3 1/18/11 9:05 AM

4
UK
CR110GP
PRECAUTIONS - CAUTION
PRECAUTIONS
• Use only in a 12-volt DC negative-ground electrical system. Disconnect the vehicle’s negative battery
terminal while mounting and connecting the unit.
• When replacing the fuse, be sure to use one with an identical amperage rating. Using a fuse with a
higher amperage rating may cause serious damage to the unit.
• Make sure that pins or other foreign objects do not get inside the unit; they may cause malfunctions,
or create safety hazards such as electrical shock or laser beam exposure.
• Please power off this unit at once and send it back to the after-sales service center or the dealer /
distributor you purchased from if one of the following symptoms is found:
(1) Water or other obstacle enters the unit;
(2) Smoking;
(3) Peculiar smell.
• If you have parked the car for a long time in hot or cold weather, wait until the temperature in the car
becomes normal before operating the unit.
CAUTION
• DO NOT open covers and do not repair yourself. Consult the dealer or an experienced technician for
help.
• Do not raise the volume level too much, as this will block outside sounds, making driving dangerous.
• Stop the car before performing any complicated operation.
To provide a clear demonstration and for easy understanding of the operation of this unit, graphic
illustration was used. However, the illustration is not necessarily of the actual unit.
1820111_CR110GP_manual UK_DE_FR 1.indd 4 1/18/11 9:05 AM

5
UK
CR110GP
PANEL CONTROLS
1. - Press to turn on the unit.
- When on, press to mute the volume.
- When on, press for more than 2 seconds to turn off the unit.
2. - Pressing SOURCE button will toggle the audio source: TUNER -> USB -> CARD-> Aux-in
3. - In tuner mode, press once or more to select band. Press for more than 2 seconds to auto search
and store stations in available memory.
- In USB/CARD mode, press to enter tuner mode.
4. - In TUNER mode Press DISP button once or more to select display content with the following se
quence: Freq->PTY->Time
- In USB/CARD mode Press DISP button once or more to select display content with the following
sequence: Time -> Folder -> File -> Title -> Artist-> Album
- Press for more than 2 seconds to enter system MENU (see “SYSTEM MENU”)
5. - Program type
6. - Alternative frequency
7. - Traffic announcement identification
8. - Remote sensor
9. - Radio tune
- Skip to next or previous track
10. - Reset hole (Press SRC button for more than 2 seconds and then press RESET button to reset the
unit.)
11. - Rotate the knob to adjust the volume level.
- Push to enter audio setup menu, then press briefly once or more to select BASS/TREBLE/BALANCE/
FADER, rotate the knob to adjust level.
- Push for more than 2 seconds to enter EQ mode. Then rotate the knob to change EQ preset: EQ OFF,
FLAT, ROCK, POP, CLASSIC.
12. - Button 1: Play/pause Press for more than 2 seconds if you want to start playback from the beginning
of the first track of your USB or SD/MMC card.
- Button 2: Intro play (10 sec.)
- Button 3: Track repeat play
- Button 4: Track random play
- Button 5: Folder down. Skip 10 tracks back files (long press)
- Button 6: Folder up. Skip 10 tracks forwards (long press)
* 1~6 Radio preset
Press to tune in a preset station. Hold for more than 2 seconds to store station.
13. - Aux-in jack
14. - USB connector
15. - SD/MMC card slot
1820111_CR110GP_manual UK_DE_FR 1.indd 5 1/18/11 9:05 AM

6
UK
CR110GP
GENERAL OPERATION
Power On/Off Button
On the panel: Press the button to turn the unit on when the vehicle ignition switch is on. Press
and hold the button to turn the unit off.
On the remote control: Press the button to turn on/off the unit.
Mode Button (SRC)
Press the SRC button to change between Radio, USB (when USB is connected), Card(when SD/MMC
card is in) or AUX play.
Adjust Volume level
On the panel: Rotate the VOL control to adjust volume level. Rotate it clockwise to increase and anti-
clockwise to decrease the volume.
On the remote control: Press ▲/▼ button to adjust volume level.
Audio Mute
On the panel: When on, press the button to mute the volume.
“MUTE” will appear on the display panel and the volume will be muted. Press the MUTE button again, or
rotate or press the VOL control to return the volume level to the setting in use before the Mute function
was activated.
On the remote control: Press MUTE button to mute the volume.
Audio Controls
On the panel: To adjust the bass, treble, balance and fader, press the VOL control, then press repeatedly
until the appropriate audio control appears on the display panel.
Within five seconds, rotate the VOL control to adjust the audio settings for the selected function.
On the remote control: Press SEL button to enter audio setting mode, then press SEL repeatedly until
the appropriate audio control appears on the display panel. Within five seconds, use VOL buttons to
adjust the audio settings for the selected function.
Auxiliary Input
To access an auxiliary device:
1. Connect the portable audio player to the AUX interface on the front panel.
2. Press the SRC button to select Aux-In mode.
Press SRC again to cancel Aux-In mode and go to the next mode.
Viewing Clock Time
Press DISP (once for Radio mode or twice for other modes), display shows the clock time for 5 seconds.
Setting The Clock Time
Press DISP, time displays. Press again for more than 2 seconds, time display blinks.
Rotate the knob to set clock, press DISP again to exit the clock setting.
1820111_CR110GP_manual UK_DE_FR 1.indd 6 1/18/11 9:05 AM

7
UK
CR110GP
USB/SD/MMC INSTRUCTIONS
1. Loading SD/MMC card Insert the SD/MMC card into the slot, with the front side upwards.
The unit will play the music automatically and the LCD will show CARD.
2. Take out SD/MMC card Push SRC button and switch to non CARD mode, slight press SD/MMC card,
which will pop out for removal.
3. Loading USB equipment Open the rubber cap, insert the USB device into the connector and the unit
will play the music in the USB device automatically, and the LCD will show USB.
4. Remove USB equipment Push the SRC button and switch to non USB mode, then remove the USB
device, close the cap.
USB/SD/MMC Notes
USB functions (flash memory type) MP3 music play
1. SD/ MMC card support
2. USB flash memory 2 in 1 (SD/MMC ) support
3. fat 16/fat 32 is possible
4. File name : 32 byte/dir name : 32 byte
5. Tag (ID3 tag ver 2.0)
- title/artist/album : 32 byte support
6. Multi card reader not support
7. USB 1.1 support, USB 2.0 support .
* Not all USB devices are compatible with the unit
1820111_CR110GP_manual UK_DE_FR 1.indd 7 1/18/11 9:05 AM

8
UK
CR110GP
TUNER INSTRUCTIONS
AM/FM Band Selector (BAND)
During radio play, press the BAND button to choose between three FM and two AM bands. The band will
appear on the display panel according to your selection.
Up/Down Tuning
Press the seek button to tune to the previous/next available station. Press and hold the
seek button to activate manual tuning. You can then use the tune/track buttons to tune
stations downward/upward step-by-step. The current frequency will be shown on the display panel.
Auto Store
On the panel: Press and hold BAND button to automatically select six strong stations and store them
in the current band. The new stations replace stations already stored in that band. Press 1-6 button to
listen to a preset station.
On the remote control: Press AMS button to search and sore 6 strong stations in the memory.
/
/
1820111_CR110GP_manual UK_DE_FR 1.indd 8 1/18/11 9:05 AM

9
UK
CR110GP
RDS ( Radio Data System )
RDS service availability varies with location. Please understand if RDS service is not available in you
area, the following service will not work. The following functions are available when receiving RDS
stations.
RDS Basics
AF( Alternative Frequency list ) When reception is poor, an RDS station broadcasting the same program is
tuned in automatically.
PS Display ( Program Service name ) The name of the station is displayed instead of the frequency.
AF Mode : Press AF button to switch AF mode on/off. AF indication on the LCD will flash until RDS
information is received.
The frequency is changed only for programs within the region.
During FM mode when AF is on, radio seek, scan and AS functions can only receive and save RDS
programs.
CT Service ( Clock Time )
When receiving an RDS station, the CT (Clock Time) service automatically adjusts the time.
NO CT is displayed in areas where CT service is not available.
Traffic Announcements
Some RDS FM stations periodically provide traffic information.
TP (Traffic Program Identification)
TA (Traffic Announcements Identification)
Radio announcements on traffic conditions TA Mode: Press TA button to turn on / off TA.
When TA mode is on the TA indicator on the LCD is displayed.
When traffic announcement is transmitted, regardless of the mode, reception will begin.
After the traffic announcement is over, it will return to previous mode and volume level.
When TA is turned on, SEEK, SCAN, AMS function can be received or saved when traffic program
identification (TP) code is received.
PTY Reception ( Program Type )
RDS FM stations provide a program type identification signal.
Example: news, rock, sport, etc.
PTY Mode: Press PTY button to turn PTY on, previous PTY type is displayed and searched if no button is
pressed for 2 seconds.
If there’s no corresponding program type. NO PTY is displayed.
PTY Type Preset
Press PTY once to enter SPEECH type or press PTY twice to enter MUSIC type. Then use buttons 1-6 to
select the desired program type.
1820111_CR110GP_manual UK_DE_FR 1.indd 9 1/18/11 9:05 AM

10
UK
CR110GP
Display Information
During playback, press the DISP button to display file information in the following order:
TIME, FOLDER, FILE, TITLE, ARTIST, ALBUM.
Skip/Seek
Press button to play previous/next track.
MP3 Overview
• MP3 is short for MPEG Audio Layer 3 and refers to an audio compression technology standard.
• The unit can read MP3 files written in the format compliant with ISO 9660. However it does not
support the MP3 data written by the method of packet write.
• The unit can not read an MP3 file that has a file extension other than “.mp3”.
• If you play a non-MP3 file that has the “.mp3” extension, you may hear some noise.
• In this manual, we refer to what are called “MP3 file” and “folder” in PC terminology as “Track” and
“Album”, respectively.
• Maximum number of directory level is 8, including the root directory. Maximum number of files and
folders per disc is 256.
• The unit may not play tracks in the order of track numbers.
• The unit plays only the audio tracks if a disc contains both audio tracks and MP3 files.
• When playing a disc of 8kbps or VBR*, the elapsed playing time in the display window will not be cor-
rect and also the intro play may not function properly.
*VBR: Variable Bit Rate.
MP3/WMA INSTRUCTIONS
/
1820111_CR110GP_manual UK_DE_FR 1.indd 10 1/18/11 9:05 AM

11
UK
CR110GP
Press and hold DISP button for more than 2 seconds to enter menu mode, then press the DISP button
repeatedly to changes the mode as follows:
LOC ON/OFF -> RADIO ST/MO -> LOUD
ON/OFF -> TA SEEK/ALARM -> MASK DPI/
ALL -> TAVOL -> RETUNE L/S
LOC ON/OFF
Rotate the knob to choose tuner sensitivity local or distant.
RADIO ST/MO mode
Rotate the knob to choose FM stereo or mono.
LOUD ON/OFF
When listening to music at low volumes, this feature will boost the bass and treble ranges to compen-
sate for the characteristics of human hearing.
TA SEEK/ALARM
If the TA (Traffic Announcements) is turned on and there is no traffic program identification code
received, no TA/TP will display and either TA ALARM or TA SEEK will be activated.
TA ALARM : Alarm is turned on.
TA SEEK: TA SEEK is automatically activated.
MASK DPI/ALL
In some cases, the AF function may be influenced by some interference, examples are signals with
strong field but without the RDS data. For this reason, the unit has two options to avoid the above
interference.
MASK DPI mode : Only AF which has different program identification is masked.
MASK ALL mode : The AF which has different program identification and NO RDS signal with high field
strength is masked.
TAVOL
Rotate the knob to choose TA volume.
RETUNE L/S
RETUNE-S or RETUNE-L is time length selection of TA SEEK retune interval.
RETUNE-S: short, TA SEEK retune interval is 45 seconds.
RETUNE-L: long, TA SEEK retune interval is 180 seconds.
Remark: RETUNE mode functions for TA during TA SEEK mode only
MENU FUNCTION
1820111_CR110GP_manual UK_DE_FR 1.indd 11 1/18/11 9:05 AM

12
UK
CR110GP
Wiring Diagram
Location Function Location Function
1 GND 9 REAR LEFT(-)
2 ACC 10 REAR LEFT(+)
3 11 FRONT LEFT(-)
4 AUTO ANNA 12 FRONT LEFT(+)
5 B+ 13 FRONT RIGHT(-)
6 14 FRONT RIGHT(+)
7 15 REAR RIGHT(-)
8 16 REAR RIGHT(+)
ELECTRICAL CONNECTIONS
Rear line out-R(Red)
Rear line out-L(White)
SWC(Black)
Antenna
Fuse 15A
1820111_CR110GP_manual UK_DE_FR 1.indd 12 1/18/11 9:05 AM

13
UK
CR110GP
Installation Procedures
First connect the electrical connections correctly.
Installation Opening
This unit can be installed in any dashboard having an opening as shown below.
The dashboard should be 4.75mm - 5.56mm thick in order to be able to support the unit.
Installation
1. Inset mounting collar into the dashboard, and bend the mounting tabs out with a screwdriver.
Make sure that lock lever is flush with the mounting collar (not projecting outward).
2. Secure the rear of the unit.
Slide the unit into the dashboard.
3. Insert trim plate.
REMOVING THE UNIT
Disconnect the power before removing the unit.
1. Remove the trim plate.
2. Insert both U-keys into the holes
on the front of the unit until they lock.
3. Pull out the unit.
4. Disconnect the connector between the unit and vehicle.
INSTALLATION GUIDE / REMOVE THE UNIT
183mm
52mm
1
2
3
1820111_CR110GP_manual UK_DE_FR 1.indd 13 1/18/11 9:05 AM

14
UK
CR110GP
The following checklist can help you solve some problems which you may encounter when using the
unit. Before consulting it, check the connections and follow the instructions in the user manual. Do not
use the unit in abnormal condition, for example without sound, or with smoke or foul smell as this can
cause fire or electric shock, immediately stop using it and call the store where you purchased it.
TROUBLESHOOTING
Problem Possible cause Solution
General
The unit will not switch on. Car ignition is not on. Turn your car key in the ignition.
Cable is not properly connected. Check cable connection.
Fuse is burnt. Replace fuse with a new fuse of
the same capacity.
No sound Volume is set at minimum or the
mute function is on.
Check the volume or switch the
mute function off.
The unit or screen does not
work normally.
The unit system is unstable. Press the RESET button.
TUNER mode
Unable to receive stations. The antenna is not connected
properly.
Connect the antenna properly.
Poor quality reception of radio
station.
The antenna is not fully ex-
tended or it is broken.
Fully extend the antenna and if
broken, replace it with a new one.
Preset stations are lost. The battery cable is not properly
connected.
Connect the permanent live on
the unit to the permanent live on
the vehicle.
USB/SD/MMC mode
Unable to insert USB device or
SD/MMC card.
The memory card or USB device
has been inserted the wrong
way round.
Insert it the other way around.
The USB device or SD/MMC card
cannot be read.
NTFS format is not supported. Check that the file system is
in FAT or FAT32 format. Due to
different formats, some models of
storage devices or MP3 players
may not be read.
1820111_CR110GP_manual UK_DE_FR 1.indd 14 1/18/11 9:05 AM

15
UK
CR110GP
General
Power supply: 12V DC(11V-16V) Test voltage 14.4V, negative ground
Maximum power output: 40Wx4 channels
Continuous power output: 20Wx4 channels (4 ,10% T.H.D.)
Suitable speaker impedance: 4-8 ohm
Fuse: 15A
Dimensions(WxHxD): 182x53x162mm
Weight: 1.0kg
Aux-in ≥300mV
FM Stereo Radio
Frequency range: 87.5-108.0 MHz
Usable sensitivity: 8 dBμ
Quieting sensitivity(S/N=50dB): 12 dBμ
Frequency response: 30Hz-15kHz
Stereo separation: 30dB(1kHz)
Image response ratio: 50dB
IF response ratio: 70dB
Signal/noise ratio: 55dB
MW(AM) Radio
Frequency range: 522-1620 KHz
Components
Mounting collar 1
Machine screws M5x6mm 4
Mounting bolt(50) 1
Trim plate 1
U-keys 2
Operating instructions 1
SWC cable 1
Note: Specifications and the design are subject to change without notice due to improvements in technology.
SPECIFICATION
1820111_CR110GP_manual UK_DE_FR 1.indd 15 1/18/11 9:05 AM

16
UK
CR110GP
1820111_CR110GP_manual UK_DE_FR 1.indd 16 1/18/11 9:05 AM

17
CR110GP
DE
WILLKOMMEN
Danke, dass Sie dieses Produkt gekauft haben.
Bitte lesen Sie diese Bedienungsanleitung gründlich, damit Sie wissen, wie Ihr Gerätemodell richtig
bedient wird. Bewahren Sie dieses Handbuch nach dem Lesen zum Nachschlagen an einem sicheren
Ort auf.
1820111_CR110GP_manual UK_DE_FR 1.indd 17 1/18/11 9:05 AM

18 CR110GP
DE
SICHERHEITSHINWEISE - ACHTUNG
SICHERHEITSHINWEISE
• Nur in einem 12-Volt-Gleichstromsystem mit negativer Masse benutzen. Bei der Montage und dem
Anschließen des Geräts muss der Batterie- Minuspol des Fahrzeugs abgeklemmt sein.
• Achten Sie beim Ersetzen einer Sicherung darauf, dass eine Ersatzsicherung mit der gleichen Nenn-
stromstärke verwendet wird. Wird eine Sicherung mit höherer Stromstärke verwendet, kann das Gerät
erheblich beschädigt werden.
• Stellen Sie sicher, dass keine Stifte oder andere Fremdkörper in das Innere des Geräts gelangen;
derartige Gegenstände können Fehlfunktionen verursachen, und es besteht die Gefahr von Strom-
schlägen oder Kontakt mit Laserstrahlen.
• Schalten Sie das Gerät sofort aus und senden Sie es dem Kunden-Servicezentrum oder dem Händler/
Vertriebspartner zu, bei dem Sie es erworben haben, wenn eine der nachfolgend beschriebenen
Situationen eintritt:
(1) Wasser oder sonstige Fremdkörper bzw. Substanzen gelangen in das Geräteinnere;
(2) Rauchentwicklung;
(3) Entwicklung eines merkwürdigen Geruchs.
• Wenn Sie das Fahrzeug einen längeren Zeitraum bei heißem oder kaltem Wetter geparkt haben,
warten Sie vor der Inbetriebnahme des Geräts, bis die Temperatur im Fahrzeug ein normales Niveau
erreicht hat.
ACHTUNG
• UNTERLASSEN Sie es, die Geräteabdeckung zu öffnen und unternehmen Sie keinen eigenen Repara-
turversuch. Ziehen Sie den Händler oder einen erfahrenen Techniker zu Rat.
• Betreiben Sie das Gerät nicht bei zu großer Lautstärke, da so Geräusche von außen nicht mehr wahr-
genommen werden und das Fahren gefährlich wird.
• Halten Sie an, bevor Sie komplizierte Bedienvorgänge durchführen.
Die Abbildung dient zur Veranschaulichung und besseren Verständlichkeit des Gerätebetriebs.
Die Abbildung gibt allerdings nicht notwendigerweise genau das Gerät wieder, das Sie in Händen halten.
1820111_CR110GP_manual UK_DE_FR 1.indd 18 1/18/11 9:05 AM

19
CR110GP
DE
ELEMENTE DES BEDIENTEILS
1. - Den Bedienknopf drücken, um das Gerät einzuschalten.
- Ist das Gerät bereits an, wird durch einfaches Drücken des Bedienknopfs die Stummschaltung aktiviert.
- Wenn das Gerät eingeschaltet ist, wird es durch gedrückt Halten des Bedienknopfs über 2 Sekunden
wieder abgeschaltet.
2. - Durch Drücken der SOURCE-Taste erfolgt die Umschaltung von einer Audio-Quelle zur nächsten: TUNER
-> USB -> CARD-> Aux-In
3. - Im Tuner-Modus den Bedienknopf einmal oder mehrfach drücken, um das Band auszuwählen. Um den
Sendersuchlauf (auto search) zu aktivieren, den Knopf länger als 2 Sekunden drücken, dann die gewünsch-
ten Radiosender im verfügbaren Speicher abspeichern.
- Im USB/CARD-Modus den Knopf drücken, um in den Tuner-Modus zu wechseln.
4. - Im TUNER-Modus die DISP-Taste einmal oder mehrfach drücken, um Anzeigeinhalte in der folgenden
Reihen folge auszuwählen: Freq->PTY->Time
- Im USB/CARD-Modus die DISP-Taste einmal oder mehrfach drücken, um Anzeigeinhalte in der folgenden
Reihenfolge auszuwählen: Time -> Folder -> File -> Title -> Artist-> Album
- Um in das System-Menü MENU zu gelangen, den Bedienknopf länger als 2 Sekunden gedrückt halten
(siehe „SYSTEM MENU”)
5. - Programmtyp
6. - Alternative Frequenz
7. - Verkehrsdurchsagen-Kennung (TA identification)
8. - Fernfühler
9. - Sendereinstellung
- Zum nächsten oder vorherigen Titel wechseln
10. - Reset-Taste (Den SRC-Knopf länger als 2 Sekunden drücken und dann die RESET-Taste drücken, um das
Gerät in den Auslieferungszustand zurückzusetzen.)
11. - Drehen Sie zum Einstellen der Lautstärke den Drehknopf.
- Drücken Sie zum Öffnen des Menüs Audioeinstellungen den Bedienknopf. Drücken Sie dann zum Wählen
zwischen BASS/TREBLE/BALANCE/FADER das Bedienelement VOL/MENU bis die gewünschte Audiofunktion
ausgewählt ist und drehen Sie zum Einstellen des jeweililgen Pegels den Drehknopf.
- Um in den EQ-Modus zu gelangen, den Drehknopf länger als 2 Sekunden gedrückt halten. Dann den
Drehknopf drehen, um die EQ-Voreinstellung zu verändern: EQ OFF, FLAT, ROCK, POP, CLASSIC.
12. - Taste 1: Wiedergabe/Pause, Länger als 2 Sekunden gedrückt halten, wenn die Wiedergabe am Beginn des
ersten auf Ihrem USB-Speicher oder Ihrer SD/MMC-Karte gespeicherten Titels gestartet werden soll.
- Taste 2: Intro-Wiedergabe (10 Sek.)
- Taste 3: Titelwiederholung
- Taste 4: Zufallstitel-Wiedergabe
- Taste 5: Verzeichnis nach unten. 10 Titel zurückblättern (lange gedrückt halten)
- Taste 6: Verzeichnis nach oben. 10 Titel vorblättern (lange gedrückt halten)
* Voreinstellung der Radiosender 1 bis 6
Den Bedienknopf drücken, um einen abgespeicherten Sender aufzurufen. Den Bedienknopf länger als 2
Sekunden gedrückt halten, um den eingestellten Sender abzuspeichern.
13. - Aux-In-Buchse
14. - USB-Anschluss
15. - SD/MMC-Kartenschlitz
1820111_CR110GP_manual UK_DE_FR 1.indd 19 1/18/11 9:05 AM

20 CR110GP
DE
ALLGEMEINER BETRIEB
Ein/Aus-Taste
Auf dem Bedienteil: Drücken Sie zum Einschalten des Geräts bei eingeschalteter Zündung des Fahrzeugs die
-Taste. Halten Sie die Taste zum Ausschalten des Geräts gedrückt.
Auf der Fernbedienung: Drücken Sie die Taste, um das Gerät ein-/auszuschalten.
Mode-Taste (SRC)
Die SRC-Taste drücken, um zwischen Radioempfang, USB-Betrieb (bei angeschlossenem USB-Speicher),
Karten-Betrieb (bei eingesteckter SD/MMC-Karte) oder AUX-Betrieb umzuschalten.
Lautstärkeeinstellung
Auf dem Bedienteil: Den VOL-Knopf drehen, um die Lautstärke einzustellen. Drehen Sie den Knopf zum
Lauterstellen nach rechts und zum Leiserstellen nach links.
Auf der Fernbedienung: Drücken Sie ▲/▼ zur Lautstärkeeinstellung.
Stummschaltung
Auf dem Bedienteil: Ist das Gerät eingeschaltet, den Knopf drücken, um die Stummschaltung zu
aktivieren.
Auf dem Display wird "MUTE" angezeigt, und die Lautstärke wird stummgeschaltet. Drücken Sie die Taste
MUTE erneut oder betätigen Sie den Drehknopf VOL/MENU, um die Lautstärke auf den Pegel einzustellen, der
vor Aktivierung der Stummschaltung eingestellt war.
Auf der Fernbedienung: Zur Aktivierung der Stummschaltung die MUTE-Taste drücken.
Audio-Einstellungen
Auf dem Bedienteil: Zur Einstellung von Bass, Höhen, Balance und Fader den VOL-Drehknopf so oft drücken,
bis die gewünschte Kategorie der Audio-Einstellungen auf der Anzeige erscheint.
Den VOL-Knopf innerhalb von fünf Sekunden drehen, um die Audio-Einstellungen für die gewählte Funktion
vorzunehmen.
Auf der Fernbedienung: Um in den Audioeinstellungen-Modus zu gelangen, zunächst die SEL-Taste so oft
drücken, bis die passende Audio-Einstellungsfunktion auf der Anzeige erscheint. Den VOL-Knopf innerhalb von
fünf Sekunden drehen, um die Audio-Einstellungen für die gewählte Funktion vorzunehmen.
Aux-Eingang
Um ein am Aux-Eingang angeschlossenes Gerät anzusteuern:
1. Das tragbare Abspielgerät an die in das Bedienteil integrierte AUX-Schnittstelle anschließen.
2. Die SRC-Taste drücken, um den Modus Aux-In auszuwählen.
Um den Modus Aux-In zu verlassen, die SRC-Taste nochmals drücken, um in den nächsten Modus umzuschal-
ten.
Uhrzeit anzeigen
DISP-Taste drücken (aus dem Radio-Modus einmal, zweimal aus anderen Modi), auf der Anzeige erscheint für
5 Sekunden die Uhrzeit.
Einstellen der Uhrzeit
DISP-Taste drücken, es erscheint die Uhrzeit. Wird die Taste nochmals länger als 2 Sekunden gedrückt,
beginnt die Zeitanzeige zu blinken.
Um die Uhrzeit einzustellen, den Drehknopf drehen, zum Verlassen der Uhrzeiteinstellung die DISP-Taste
erneut drücken.
1820111_CR110GP_manual UK_DE_FR 1.indd 20 1/18/11 9:05 AM
Table of contents
Languages: