7
❐Stellen Sie das Gerät an einem Ort auf, von dem es nicht herunterfallen oder am Kabel
heruntergezogen werden kann! Kinder und Tiere sollten beaufsichtigt werden, um sicher-
zustellen, dass sie nicht mit dem Gerät spielen!
❐Schieben oder ziehen Sie das Gerät nicht über den Untergrund, auf dem es steht, um einen
Abrieb der Füßchen zu vermeiden.
❐Verwenden Sie zur Entnahme des Gebäcks keine Küchenutensilien aus Metall oder sonstige
scharfkantige Gegenstände, um die antihaftbeschichteten Backflächen nicht zu beschädigen!
❐Achten Sie darauf, dass Sie das Gerät nicht überfüllen! Überschüssiger Teig kann an den
Seiten des Gerätes auslaufen. Das Gerät sollte sich außerdem immer ohne große Kraftauf-
wendung schließen lassen. Versuchen Sie nicht, das Gerät mit Gewalt zu schließen.
Die Backflächen haben eine Antihaftbeschichtung, für ein optimales Ergebnis empfeh-
len wir Ihnen jedoch, sie vor dem ersten Backvorgang leicht mit Speiseöl oder -fett ein-
zufetten. Benutzen Sie kein Kochspray, da es die Antihaftbeschichtung angreifen kann!
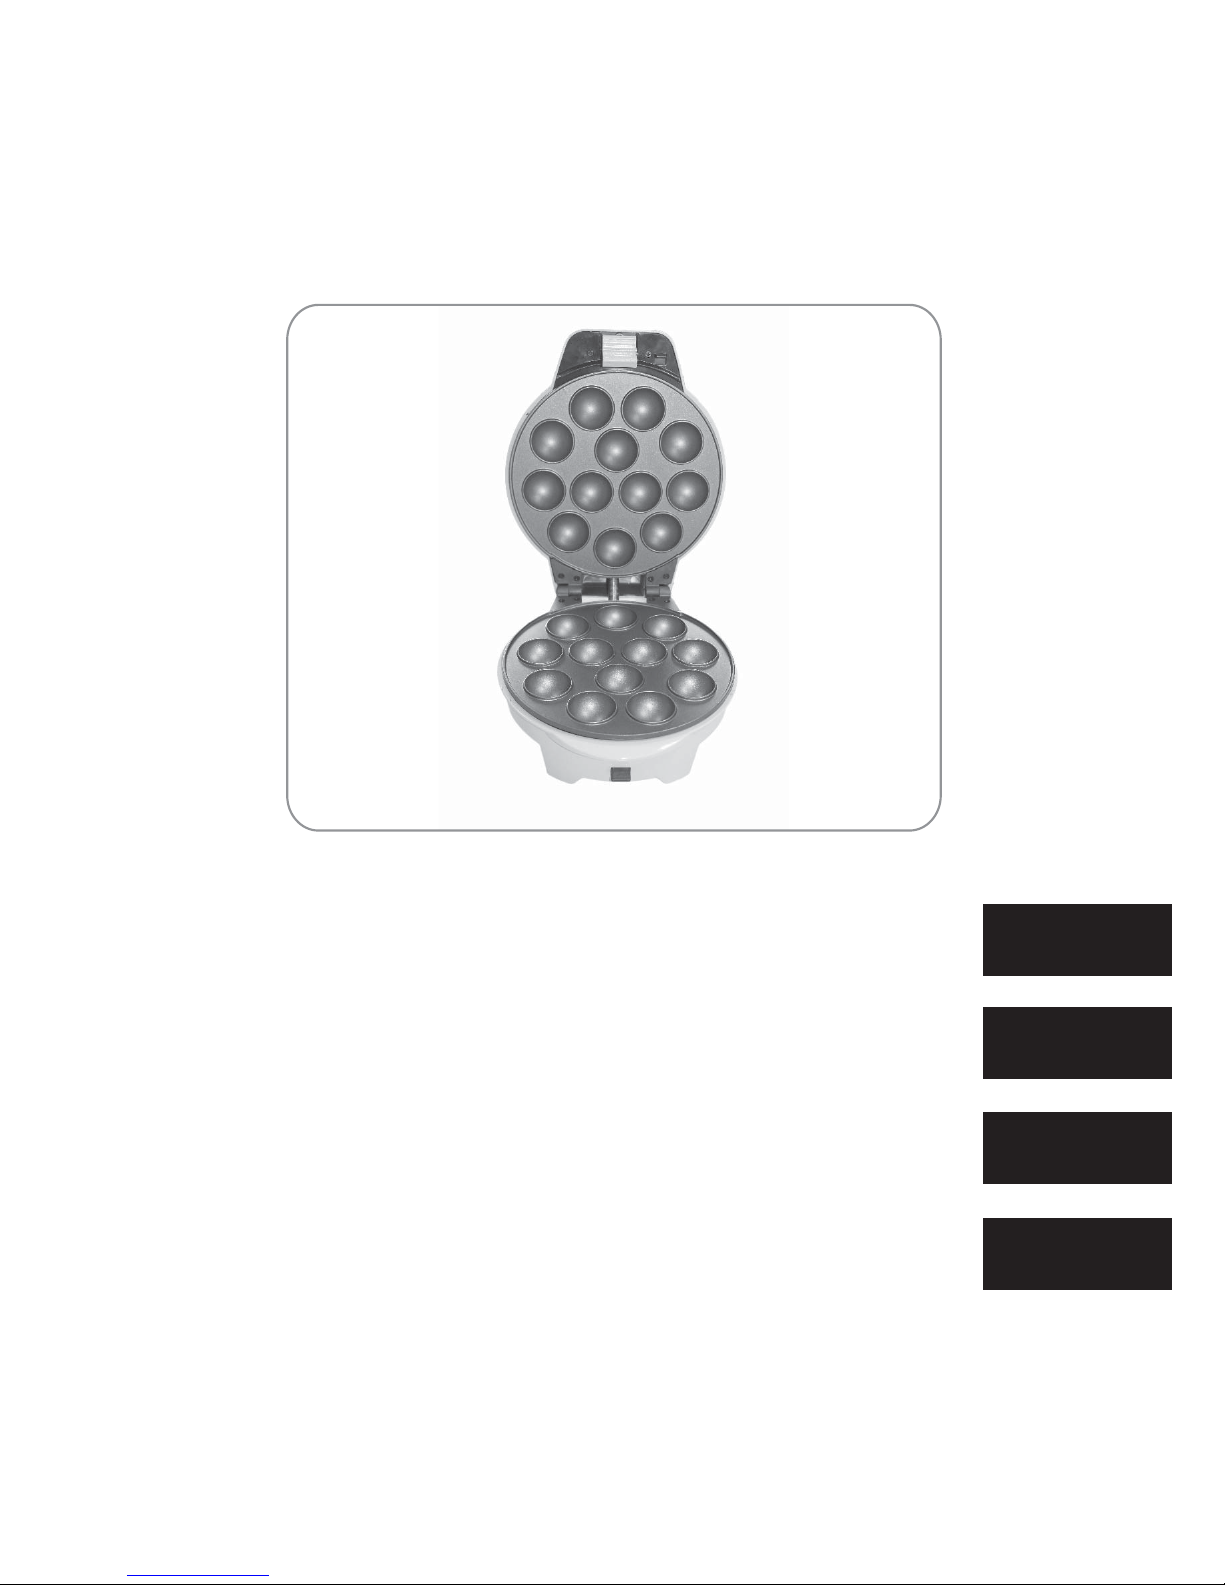
Mit dem Multibäcker backen...
1. Bereiten Sie den Teig zu. Einen Rezeptvorschlag finden Sie im Kapitel „Teiggrundrezept“.
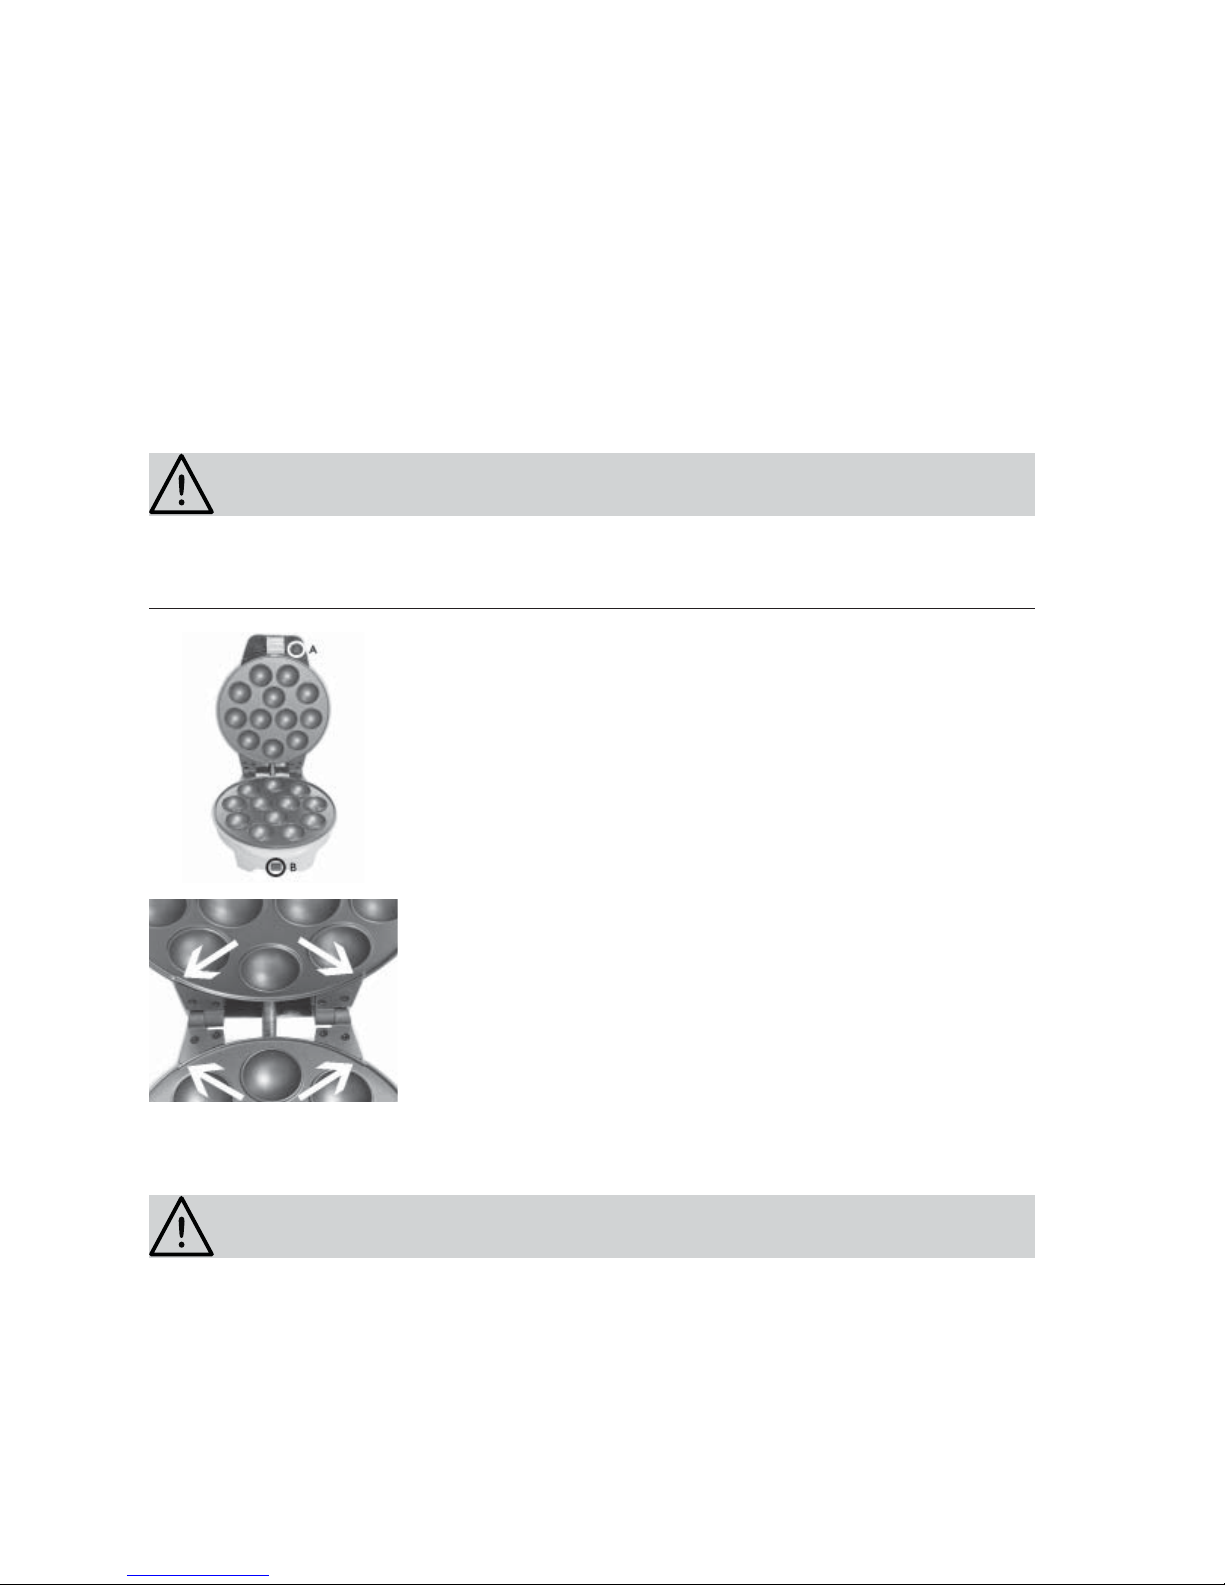
2. Setzen Sie ein Plattenpaar nach Wahl in das Gerät ein (siehe Kapitel „Backflächen wech-
seln/einsetzen“).
3. Stellen Sie das Gerät auf eine trockene und hitzebeständige ebene Fläche in ausreichendem
Abstand zu brennbaren Gegenständen auf. Legen Sie ggf. eine hitzebeständige Unterlage
unter das Gerät.
4. Öffnen Sie den Deckel und fetten Sie ggf. die Backflächen leicht ein, bevor Sie den ersten
Backvorgang starten.
5. Heizen Sie das Gerät vor: Schließen Sie es an einer ordnungsgemäß installierten Steckdose
an. Beide Kontrollleuchten leuchten auf, sobald das Gerät an eine Steckdose angeschlossen
wurde. Das Gerät beginnt unverzüglich mit dem Heizvorgang. Halten Sie das Gerät wäh-
rend des Aufheizvorganges geschlossen.
6. Das Gerät hat seine Betriebstemperatur nach ca. 3 –4 Minuten erreicht, wenn die Kont-
rollleuchte II erlischt.
7. Klappen Sie den Deckel auf, wenn das Gerät Betriebstemperatur erreicht hat.
8. Geben Sie den vorbereiteten Teig in die Formen der unteren Backfläche. Die Formen der
unteren Backfläche sollten gut gefüllt sein. Wieviel Teig genau in die Backformen gefüllt
werden muss, ist von der Beschaffenheit des Teiges abhängig und lässt sich am besten
durch einen Probe-Backdurchgang bestimmen. Lassen Sie sich nicht entmutigen, wenn der
erste Backdurchgang nicht perfekt gelingt!
9. Schließen Sie vorsichtig den Deckel, und lassen Sie das Gebäck ca. 6 – 8 Minuten backen.
Achten Sie darauf, dass der Verschlussriegel des Deckels eingerastet ist.
10. Öffnen Sie den Deckel, um zu überprüfen, ob das Gebäck bereits Ihren Wünschen ent-
sprechen oder noch weiter gebacken werden müssen.
11. Wenn das Gebäck fertig sind, entnehmen Sie diese vorsichtig mit Hilfe von Küchenutensi-
lien aus Holz oder Kunststoff und legen Sie sie z.B. auf ein Rost zum Auskühlen.
12. Befüllen Sie das Gerät erneut, um weiteres Gebäck zu backen.
13. Wenn Sie keine weiteres Gebäck backen möchten, ziehen Sie den Stecker aus der Steck-
dose und lassen Sie das Gerät geöffnet vollständig abkühlen, bevor Sie es reinigen und
verstauen (siehe Kapitel „Reinigung und Aufbewahrung“).