manuals.online logo
Brands
  1. Home
  2. •
  3. Brands
  4. •
  5. GoVideo
  6. •
  7. DVD VCR Combo
  8. •
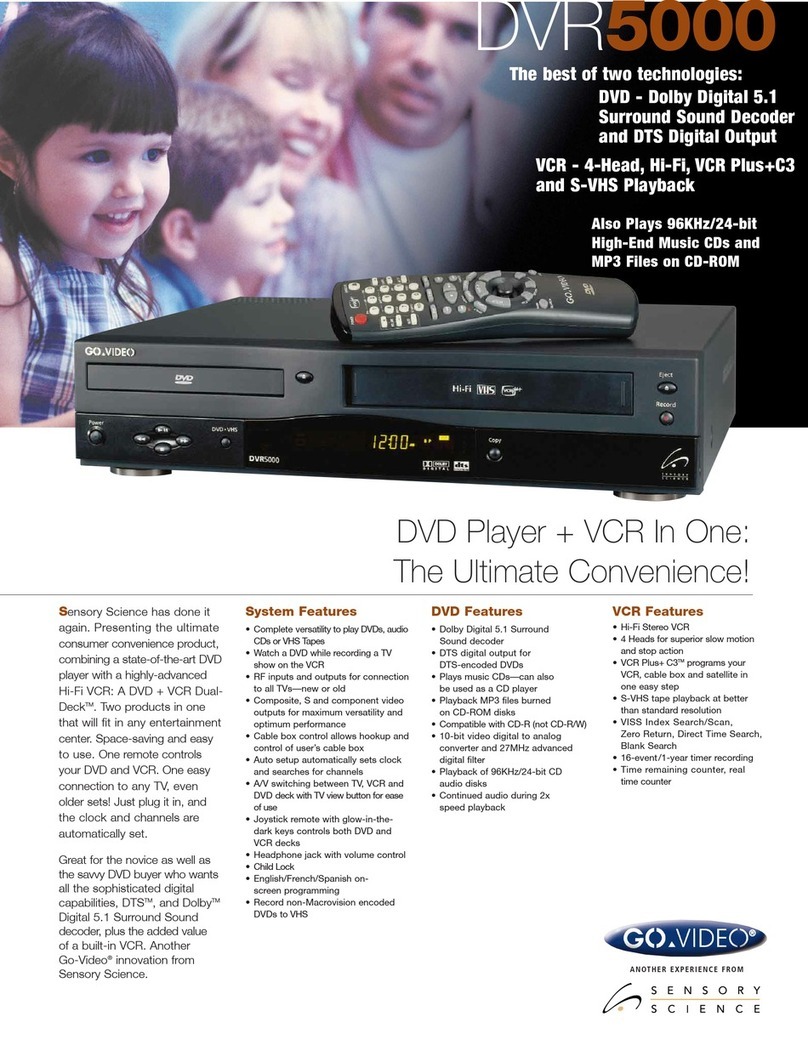
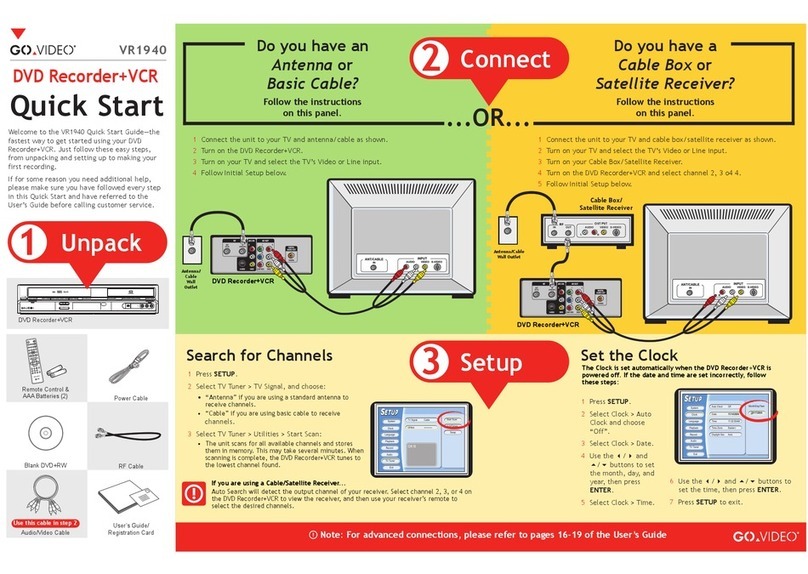
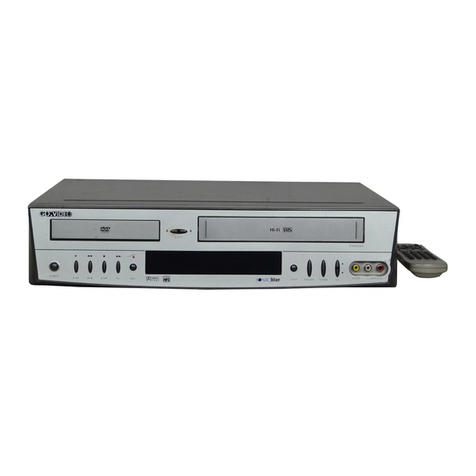
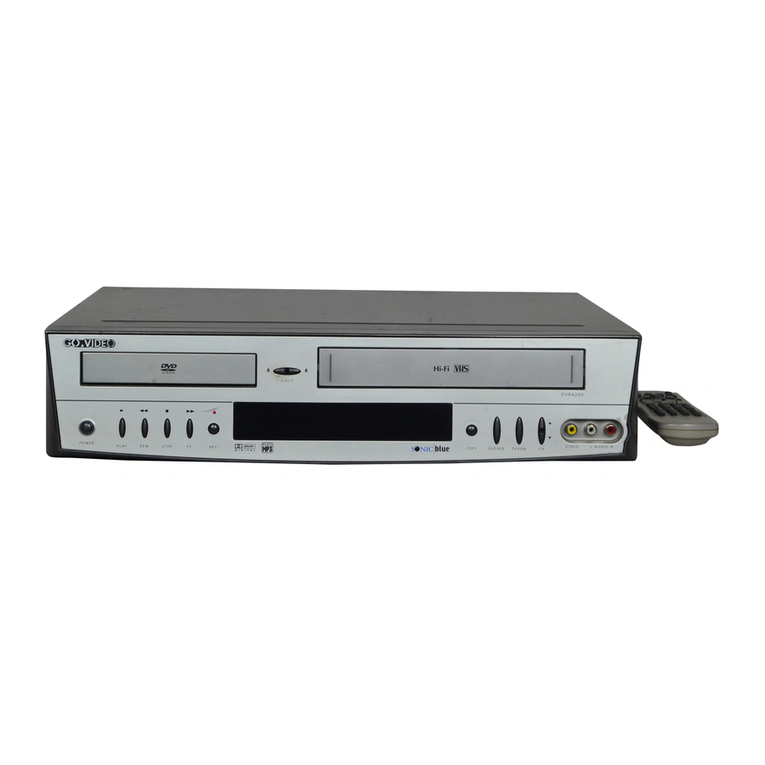
  9. GoVideo DVR5000 User manual

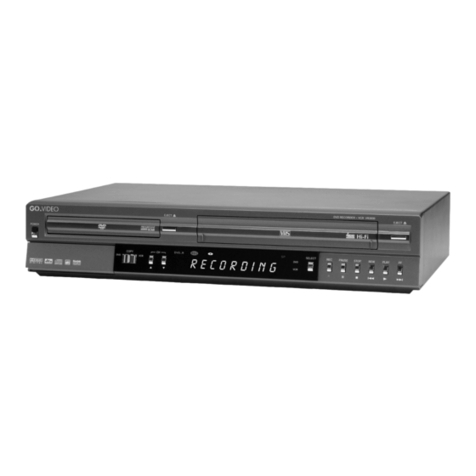
GoVideo DVR5000 User manual

Quick Reference Guide
BASIC DVD PLAYBACK
1
Open Disc Drawer
Press the Open/Close button to power on the DVD-
VCR and open the disc drawer.
2
Insert Disc
Place the disc in the drawer
with the label side facing up. If
the disc has two sides, orient
the disc with the desired label
facing up.
3
Close Disc Drawer
Press the Open/Close button again to close the disc
drawer.
4
Play the DVD
Press the Play/Pause button.
• Many discs will begin playback automatically
when the disc drawer closes.
• If the DVD has a disc menu, or more than one
title, the disc menu may appear. If so, push the
joystick up, down, left, and right to highlight disc
options, then press Enter to select.
BASIC VHS PLAYBACK
1
Insert VHS Tape
Insert a standard VHS videotape into the VHS Deck.
• Power will turn on
automatically when you
insert a videotape.
2
Play Tape
Press the Play/Pause button. If the tape is missing the
Record Safety Tab and Auto Play is turned on, the
tape will begin to play automatically; see the User’s
Guide for details.
3
Stop Playback
Press the Stop button.
4
Eject Tape
Press the Open/Close button on the remote control
or the Eject button on the front panel.
REMOTE OVERVIEW
Sensory Science Corporation
7835 East McClain Drive
Scottsdale, Arizona 85260
Tel. 480.998.3400 Fax 480.998.8312
www.sensoryscience.com www.govideo.com
©2000 Sensory Science Corporation. All rights reserved.
Guía de referencia rápida
REPRODUCCIÓN DVD
1
Abra el cajón de disco
Presione Open/Close para encender el DVD-VCR y
abrir el cajón de disco.
2
Inserte el disco
Inserte el disco en el cajón con
la etiqueta hacia arriba. Si el
disco tiene dos lados, oriente el
disco con la etiqueta deseado
hacia arriba.
3
Cierre el cajón de disco
Presione Open/Close de nuevo para cerrar el cajón
de disco.
4
Inicie la reproducción DVD
Presione Play/Pause.
• Muchos discos comenzarán a reproducir
automáticamente cuando se cierre el cajón de
disco.
• Si el DVD tiene un menú de disco, o más de un
título, el menú de disco puede aparecer. Si así es,
empuje la palanca de control hacia arriba, abajo,
izquierda o derecha para destacar opciones en el
menú. Entonces, presione Enter para seleccionar.
REPRODUCCIÓN VHS
1
Inserte la cinta
Inserte una cinta estándar en la lectura VHS.
• El DVD-VCR se encenderá automáticamente
cuando se inserta una cinta.
2
Inicie la reproducción
Presione Play/Pause. Si la cinta no tiene la pestaña
para seguridad de grabación y la función “Auto Play”
está en marcha, la cinta comenzará a reproducir
automáticamente; refiérase a la Guía del usuario.
3
Pare la reproducción
Presione Stop.
4
Expulse la cinta
Presione Open/Close en el control remoto o presione
Eject en el panel frontal.
CONTROL REMOTO
Sensory Science Corporation
7835 East McClain Drive
Scottsdale, Arizona 85260
Tel. 480.998.3400 Fax 480.998.8312
www.sensoryscience.com www.govideo.com
©2000 Sensory Science Corporation. Todos los derechos reservados.
DESEMPAQUE
1
Desempaque el DVD-VCR
Asegúrase de tener los artículos siguientes:
• DVD-VCR
• Guía de referencia/Lea primero
• Tarjeta de garantía y registro
• Guía del usuario
• Ratón de caja de cable
• 1 cable RF coaxial
• Control remoto
• 2 baterías AA
2
Coloque las baterías en el control remoto
• Quite la tapa del compartimento para baterías y coloque las 2 baterías tipo AA, cerciorándose que las
polaridades (+/–) queden en la posición correcta. Seguidamente vuelva a poner la tapa.
CONEXIONES
1
Conecte la antena al DVD-VCR
Conecte el cable de su antena interior/exterior o cable basico al enchufe “IN (FROM ANT.)” en el parte posterior
del aparato.
2
Conecte a la televisión
Conecte el DVD-VCR al televisor por medio
del enchufe “OUT (TO TV)” con el cable
coaxial, o por las entradas “LINE OUT” con
cables tipo RCA. Se recomienda la conexión
de línea si su televisor tiene entradas líneas.
3
Seleccione el canal de salida
Si Ud. seleccionó la conexión “OUT (TO TV”,
cambie el canal a 3 o 4, cualquier de los dos
no se utiliza por una cadena local.
4
Enciende el DVD-VCR y TV
Enchufe y enciende el DVD-VCR y la televisión.
5
Seleccione el canal 3, 4 o línea
Si Ud. utilizó la conexión “OUT (TO TV)”, seleccione el canal 3 o 4 (asegúrandose de utilizar el mismo canal
seleccionado en el paso 3). Si Ud. utilizó la conexión “LINE OUT”, seleccione la entrada línea en su televisor.
• Se aparacerá el menú “Language/Langue/Idioma”. Continúe abajo con Ajustes Iniciales.
AJUSTES INICIALES
1
Ajuste el idioma
Presione 1, 2, o 3 para seleccionar Inglés, Francés o Español.
2
Recordatorio antena/cable
Muestra un mensaje en la pantalla para recordarle a conectar una antena o cable, si
Ud. todavía no lo hizo. Presione Enter para comenzar la configuración automática.
3
Configuración automática
El DVD-VCR detecta automáticamente si Ud. tiene una antena o cable, y entonces explora y memoriza todos los
canales activos. También fija la hora interna del DVD-VCR.
• Este proceso puede demorar unos minutos. Cuando termine, el DVD-VCR seleccionará el canal encontrado más
bajo.
QRG-DVR5000
Importante: Lea primero
ESPAÑOL ESPAÑOL ENGLISH
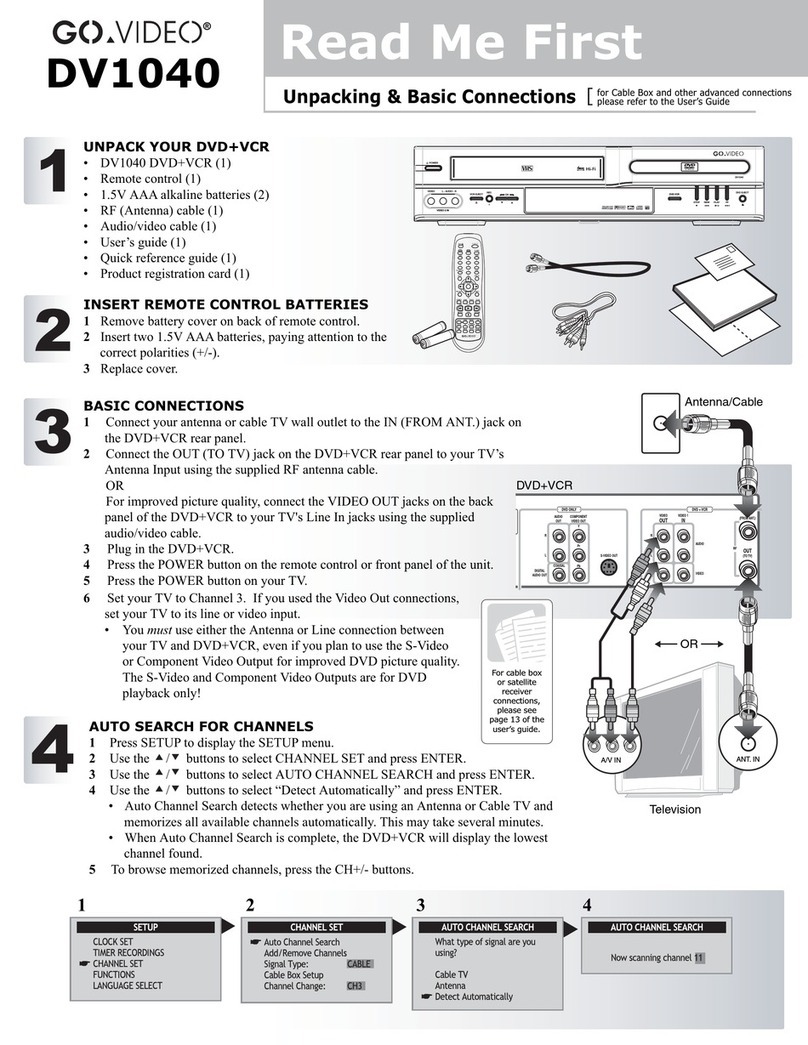
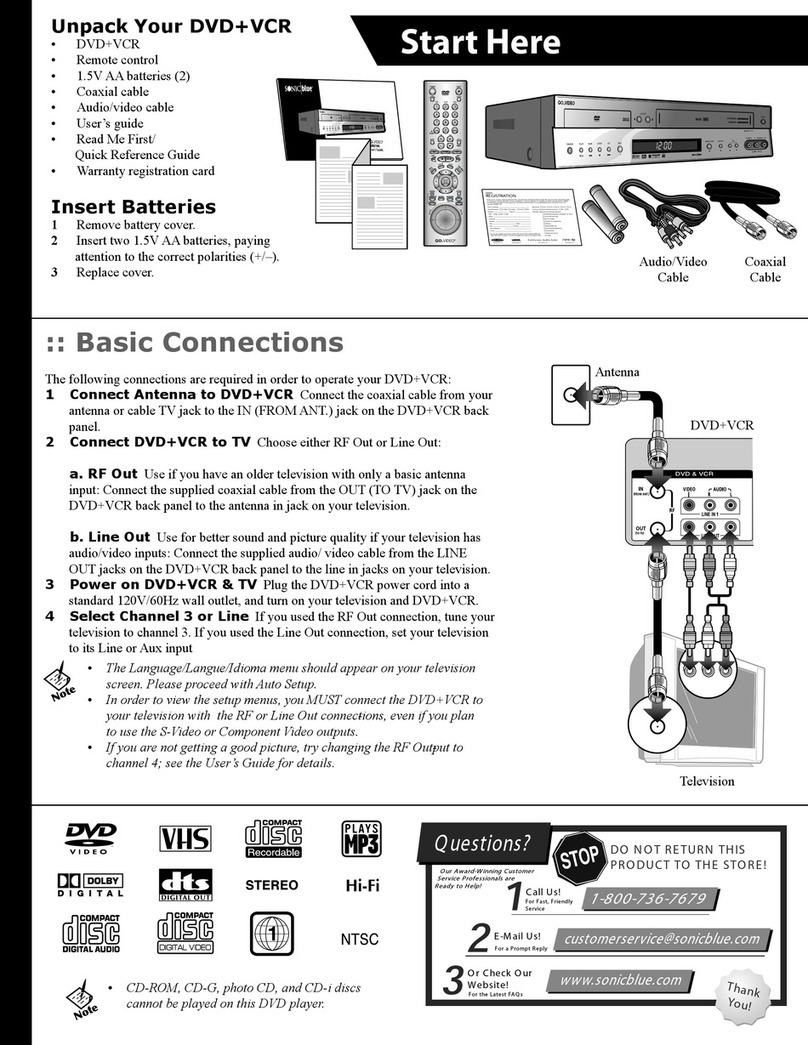
UNPACK
1
Unpack your DVD-VCR
Please be sure the following items are included in your DVD-VCR box:
• DVD-VCR (1)
• Read Me First/Quick Reference Guide (1)
• Warranty/Registration Card (1)
• User’s Guide (1)
• Cable Mouse for Cable Box Control (1)
• RF (Radio Frequency) Antenna Cable (1)
• Remote Control (1)
• 1.5V “AA” Batteries (2)
2
Insert Remote Control Batteries
• Remove the rear battery cover and insert two 1.5V “AA” batteries, paying attention to the correct polarities (+/–).
• Replace the cover.
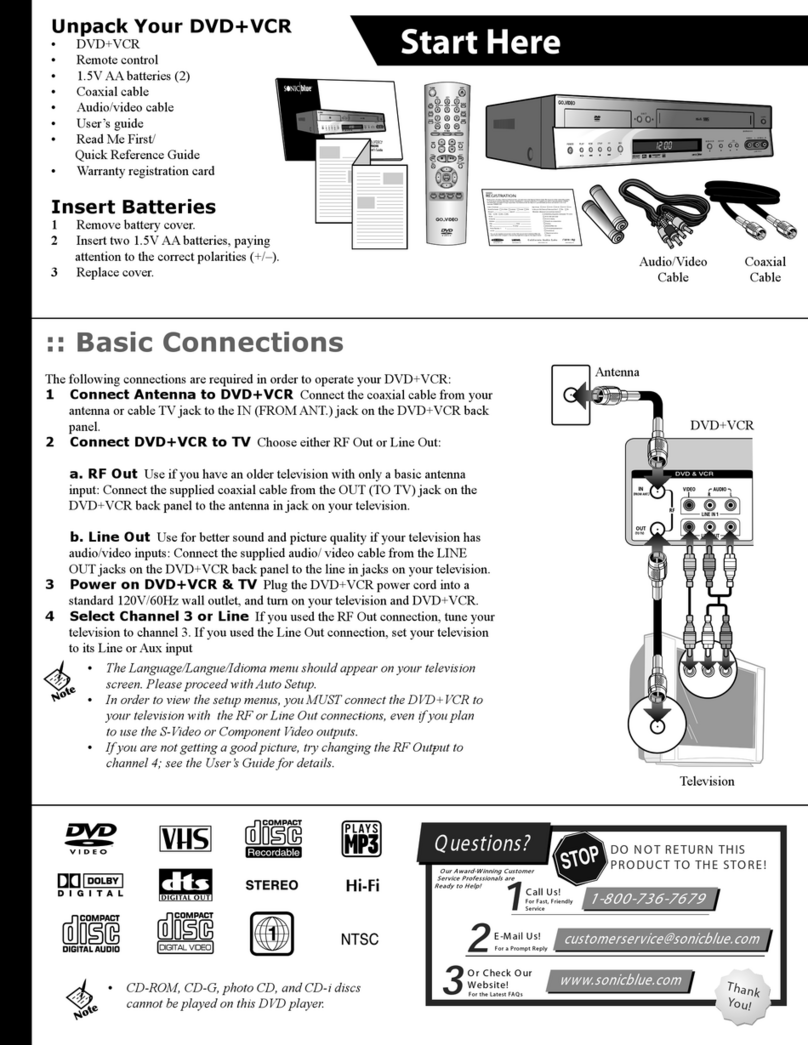
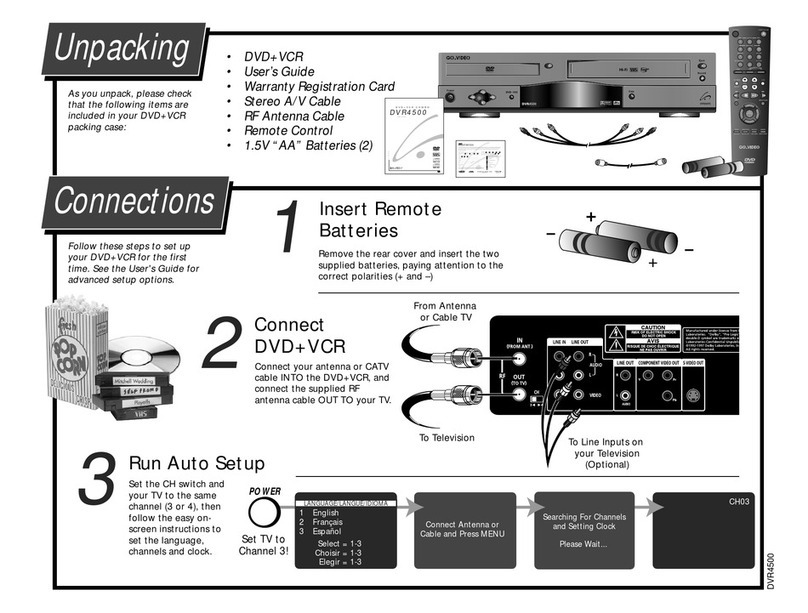
BASIC CONNECTIONS
1
Hook up Antenna or CATV
Connect your indoor/outdoor antenna or CATV cable to the IN (FROM ANT.) jack on the back panel.
2
Connect to your TV
Connect your DVD-VCR to your TV using either the OUT (TO TV) jack, or the LINE OUT jacks. If your TV has line
inputs, you can enjoy improved audio/video
quality using the LINE OUT connection.
3
Set the Channel Switch
If you used the OUT (TO TV) connection,
set the Channel Switch to 3 or 4, whichever
channel is not active in your area.
4
Turn on the DVD-VCR and TV
Plug in the DVD-VCR and television, and
turn on both.
5
Select Channel 3, 4, or Line
If you used the OUT (TO TV) connection,
select Channel 3 or 4 (be sure to use the same channel you selected in Step 3). If you used the LINE OUT connec-
tion, set your television to its line input.
• The “Language/Langue/Idioma” menu will appear on the screen. Please continue with Auto Setup below.
AUTO SETUP
1
Set the On-Screen Menu Language
Press 1, 2, or 3 to select English, French, or Spanish.
QRG-DVR5000
Read Me First
2
Antenna/Cable Reminder
A message is displayed to remind you to connect an Antenna or Cable
if you have not already done so. Press Enter to start Auto Setup.
3
Run Auto Setup
The DVD-VCR will automatically detect whether an antenna or cable is connected, then
it will search for all active channels in your area and set the clock automatically.
• This procedure may take a few minutes to complete. When finished, the DVD-VCR
will tune to the lowest channel found.
Guide de référence rapide
LECTURE DVD EN BASE
1
Ouvrer le tiroir de disque
Appuyez sur la touche Open/Close pour allumer le
DVD-VCR et ouvrir le tiroir de disque.
2
Introduire le disque
Mettez le disque dans la tiroir
avec l’étiquette vers le haut. Si
le disque a deux côtés, orientez-
le avec l’étiquette désirées vers
le haut.
3
Fermer le tiroir de disque
Appuyez sur la touche Open/Close encore pour
fermer le tiroir de disque.
4
Démarrer la lecture
Appuyez sur la touche Play/Pause.
• Beaucoup de disques commençeront la lecture
automatiquement quand le tiroir de disque se
ferme.
• Si le DVD a un menu de disque, ou plus d’un
titre, le menu de disque peut apparaître. Si oui,
poussez la manette vers le haut, bas, gauche, ou
droit pour souligner les options de disque, alors
appuyez sur la touche Enter pour sélectionner.
LECTURE VHS EN BASE
1
Introduire la vidéocassette
Mettez la vidéocassette dans la lecteur VHS.
• Le DVD-VCR s’allumera automatiquement quand
une vidéocassette est inserée.
2
Démarrer la lecture
Appuyez sur la touche Play/Pause. Si la languette de
sécurité d’enregistrement est absente est la fonction
“Auto Play” est allumé, la vidéocassette démarre la
lecture automatiquement; reportez-vous au Guide
d’utilisation.
3
Arrêter la lecture
Appuyez sur la touche Stop.
4
Ejecter la vidéocassette
Appuyez sur la touche Open/Close sur la
télécommande ou la touche Eject sur le panneau
avant.
TELECOMMANDE
Sensory Science Corporation
7835 East McClain Drive
Scottsdale, Arizona 85260
Tel. 480.998.3400 Fax 480.998.8312
www.sensoryscience.com www.govideo.com
©2000 Sensory Science Corporation. Tous droits réservés.
DEBALLAGE
1
Déballage du DVD-VCR
Assurez-vous que vous disposez des articles suivants:
• DVD-VCR
• Guide de référence rapide
• Carte d’enregistrement
• Guide d’utilisation
• Souris pour contrôler la boîte de câble
• Câble coaxial RF
• Télécommande
• Deux (2) piles “AA”
2
Installation des piles de la télécommande
• Enlever le couvercle du compartiment et insérez deux piles “AA” en vous assurant que leurs poles (+ et –) sont
correctement orientés.Refermez le couvercle.
CONNEXION
1
Connexion de l’antenne/câble
Branchez le câble de l’antenne intérieure/extérieure ou le câble de base sur la prise “IN (FROM ANT.)” à l’arrière du
DVD-VCR.
2
Connexion du téléviseur
Branchez le DVD-VCR au téléviseur en
utilisant ou la prise “OUT (TO TV)” ou les
prises “LINE OUT”. La connexion de ligne est
recommandé si votre TV est équipée avec des
entrées de ligne.
3
Réglage de la chaîne
Si vous avez utilisé la connexion “OUT (TO
TV)”, réglez la chaîne à 3 ou 4. Sélectionnez
cela qui n’est pas utilisée par une station
locale.
4
Mise en marche
Branchez le DVD-VCR et le téléviseur, est allumez tous les deux.
5
Seléction de la chaîne 3, 4, ou ligne
Si vous avez utilisé la connexion “OUT (TO TV)”, sélectionnez la chaîne 3 ou 4 (en vous assurant d’utiliser la même
chaîne choisie dans l’étape 3). Si vous avez utilisé la connexion “LINE OUT”, sélectionnez l’entrée ligne de votre TV.
• Le menu “Language/Langue/Idioma” apparaît, alors continuez ci-dessous.
REGLAGE
1
Langue
Utilisez les touches 1, 2, ou 3 pour sélectionner anglais, français, ou espagnol.
2
Rappel d’antenne/câble
Un message est affiché pour vous rappeler de relier une antenne ou câble, si vous
n’avez pas déjà fait ainsi. Appuyez sur la touche Enter pour commencer la réglage
automatique.
3
Réglage automatique
Le DVD-VCR détecte automatiquement si vous avez connecté une antenne ou câble, alors parcourt et mémorise
tous les canaux en activité. Alors, règle l’horloge interne du DVD-VCR.
• Ceci peut durer quelques minutes. Ensuite, le DVD-VCR sélectionne la chaîne trouvée la plus basse.
QRG-DVR5000
À lire en priorité
FRANÇAIS FRANÇAIS ENGLISH
Other manuals for DVR5000

3

Other GoVideo DVD VCR Combo manuals

GoVideo DVR 4200 User manual

GoVideo

GoVideo DVR 4200 User manual

GoVideo DV1030 User manual

GoVideo

GoVideo DV1030 User manual

GoVideo DV2140 Instruction Manual

GoVideo

GoVideo DV2140 Instruction Manual

GoVideo VR2940 User manual

GoVideo

GoVideo VR2940 User manual

GoVideo DV1130 User manual

GoVideo

GoVideo DV1130 User manual

GoVideo DVR5000 User manual

GoVideo

GoVideo DVR5000 User manual

GoVideo DV1030A User manual

GoVideo

GoVideo DV1030A User manual

GoVideo VR3845 User manual

GoVideo

GoVideo VR3845 User manual

GoVideo VR3845 User manual

GoVideo

GoVideo VR3845 User manual

GoVideo DVR 4200 User manual

GoVideo

GoVideo DVR 4200 User manual

GoVideo HT2010 User manual

GoVideo

GoVideo HT2010 User manual

GoVideo DVD Recorder+VCR User manual

GoVideo

GoVideo DVD Recorder+VCR User manual

GoVideo DV1040 User manual

GoVideo

GoVideo DV1040 User manual

GoVideo VR4940 Manual

GoVideo

GoVideo VR4940 Manual

GoVideo VR2940 User manual

GoVideo

GoVideo VR2940 User manual

GoVideo DV2130 Instruction Manual

GoVideo

GoVideo DV2130 Instruction Manual

GoVideo DVR 4550 User manual

GoVideo

GoVideo DVR 4550 User manual

GoVideo VR1940 User manual

GoVideo

GoVideo VR1940 User manual

GoVideo DVR4500 User manual

GoVideo

GoVideo DVR4500 User manual

GoVideo DVR4400 User manual

GoVideo

GoVideo DVR4400 User manual

GoVideo VR1940 User manual

GoVideo

GoVideo VR1940 User manual

GoVideo DVR4500 User manual

GoVideo

GoVideo DVR4500 User manual

GoVideo sonic/blue DVR 4250 User manual

GoVideo

GoVideo sonic/blue DVR 4250 User manual

GoVideo sonic/blue DVR 4250 User manual

GoVideo

GoVideo sonic/blue DVR 4250 User manual

Popular DVD VCR Combo manuals by other brands

Toshiba D-VR3SU owner's manual

Toshiba

Toshiba D-VR3SU owner's manual

Palsonic DVDV100 instruction manual

Palsonic

Palsonic DVDV100 instruction manual

Philips H982NUD user manual

Philips

Philips H982NUD user manual

Sylvania DVR90VF quick guide

Sylvania

Sylvania DVR90VF quick guide

THOMSON DTH6100 manual

THOMSON

THOMSON DTH6100 manual

Metz DN52 operating instructions

Metz

Metz DN52 operating instructions

FUNAI DDVR-6830 Service manual

FUNAI

FUNAI DDVR-6830 Service manual

Curtis DVD7802 Specification sheet

Curtis

Curtis DVD7802 Specification sheet

Magnum DVC-9000 instruction manual

Magnum

Magnum DVC-9000 instruction manual

Samsung V80 instruction manual

Samsung

Samsung V80 instruction manual

Sony SLV-D550P Specification sheet

Sony

Sony SLV-D550P Specification sheet

Targa DVH-5100x owner's manual

Targa

Targa DVH-5100x owner's manual

Daewoo DC-S83D1D Service manual

Daewoo

Daewoo DC-S83D1D Service manual

AWA W1090 user manual

AWA

AWA W1090 user manual

Toshiba SD-V592SU owner's manual

Toshiba

Toshiba SD-V592SU owner's manual

FUNAI SV2000 WV20V6 owner's manual

FUNAI

FUNAI SV2000 WV20V6 owner's manual

Toshiba D-VR60DTKF Service manual

Toshiba

Toshiba D-VR60DTKF Service manual

Philips DVP3050V/37 user manual

Philips

Philips DVP3050V/37 user manual

manuals.online logo
manuals.online logoBrands
  • About & Mission
  • Contact us
  • Privacy Policy
  • Terms and Conditions

Copyright 2025 Manuals.Online. All Rights Reserved.