GPX MOTO GPX300r TSE User guide

GPX MOTO
- 2 -
www.GPXMOTO.com + www.GPXMOTOUK.com
This service manual is edited by GPXMOTO
No part of this publication may be reproduced without authorization.
GPXMOTO reserves the right to make changes at any time without notice and without incurring
any obligation.
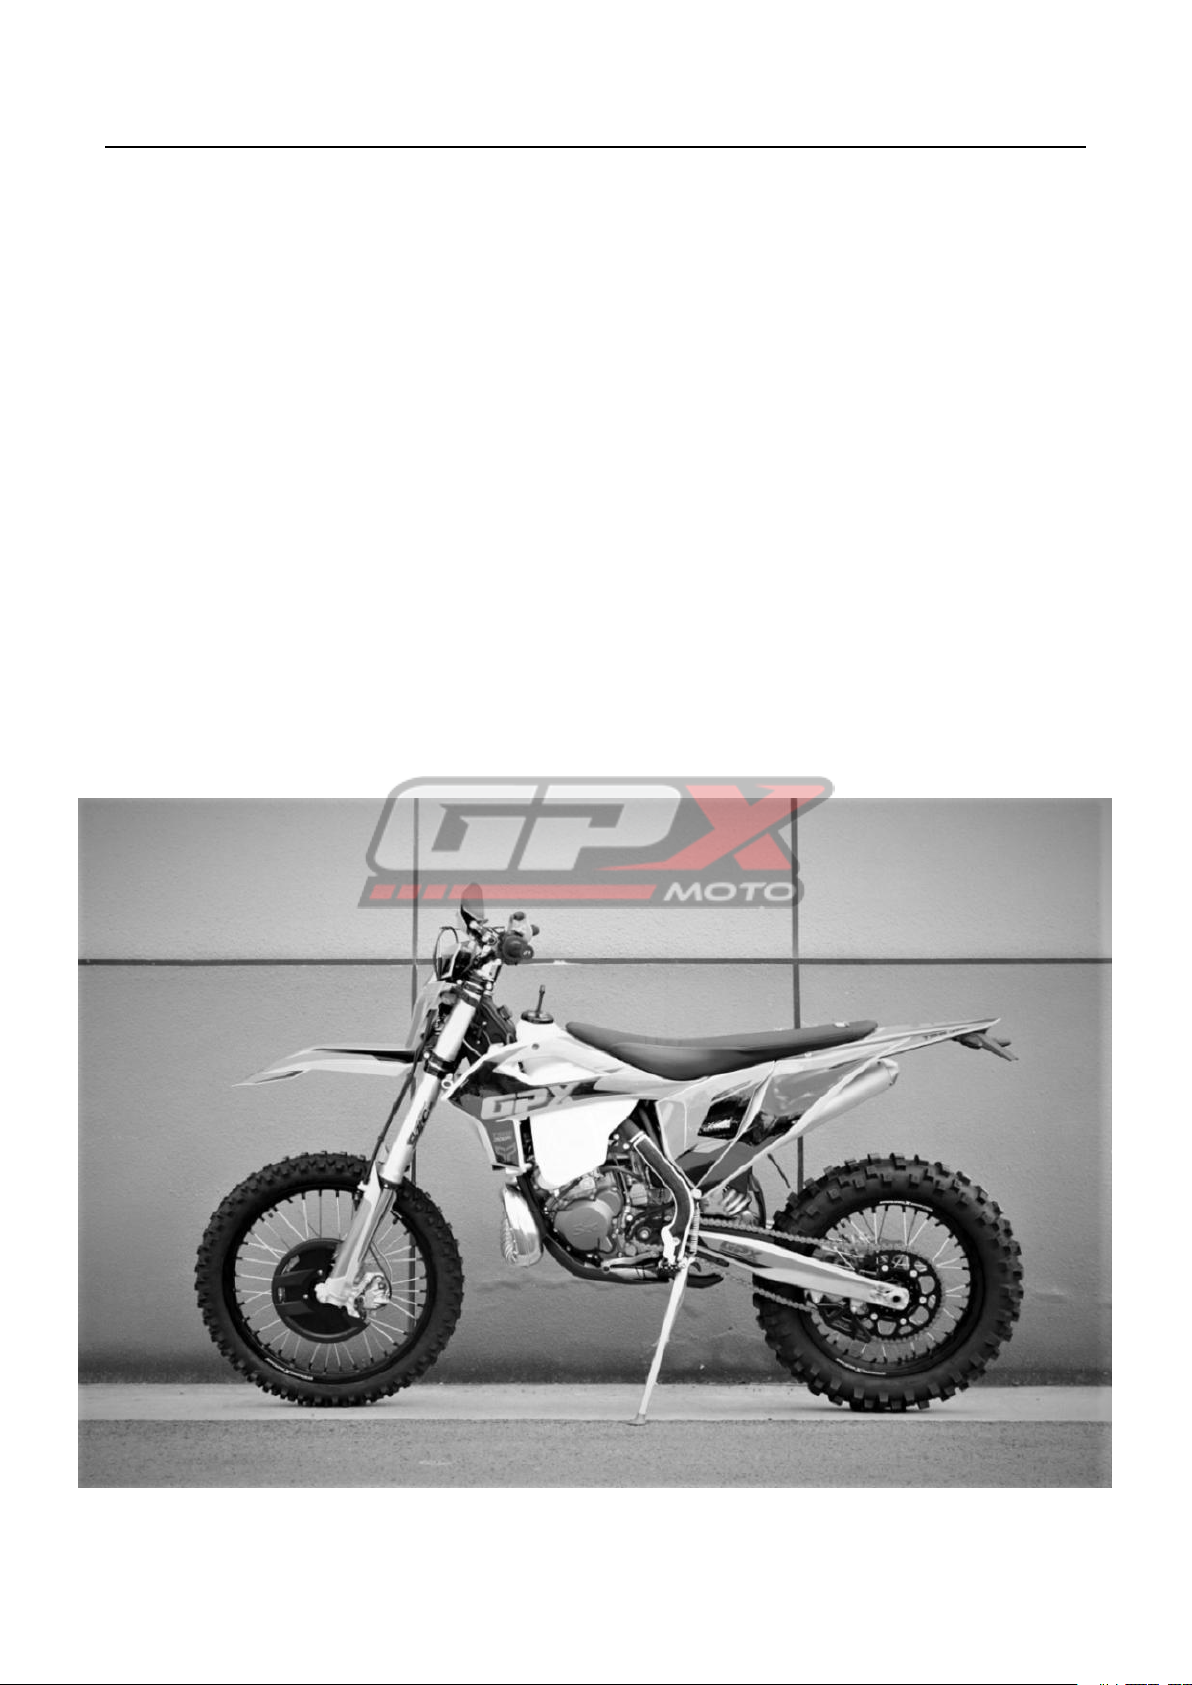
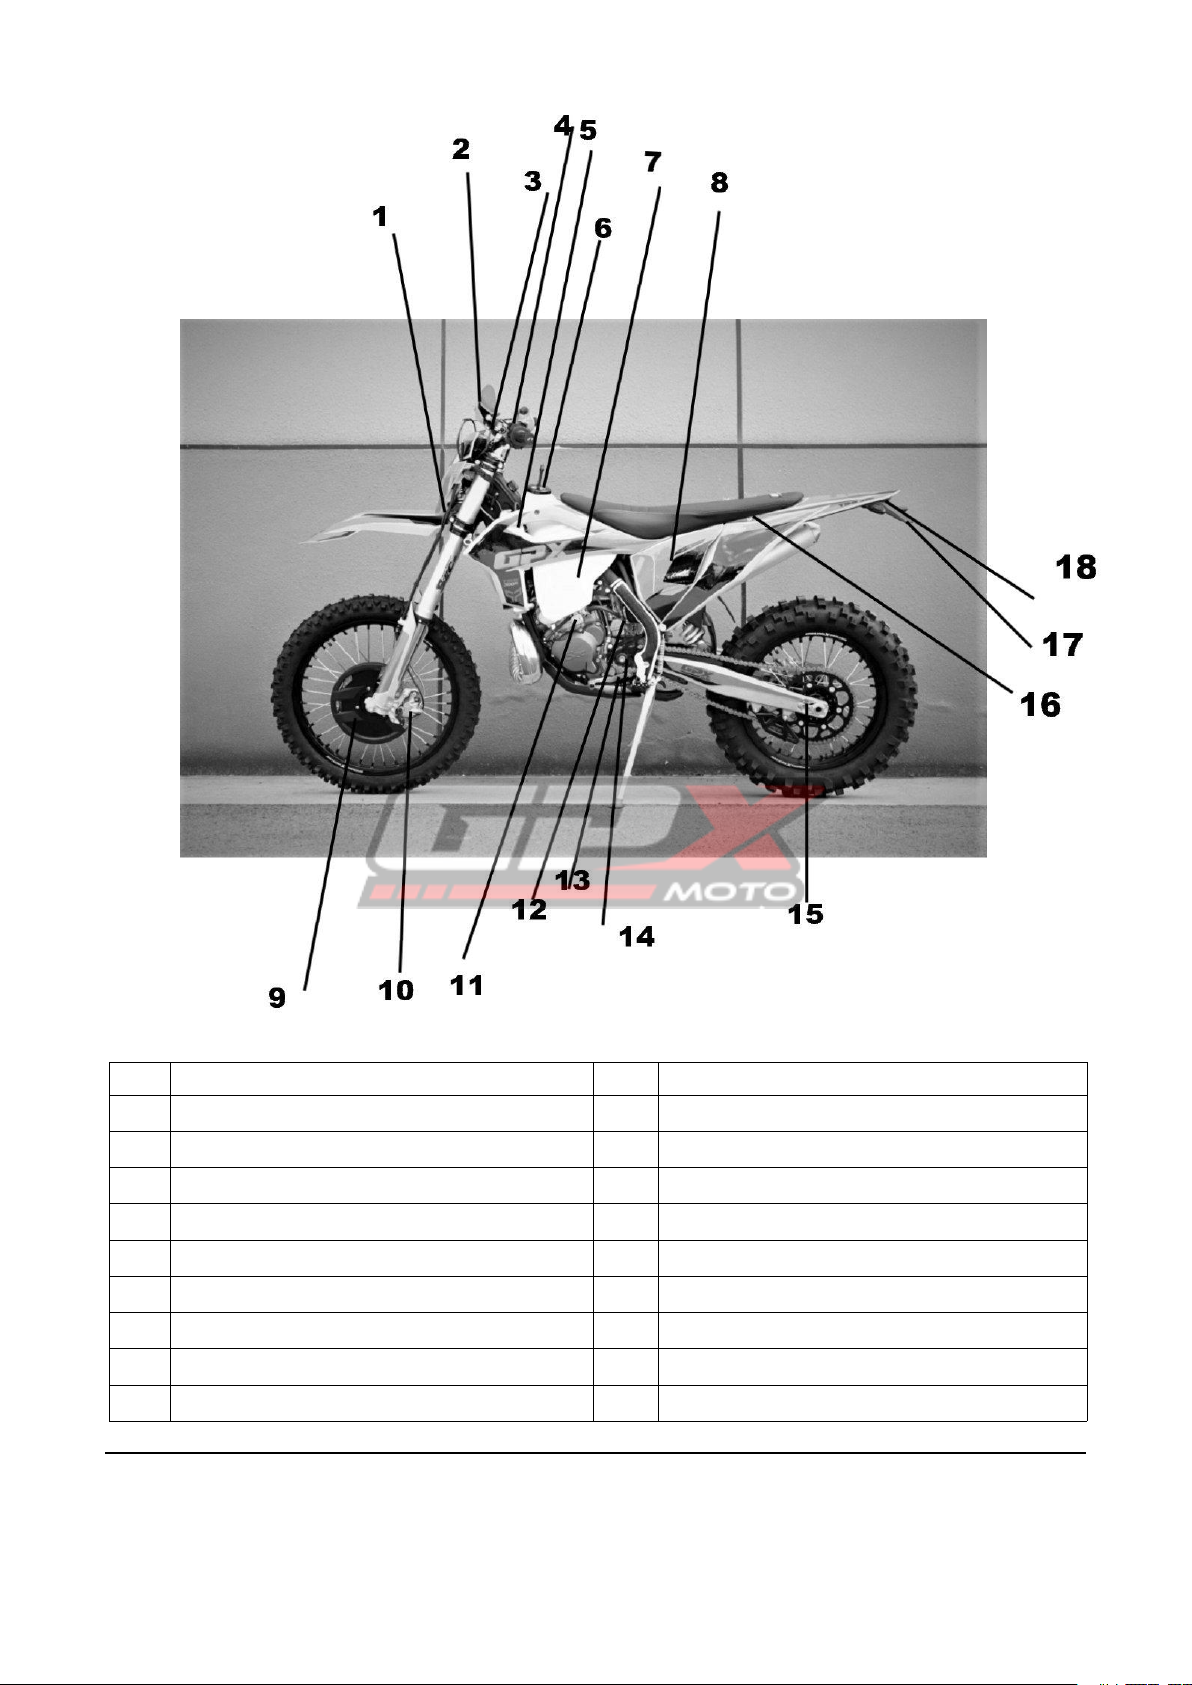
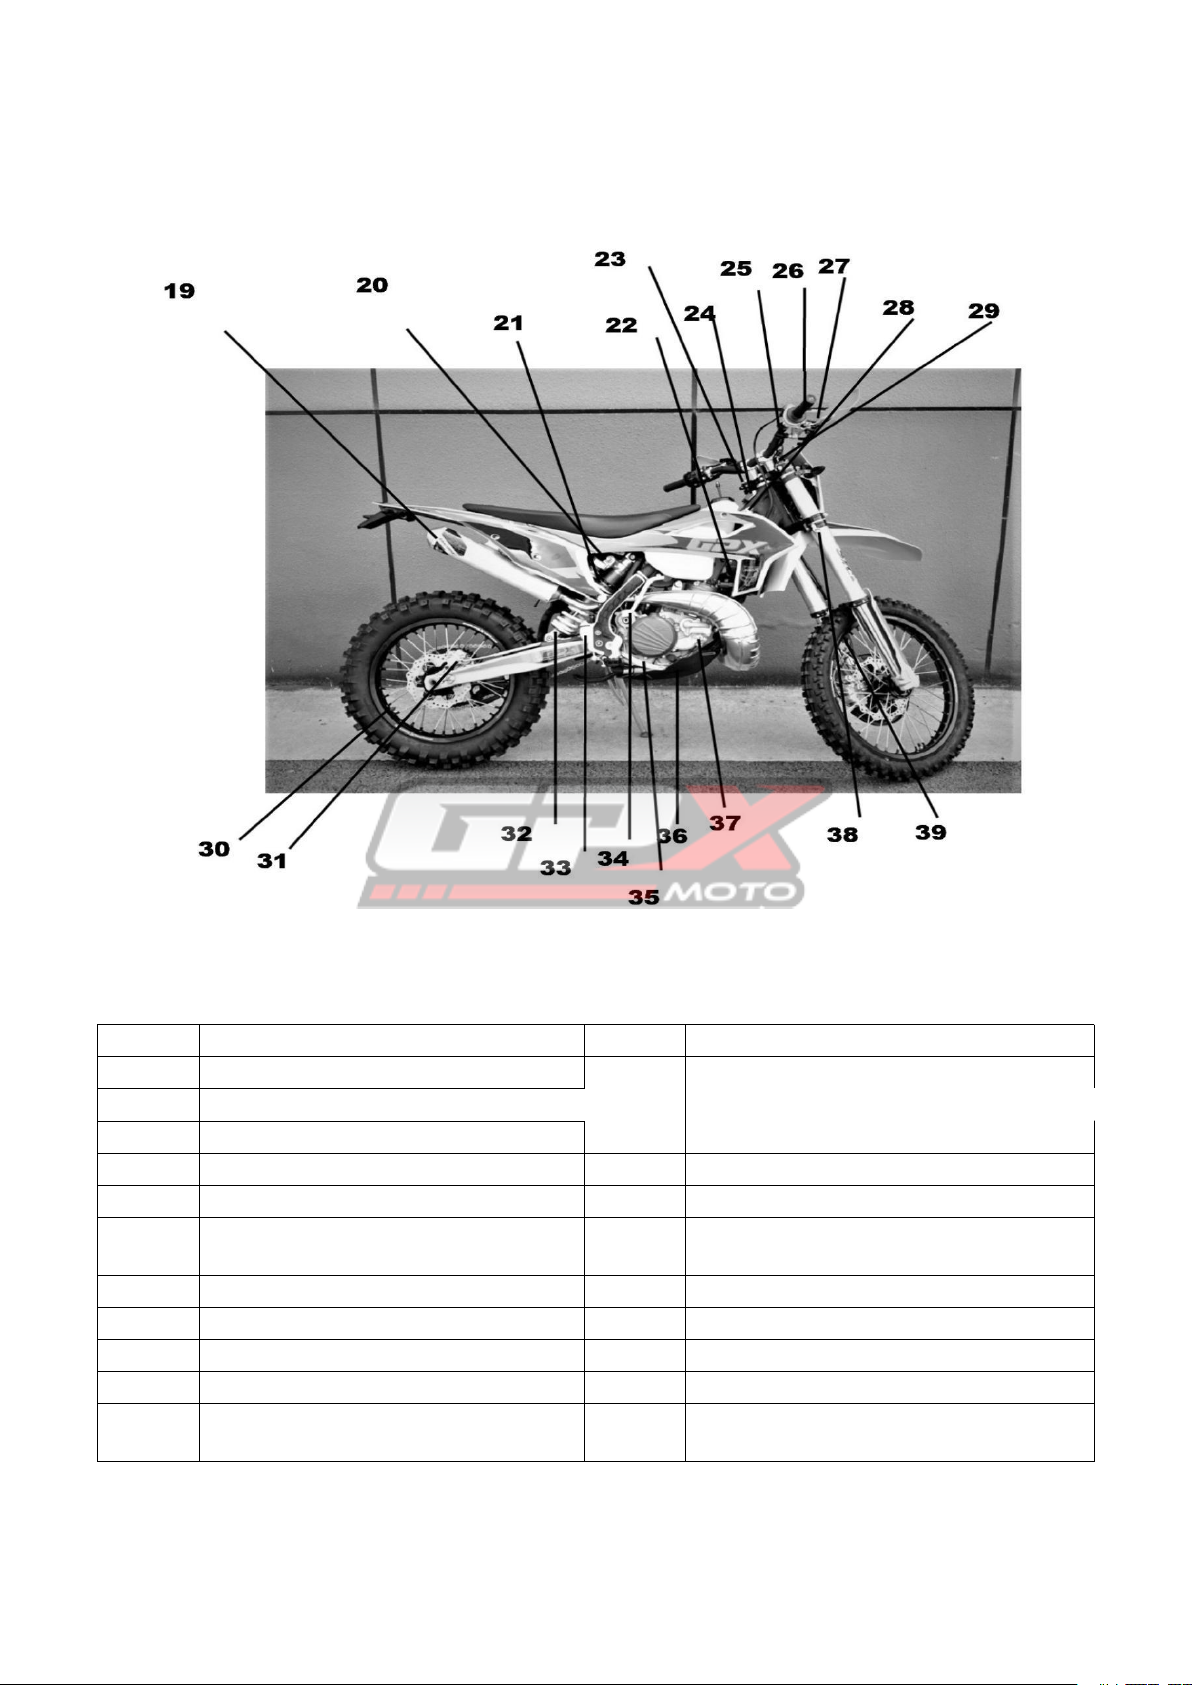
The vehicle pictured in this owner’s manual may not match your actual vehicle.
PREFACE
Congratulations on your purchase of a GPX motorcycle. We believe that you have made an
excellent choice ,which will give you great and reliable performance.
This Handbook and Manual will give you an understanding of our product. It has detailed the
complete range of specialized maintenance and adjustment schedules as well as the procedures
required.
This document also explains extensive troubleshooting methods as well as a comprehensive technical
specification. To assist you there are many photographs and guides to assist you.
Please read this manual carefully and carry out maintenance according to a professional standard.
carrying out the correct maintenance at the required schedule will effectively prolong the service
life of each component, improve the motorcycle and engine performance as well as the reliability of
the vehicle.
Riding motorcycles is dangerous and the GPX should not be operated with out the rider wearing a
helmet , goggles ,boots and gloves at the bare minimum.
It is expected that the operator has a good knowledge of riding and maintaining motorcycles. If you
do not , you should seeking specialised riding coaching and take your motorcycle to a GPX dealer
when adjustments or work is required. This is a basic handbook and manual only. It expected that the
operator should have a much more comprehensive knowledge that this basic manual displays. If you
do not , then take your motorcycle to a GPX dealer.
For the sake of technical development, GPXMOTO will reserve the right of modifying motorcycle
structure, equipment, and spare parts without notice. Due to that different markets have different law’s
requirement, we’ve adjusted model accordingly, the model image in this manual maybe not match your
actual vehicle. In addition, if there is any question concerning this manual, please visit our website
www.GPXMOTO.COM or WWW.GPXMOTOUK.COM and consult our customer service.
Alternatively you can call your GPX dealer for advice and assistance.
The contents of this manual are subject to change without prior notice due to vehicle

GPX MOTO
- 3 -
www.GPXMOTO.com + www.GPXMOTOUK.com
improvement. The actual state of the motorcycle in questions should determine the overall
level of maintenance required.
MEANINGS OF REPRESENTATION
SYMBOLS USED
The meaning of specific symbols is described below
* All work marked with this symbol requires specialist knowledge and technical understanding. If
you do not have the confidence to perform that, you can go to an authorized GPX workshop or GPX
after-sale service point. There, your motorcycle will be optimally cared for by specially trained
experts using the specialist tools required.
→ Indicates a page reference (more information is provided on the specified page).
DEGREES OF RISK AND SYMBOLS
Your safety, and the safety of others, is very important. Operating this motorcycle safety is an
important responsibility. Please read this manual carefully.
Safety Messages preceded by a safety alert symbol and one of three signal words:
DANGER: Indicates a danger that will immediately and invariably lead to fatal or permanent injury
if the appropriate measures are not taken.
WARNING: Indicates a danger that is likely to lead to fatal or serious injury if the appropriate
measures are not taken.
CAUTION: Indicates a danger that may lead to minor injuries if the appropriate measures are not
taken.
Other important information:
Please note that it is not practical or possible to warn you about all hazards associated with operating
or maintaining a motorcycle.
Therefore, you must have basic mechanical safety knowledge and use your own good judgement.
If you cannot complete the process of operating or maintaining, please consult a more experienced
senior technician before operation.

GPX MOTO
www.GPXMOTO.com + www.GPXMOTOUK.com
- 10 -
ADVICE
Most of off-road motorcycle fatalities are caused by head injuries. Without helmets, the chances of
serious injury or death caused by head injuries are much higher. Always wear an approved
motorcycle helmet and protective apparel such as goggles, gloves and boots while riding, which will
save your life at the critical moment.
This motorcycle was designed for off road racing , therefore there is no capacity to carry a
passenger .Please therefore do not use this motorcycle to carry any passengers. Ignoring this or order
rules could lead to serious injury or a fatality.
Do not use non-original parts to modify this motorcycle. If you need to replace any parts, please use
spare parts and accessory products that are approved and / or recommended by GPX and have them
installed by an authorized GPX workshop. GPX accepts no liability for any personal modification,
other products and any resulting damage or loss.
Our TSE series products are specially designed for off-road racing and riding.
Please take care of your vehicle and avoid any problem caused by improper use.
Please check your motorcycle carefully before riding and do the maintenance accordingly after use.
If you crash the motorcycle, check the condition of the motorcycle before you resume your journey.
Ignoring this advice could easily lead to an accident and endanger your own safety as well as others ,
as you may be riding a broken or faulting motorcycle .
When using this motorcycle, the temperature of the engine and exhaust pipe is very high, so it needs
to a period to cool down after parking. During this period, do not touch the engine or exhaust pipe as
you will scold yourself.
Do not wear shorts while riding, otherwise leg injuries may happen.

GPX MOTO
www.GPXMOTO.com + www.GPXMOTOUK.com
- 11 -
Lessons learnt from a little time with the TSE 300
As is normal on dirt bikes , water can enter the air box when washing. It is imperative that the air filter is cleaned and
oiled after every wash and every ride. This is the most important maintenance action you can complete to ensure the
long life of your motorcycle
Loctite the gear lever bolt
Loctite the kick start bolt
Loctite all the stand bolt and nuts
Do not over tighten the chain as you will cause it to wear. See the section in this handbook
Do not start adjusting the carburettor settings unless you are HIGHLY competent in tuning.
Ensure the rubber boot behind the headlight houses all of the electrical connections. Seal the top of the rubber boot
with a zip tie
Spend time ensuring that the speedometer cable is correctly routed to avoid it bunching up.
It is possible to accidentally knock the kill switch when you are riding in a standing position. Position this carefully
to avoid this.
When removing the carburettor it is very very important to do this by lifting up the rear subframe. Wrenching out the
carburettor sideways will eventually damage and split the rubber so you must not to this , as it is not designed for this.
Keep a close eye on your spoke tension to ensure they do not come loose
Pull down the fork dust seals and clean your fork seals from time to time with a seal buddy. Often it’s a little dirt
under the seal causing a weep and the seal does not need replacing.
APPEARANCE
TSE 300r COMPONENTS AND POSITIONS

GPX MOTO
www.GPXMOTO.com + www.GPXMOTOUK.com
- 13 -
No.
Name
No.
Name
1
Front LED light
10
Front brake caliper
2
Handguard
11
Petrol on off and reserve tap
3
Hydraulic clutch lever
12
Carburettor
4
Switch gear
13
Gear lever
5
Coolant overflow tank
14
Front sprocket
6
Petrol filler cap wth vent
15
Chain adjuster
7
Petrol tank
16
Seat
8
Air filter access
17
Number plate mount
9
Front disc guard
18
Rear light and brake light

GPX MOTO
www.GPXMOTO.com + www.GPXMOTOUK.com
- 14 -
No.
Name
No.
Name
19
Rear silencer
30
Security rim lock
20
Fast and slow speed compression
31
Rear brake caliper
21
Spring preload adjuster
32
Rear shock rebound adjuster
22
Radiator fan
33
Rear brake master cylinder
23
Hour meter
34
Kick start
24
Fork compression and spring preload
adjuster + bleed valve
35
Rear brake lever
25
Electric start button
36
Sump guard
26
Throttle
37
Power valve adjuster
27
Front brake lever
38
Motorcycle tie down loop
28
Radiator cap
39
Security rim lock
29
Fork rebound , spring preload and
bleed valve

GPX MOTO
www.GPXMOTO.com + www.GPXMOTOUK.com
- 17 -
PARAMETER
DIMENSIONS AND SPECIFICATION - TSE 300R
L*W*H(mm)
2170×830×1285
Wheelbase(mm)
1480mm
Net weight(kg)
109kg
Tire size
F: 80/100-21;R: 110/100-18. Rear will accept a 140 80/90 18” Enduro or
MX tyre. Comes fitted with off road tyre
Seat height(mm)
960 mm.
Min ground clearance
(mm)
370mm
Tank volume(L)
9.4 litres
Engine Parameters
Engine type
Single cylinder, water cooled two stroke with adjustable power valve and
counter balancer.
Clutch type
Wet type, Multiple disk
Cylinder
diameter×stroke
72x72 mm
Oil / ratio
During run in period 40/1. After run in period 50/1. On both occasions
always with quality branded fully synthetic 2 stroke oil
Displacement
293 cc
Shift type
Usually engaged two - stage transmission six - speed transmission,
International profile 1-N-2-3-4-5-6
Starting
12v Electric start with starter placement under engine and with direct
attachment to flywheel (No maintenance with no gears to wear) . Kick
start back up.
Fuel control system
Flat side carburettor
Battery
Stock lithium 12v battery for high performance electric starting and
reliable electronics
Chain
#520, 13T/52T O ring
Frame/Shock/Brake/Wheel system Parameters
Frame type
Central double cradle type high-strength steel tube frame, GPX
International patent design
Front shock
SZC Front suspension. Comprising of quality high performance
Telescopic forks with adjustable compression and rebound
damping.Adjustable spring preload on forks.
Rear shock
Compression recovery dual adjustable nitrogen airbag rear shock,
Quality high performance unit with spring preload, adjustable
compression as well as rebound damping

GPX MOTO
www.GPXMOTO.com + www.GPXMOTOUK.com
- 19 -
Handlebar
Competitive high-strength aluminium alloy fat bar (imported),,material
7075 Φ28.6mm, with GPX special ultra-soft off-road grip
F/R rims
F 1.60×21, R 2.15×18, 7050 high strength aluminium rim ,
forged CNC wheel hub
F brake system
Powerful Hydraulic alloy twin piston caliper with 260mm disc
R brake system
Powerful Hydraulic alloy twin piston caliper with 240mm disc
Others
Air filter type
Sponge filter core filter type
Fuel type
92# and above grade gasoline. 50/1 ratio premix with fully synthetic
quality oil after fully run in. 40/1 whilst running in.
Motorcyclists
1 person(rider)

GPX MOTO
www.GPXMOTO.com + www.GPXMOTOUK.com
- 20 -
CONTROL
CLUTCH
The clutch is controlled by the clutch lever, which is
fitted on the left side of the handlebar.
By adjusting black plastic ribbed nut on the clutch lever
it is possible to adjust the feel and operation of the
clutch.
FRONT DISC BRAKE
The front disc brake is controlled by the hand brake
lever, which is fitted on the right side of the handlebar.
By adjusting the small bolt and lock nut on the lever
you can change the biting point of the lever and the
distance of the brake lever to your preference.
The front wheel adopts the floating - caliper disc brake,
which is installed under the left front fork and fixed by
two bolts.

GPX MOTO
www.GPXMOTO.com + www.GPXMOTOUK.com
- 22 -
THROTTLE LEVER
er
The throttle lever is located on the right side of the
handlebar. The throttle is very sensitive.
Turn the throttle counter clockwise to increasing the
engine speed and power output. The reverse will reduce
the engine speed and power output. It will back to
normal smoothly once you lease the handle.
STARTING
The start button is a square one and fitted on the right
side of the handlebars, near the throttle grip.
It is expected that you will only need to press this button
for a maximum of 2 seconds to start the motorcycle .
Release the button as soon as the engine starts . If the
engine does not start , then visit the troubleshooting
pages for help.
Attention:When starting the motorcycle in any gear ,
you should operate the clutch with your left hand to
avoid possible sudden forward motion when starting the
GPX .
The TSE engine has a kick start also , as well as the
electric start through the start button.
STOPPING
The red stopping button is fitted on the left side of the
handlebar near the grip.

GPX MOTO
www.GPXMOTO.com + www.GPXMOTOUK.com
- 23 -
FUEL TANK SWITCH
fuel tank switch
The fuel tank switch is located on the bottom left side
of the fuel tank. By turning the switch, you can control
the entrance of the fuel into into the carburettor.
The meaning of symbols on the oil tank switch is
shown as the left picture.
“ON”: indicates that the switch is opened for petrol
discharge.
“OFF”: indicates that the switch is closed, and the
petrol discharge is stopped.
“RES”: indicates that the reserve petrol is activated.
SHIFTING
The gear shift is located on the left side of the engine.
This is operated by the left foot by pushing down or by
pulling up with your foot.
The GPX engine has six gear as International Standard,
and you can find the illustration on the left.

GPX MOTO
www.GPXMOTO.com + www.GPXMOTOUK.com
- 24 -
REAR DISC BRAKE
The rear brake pedal is located on the right side of the
engine and is operate by pushing down on it gently using
the right foot.
The rear brake adopts a floating caliper disc brake. This
is located on the right side of the rear wheel and fixed
by a disc brake bracket.
SIDE STAND SUPPORT
The GPX has a retractable side stand for parking.
When parking, make the stand is fully down. When
operating the motorcycle make sure the stand is
retained in the up position by use of the rubber band.

GPX MOTO
www.GPXMOTO.com + www.GPXMOTOUK.com
- 26 -
PREPARING FOR USE
ADVICE ON FIRST USE
1. Before your first trip, read the entire operating instructions carefully, especially the section of
“Controls” and “Riding Instructions”.
2. When driving, please carry out a standardized run-in period first.
3. If any parts problems are found during using, you can repair that according to this manual or
contact GPX Dealers for professional aid.
4. After each use, clean the vehicle with running water.
5. GPX is not responsible for any vehicle problems caused by malicious acts
RUN-IN PROCESS
Motorcycle engines have a lot of relative moving parts, such as pistons, piston rings, cylinder
blocks, meshing transmission gears, etc. Therefore, in the initial stage of use, the engine must be
operated more gently than when riding afterwards . The running-in can make the moving parts
adapt to each other, correct the working gap, and form a good smooth friction surface that can
withstand larger loads. Only after standard running-in can the engine have excellent performance
and reliability.
The recommended running-in steps are as follows:
1.
0-2.5h stage: Using under the throttle level of 50% ~ 75%, the speed should be changed
frequently to avoid the motorcycle working at the same condition for a long time,
Let the engine rest and cool down for 5 ~ 10 minutes after each 1-hour work.
Do not accelerate suddenly to protect your throttle.
2.
2.5-4h stage: Using under the throttle level of 50% ~ 75% throttle and work for a long time at
the same condition.
In actual working, the throttle can be up to full level, but not more than 5 ~ 10 seconds;
3.
4-5h stage: Using under the throttle level of 75% ~ 100%
4.
More than 5h: increase the speed to 60 ~ 80km/h, until the full engine performance can be used.
DANGER:When riding a motorcycle, do not speed up regardless of the consequences. This
behaviour can easily cause engine damage and also cause safety accidents.
So, please ride the vehicle properly.
Table of contents
Other GPX MOTO Motorcycle manuals