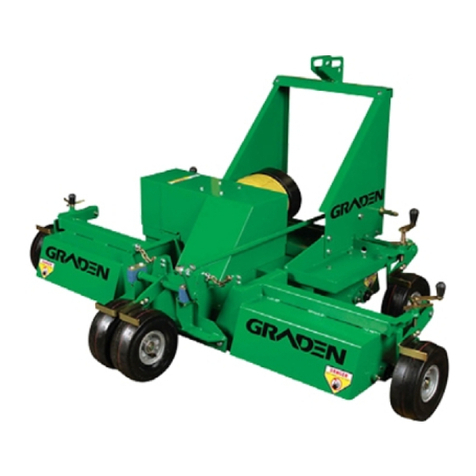
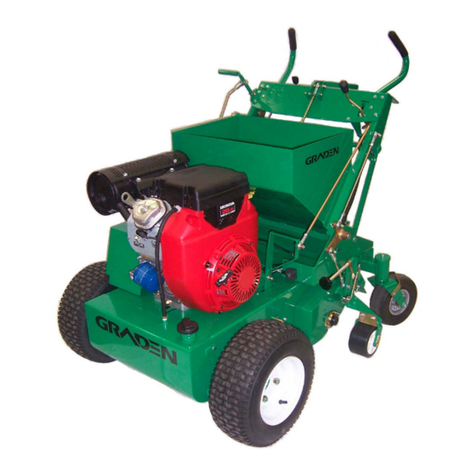
GRADEN CSI Mk 2 User manual

CSI Mk 2
CONTOUR SAND INJECTION
VERTICUTTER / SCARIFIER
Owner’s Manual


Table of Contents
1. Specifications
1.1 Specifications
1.2 Statement of Machine Use
1.3 Serial Number Plate
2. To the Owner
2.1 Preliminary Instructions
2.2 Warning Symbols
2.3 Servicing the Verticutter
3. Safety Information
3.1 General rules
3.2 Training
3.3 Personal Protective Equipment (PPE)
3.4 Preparation
3.5 Operational Safety
3.6 Maintenance Safety
3.7 Transport Safety
4. Controls
4.1 Motion Control Handles
4.2 Reverse Lever
4.3 Blade Engage Handle
4.4 Lifting/Lowering Controls
4.5 Throttle Lever
4.6 Choke Lever
4.7 Ignition Switch
4.8 Neutral Lever
4.9 Cutting Depth Control
4.10 Speed Gauge
4.11 Sand Flow Metering Gauge
4.12 Safety Interlocks
5. Operating Instructions
5.1 Preliminary Checks
5.2 Start Up
5.3 Driving (traversing) the Verticutter
5.4 Verticutting
5.5 Sand Injection Verticutting
5.6 Shut Down
5.7 Clean Down

Table of Contents (cont’d)
6. Maintenance Operations
6.1 Adjustments and Settings
6.1.1 Injection Tube Adjustment
6.1.2 Rotor Relay Belts
6.1.3 Rotor Belts
6.1.4 Gearbox Drive Belt
6.1.5 Transmission Drive Belt
6.1.6 Auger Drive Belt
6.2 Replacements
6.2.1 Blade Replacement
6.2.2 Belt Replacement
6.2.2.1 Rotor Belts
6.2.2.2 Rotor Relay Belts
6.2.2.3 Gearbox Drive Belt
6.2.2.4 Transmission Drive Belt
6.2.2.5 Auger Drive Belt
6.3 Engine Maintenance
6.4 Battery Maintenance
6.5 Maintenance Schedule
7. Parts Diagrams
8. Wiring Diagram
9. Warning/Compliance Decals

1.1 Specifications
Model CSI Mk2 - Contour Sand Injection Verticutter/Scarifier
Engine Honda GX630
Power 15.5kW(20.8HP) Horizontal shaft
Engine Oil SAE 10W-30 Grade
Approx. 1.5 litres (without oil filter replacement)
Approx. 1.7 litres (with oil filter replacement)
Fuel Unleaded
Cutting Width 515mm
Cutting Depth 0-40mm (maximum with standard blades)
Blades Tungsten carbide tipped spring steel
Blade Size
Part Number 0232
Part Number 1122
Part Number 0217
210mm Diameter – 2mm tip (Standard)
210mm Diameter – 1mm tip (Optional)
210mm Diameter - 3mm tip (Optional)
Blade Tip Speed 2,375m/min at 3600 rpm
Blade Configuration 17 Blades at 32mm spacings
Weight 290kgs
Length x Width x Height 130cm x 103cm x 123cm
Tyres
Front
Rear
16 x 6.50 – 8 Turf Pattern - tubeless
9 x 3.50 – 4 Slick Pattern – tube type
Tyre Pressure
Front
Rear
69 kPa (10 psi) - maximum
103 kPa (15 psi) – maximum
Rotor Belts Carlisle B32 Super II V-Belt
Rotor Relay Belts Carlisle B38 Super II V-Belt
Gearbox Drive Belt Carlisle A31 Super II V-Belt
Transmission Drive Belt Carlisle A31 Super II V-Belt
Auger Drive Belt Carlisle A24 Super II V-Belt

1.2 Statement of Machine Use
The Graden Contour Sand Injection Verticutter/Scarifier’s main use is as a
verticutting/scarifying/de-thatching tool with the option to inject sand into the
newly created grooves on areas such as golf courses, bowling greens, cricket
wickets, tennis courts and other sporting fields and fine turf areas.
It is not for use on turf areas where rocks and other hard foreign bodies may
be present. The use of this machine in turf profiles of this nature will likely
cause premature wear or shattering of the blade tips and could result in rocks
being projected at dangerous speeds, resulting in potential injury to the
operator or damage to the machinery.
This machine is not for use in anything other than the soil profiles typically to
be found on the sporting fields mentioned above. Any use of this machine in
any other type of surface or for any other purpose may void the warranty.
Please contact Graden Industries if you are unsure about your application
complying with the intended use of this machine.
1.3 Serial Number Plate
The serial number plate layout is shown below. It is important to note in
particular the Model and Serial numbers to assist you when ordering parts or
discussing servicing needs with your Graden Dealer. Also on the plate you will
find mass information and the year of manufacture.

2. To the Owner
Read this manual before operating the Verticutter
2.1 Preliminary Instructions
•It is important that the owner completely familiarises themselves with the
contents of this manual
•Keep this manual at hand as a ready reference for anybody using the
Graden Contour Sand Injection Verticutter
•The designed and tested safety features of this machine are dependent on
it being operated within the limitations described in this manual
2.2 Warning Symbols
Throughout this manual the following safety alert symbols are used to indicate
important safety issues. When either of these symbols are present the
operator must be aware that there is the potential to damage equipment
and/or incur serious personal injury.
CAUTION
This signal denotes a potential equipment hazard:
failing to follow the instructions or procedures may
result in equipment malfunction or damage.
WARNING
This signal denotes a serious personal safety hazard:
failing to follow the instructions or procedures may
result in serious, or even fatal, injury.

2.3 Servicing the Graden Contour Sand Injection Verticutter
The Graden Contour Sand Injection Verticutter has been carefully engineered
and manufactured to provide safe, dependable and effective service.
As with all mechanical equipment it requires routine cleaning and
maintenance.
Your authorised Graden representative has access to tools, genuine spares
and equipment to service any and all of your requirements.
Use only genuine Graden parts; substitute parts will void the warranty and
may not meet the safety and performance standards required for safe and
effective operation of the Verticutter.
Please record the model and serial numbers of the Verticutter in the space
provided below and quote this information when ordering parts or
communicating with Graden Industries or its’ approved representatives.
Model : CSI Mk2
Serial Number : ___________________
Date Purchased : ___________________

3. Safety Information
This manual is provided to help you operate and maintain the Contour Sand
Injection Verticutter. Please read it carefully.
It has been compiled from extensive field experience and engineering data.
In some aspects it is generalised because it is impossible to cover all operating
scenarios. However, combining the information provided in this manual with
your own increasing experience and knowledge with the Contour Sand
Injection Verticutter will enable you to develop procedures suitable for your
individual needs.
This machine, like most modern machinery, is constantly undergoing
development on the basis of experience and market needs. At the time of
printing, material in this manual was current but may vary due to the
aforementioned ongoing development.
Graden Industries reserve the right to change the machinery specifications
without notice.
3.1 General Rules
•Direction on the machine (right or left) is determined from standing behind
the handles and facing in the direction of forward travel
•Numbers in brackets are listed in this manual; they refer to the part
numbers shown on the diagrams and are listed to assist in part
identification
•When viewed from the right side the blades rotate anti-clockwise (counter
rotating to the forward rotation of the front drive wheels)
•This is a precision piece of machinery with high speed cutting blades
WARNING
Keep hands and feet away from rotating parts of
the Verticutter, especially the Tungsten Carbide
tipped blades.
•Do not allow children to operate the machine or be near it during its’
operation
•Only people who are very familiar with the rules of safe operation should
be allowed to use this machine

•Only use the machine during daylight or in good artificial light
•Some illustrations in this manual may show the Verticutter with safety
guards removed, this is not a normal situation!
WARNING
Never operate the Verticutter with any of
the covers or safety guards removed or not
properly secured.
3.2 Training
CAUTION
Read this manual completely before
beginning how to learn to use the Verticutter.
•Do not allow anybody to operate the machine without instruction
•Know your controls and how to stop the machine and shut down the
engine quickly in an emergency
•To maintain control and reduce the possibility of upset, damage or
collision, operate the machine smoothly. Avoid erratic operation and
excessive speed
CAUTION
Stay alert for holes, ditches or obstacles that
might obstruct the unit or cause it to tip over.
•Be aware of the hazards associated with the engine :
⇒Petrol is highly flammable so only use an appropriate container
⇒Never remove the fuel cap or add fuel while the engine is running or
still hot
⇒Never add fuel indoors and wipe up any spillages
⇒Never run the engine in an enclosed area because exhaust gases are
toxic

WARNING
The engine uses highly flammable petroleum
fuel and produces toxic exhaust gases.
Only add fuel to, or run, the engine in the
open - never indoors.
3.3 Personal Protective Equipment (PPE)
•Clothing should be reasonably snug fitting and not free flowing so as to
avoid the risk of entanglement in moving parts
•Wear sturdy footwear, preferably steel capped safety shoes or boots
•Use appropriate PPE for eyes, ears and hands
WARNING
Never wear sandals, sneakers or have
bare feet when operating the Verticutter.
3.4 Preparation
•Ensure all safety warnings and decals are in place and legible
•Remove any accumulated debris that might represent a fire hazard
•Ensure that the blades are in a serviceable condition and that the rotor
shaft mounting bolts are secure
•Perform any appropriate scheduled maintenance before starting the
machine
3.5 Operational Safety
•Always disengage the rotor blades before attempting to start the
Verticutter
•Always raise the rotor blades before attempting to start the machine

•Always disengage the blades and raise them when crossing gravel,
walkways, roads, etc. or indeed any ground which you do not wish to
verticut
WARNING
Always disengage the rotor blades and stop the
engine in any of the following situations :
•leaving the machine unattended
•attempting to unclog or clear the blades
•making any repairs or adjustments
•inspecting the unit for damage after striking
any foreign object
•Always repair any damage before recommencing operation
3.6 Maintenance Safety
WARNING
Raise blades clear of turf, disengage blades and
turn off engine before carrying out any
maintenance or servicing.
•Never allow anybody to start the engine while adjustments, maintenance
or servicing are being performed
•Keep machine free of any debris
•Remove debris from underneath the Verticutter after each use
•Verify that all warning labels and decals are present, visible and legible
•Periodically check that all bolts, fasteners and catches are secure and in
safe operating condition
•After any maintenance or servicing, ensure that all guards and safety
devices are correctly installed and secure before operating the Verticutter

WARNING
Frequently check the rotor blades. Verify that all
the tips are in good condition.
Ensure that the blades are firmly held and there
is no slack due to damaged or worn spacers.
3.7 Transport Safety
When transporting the unit it is very important to;
•Always ensure the blades have been disengaged and the rotor housing
raised before loading or unloading the machine onto/from a trailer or
other transportation device.
•Ensure the engine has been turned off at the ignition switch.
•Ensure the machine is securely tied down during transport.
CAUTION
Ensure the blades have been disengaged
and the rotor housing lifted into the raised
position before loading or unloading the unit
onto a trailer, or serious damage to
equipment could occur.

4. Controls
Please refer to the illustrations. All directions are given with reference to
standing behind the handles and facing in the direction of forward travel.
4.1 Motion Control Handles
These handles (1639) control forward motion of the Verticutter, as well as
allowing you to steer the machine left and right.
They naturally return to the neutral position when released. To move forward,
rest your hands on top of the controls and gently push down. The further
down they are pushed, the faster the forward speed of the machine.
Maximum forward speed corresponds to a brisk walking pace.
To go in reverse see instructions under REVERSE LEVER. The Motion Control
Handles are fitted with a Safety Switch (5602) in the top of the handle. Whilst
the blades are engaged one or both of these buttons must be depressed at
all times or the engine will switch itself off.
4.2 Reverse Lever
The reverse lever (1211) allows you to reverse the machine, it is speed limited
for safety reasons. Before reversing always ensure you have a clear path to
reverse over and there is plenty of room to manoeuvre the machine. Reverse
is engaged by sliding the lever to the right and pulling back towards yourself.
When you are finished reversing, release the lever and it will automatically
return to the neutral position.
It is important to NEVER reverse up to a wall, fence or other obstacle. Always
ensure you have adequate room to reverse the machine where you want
and still allow plenty of room for yourself to manoeuvre. Release the handles
to let the machine return to the neutral position.
WARNING
NEVER REVERSE THE MACHINE UP AGAINST
A SOLID OBSTACLE, LIKE A WALL OR
FENCE. DOING SO COULD CAUSE SERIOUS
INJURY AS YOU MAY BECOME TRAPPED
BETWEEN THE MACHINE AND THE
OBSTACLE
4.3 Blade Engage Handle
This handle engages the rotor blades.
Pull the blade engage handle (1485) towards you gently and smoothly until it
locks down in position against the control panel. The blades are now
engaged. Push the blade engage handle away from you to disengage the
blades.

MOTION
CONTROL
HANDLES
LIFTING/LOWERING
HANDLE
THROTTLE
LEVER
SPEED
GAUGE
SPEED GAUGE
LOCK
BLADE ENGAGE HANDLE
REVERSE
LEVER
CONTROL PANEL CONTROLS
SAFETY BUTTON SWITCHES
4.4 Lifting/Lowering Controls
The Lifting/Lowering Handle lowers and raises the blade housing.
The blades should be engaged before lowering them into the turf to avoid
undue stress to the rotor belts and engine.
To operate just push this lever forward to lower the blade housing into the turf.
This should be done gently to allow the blades to 'dig' their way into the turf.
To raise the rotor housing, pull the lever back towards the operator, coming right
over until it is resting against the control panel.

4.5 Throttle Lever
Controls rpm of the engine.
Moving the lever upwards decreases the engine speed. Moving it
downwards increases engine speed. All the way up is the engine idle
position. Verticutting should be carried out at a high engine speed to give
high tip speed and a better cut. When you are finished using the machine,
the engine should be run at idle for a few seconds before shutting the
engine down.
4.6 Choke Lever
This control is required when starting the engine.
Before turning the ignition switch, pull the Choke control to on. Set the throttle
lever as described below, then use the Ignition Switch to start the machine as
described below. Once the engine is running, push the Choke control to off.
Do not use the choke if the engine is already warmed up or the air
temperature is high.
4.7 Ignition Switch
Starts and stops the engine.
This key switch is located on the control panel of the engine. It has three
positions; OFF, ON and START. To start the machine, first make sure the
choke control is on and the throttle control is set slightly towards the FAST
position. Now turn the key to the START position until the engine fires.
Release the key and it will automatically return to the RUN position. Move the
Choke to off and set the throttle to the desired speed. When you have finished
using the machine, move the throttle lever down to the idle (SLOW) position
and let the machine run for a few seconds, then turn the key to OFF.
4.8 Neutral Lever
This small lever (2150) is located on the left side of the machine, behind the
front drive wheel, and has two positions;
NEUTRAL: allows the machine to be pushed manually
DRIVE: engages the transmission for normal operation
The neutral lever is a small lever which requires the operator to pull the lever
out through the keyhole to put the machine in the drive position. Neutral is
obtained by pushing the lever back through the keyhole on the machine.
4.9 Cutting Depth Control
The cutting depth is set via the height adjustment thread (1486) located on
the left hand side of the unit on the rotor housing assembly. The depth is
adjusted by screwing the control in or out. The control has a locking lever
(1464) to hold it in place to maintain the cutting depth whilst cutting.
IGNITION SWITCH
CHOKE
HOURMETER

HEAVY
MEDIUM
LIGHT
E
F
G
4.10 Speed Gauge
When using the sand injection feature of the machine the speed control
adjuster (1489), located on the control panel, will need to be used to maintain
a constant forward speed to ensure even sand distribution. The adjuster can
be screwed in or out to adjust the speed, then the speed gauge bracket (1463)
must be turned around to lock the forward speed until you have finished your
pass. To give you full speed again you need to turn the speed gauge bracket
back out of the way.
4.11 Sand Flow Metering Gauge
This small gauge (2604) located just above the left rear tyre on top of the
Carriage Bracket (1299) sets the flow rate of the sand from the hopper (1274).
There are three discrete positions; LIGHT, MEDIUM and HEAVY. LIGHT is the first
position and allows the least amount of sand through. MEDIUM is the next
position and allows a medium flow rate of the sand. HEAVY is when the gauge
is turned so the bracket allows full flow of sand through to the injection tubes.
These three positions are shown in the diagram below. The Sand Flow Metering
Gauge is used in conjuction with the forward Speed Gauge control to get the
sand into the groove at the desired level.
4.12 Safety Interlocks
This machine is fitted with a couple of safety interlock switches to protect the
operator from harm. As mentioned under the MOTION CONTROL HANDLES
section, there are two small button switches in the ends of the Motion Control
Handles, which are linked to a safety switch on the blade engagement
system. Before and during blade engagement one or both of these small
button switches must be pressed down and held down. If the operator
releases both buttons whilst the blades are engaged the engine will cut out
for the operators safety. There is also a safety switch connected to the blade
engagement lever to make sure you cannot start the machine with the
blades engaged.
SAND FLOW METERING GAUGE SETTINGS

5. Operating Instructions
WARNING
Do not operate the Verticutter until you
have completely read this manual.
5.1 Preliminary Checks
1. Clear any debris from above and underneath the machine
2. Ensure scheduled maintenance activities have been completed.
3. Inspect belts for condition and correct tension.
4. Inspect blades for wear or damage.
5. Ensure all guards and covers are firmly fixed in place
6. Check engine oil level; change according to manufacturer’s
recommendations.
7. Ensure there is petrol in the fuel tank.
5.2 Start Up
1. Check that blades are disengaged - push blade engage handle all
the way forward.
2. Check that blades are in raised position - pull lift/lower handle
towards you and ensure that it locks into position
3. Put neutral lever (left side of machine) into the NEUTRAL position
(lever pushed into the base).
4. Engage the choke lever, set the throttle lever.
5. Turn ignition switch around to the START position. Release key when
engine starts. Key will return to the RUN position automatically.
6. Push the choke lever in.
7. From the operating position, move the throttle lever to the desired
setting.
WARNING
It is advisable to practice driving the
machine in a wide open area when first
learning. This will allow you to get
comfortable with the controls and how to
stop the unit quickly.

5.3 Driving (Traversing) the Verticutter
1. Put the neutral lever (left side of machine) to the DRIVE position
(lever pulled out of the base).
2. Use the motion control handles to move in the desired direction.
Push the handle downwards to move forward; to reverse use the
reverse lever. Maximum reverse speed is considerably slower than
maximum forward speed.
3. Speed is controlled by the pressure applied to the motion control
handles. The further the handles are pushed down, the faster the
forward speed.
4. To turn push the handles left or right. If you do this at high speed you
may lose control of the unit. So until you are familiar with the
controls and the ‘feel’ of the machine, it is important that you
reduce your speed when starting a turn, just like you would when
driving a car around a corner. If you feel the unit is ‘getting away’
from you then release the levers so they will return to the neutral
position automatically and the machine will come to a stop quickly.
5.4 Verticutting
1. Select the depth of cut via the height adjustment knob on the left
hand side of the rotor housing. Normal range of cut (with standard
210mm blades) is 0mm to 40 mm deep. One revolution of the knob
is approximately equivalent to 1mm change in the cutting depth.
Clockwise rotation of the knob means a shallower cut; anti-
clockwise means a deeper cut. It is recommended to do a test run
if you are unsure of the cutting depth. Measure it and adjust the
setting accordingly.
2. Increase engine speed to maximum rpm; maximum engine speed
results in a high blade tip speed and a cleaner cut.
3. Engage the blades by slowly pulling the blade engagement handle
toward you. It will lock in the engagement position.
4. Lower the blades into the turf by slowly pushing the lifting/lowering
lever forward. Allow the weight of the Rotor Housing to take the
blades into the turf.
5. Now push down on the Motion Handles until you are travelling at the
desired speed.
6. Steer the machine in a straight line while the blades are cutting.
Trying to change direction while the blades are in the turf may lead
to a furrowing/scalping action and can put undue stress on the
belts, blades and machine in general.
7. At the end of a pass;
-raise the blades by pulling the lift/lower lever towards you
-steer the Verticutter around to make your next run
-repeat from Step 4 onwards
For extra safety, disengage the blades before lifting them out of the ground.
This will stop the blades rotating quicker. When travelling from area to area
disengage the blades and raise them.

5.5 Sand Injection Verticutting
1. If you wish to sand inject whilst Verticutting, you will need to fill the
hopper with kiln-dried sand before starting the pass. It is advisable
not to attempt to sand inject in wet weather, as even the smallest
amount of rain will make the dried sand block up the injection tubes,
resulting in uneven and inconsistent sand levels in the grooves.
2. You will need to experiment to get your cutting depth, speed gauge
setting and sand flow adjuster setting in synchronization with each
other. The ideal result is that the grooves are filling to the top with
sand, not being left shallow or heaping over the top of the groove.
3. Once you have the setting right for your depth of cut, it is a good
idea to note the settings you have for future reference. A set of
guidelines has been drawn up in the table below. They are only
guidelines and you may find in your own circumstances that you
need to adjust the settings for your conditions and preferences.
Cutting Depth
(mm)
Cutting Depth
(inches)
Sand Flow
Adjuster
Speed Limiter Setting
6 ¼” LIGHT Very High
10 3/8” LIGHT High
13 ½” MEDIUM Medium-High
20 ¾” MEDIUM Medium
25 1” MEDIUM-HEAVY Medium-Low
30* 1 ¼” HEAVY Low to Medium*
35* 1 3/8” HEAVY Very Low to Medium*
* At these deeper settings, you will find that as the machine continues along the pass, the
accumulated debris being removed by the blades actually starts slowing the machine
down, so it will probably be necessary for you to adjust the Speed Limiter during the pass
to increase your forward speed. This will avoid sand heaping up out of the groove due to
the slowing down of the machine.
4. As you engage the blades for your pass, the distributor tray for the
sand will automatically open and the sand will start pouring into the
grooves. You should immediately pull the levers down to the speed
limit you have set to ensure consistent depth.
5. When you reach the end of your pass immediately raise the rotor
housing and the sand will be automatically shut off.
6. Check the sand level in the hopper after every pass and top up as
required. On long passes you may need to top up the sand on the
go, as it is important to never run out of sand.
7. Line up the machine for the next pass and repeat from step 4
onwards until you have completed your job.
Table of contents
Other GRADEN Lawn And Garden Equipment manuals