Gradus Group impact Qualite QL-3560-LED User manual

1
QL-3560-LED
Qualite LED Floodlight
INSTRUCTIONS

2
Thank you for choosing Impact.
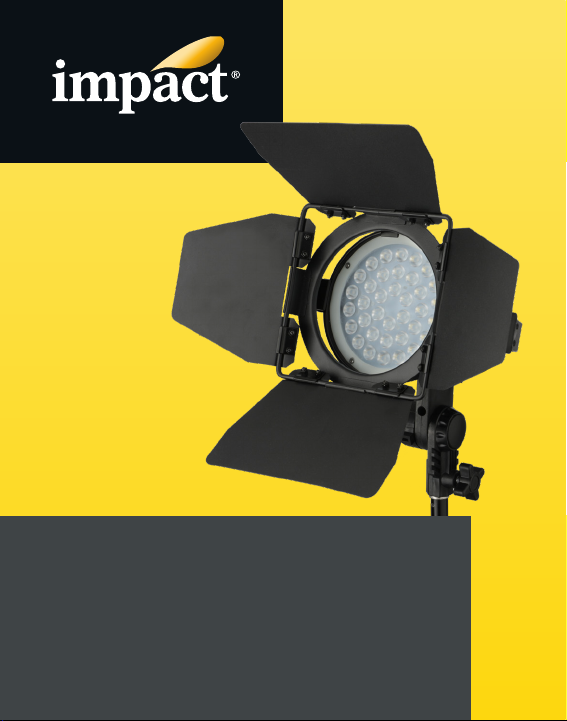
The QL-3560-LED is the digital LED version of Impact’s popular Qualite.
This high-output xture draws only 34 watts and operates on both AC and
DC power. It features a TIR LED panel that furnishes a focused and bright
beam with a long reach. The color temperature of 5600 K and a CRI of
97 deliver a natural-looking daylight beam with high color rendering and
accuracy.
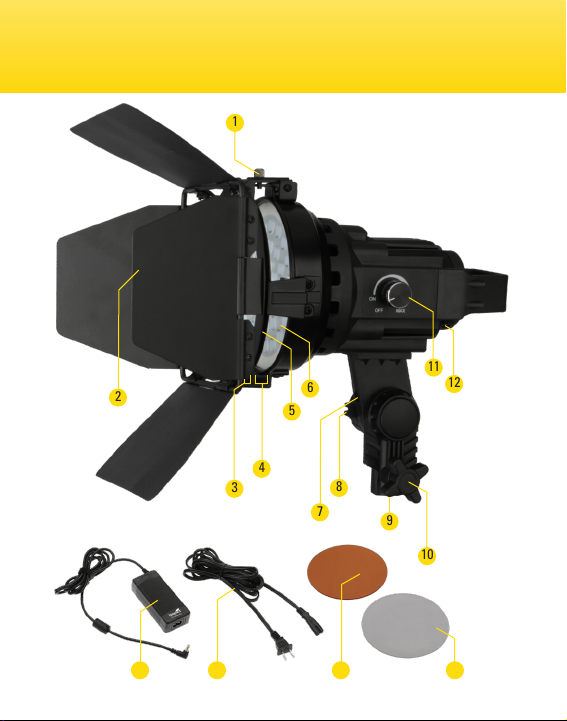
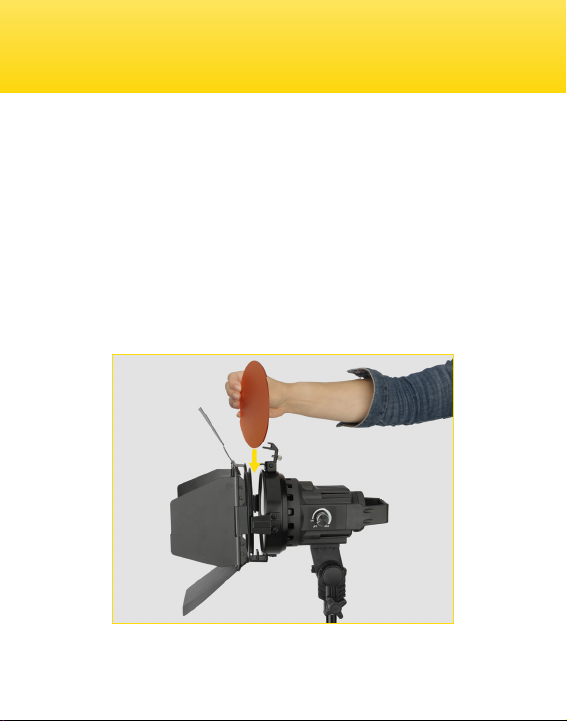
The QL-3560-LED has stepless dimming from 0% to 100% and includes
four-way barndoors for shaping the light and preventing light spill. Diffuser
and orange lter discs are included to soften the beam and to match
tungsten light you might be using on your set. The xture is designed with
an accessory bracket that accepts Impact’s speed ring, so you can add a
softbox to your setup for light that’s perfect for portraits and headshots.
Precautions
Introduction
• Please read and follow these
instructions, and keep this manual in a
safe place.
• Keep this unit away from water and any
ammable gases or liquids.
• Make sure the unit is powered off when
plugging it into a power source.
• Use only the correct, recommended
voltage.
• Do not attempt to disassemble or repair
the equipment—doing so will void
the warranty, and Impact will not be
responsible for any damage.
• Handle the unit with care.
• Do not stare directly at the lights
when they are powered on.
• Clean the unit with only a soft,
dry cloth.
• Keep this unit away from
children.
• Use only parts provided by the
manufacturer.
• Make sure the item is intact and
that there are no missing parts.
• All images are for illustrative
purposes only.

3
Specications
Light Fixture
Beam Angle 45°
Color Temperature 5600 K
Color Accuracy Standard CRI: 97
Cooling System Passive
Dimming Yes, 0% to 100%
Display LCD
Housing Material Metal
Light Intensity @ 3 ft. 9150 lx
Number of LEDs 36
Expected Lamp Life 50,000 hr.
Dimensions (L × W × H) 8.4 × 7.5 × 5.6 in. (21.3 × 19 × 14.2 cm)
1.9 lb. (0.86 kg) without barndoors
2.5 lb. (1.13 kg) with barndoors
Power
AC Input Power 100 to 240 V, 50/60 Hz
DC Input Power 15 V, 4 A
Power Source AC outlet
Max Power Consumption 34 W
Power Pass-Through No
Mounting
Fixture Mount 5/8 in. receiver
Connectors
Power Input Connector 2.5 mm barrel
Weight

4
Overview
1Locking screw
2Barndoors
3Barndoor Slot
4Accessory Slot
5Barndoor mounting
collar
6LED panel
7Umbrella mount
8Tilt adjustment knob
95/8 in. receiver
10 Locking knob
11 Power/dimmer
12 Power socket
Qualite LED Daylight
13 Power adapter
14 Power cord
15 Orange lter
16 Diffuser

5
Overview
3
4
13 14
6
5
8
10
15 16
79
12
11
1
2

6
The Qualite LED mounts on any standard light stand with a 5/8 in. stud.
Mounting the Qualite LED
1. Loosen the locking screw, and
seat the receiver onto the 5/8 in.
stud.
2. Tighten the locking screw until
secure. Do not overtighten.

7
Attaching the Barndoors
The barndoors shape the beam and prevent light spill.
To attach the barndoors:
1. Loosen the locking screw, and open the hinged accessory bracket.
2. Slide the barndoor mounting collar into the accessory slot of the
accessory bracket.
3. Close the accessory bracket, and tighten the locking screw until
secure.
When properly installed, the barndoors should rotate 360°.
Mounting the Qualite LED
1. 3.

8
Using the Diffuser and Filter
The diffuser and orange lter can be used with or without the barndoors.
Use the diffuser to soften the light and cut down on harsh shadows. Use
the orange lter to emulate the warm light of a tungsten bulb with a color
temperature of approximately 3200 K.
Insert the lter or diffuser into the accessory slot. When using the diffuser
or lter with the barndoors, insert the disk in the accessory slot between
the light and barndoors.

9
Using the Diffuser and Filter
1. Loosen the tilt adjustment knob, and position the light as desired.
2. Retighten the knob. Do not overtighten.
Adjusting the Light Angle
Important! Always support the light with one hand while loosening the tilt
knob to reposition the light.

10
Powering On and Adjusting the Brightness
1. Plug the power adapter cord into the power socket.
2. Attach the power cord to the power adapter, and plug it into an
available outlet.
3. Turn the power/dimmer knob clockwise to power on and adjust the
brightness level.
The Qualite LED can be powered by a V-mount battery using the
Watson Pro CA-DTAP-25M cable (sold separately).
Connect the cable to the V-mount battery’s D-tap output and to the
Qualite LED’s power socket.
Refer to the V-mount battery’s user manual to determine the battery’s
remaining capacity and when to recharge your battery.
AC Power
DC Power
Before connecting the Qualite LED to a power source, make sure the light
is turned off.

11
Attaching a Speed Ring
AC Power
DC Power
The Angler 7464-SFS speed ring (sold separately) allows you to attach
most major brands of softboxes to the Qualite LED. To attach a speed ring,
remove the barndoors, and follow these steps:
1. Loosen the locking screw, and open the hinged accessory bracket.
2. Slide the speed ring into the barndoor slot of the accessory bracket.
3. Close the accessory bracket, and tighten the locking screw until
secure.
When properly installed, the speed ring should rotate 360°.

12
One-Year Limited Warranty
This Impact product is warranted to the original purchaser to be free from
defects in materials and workmanship under normal consumer use for a
period of one (1) year from the original purchase date or thirty (30) days
after replacement, whichever occurs later. The warranty provider’s re-
sponsibility with respect to this limited warranty shall be limited solely to
repair or replacement, at the provider’s discretion, of any product that fails
during normal use of this product in its intended manner and in its intended
environment. Inoperability of the product or part(s) shall be determined by
the warranty provider. If the product has been discontinued, the warranty
provider reserves the right to replace it with a model of equivalent quality
and function.
This warranty does not cover damage or defect caused by misuse, neglect,
accident, alteration, abuse, improper installation or maintenance. EXCEPT
AS PROVIDED HEREIN, THE WARRANTY PROVIDER MAKES NEITHER ANY
EXPRESS WARRANTIES NOR ANY IMPLIED WARRANTIES, INCLUDING
BUT NOT LIMITED TO ANY IMPLIED WARRANTY OF MERCHANTABILITY
OR FITNESS FOR A PARTICULAR PURPOSE. This warranty provides you
with specic legal rights, and you may also have additional rights that vary
from state to state.
To obtain warranty coverage, contact the Impact Customer Service Depart-
ment to obtain a return merchandise authorization (“RMA”) number, and
return the defective product to Impact along with the RMA number and
proof of purchase. Shipment of the defective product is at the purchaser’s
own risk and expense.
For more information or to arrange service,
visit www.impactstudiolighting.com or
call Customer Service at 212-594-2353.
Product warranty provided by the Gradus Group.
www.gradusgroup.com
Impact is a registered trademark of the
Gradus Group. ©2019 Gradus Group LLC. All Rights Reserved. GG2
Table of contents
Popular Floodlight manuals by other brands

brennenstuhl
brennenstuhl JARO 2050 T operating instructions

HEPER
HEPER RHINO Installation & maintenance instructions

JUNO
JUNO AccuLite Caribe installation instructions

Stairville
Stairville LED Flood Panel 150 20 user manual

ProLights
ProLights PARCOLOR56 user manual

SM International
SM International B-BYRON user guide