Contents
Safety
Introduction
System Overview
How the Robotic Cleaner Cleans Your Pool
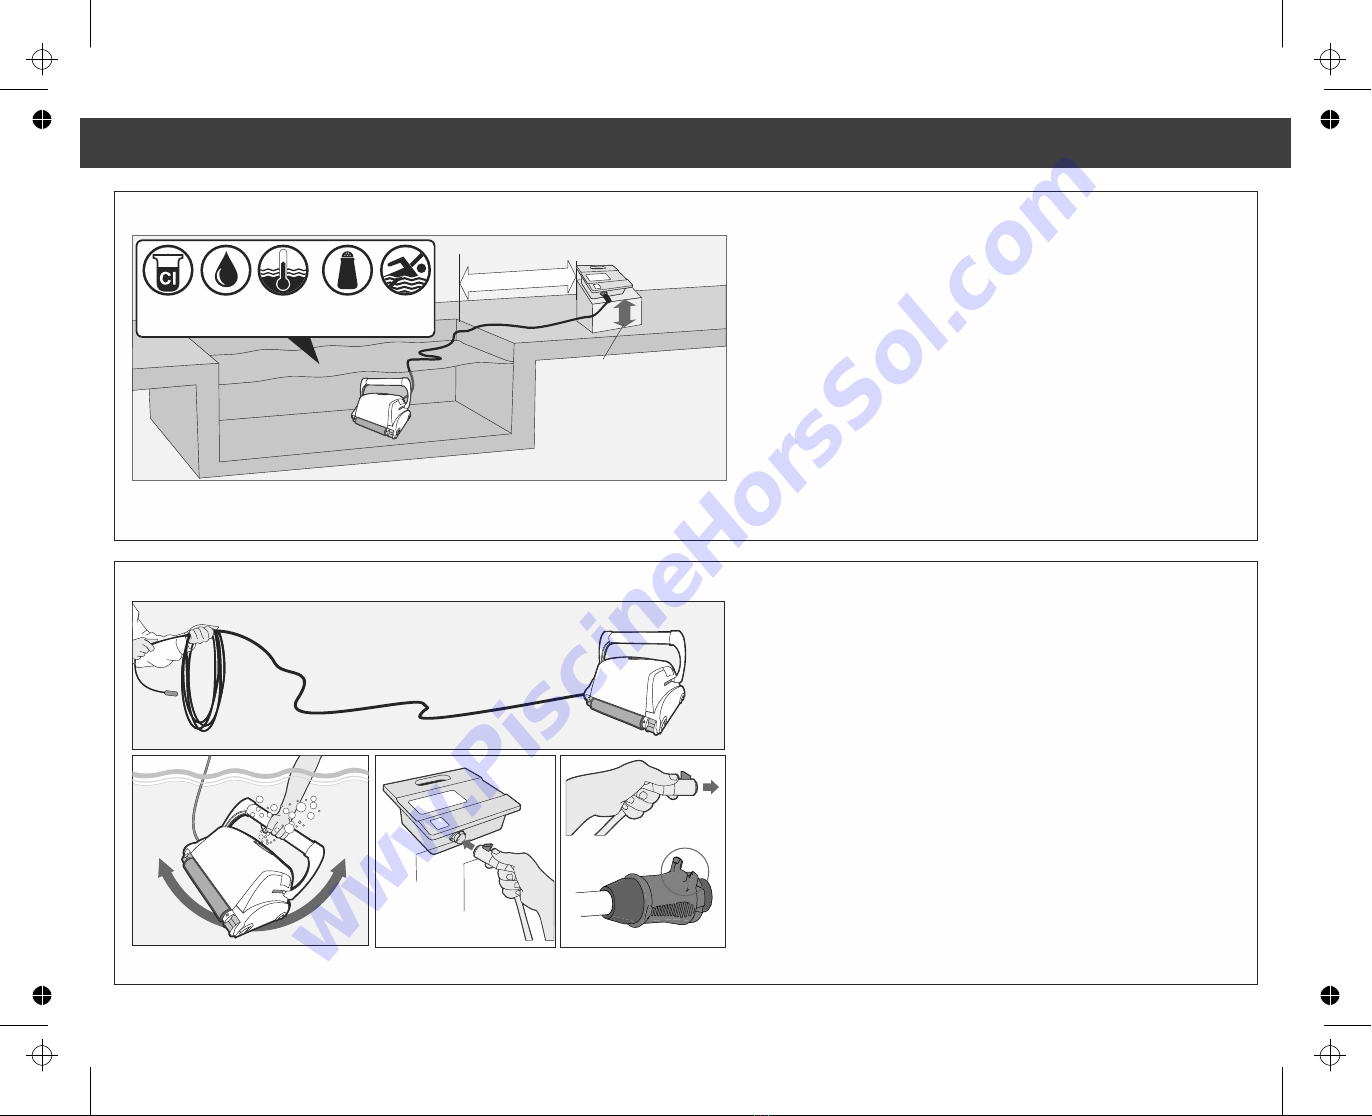
Operating Conditions
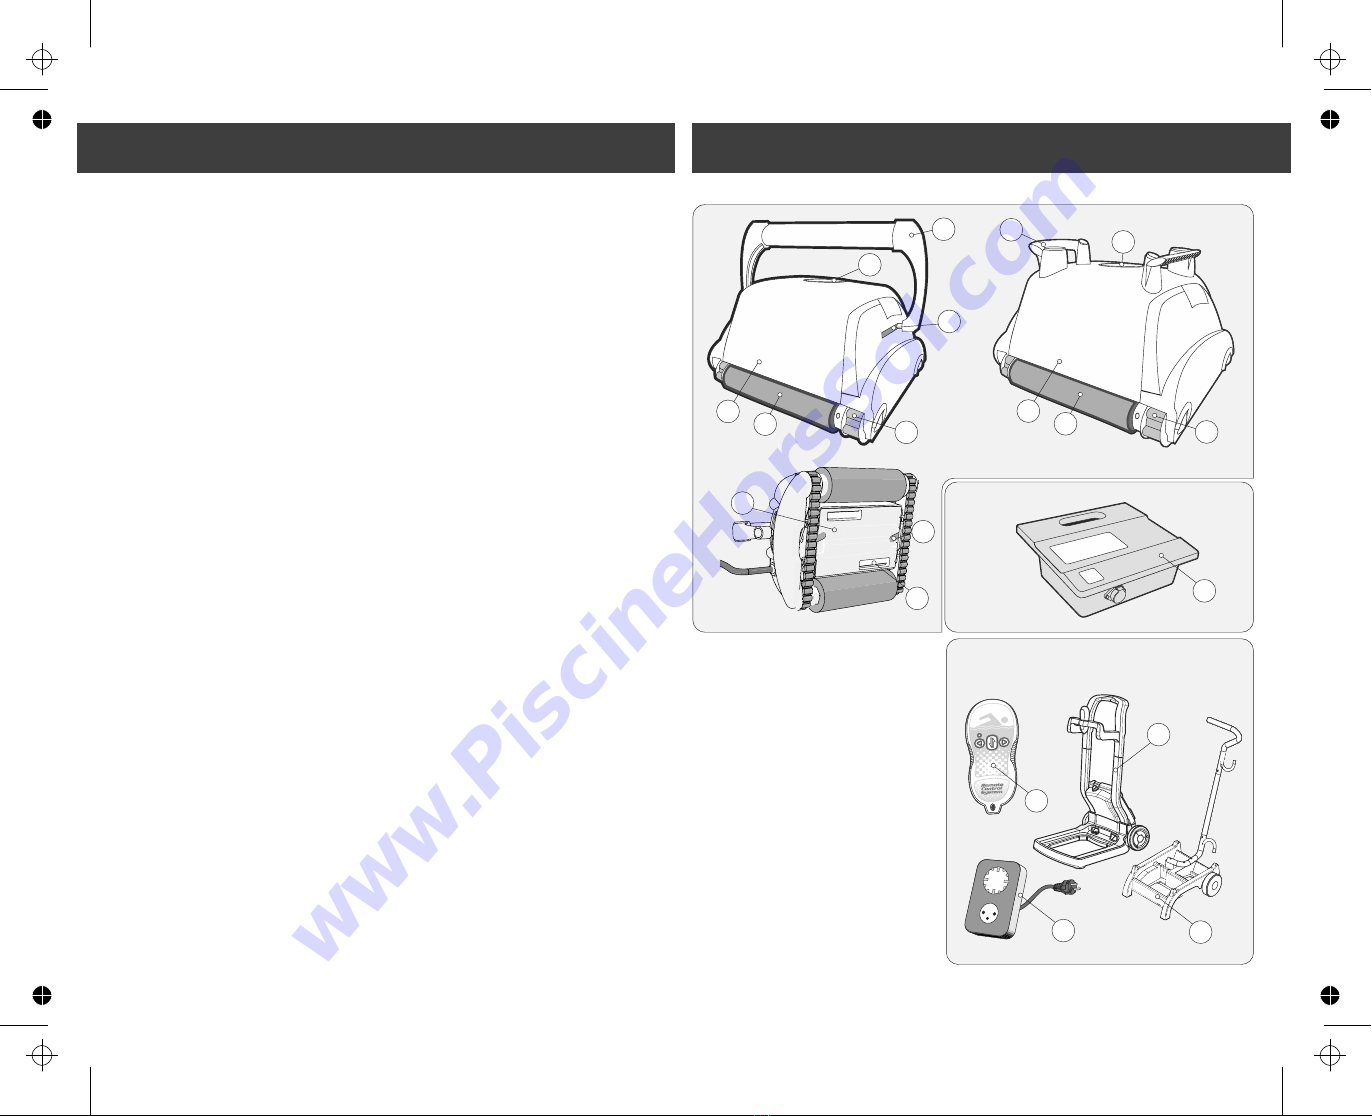
Components
Cleaner And The Main Parts
Power and Control Unit
Operation
Before First Use
Placing Cleaner Unit into the Water
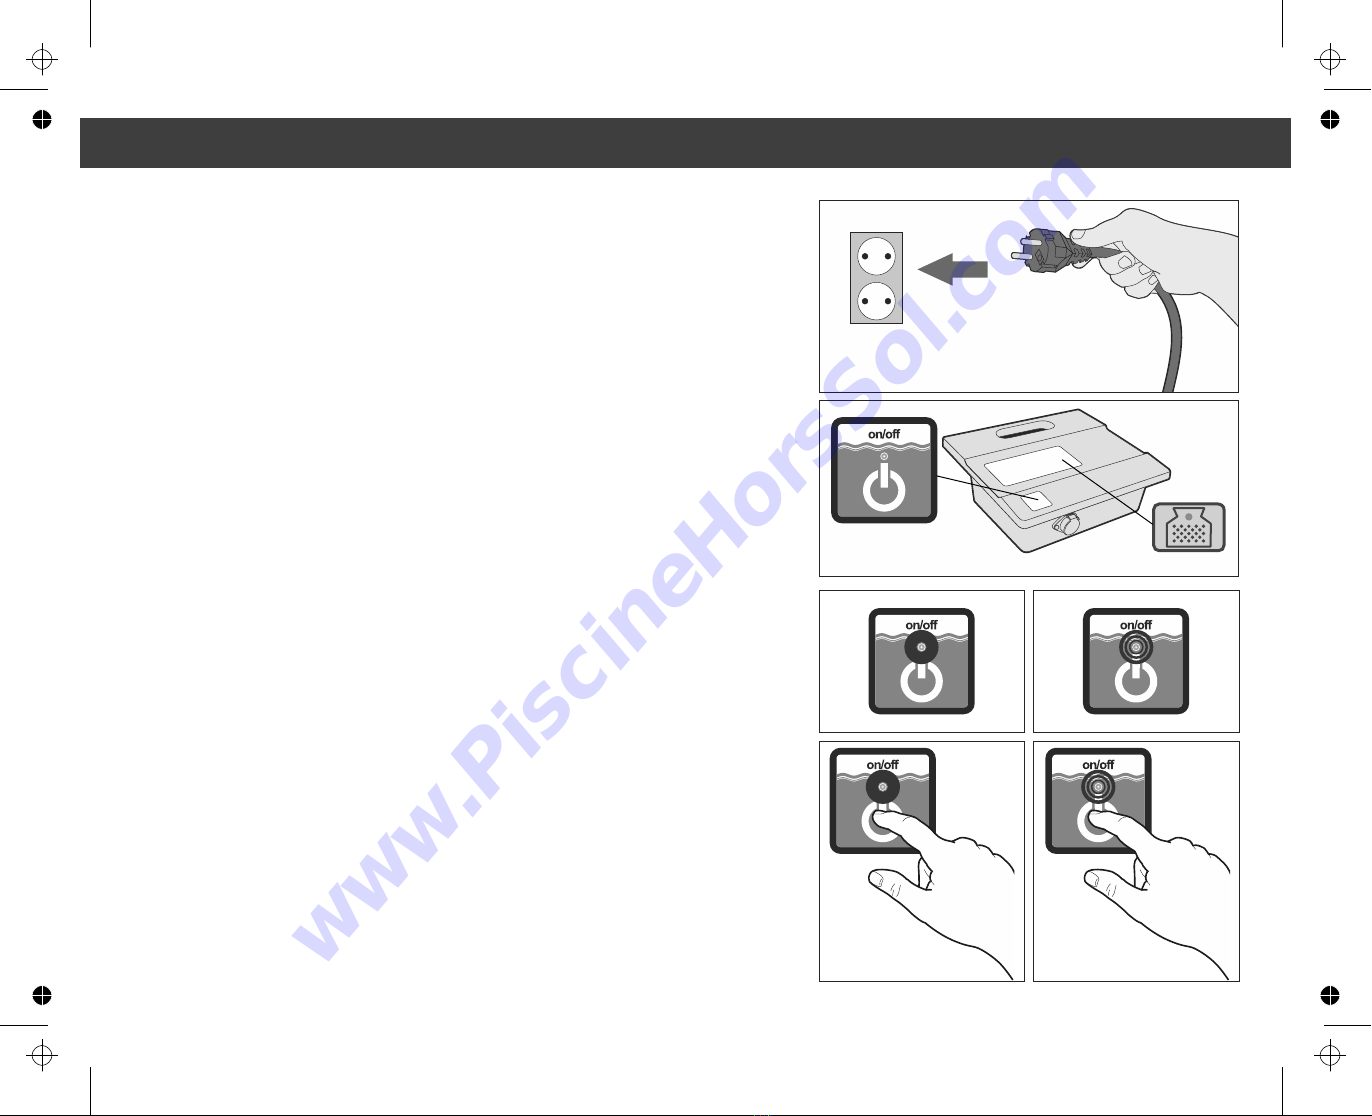
Starting the Robotic Cleaner
Cleaning Cycle
Stopping Robotic Cleaner Operation
Pulling Cleaner Unit out of the Water
Maintenance
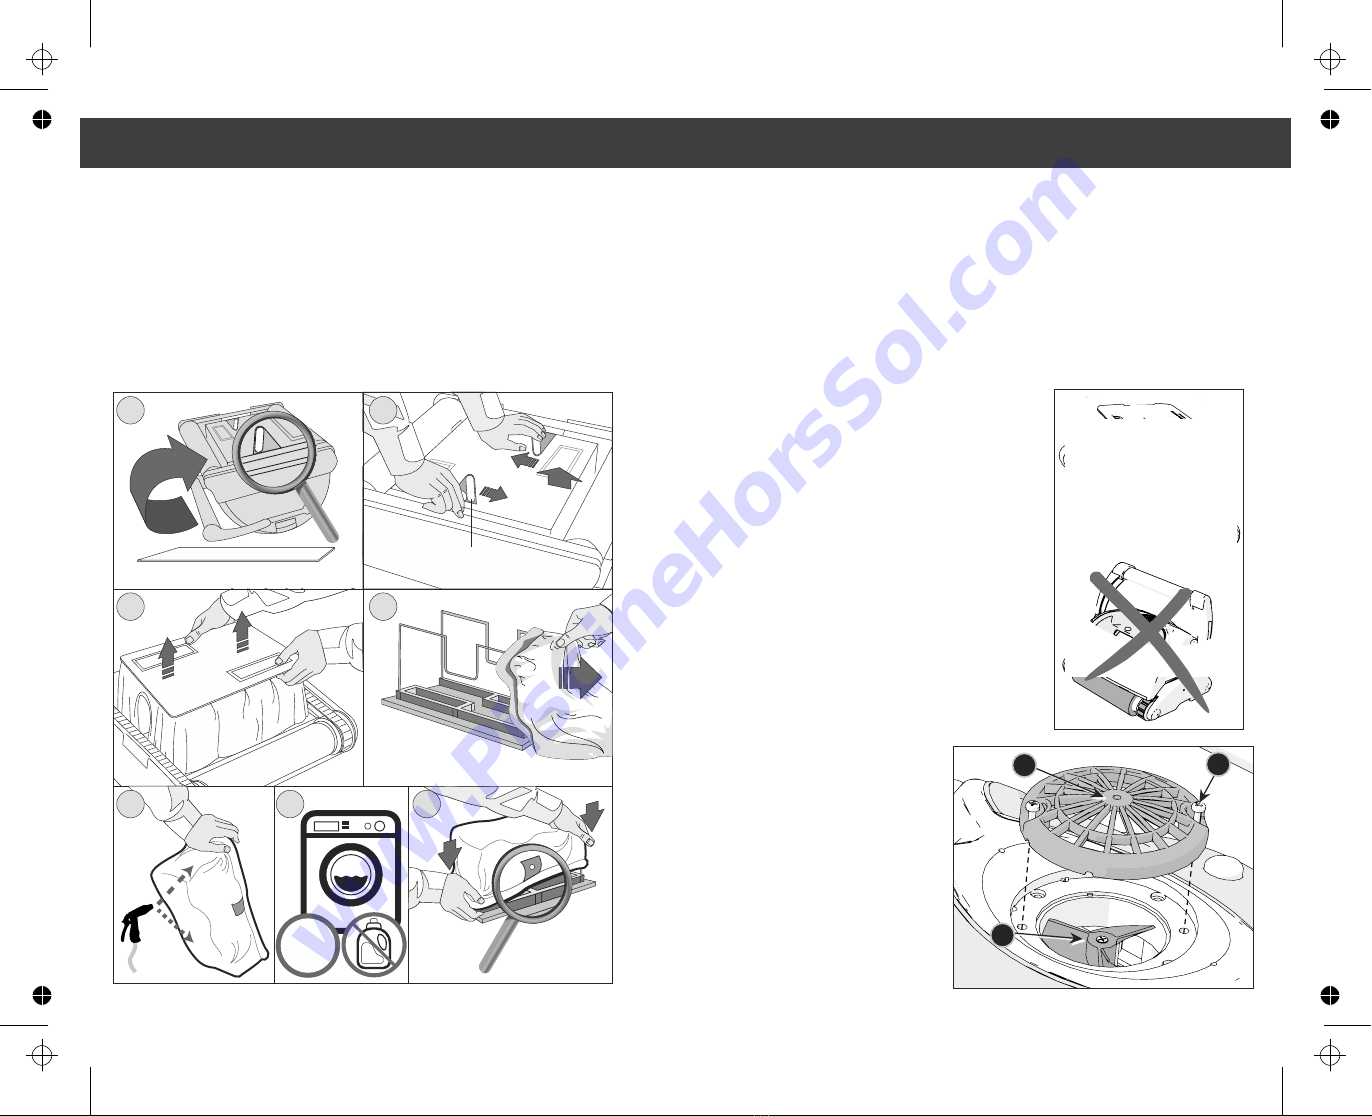
Cleaning Filter
Storing the Robotic Cleaner
Checking Water Outlet Propeller
Robotic Cleaner Programming
Control Panel - Buttons and Indicators
Overlay Buttons
Using an External timer
Troubleshooting
Remote Control
Remote Control Overview
Using the Remote Control
Caddy (optional)
Overview
Assembling the Caddy
Loading the Robotic Cleaner on the Caddy
Trolly (optional)
Overview
Assembling the Trolly
IMPORTANT SAFETY INSTRUCTIONS
READ AND FOLLOW ALL THE INSTRUCTIONS
CAUTION: Do not plug the power supply into a grounded outlet or do not switch the
pool cleaner “ON” if it is not fully immersed in water. Operating the cleaner out of water
will cause severe damage immediately and will result in loss of warranty.
Allow the cleaner to remain in the pool for 15 to 20 minutes following the end of its
cleaning cycle. This will allow the motors to cool adequately. Do not leave the cleaner
in the pool all the time. Always remember to turn the power supply “OFF” and unplug it
from the power outlet before removing the cleaner from the pool.
WARNING: The cleaner must not be used when people are in the water. For use
with swimming pool only
Safety Note
- The unit must be supplied through a residual current device (RCD) having a rated
residual operating current not exceeding 30 mA
- The connection to the branch circuit should be consistent with the local and national
wiring rules (electrical code).
- Mishandling of the unit can result in leakage of lubricants.
- If the supply cord is damaged, it must be replaced by the manufacturer’s service
agent or a qualified and trained person in order to avoid hazards.
WARNING: A Ground Fault Current Interrupter (GFCI-USA) or a Residual Current
Device (RCD-EUROPE) must be installed to protect your electric outlet and prevent
any possible electric shock.
This appliance is not intended for use by persons (including children)
with reduced physical, sensory or mental capabilities, or lack of
experience and knowledge, unless they have been given supervision or
instruction concerning use of the appliance by a person responsible for
their safety. Children should be supervised to ensure that they do not
play with the appliance.
SAVE THESE INSTRUCTIONS
3