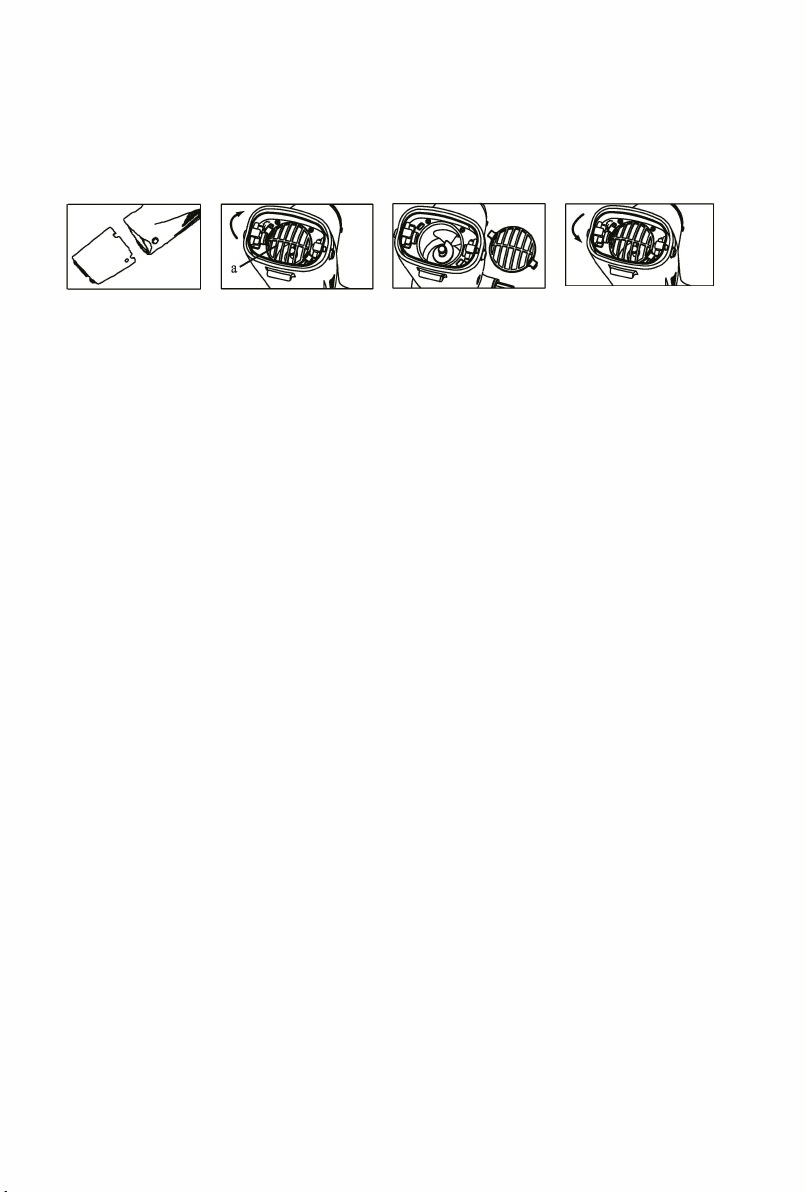
How to clean the dirt on the impeller?
(1 ). Turn off cleaner and remove suction par! from cleaner body, as Picture A.
(2).
Hold the body, pinch the hand-protection part(Picture B, as "a" shows), turn it
clockwise until the end, then drag it out;
(3). Clean the dirt on the impeller.
(4). Do the opposite way to assemble the impeller.
A B e D
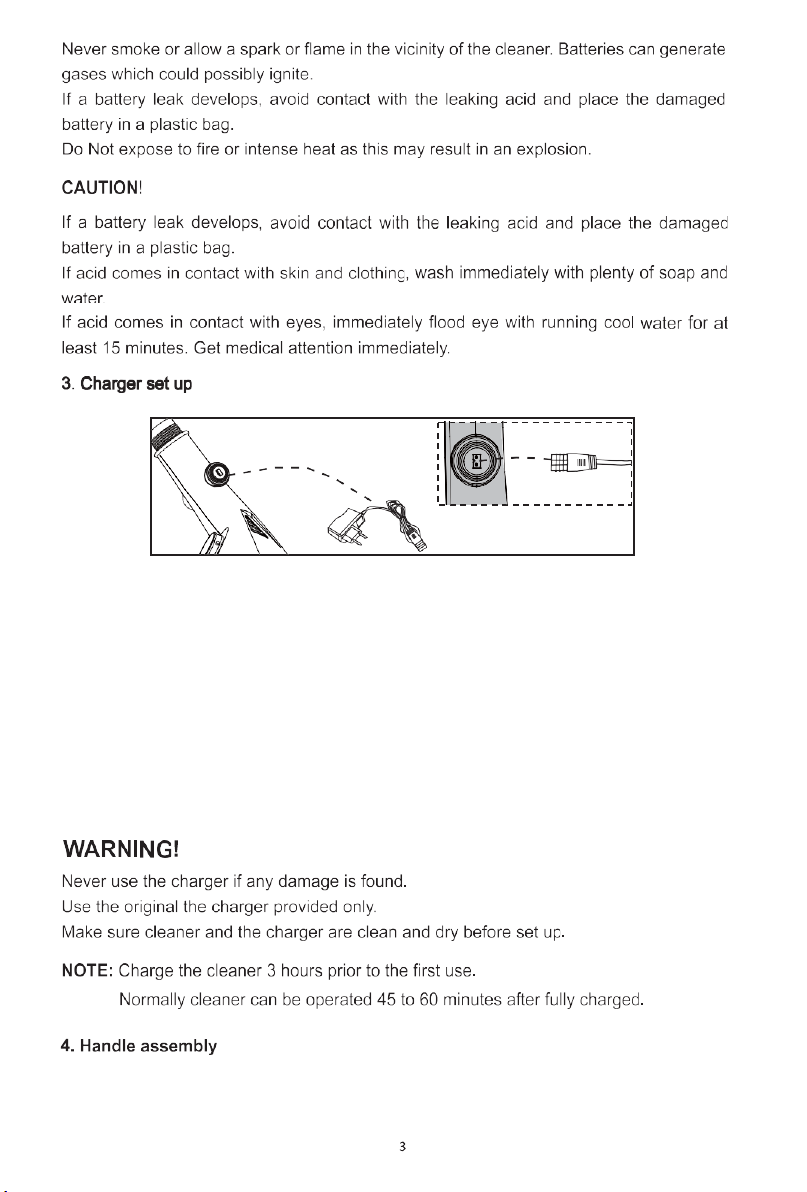
WARNING!
This cleaner is not intended for use by persons lack of experience and
knowledge, unless they have been given supervision or instruction concerning
use of the appliance by a person responsible far their safety.
lt is not a TOY. Children should be supervised to ensure that they do not play
with this cleaner and its accessories. Never allow children to operate this
product. Keep this cleaner and its accessories away from children.
Be sure the cleaner is fully immersed in the water befare operation. DO NOT
operate it outside of water. lt will lead to failure of the shaft seal / motor, and
then VOID the warranty.
Maximum operating depth in water: 3 meters (10ft).
Operating
water
temperature:
4
º
C
(39.2
º
F)-35
º
C
(95
º
F)
DO NOT use this cleaner if any damage is faund.
lt is necessary to change parts or assemblies as quickly as possible if they
become damaged. Only use parts certified by the distributor or manufacturer.
Detach the cleaner from charger and make sure the cleaner is power off befare
operating the product.
Do not operate this cleaner when people/pets are in the water.
Risk of Suction Entrapment Hazard. This cleaner generates suction. Avoid hair,
body or any loase parts of your clothing to contact with the suction hole of the
cleaner in operation.
Never insert body parts, clothing or other objects into the openings and moving
parts of the cleaner.
DO NOT use this cleaner to pick up any toxic substance, flammable or
combustible liquids such as gasoline, or operate in the presence of explosive
or flammable fumes.
5