Green Panther Ultimate 20 L User manual

Note: Please read the following instructions before use. This book contains important information on SAFETY, ASSEMBLY, OPERATION
& DISCLAIMER: DUE TO CONSTANT UPGRADATION, FEATURES AND SPECIFICATIONS ARE SUBJECT TO CHANGE WITHOUT NOTICE
ULTIMATE 20 L
GREEN PANTHER
LAWN MOWER
Multi-Purpose Professional
Lawn Mower
Fuel Efficient
196cc Powerful Engine To cover large area
in less time
User Manual

2
MANUAL CONTENTS Page No.
Introduction 3
Safety instructions 4
Setting up 5
Engine Oil 6
Removing Mulch Plugs 7
Maintenance 8
Benefits for you 10
Useful Mulch Mowing tips 11
Spare parts 12
Free Service coupon 16
Warranty Card 18
Do’s & Dont’s 19
CARTON CONTENTS Quantity
Green Panther ULTIMATE 20 L Lawn Mower 1
User manual 1
Engine manual 1
Grass catcher assembly
FREE ACCESSORIES
Spare Blade (4 Blades) 1Set
Safety Articles 1Set
Repair Tools For Enigne 1Set
Repair Tools For Mower 1Set
NB. Mowers which have the mulch option will have the
mulch Plug fitted into the rear chute of the mower.

3
INTRODUCTION
Congratulations on your purchase of Green Panther ULTIMATE 20 L Lawn Mower. This manual
covers the setting up, operation and maintenance of the Green Panther ULTIMATE 20 L Lawn
Mower. Please read and understand this owner’s manual before using the mower. If any point
is unclear, contact The manufacturer or agent. To emphasise special information the following
WARNING and CAUTION highlights are used.
MAINTENANCE
Please keep the manual and the engine booklet for your future reference.
They contain important information about your mower.
TECHNICAL SPECIFICATION
MODEL ULTIMATE 20-L LAWN MOWER ALLOY DECK
TYPE SELF PROPELLED
ENGINE LONCIN 196CC/IP-70/OHV
ENGINE STARTING EASY PULL START SYSTEM
AREA TO COVER AN AREA OF 2400M2
DRIVE SPEED(MIN-MAX) 0-3.96 KM/HR
CUTTING HEIGHT 15MM-75MM-10 STAGES-SINGLE LEVER
CUTTING WIDTH 20"/508MM
NET/GROSS WEIGHT 40KGS/42KGS
WHEELS 8"-FRONT & 7.5" REARX45MM TYRE WIDTH WITH BALL BEARING
DISK BLADE FLAIL -SWING BACK BLADE SYSTEM-4 BLADES
SAFETY BREAK LEAVER FOR IMMEDIATE STOP
UTILITY WASH PORT-EASY CLEANING & TO KEEP DRY-TO CLEAN THE DECK
GRASS DISCHARGE REAR COLLECTION
GRASS BAGS PVC HARD CASE BOX -70LITRES
ACCESSORIES-FREE SPARE BLADE 1SET(4BLADES), SAFETY ARTICLES, USER MANUAL,
REPAIR TOOLS FOR ENIGNE & MOWER

4
SAFETY INSTRUCTIONS
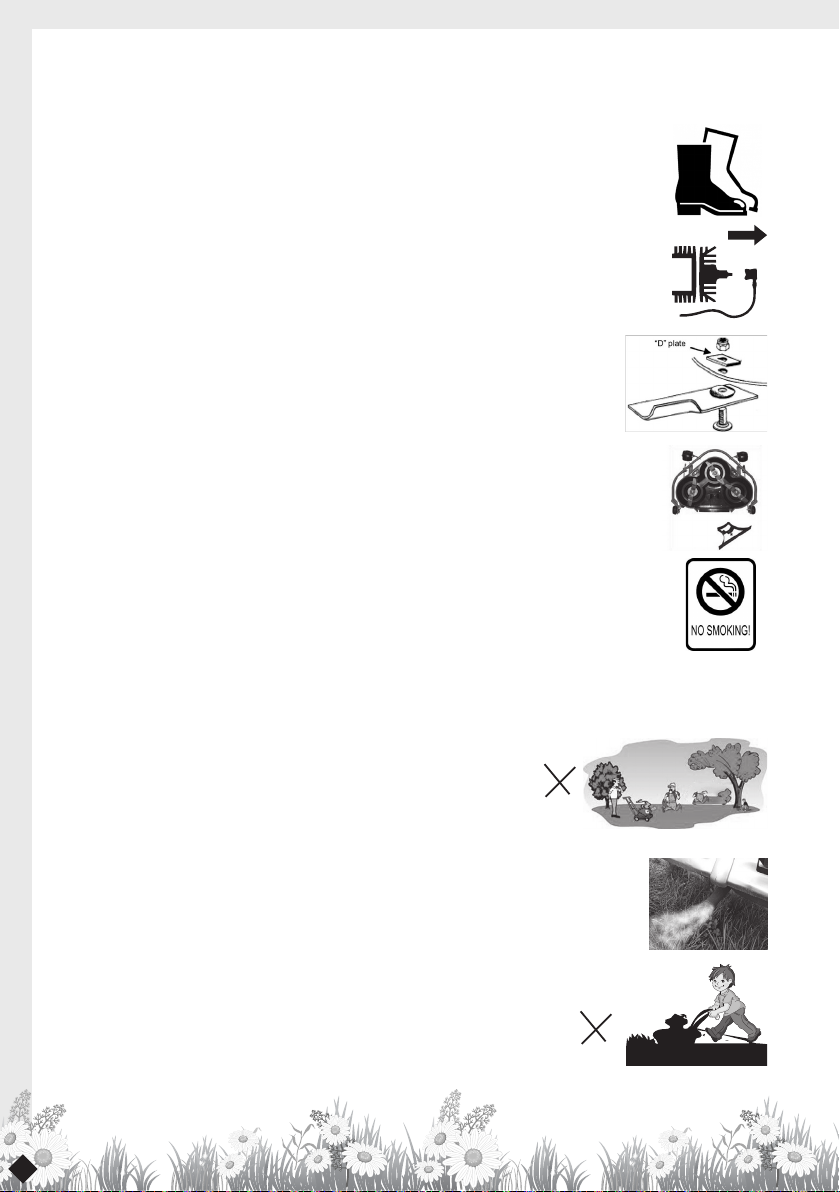
• Never mow while barefoot or wearing open sandals. Wear long trousers and heavy shoes
• Know your controls. Read the owner’s manual carefully.
Learn how to stop the engine quickly in any emergency
• Make sure the lawn is clear of sticks, stones, bones, wire and debris.
They could be thrown by the blade
• Stop the engine and disconnect the spark plug wire before clearing
blockages, checking, or working on the mower.
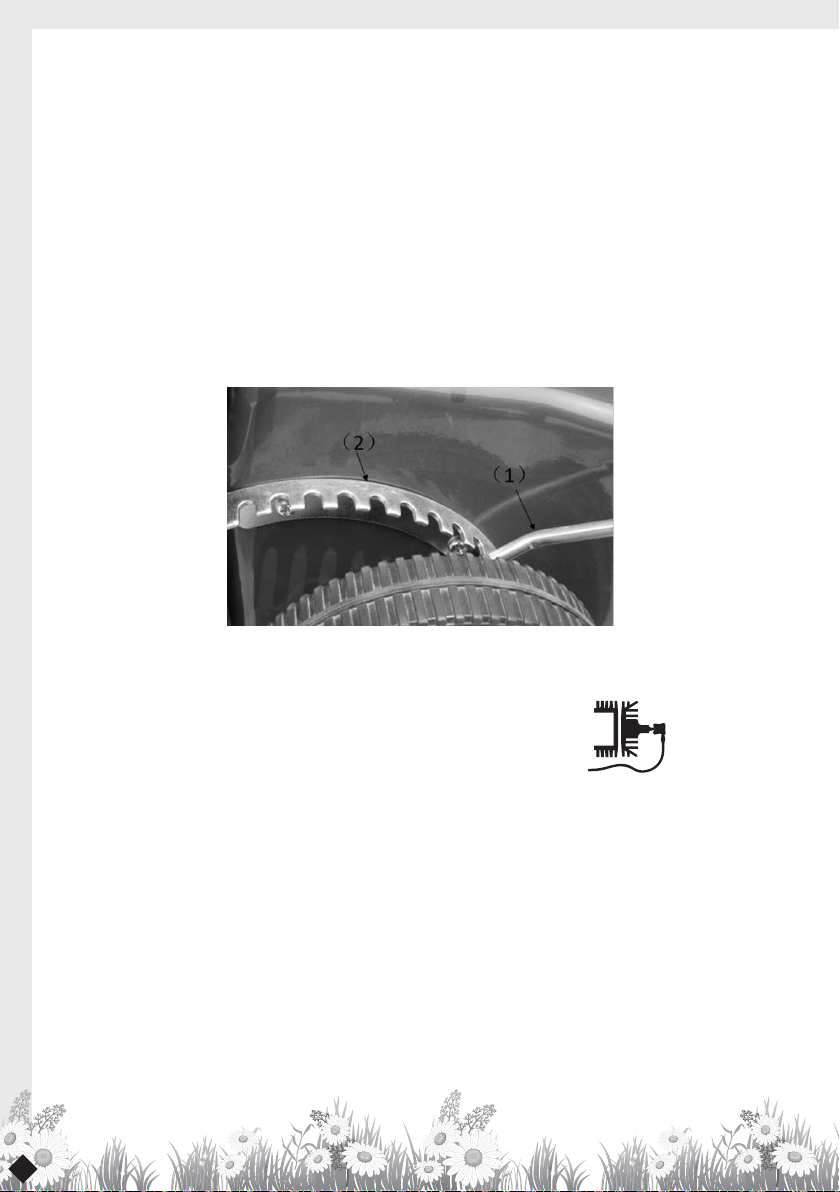
• Before using, always visually inspect to see that blades, blade bolts and cutter
assembly are not worn or damaged. Replace worn or damaged blades in
sets to preserve balance.
DAMAGED BLADES AND WORN BOLTS ARE MAJOR HAZARDS.
• Check all nuts, bolts and screws often; always be sure the mower is in
a safe operating condition. Use only genuine replacement parts.
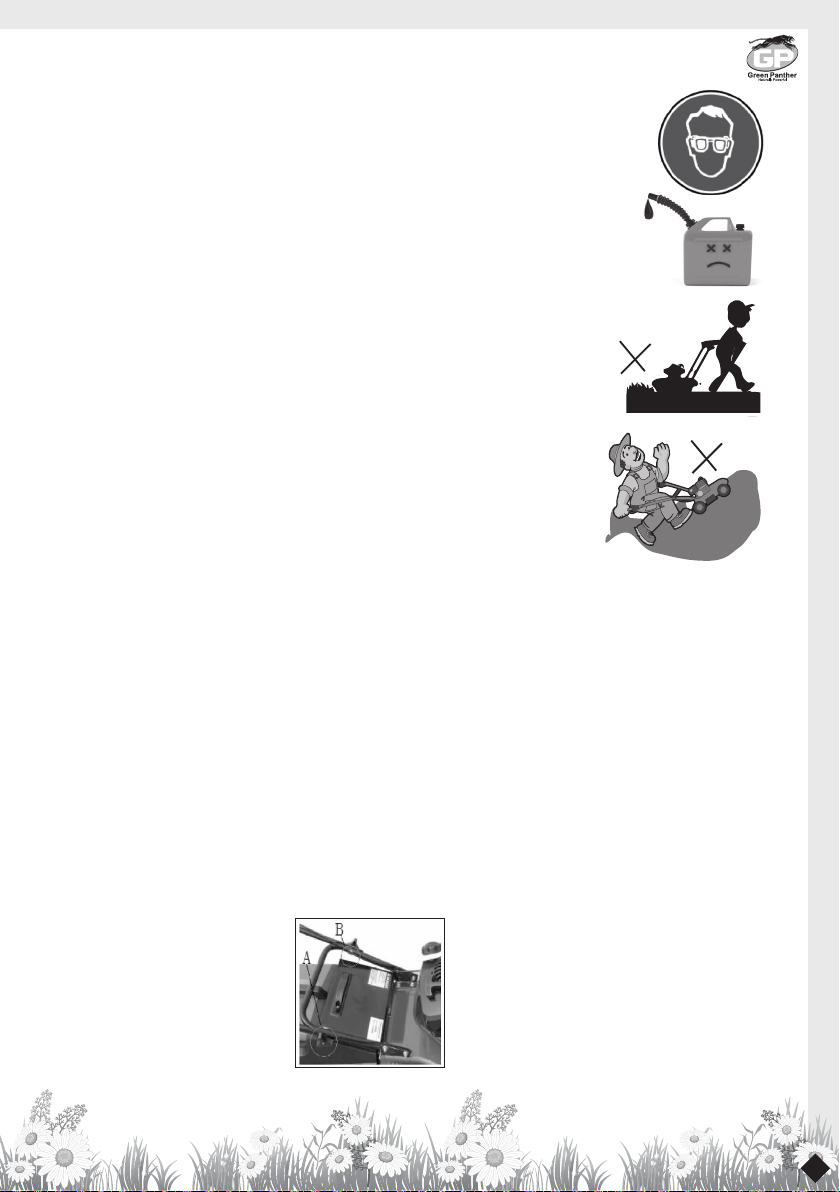
• Refuel outdoors only. Do not smoke while fuelling engine. Add fuel
before starting the engine. Never remove the cap off the fuel tank
or add fuel while the engine is running or the engine is hot.
If fuel is spilled, do not attempt to start the engine but move the machine away from the
area of the spill and avoid creating any source of ignition until fuel vapors have dissipated.
• Do not mow whilst people, especially children or pets are in the mowing area.
• Replace worn or faulty silencers (mufer)
• Mow only in good daylight.
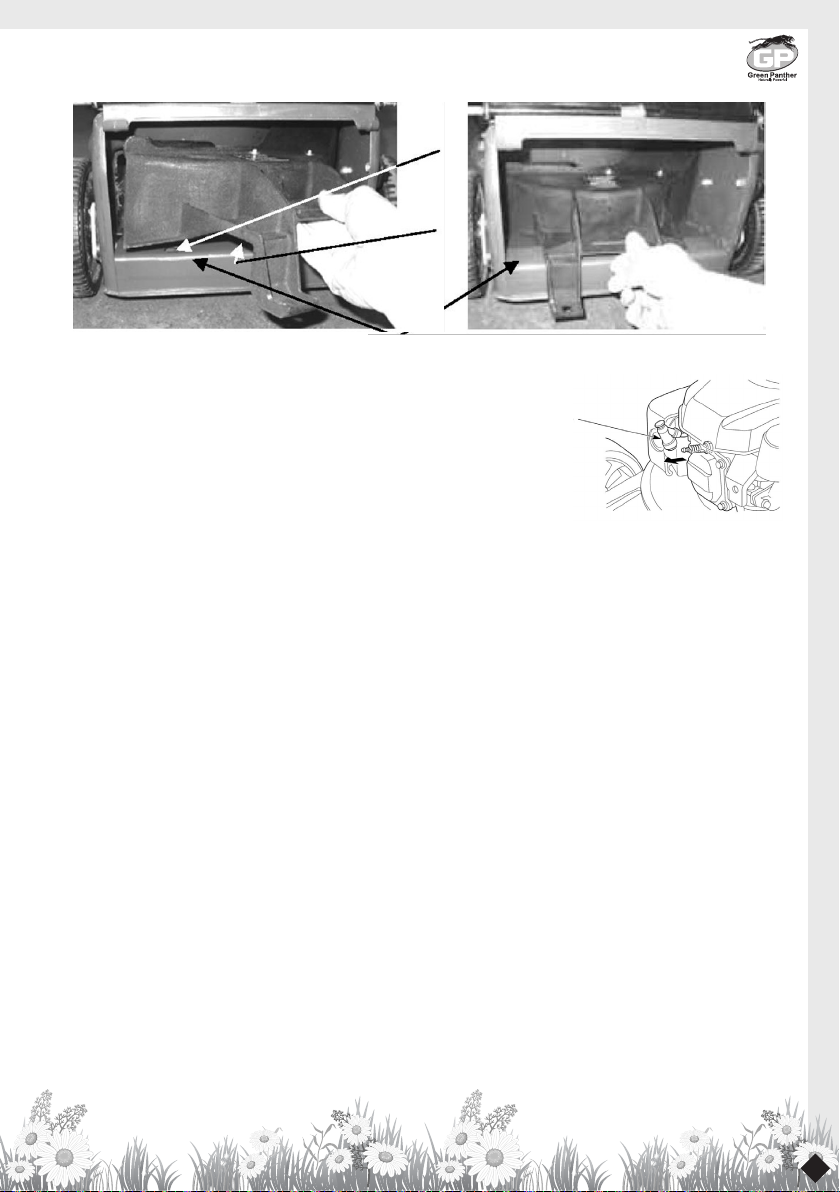
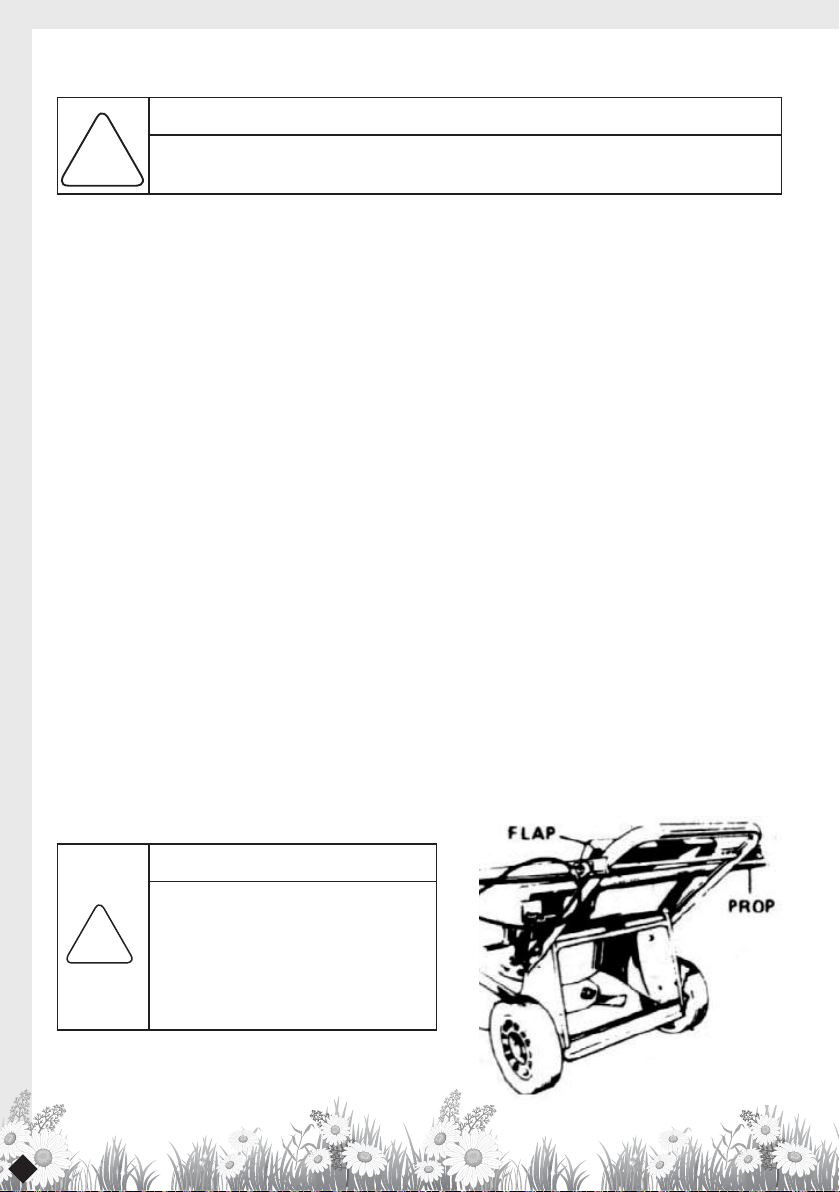
• Never use the mower unless the grass catcher or guards
(rear ap) provided by the manufacturer are in position.
• Start the engine carefully with feet well away from the blade.
• Do not operate the engine in a conned space where exhaust fumes
(carbon monoxide) can collect.
• Stop the engine whenever you leave the mower, even for a moment.
• Do not allow children or people unfamiliar with these instructions
to use the mower.
• Store the mower in a well-ventilated room away from naked ames
found in hot water heaters.

5
• Do not over-speed the engine or alter governor settings.
Excessive speed is dangerous and shortens the mower life.
• It is advisable to wear suitable eye protection when operating a mower.
• Turn the fuel off at the conclusion of mowing and reduce the throttle
setting during engine run-out.
• Store fuel in a cool place in a container specically designed for the purpose.
In general, plastic containers are unsuitable.
• Stop the engine, disconnect the spark plug wire and inspect the mower if:
a) the mower begins to vibrate abnormally; or b) after striking a foreign object.
• Never cut grass while walking backwards
• Stop the engine before pushing the mower across gravel drives,
walks or roads. Always walk, never run
• Mow across the face of slopes, never up and down.
• Exercise extreme caution when changing direction on slopes.
Do not mow excessively on steep slopes.
• Never pick up or carry a mower when it is operating
SETTING UP
Preliminary
• Open the lawn mower carton carefully folding back the carton top aps.
• Lift out the plastic grass catcher components.
• With the aid of a second person carefully lift the lawn mower
out of the carton and place on a level surface.
• Loosen the two handle bar pivot bolt knobs (A) (where tted).
• Fold the handle bars out straight, inline with the lower handle bars. Tighten the two handle
bar pivot bolt knobs (A) or the cam locks (B) to secure the handle bars in position.
• Remove and discard the white protective packing sheet from the mower.
Handle bar pivot bolt knobs
Fig 1

6
ENGINE OIL
•The 4 stroke engine fitted to the lawnmower is shipped with no oil in the sump
•Oil must be added before attempting to start the engine otherwise damage to the engine will occur.
ENGINE FUEL
• Use only fresh unleaded fuel in the lawnmower engine
OPERATION -Mulch Mowers
Installing the Mulch Plug
• With the engine stopped, raise the rear ap of the mower and remove the grass catcher
• Insert the long right hand side of the mulch plug rst into the rear chute of the mower.
Refer to figure 7
• Rotate the left hand side into the rear chute of the mower and push it as far forward as possible.
• Align the two locating pins (1) (on the underside of the mulch plug) with the slots (2) in the top
surface of the back ledge (3) of the mower base and lower the mulch plug until the lower face
rests at on top of the back ledge of the mower base. Refer to gures 7 & 8
• Lower the rear ap. To ensure the mulch plug is correctly seated, the rear ap should close
against the vertical face of the mulch plug legs with clearance to the horizontal extensions.
Adjusting the Cutting Height

7
REMOVING THE MULCH PLUG
• With the engine stopped, raise the rear ap of the mower.
• Grasp the rear of the mulch plug and lift up and away from the mower.
• Guide the mulch plug out by rotating the shorter left hand side to the
right and then guiding the longer right hand section until clear of the mower.
OPERATION -All mowers
To start the engine
Refer to the engine owner’s manual for detailed starting procedure. Ensure that the engine oil is at the
correct level and that the fuel tank is full of fresh unleaded fuel.
• Move the throttle control lever to the :- “CHOKE” position (where tted) - or the “FAST” position
and prime the engine. Refer to the engine owner’s manual.
• Grasp rope handle and pull slowly until resistance is felt. Then pull the cord rapidly to overcome
compression, prevent kickback and start engine. Repeat if necessary
• If a “Choke” is tted move the throttle control lever to the “FAST” position after the engine starts
.
TO STOP THE ENGINE
Move the throttle control lever to the “STOP” position, Wait till the engine comes to a complete stop before
removing or fitting the grass catcher or mulch plug to the mower, or attempting any maintenance work on
the mower.
Mulch plug installation (A) - Push Mower Mulch plug installation (B) - Push Mower

8
MAINTENANCE
Engine air cleaner
Refer to the engine owner’s manual for detailed maintenance instructions. The engine air cleaner
elements must be serviced after every 25 hours of normal mowing. The elements must be serviced
more regularly if the mower is used in dusty conditions. Replace immediately if the element is
damaged.
Spark plug
Refer to the engine owner’s manual for detailed maintenance instructions. For best results, remove
the spark plug every 50 hours for gap checking and replace every 100 hours of use. Replace the spark
plug at any time if it is found that the electrodes are pitted or burned or the porcelain cracked. For
replacement refer to engine owner’s manual for correct spark plug.
Muffler
Check the condition of the mufer periodically for rust and cracks. Replace if found to be damaged
as this can lead to increased exhaust noise. Replace only with a genuine original equipment part.
Blades
Check the condition of the blades and central fasteners at regular intervals, or after striking a solid
object, or if the mower begins to vibrate abnormally. The blades with use, will lose their sharp edge
and the quality of the grass finish will deteriorate. When this happens, all the blades should be
removed and replaced with a new set of blades. Always use genuine replacement blades and only
replace blades in sets to maintain balance.
CAUTION
Always ensure the engine is stopped
and the spark plug lead is removed
before attempting any maintenance
on the mower. Secure the mower
safely when titled upwards to access
the underside
Warning
Before carrying out any maintenance on the mower remove the spark plug lead from
the spark plug to prevent accidental starting
!
!

9
Cutting Assembly
•With the engine stopped, remove the spark plug lead and grass catcher or mulch plug.
•Set the height of cut lever to the high cut position, and fold the handle bars.
•Tilt the mower so the spark plug is up.
•Inspect the cutting assembly for damage and wear.
•Check the disc retaining bolts. Tighten the centre bolt to 5762Nm and the three concentric bolts
to 8-11Nm.
•Return the mower to its normal position and re-attach the spark plug lead
Blade Change
•with the engine stopped, spark plug lead and grass catcher or mulch plug removed.
open the discharge ap and prop in the open position.
•set the mower to the high cut position and fold the handle
bar forward.
•Rotate the cutting assembly carefully to access the blade
retaining bolts. refer fig 16
•using gloves and a suitable spanner, remove the blade assembly.
• Retain the “D” plates and discard the blades and fasterners.
NB. Mowers fitted with a circular cutting disc must be fitted with a “D”plate
•Fit new blades and fasten in the correct order. refer fig 16
Cleaning
To ensure safe operation and long life it is recommended to clean the mower after every use. This will
prevent corrosion, overheating and fire risk while ensuring ultimate performance.
Cleaning the underside of the mower
Place the mower outdoors on a at surface.
• Set the cut height to maximum.
• With the engine stopped, remove the grass catcher or mulch plug and lift open the discharge ap.
• Use a garden hose to wash out all the grass clippings.
• Inspect the underside and repeat the cycle if still not clean.
Cleaning the upper side of the mower
•Use a dry cloth or soft brush to remove all loose clippings.
•Use a damp cloth with mild detergent to clean away oil or other grime.
•Wash the grass catcher and/or mulch plug separately from the mower with a hose.
Wash all clippings out of the inside, outside and from the grass catcher mesh.
•Let the mower dry before storing.

10
BENEFITS FOR YOU
Because you mulch as you mow the time and cost savings are also significant:
•Eliminating raking of leaves before mowing
(Mulch mowing picks up and converts fallen leaves into mulch).
•Eliminating raking of cut grass.
•Saves time spent emptying the catcher.
•Automatically disposing of grass clippings.
•Eliminating the need to dispose of clippings at the refuse tip.
BENEFITS TO YOUR LAWN
Research has shown that lawns are usually cut too short, grass, like any other plant life, relies on
photosynthesis to regenerate and survive. Reduced leaf size (from cutting too low) can seriously
effect a lawn by:
• Making it more susceptible to disease.
• Encouraging weeds to take hold.
• Exposing the soil to:
- greater evaporation
- temperature extremes
- erosion
Raising the cut height and using mulch mowing follows the best practice for nurturing a healthier
more attractive lawn with less water usage.
MULCH MOWING INFORMATION
Some models are fitted with an option for mulch mowing. A mulch plug is supplied with these mowers and
it is installed in the rear discharge chute (as noted in the “OPERATION” section of this manual) to perform
mulch mowing. The following information provides advice on mulch mowing .
MULCH MOWING
The mulch mowing setup reduces the grass clippings into very fine particles.
The design allows for the even distribution of the grass particles at the base of the lawn. The mulched
clippings can then:
•Break down quickly, releasing nutrients into the soil, saving on fertilizer costs.
•Reduce evaporation of moisture from the soil which reduces watering costs and effort.
• Help to control temperature extremes protecting the roots of the grass.
•Assist in controlling soil erosion.

11
USEFUL MULCH MOWING TIPS
Mulch mowing is an art form and to produce the best results consistently, follow these useful hints:
•Do not attempt to mulch if the grass is too wet.
Wet grass tends to clump together and does not evenly spread out. It also clogs up the underside
of the base.
•Do not mulch mow on too low a cutting height.
Remember the maximum cut should be 25mm off the top of the grass, or 1/3rd the grass (blade)
height, whichever is the lesser amount .
•Do not push the mower too fast.
To obtain the best finish it may be necessary to regulate the ground speed.
•Run the engine at full throttle.
Running the engine at low speed does not allow the blades tomulch the grass efficiently.
•Keep the mulch blades sharp.
The mulch blades are designed to cut and re-cut the blades of grass. If the mulch blades are
not kept sharp, mulching performance will be reduced.
•Keep the underside of the mower and mulch plug clean.
Build-up of grass under the mower base blocks the airow created by the mulch blade and
reduces the mulching performance.
•If the conditions for mulch mowing are not ideal and some clipping trails are visible after cutting
maybe necessary to:
1. Fit the grass catcher and catch mow.
2. Re-mow over the visible clippings.
3. Raise the cut height.
4. Rake the clippings up after mowing.
MAINTENANCE
Mulching Equipment - For optimum mulching performance
•The mulch blades are to be kept sharp.
•Maintain the blade sharpening angle when sharpening.
•Keep the cutting edge feather free when sharpening.
•Keep the underside of the mower deck and the mulch plug free of build-up.
•Refer to the Cleaning section on page 7.

12
Green Panther Lawn Mower ULTIMATE 20 L - Spare Parts Diagram

13

14
GREEN PANTHER LAWN MOWER ULTIMATE 20 L
SPARE PARTS LIST
PART NO. PART NO. Description
GP-LM-U20-01 4062370 BACK COVER
GP-LM-U20-02 7020606 WING NUT M6
GP-LM-U20-03 4280990 BACK COVER BRACKET
GP-LM-U20-04 7030601 FLAT WASHER 6
GP-LM-U20-05 7040602 ELASTIC WASHER 6
GP-LM-U20-06 7260636 M6X30 SCREW
GP-LM-U20-07 7030413 CORE PULLING RIVETS 4.8X12
GP-LM-U20-08 4011600 BACK COVER HANDLE
GP-LM-U20-09 4011610 LOCKING HANDLE
GP-LM-U20-10 7010043A BOLT
GP-LM-U20-11 7130516 ELASTICL PIN 5X20
GP-LM-U20-12 4011800 PUSH HANDLE
GP-LM-U20-13 4010461 LOWER HANDLE
GP-LM-U20-14 7030802 FLAT PAD 8
GP-LM-U20-15 7020009A LOCK NUT 5/16”
GP-LM-U20-16 4020540 OUTER TUBE
GP-LM-U20-17 7150003 STEEL RING
GP-LM-U20-18 4021020 WRENCH
GP-LM-U20-19
GP-LM-U20-20
GP-LM-U20-21 5071900 CLUTCH LINE
GP-LM-U20-22 7051206 CLUTCH SPRING
GP-LM-U20-23 4020621 CONTROL HANDLE
GP-LM-U20-24 7020602 HEXAGONAL LOCK NUT M6
GP-LM-U20-25 5071960 THROTLE CABLE
GP-LM-U20-26 7260635 SCREW M6X16
GP-LM-U20-27 4062650 SHIELD
GP-LM-U20-28 7130401 PIN 4X20
GP-LM-U20-29 1020360 SPROCKET GEAR
GP-LM-U20-30 7141002 SPRING D=10
GP-LM-U20-31 1060601 CHAIN 06B 52
GP-LM-U20-32 4271110 LEFT LUG WELDING
GP-LM-U20-33 7150026 NYLON TIES
GP-LM-U20-34 4240371 20” ALUMINUM ALLOY SHELL
GP-LM-U20-35 7180812 SQUARE BOLTS M8X20
GP-LM-U20-36 4271120 LUG WELDING
GP-LM-U20-37 7050202 SPRING
GP-LM-U20-38 4181040 BACK COVER AXIS
GP-LM-U20-39 6070370 SIDE LABEL
GP-LM-U20-40 7020830 LOCK NUTS M8
GP-LM-U20-41 7010805 BOLTS M8X20
GP-LM-U20-42 7130211 PIN Ф2.5X25
GP-LM-U20-43 7220540 OIL SEAL RING
GP-LM-U20-44 4210621 REAR AXLE WELDING
GP-LM-U20-45 1011560 DRIVE SHAFT
GP-LM-U20-46 4070390 OUTER SLEEVE
GP-LM-U20-47 7260635 SCREW M6X16
GP-LM-U20-48 4063060 STEEL COVER
GP-LM-U20-49 7061208 BEARING 1616Z
GP-LM-U20-50 4160500 GEAR WASHER
GP-LM-U20-51 7220630 RING
GP-LM-U20-52 8011000 SELF-PROPELLED 8”
GP-LM-U20-53 4063049 WHEEL COVER
GP-LM-U20-54 7141201 SHAFT CLIPS D=12
GP-LM-U20-55 7133101 GEAR PIECE
GP-LM-U20-56 1030290 RIGHT GEAR
GP-LM-U20-57 7010605 BOLT M6X20
GP-LM-U20-58 4020610 REAR AXLE BRACKET
GP-LM-U20-59 7260635 SCREWS M6X16
GP-LM-U20-60 7020614 LOCK M6
GP-LM-U20-61 5012507 ASY H/ADJ HANDLE
GP-LM-U20-62 7082920 PAD
GP-LM-U20-63 7010606 BOLT M6X20
GP-LM-U20-64 5012507 Asy H/ADJ handle
GP-LM-U20-65 7082920 Pad
GP-LM-U20-66 7010606 Bolt M6×20
GP-LM-U20-67 7230412 PULLING RIVETS 4.8X14
GP-LM-U20-68 4040750 BOARD
GP-LM-U20-69 8010980 FRONT WHEEL 7.5”
GP-LM-U20-70 4151120 AXIS PLATE
GP-LM-U20-71 7081250 SLEEVE
GP-LM-U20-72 4210630 FRONT AXLE WELDING
GP-LM-U20-73 4151110 LEFT ANTERIOR AXIS PLATE
GP-LM-U20-74 6070360 ANTERIOR LABEL
GP-LM-U20-75 7054206 BALANCE SPRING
GP-LM-U20-76 4050911 ASY DRAW BAR
GP-LM-U20-77 7120190 NYLON COVER
GP-LM-U20-78 7130202 R PIN
GP-LM-U20-79 7030810 NYLON GASKET
GP-LM-U20-80 2502130 Gasoline Engine (GXV160UH2N4)
GP-LM-U20-81 7020814 HEXAGONAL NUT M8X1
GP-LM-U20-82 7040802 ELASTIC CUSHION 8
GP-LM-U20-83 7030807 FLAT PAD 5/16X7/8X16G
GP-LM-U20-84 7010872 HEXAGONAL BOLT M8X1X45
GP-LM-U20-85 7010015A BOLT 5/16-24UNF
GP-LM-U20-86 1041131 HONDA ENGINE PULLEY(Ф25.4)
GP-LM-U20-87 7200649 HEXAGON SOCKET SET SCREWS M6X10
GP-LM-U20-88 7110620 KEY(B=6.31)
GP-LM-U20-89 3031591 COUPLING(Ф25.4)
GP-LM-U20-90 7020008A LOCK NUT 3/8”
GP-LM-U20-91 4161700 D GASKET
GP-LM-U20-92 3050300 CIRCULAR CUTTER
GP-LM-U20-93 4161710 TOSS CUTTER GASKET(SADDLE SHAPE)
GP-LM-U20-94 3010480 TOSS CUTTER 117X50
GP-LM-U20-95 7181062 TOSS CUTTER BOLT
GP-LM-U20-96 4151350 CUTTER PLATE
GP-LM-U20-97 7040003A ELASTIC CUSHION 5/16X1/8X3/32
GP-LM-U20-98 7010002A INCH SCREW 5/16”
GP-LM-U20-99 7010042A CENTRAL SCREW 3/8-24UNF
GP-LM-U20-100 7031017 FLAT PAD 3/8X3/4X16G
GP-LM-U20-101 1041140 TOP HALF OF THE PULLY
GP-LM-U20-102 7110515 FLAT KEY TYPE A 5X5X14
GP-LM-U20-103 7010664 SCREW M6X12
GP-LM-U20-104 1041150 BOTTM HALF OF THE PULLY
GP-LM-U20-105 7054001 LARGE COMPRESSION SPRING
GP-LM-U20-106 4150265 PLATE
GP-LM-U20-107 7010836 HEXAGON HEAD BOLTS M8X1X20
GP-LM-U20-108 1050080 TRIANGULAR V BELT XPA600
GP-LM-U20-109 4062640 BELT COVER
GP-LM-U20-110 7010642 SCREW M6X35
GP-LM-U20-111 7010666 SCREW M6X50
GP-LM-U20-112 4063070 LEFT DUST COVER
GP-LM-U20-113 4062660 CHAIN GUARD
GP-LM-U20-114 1020370 12 TOOTH SPROCKETS
GP-LM-U20-115 1030280 LEFT GEAR
GP-LM-U20-116 4090830 HANDLE
GP-LM-U20-117 7260644 SCREW M6X20
GP-LM-U20-118 7030601 FLAT PAD 6
GP-LM-U20-119 7030501 FLAT PAD 5
GP-LM-U20-120 7210510 SELF-TAPPING SCREWS ST4.8X50
GP-LM-U20-121 4091020 GRASS CATCHER DOWN PIECE
GP-LM-U20-122 4091040 STENCIL
GP-LM-U20-123 4091010 GRASS CATCHER UPPER PIECE
GP-LM-U20-124 4091030 DECORATIVE COVER
GP-LM-U20-125 4091000 GRASS CATCHER
GP-LM-U20-126 7051708 EXTENSION SPRING
GP-LM-U20-127 4020581 CLUTCH LEVER
GP-LM-U20-128 1080120 SPEED REDUCER
GP-LM-U20-129 4090950 BLOCK
GP-LM-U20-130 4062897 INNER FENCE
GP-LM-U20-131 4062892 BACK FENCE
GP-LM-U20-132 4062896 BACK FENCE RIGHT
GP-LM-U20-133 4062898 BACK FENCE LEFT
GP-LM-U20-134 4062894 BLOCK FRONT SUPPORT
GP-LM-U20-135
GP-LM-U20-136
GP-LM-U20-137 7020602 TYPE 1 HEXAGON NUTS M6
GP-LM-U20-138 7030601 FLAT PAD 6
GP-LM-U20-139 5071910 THROTTLE CONTROL BOX
GP-LM-U20-140 7260625 SCREW M6X45
GP-LM-U20-141 6061330 LABEL
GP-LM-U20-142 6070240 WARNING LABEL
GP-LM-U20-143 6070380 NAME LABEL

15
Small Maintenance. Big Savings.

16
1st Free Service Coupon ISO 9001-2015
CERTIFIED COMPANY
FREE SERVICE COUPON (30 Days / 20 hrs (Which ever is earlier)
Model
PDI Date
Dealer’s Office Seal & Signature
Service No.
Purchase bill no. Date
Serial Number
Customer Signature.........................................
Conditions: Operations listed have been performed to my entire satisfaction without any labour charges. Only consumables were charged.
WARRANTY AND FREE SERVICE COUPON
ULTIMATE 20 L LAWN MOWER
2nd Free Service Coupon ISO 9001-2015
CERTIFIED COMPANY
FREE SERVICE COUPON (30 Days / 20 hrs (Which ever is earlier)
Model
PDI Date
Dealer’s Office Seal & Signature
Service No.
Purchase bill no. Date
Serial Number
Customer Signature.........................................
Conditions: Operations listed have been performed to my entire satisfaction without any labour charges. Only consumables were charged.
WARRANTY AND FREE SERVICE COUPON
ULTIMATE 20 L LAWN MOWER
3rd Free Service Coupon ISO 9001-2015
CERTIFIED COMPANY
FREE SERVICE COUPON (30 Days / 20 hrs (Which ever is earlier)
Model
PDI Date
Dealer’s Office Seal & Signature
Service No.
Purchase bill no. Date
Serial Number
Customer Signature.........................................
Conditions: Operations listed have been performed to my entire satisfaction without any labour charges. Only consumables were charged.
WARRANTY AND FREE SERVICE COUPON
ULTIMATE 20 L LAWN MOWER
Bungalow | Hotels | Gardens | Stadium | Resorts | Lawns | Parks | Golf Course

17
1. LIMITED WARRANTY PERIOD : For a period of six months from the date of Sale / delivery of the product which ever is earlier. 2. LIMITED
WARRANTY OBLIGATION : Replacement of defective part(s) by authorized dealer are free of charges. If found defective by reasons of defective
material / poor workmanship, parts will be replaced and there will be no value re-imbursement. 3. TERMS & CONDlTlONS : a. Claims under
warranty will be accepted on submission of Warranty Card duly filled and stamped by authorized dealer together with the original purchase
document. : b. Shipping / transportation / Incidental charges incurred in replacing defective parts under warranty shall be borne by the purchaser.
WARRANTY null & void if
(i) Lack of maintenance, (ii) Incorrect use of the machine or tampering, (iii) Use of non-genuine spare parts, (iv) Usage of acids, solvents, or any
ammable materials, (v) Non-usage of lter water / clear water / soft water & using water above 40°C temperature, (vi) While using the pressure
washers to draw water which is contaminated with dust & solvents (eg. paint thinners, gasoline, oil, etc.), (vii) Repair done by unauthorized
service people, (viii) Those parts subject to wear & tear due to normal operations and plastic parts, rubber items etc, (ix) Loose connections,
faulty electrical xtures & uctuations in power supply.
4. Should any failure occur during or after the warranty period, customer does not have the right to interrupt payment / price discount.
5. Incidental or consequential damages like inconvenience commercial loss, loss of tie, mental agony etc.
6. Loss of any nature due to operation or non-operation is not covered under warranty.
7. All free service are at Dealer’s service point only.
8. Warranty ceases if service is not done periodically.
9. The attached card should be completed and returned to Ratnagiri Impex Pvt. Ltd. for registration immediately after sale / delivery.
10. The warranty is void unless you register the warranty card with Ratnagiri Impex Pvt. Ltd.
11. The decision of Ratnagiri Impex Pvt. Ltd., in settling the warranty is nal in all respects.
12. All disputes are subject to Bangalore Courts Jurisdiction

18
Purchaser’s Name & Address
Product Name
Product Serial No.
Invoice / DN No.
Date of Delivery
Dealer’s Office Seal
Dealer Sign
Customer Sign.
I/We accept the terms and conditions of Warranty
as in the Warranty Card.
CUSTOMER COPY
Warranty Card
ULTIMATE 20 L LAWN MOWER
Purchaser’s Name & Address
Product Name
Product Serial No.
Invoice / DN No.
Date of Delivery
Dealer’s Office Seal
Dealer Sign
Customer Sign.
I/We accept the terms and conditions of Warranty
as in the Warranty Card.
DEALER’S COPY
Warranty Card
ULTIMATE 20 L LAWN MOWER
Purchaser’s Name & Address
Product Name
Product Serial No.
Invoice / DN No.
Date of Delivery
Dealer’s Office Seal
Dealer Sign
Customer Sign.
I/We accept the terms and conditions of Warranty
as in the Warranty Card.
COMPANY COPY
Warranty Card
ULTIMATE 20 L LAWN MOWER

19
• Always read the instruction manual supplied along with the equipments and understand the
correct installation and operating procedures before attempting to use the equipments.
• It is important to use the personal protection equipments such as head helmet with visor, ear
defenders, goggles, safety gloves, cut resistant shoes, trousers and jackets while operating
potentially dangerous machines.
• Avoid untrained persons using the equipments. Children must not be allowed to handle these
equipments.
• Always use genuine spares and accessories in repairs and usage to derive maximum life of
the equipments.
• Always keep the equipments in good working condition to minimise loss of output as well as
to reduce the pollution and save the environment.
• Do not use the machine within range of persons unless they wear protective clothing.
• Do not operate the machine when fatigued or under the inuence of alcohol or drugs.
• For more query kindly contact for our Service Center/Dealer/ franchise
Do’s Don’ts

RATNAGIRI IMPEX PVT LTD
Annapurna House, #1/1G, 7th Cross, New Guddadahalli
Mysore Road, Bangalore-560 026
Customer Care: 1800-425-3036
email: [email protected]
www.ratnagiriimpex.com AN ISO 9001:2015 CERTIFIED COMPANY
OUR RANGE OF OTHER PRODUCTS
Mowing Patterns
Your ULTIMATE 20 L Green Panther Lawn Mower mower will work most efficiently if you use the following mow-
ing patterns as much as possible. Cutter housing, equipment design and the direction in which the blades rotate,
cause these mowing patterns to give the best results.
Table of contents
Other Green Panther Lawn Mower manuals