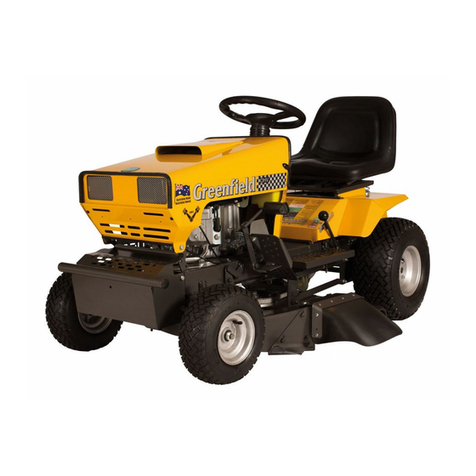
Greenfield GT03716 User manual

1
Owners Manual
Instrucons & Original Equipment Parts Lisngs
Model GT03716
Grass Catcher
Model GT03030
Tip Trailer
Model GT03580
Dozer Blade
Greeneld Mowers Pty Ltd
123 Boundary Rd, Rocklea. QLD 4106
Ph: (07) 3875 9400
F: (07) 3875 9425
E: info@greeneld.com.au
www.greeneld.com.au

2
Contents
Safety Instrucons - Grass Catcher 3
Operang Instrucons - Grass Catcher
4Fing Instrucons - Grass Catcher
5Assembly Instrucons - Grass Catcher
6Catcher Mounng Arm
7Parts Lisngs - Catcher
8
Safety Instrucons - Tip Trailer 9
Spare Parts & Assembly - Tip Trailer 10
Frame Assembly- Dozer Blade 11
Blade Aachement & Arculaon - Dozer Blade 12
Operaon - Dozer Blade 12
Handle & Link Assembly - Dozer Blade 13

3
Safety Instrucons - Grass Catcher
1. WARNING - Disconnect the spark plug lead to avoid accidental starng before aempng any
inspecon or maintenance.
2. Do not mow whilst people, especially children or pets, are in the mowing area. Children should
be kept safely supervised. Never assume that children will remain outside of the cung area.
Do not reverse before looking behind.
3. Ensure that the area to be mowed is clear of scks, stones, boles, bones, wire, and other
debris that could be thrown by the blades or damage the Grass Catcher.
4. Never aempt to empty the Grass Catcher without rst disengaging the cung blades. If the
Grass Catcher is lied for emptying whilst the cuer clutch is engaged, the high speed cung
blades will be exposed. Serious personal injury or death could be caused by contact with the
blades or thrown debris.
5. A mower operator should be in good physical and mental health and not under the inuence
of any drug, alcohol or any other substance that could impair vision, coordinaon or judgment.
6. Do not carry passengers.
7. Know your controls. Read the operang instrucons carefully. Learn how to stop the mower
and the engine quickly in an emergency.
8. Do not operate the machine without rst inspecng the blades, blade bolts, and blade holder
for wear or damage. Damaged blades and worn bolts are hazardous. Replace worn or
damaged parts with genuine Greeneld replacement parts only. Use of inferior, non-genuine
service parts could result in damage or personal injury.
9. Check that the Grass Catcher, guards, and switches provided by the manufacturer are
operang properly and ed securely. Regularly check all components to ensure that the
machine is in a safe operang condion.
Thank you for purchasing an Australian made Greeneld aachment. Your Greeneld aachment
is designed to be used as an accessory to your Greeneld FastCut ride-on lawn mower. Please
ensure to follow the manufacturer’s safety, operang, and maintenance instrucons for many
years of trouble free operaon and service.
Before ng the aachment to the mower, read the owner’s manual carefully. Do not allow
children or any person unfamiliar with the safe operang procedure to operate the mower. Your
Greeneld aachment has been designed to meet stringent safety standards - but we remind you
that a mower is a cung device - used incorrectly, it may cause personal injury or death. Remove
the key from the machine when not in use.
Greeneld Aachments

4
Fing Instrucons - Grass Catcher
To Fit the Catcher Locaon Peg to the Cuer Deck
1. Fit the cup head bolt (GT00181) from the underside of the chute into the round hole between
the two (2) stone guard xing bolts.
2. Place the long spacer (GT03741) onto the bolt located at the top of the cuer deck, then the
washer (GT01050), followed by the nylon lock nut.
3. Tighten rmly.
4. Ensure that the underside head of the bolt is ghtened ush with the cuer deck.
Mounng the Skid
1. Turn the Catcher body upside down and bolt the skid as illustrated on pg. 5 g. 1.
Assembly of the Catcher
1. Bolt the boot bracket to the Catcher body using the correct row of holes for each model as
shown on pg. 5 Fig. 2.
Bolng the Pivot Plate
1. Fit the Catcher pivot plate to the Catcher mounng arm, including the washers and the grip
clip as shown in illustraon on pg. 5 Fig. 3.
2. Posion the front of the Catcher body onto the peg in the cuer deck (with the cuer deck in
the high posion) and the rear end of the Catcher resng on the at part of the pivot plate.
3. Move the pivot plate so that the Catcher Arm (aached to the rear of the mower) is halfway
along its slots in the pivot plate. Align the six (6) mounng holes in pivot plate with the mower
and bolt together with the wear plates on the pivot plate aachment shown in illustraon pg.
5 Fig. 4.
4. Bolt the spring brackets to the body and the hinged door, t the washers, springs, nuts, and
handle as shown in illustraon pg.5 Fig. 5.
Fing the Catcher Arm
See illustraon ‘Catcher Mounng Arm’ pg. 6.
1. Slip the washer onto the end of the Catcher Arm.
2. Holding the Catcher up vercally, slip the mounng slots over the Catcher Arm.
3. Put on the washer, then t the grip pin from the front to the rear through the hole in the
Catcher Arm.
4. Swing the Catcher down to posion it onto the peg located on the cuer deck.

5
Figure 1 Figure 3
Figure 2 Figure 4
Figure 5
Assembly Instrucons - Grass Catcher
Skid aachment as seen with Catcher turned upside down. Pivot plate posioning as seen from under Catcher.
Catcher arm to be
halfway along slot.
17
15
23
Boot bracket aachment.
17
6
23
1
17
3
7
2
13
1
14
16
Inside Catcher.
Pivot plate aachment.
23
23
23
8
9
18
5
25
26 11
27
17
19
18
28
24
4

6
Catcher Mounng Arm
Mounng
Arm
Washers
Clip Grip

7
Parts List - Catcher
Index Part # Descripon Qty Supplied
1GT03720 Catcher Body 30/32 L.H 1
2GT03611 Pivot Plate 1
3GT03612 Wear Plate 2
4 GT03727 Spring Bracket 1
5 GT03735 Lever 1
6 GT03653 Boot Bracket 1
7 GT03713 Spacer - 12mm 4
8 GD05546 Knob 1
9 GT00748 Spring 1
10 GT02094 Grip Clip 1
11 GT01022 Washer - 1/4” x 5/8” 1
12 GT03640 Washer Large - 22” x 38” 2
13 GT03730 Reinforcing Plate 1
14 GT02099 Screw - 3/16” x 1 1/4” 4
15 GT03731 Skid 1
16 GT02097 Screw - 3/16” x 5/8” 2
17 GT02078 Nyloc Nut - 3/16” 21
18 GT01035 Washer Small - 5/16” x 3/4” 3
19 GT01020 Nyloc Nut - 5/16” 2
20 GT00181 Bolt Cup Head - 5/16” x 3/4” 1
21 GT03741 Spacer - 16mm 1
22 GT01050 Washer - 5/16” x 1 1/4” 1
23 GT02082 Screw - 3/16” x 1/2” 15
24 GT03738 Catch 1
25 GT03737 Bracket 1
26 GT02499 Screw - 1/4” x 3/4” 1
27 GT00097 Nyloc nut - 1/4” 1
28 GT00073 Nut - 5/16” 1

8
Parts List - Catcher Arm
Index Part # Descripon Qty Supplied
1GT03711 Bracket Assmebly 1
2GT03717 Arm Assembly 1
3GT00218 Hitch Pin 1
4 GT01020 Nyloc Nut - 5/16” UNC 2
5 GT01451 Set Screw - 5/16” UNC x 1 ZP 2
Operang Instrucons - Grass Catcher
1. Thoroughly read the safety and operang procedures of this manual.
2. Check that the Catcher is securely ed to the mower.
3. The Catcher will operate eecvely with standard blades, although when four blades are
ed, beer performance can be expected.
4. Check that the cung blades ed to the mower are in good condion. Also check that the
underside of the cuer deck has no build up of grass, mud, or debris that may eect the
unhindered ow of grass into the Catcher.
5. Use the maximum engine speed available for best performance and regulate the ground speed
through heavy areas with the variable speed foot control pedal.
6. To Empty - this should not be performed whilst the cung blades are engaged.
• Disengage the blades (cuers out). Refer to the mowers owner manual.
• Swing open the door to a full 180°.
• Li the Catcher up using the handle aached to the front of the Catcher. When the
Catcher is completely full it may be necessary to drive the tractor slowly forward
approximately 1 metre whilst holding the Catcher up in the emptying posion in order
to release all of the material.
• When empty, lower the Catcher back down onto the locang peg of the cuer deck.
• Swing the door closed and secure.

9
Safety Instrucons - Tip Trailer
1. Do not carry passengers.
2. Ensure the towing vehicle is in good condion.
3. This trailer has been specically designed to be towed with a Greeneld ride-on mower. Use
only the approved drawbar hitch as shown.
4. Limit loads to those you can safely control. This trailer weighs 30kg. The load should not
exceed 120kg. Maximum gross weight is 150kg.
5. Do not tow on slopes any steeper than you would comfortably use a loaded wheel barrow
on. Always tow the Tipping Trailer in accordance with the mowers operang instrucons for
mowing on slopes.
6. Stay alert for holes in the terrain and other hidden hazards.
7. This trailer should not be used at speeds faster than that of a normal ride on mower.
8. Do not turn sharply. Use care when reversing.
9. When towing this trailer ensure the blades of the ride on mower are disengaged and the cuer
deck is raised to its full height.
10. Tow only in good daylight.
11. We recommend that the dierenal on a mower towing a load be locked out. i.e. Both rear
wheels driving.
12. A mower operator should be in good physical and mental health and not under the inuence of
any drug, alcohol or any other substance that could impair vision, coordinaon, or judgment.
13. Ensure the lock down catch on the trailer bin is regularly oiled and working correctly.
14. Ensure the majority of the load is toward the front of the trailer.
15. Do not drive with the trailer in the pped posion.
16. Do not p the trailer from the mowers operang seat.
17. Before leaving the towing vehicle, switch o the engine and engage the parking brake.
18. Do not put hot coals or ash in this trailer.
19. Do not lend or sell this trailer without the safety and operang instrucons.
20. Ensure to inate the tyres to the correct operang pressure (Normal Load 25psi, Max load
30psi).

10
Spare Parts and Assembly - Tip Trailer
Item Part# QTY Descripon
1GT3031 1Plasc Tray
2GT3035 1Metal Pan
3GT3040 1Axle Beam
4 GT3045 1Draw bar
5 GT3055 2Tie rail
6 GT3060 2Wheel comp.
7 GT0628 2Collar
8 GT3053 1 Catch
9 GT20009 1Spring
10 GT1234 1Bolt
11 GT2466 3Nyloc nut
12 GT1012 4 Washer
13 GT0730 2Bush
14 GT01024 2Bolt
15 GT1301 4 Bolt
16 GT1020 8 Nyloc nut
17 GT1021 4 Cup head bolt
18 GT3863 1Spacer
19 GT0218 1Hitch Pin
17 1
5
2
26
8
4
9
1
16
16
15
11
12
13
14
10
11
18
19
4
18
19

11
Frame Assembly- Dozer Blade
1
3
4
2
7
6
8
9
8
11
10
5
Item Part# QTY Descripon
1GT01093 4 Bolt - 3/8”
2GT02466 4 Nyloc Nut - 3/8” x 1”
3GT09407 2Thick Washer - 3/8” x 1”
4 GT02246 2Black PVC Cap
5GT12323 1 Spring Anchor
6 GT01554 1Tension Spring
7 GT02444 2Bolt - 1/2” UNC x 3”
8 GT00023 4 Washer - 1/2” x 1”
9 GT02495 2Nyloc Nut - 1/2” UNC
10 GT03807 2Leg
11 GT03565 1Load Frame
12 GT03566 1Tab Bolt
13 GT01020 1Nyloc Nut - 5/16”
5
13
12
8
9
6
5
8
710
4
1
2
3
11
Models ed with front bumper - single
Cyl.
Models ed with V-Twin Cyl. Muer
Guard/ Bumper.

12
Blade Aachment & Arculaon
Item Part# QTY Descripon
8 GT00023 1Washer - 1/2” x 1”
9 GT02495 3Nyloc Nut - 1/2” UNC
12 GT03565 1Load Transfer Assembly
14 GT03376 1Bolt Retainer
15 GT02494 1Bilt - 1/2” UNC x 32
16 GT03390 1Dozer Blade Assembly
9
8
12
14
15
16
Dozer Blade Operaon
The Blade can be used in the straight across posion
or up to 20 degrees angle to either side by loosening
the two nuts on the bolt retainer. Rotate the Blade to
the desired posion and re-ghten both of the nuts.
Three holes are provided to enable the Blade to be
posively locked in the straight or full angle posions
using the bolt.
!
Blade Arculaon

13
Handle & Link Assembly
Item Part# QTY Descripon
2GT02466 3Nyloc Nut - 3/8”
17 GT03575 1Rear Link
18 GT03832 1Handle Assembly
19 GT03573 1Front Link
20 GT03568 1 latch
21 GT02242 1Handle Grip
22 GT01012 5 Washer - 3/8” x 7/8”
23 GT00730 3Pivot Bush
24 GT01474 1Cup HD Bolt - 3/8” x 1 1/4”
25 GT02425 2Screw - 1/4” x 5/8” CSK
26 GT01022 2Washer - 1/4” x 5/8”
27 GT00097 2Nyloc Nut - 1/4”
28 GT01024 2Bolt - 3/8” x 1 1/4”
29 GT01451 1Bolt - 5/16” x 1”
30 GT01050 1Washer - 5/16” x 5/8”
31 GT00579 1Wave Washer
32 GT03713 1Spacer
17
19
25
20
27
26
A
21
23
22
22
2
24
18
B
13
32
2
22
31
23
28
30
29
C
28
23
22
2
22
2
17
25
26
27
19
20
21
22
24
22 23 18
2
22 22
22
2
23
28
30 28
29
23
31
32
13
This manual suits for next models
2
Table of contents
Other Greenfield Lawn Mower manuals
Popular Lawn Mower manuals by other brands

Craftsman
Craftsman 917.374112 owner's manual

Lastec
Lastec ARTICULATOR XF100 Series Operator's manual

Yard-Man
Yard-Man 1070-8 Owners operating manual and parts list

Jacobsen
Jacobsen AR-522 jossa ROPS Maintenance manual

Robomow
Robomow RC304 Original operating instructions

LawnMaster
LawnMaster MCAC3618M Operator's manual