Audio cable with 3.5mm 4-pin plugs
Table 2 lists all the parts included in the SM-300 package.
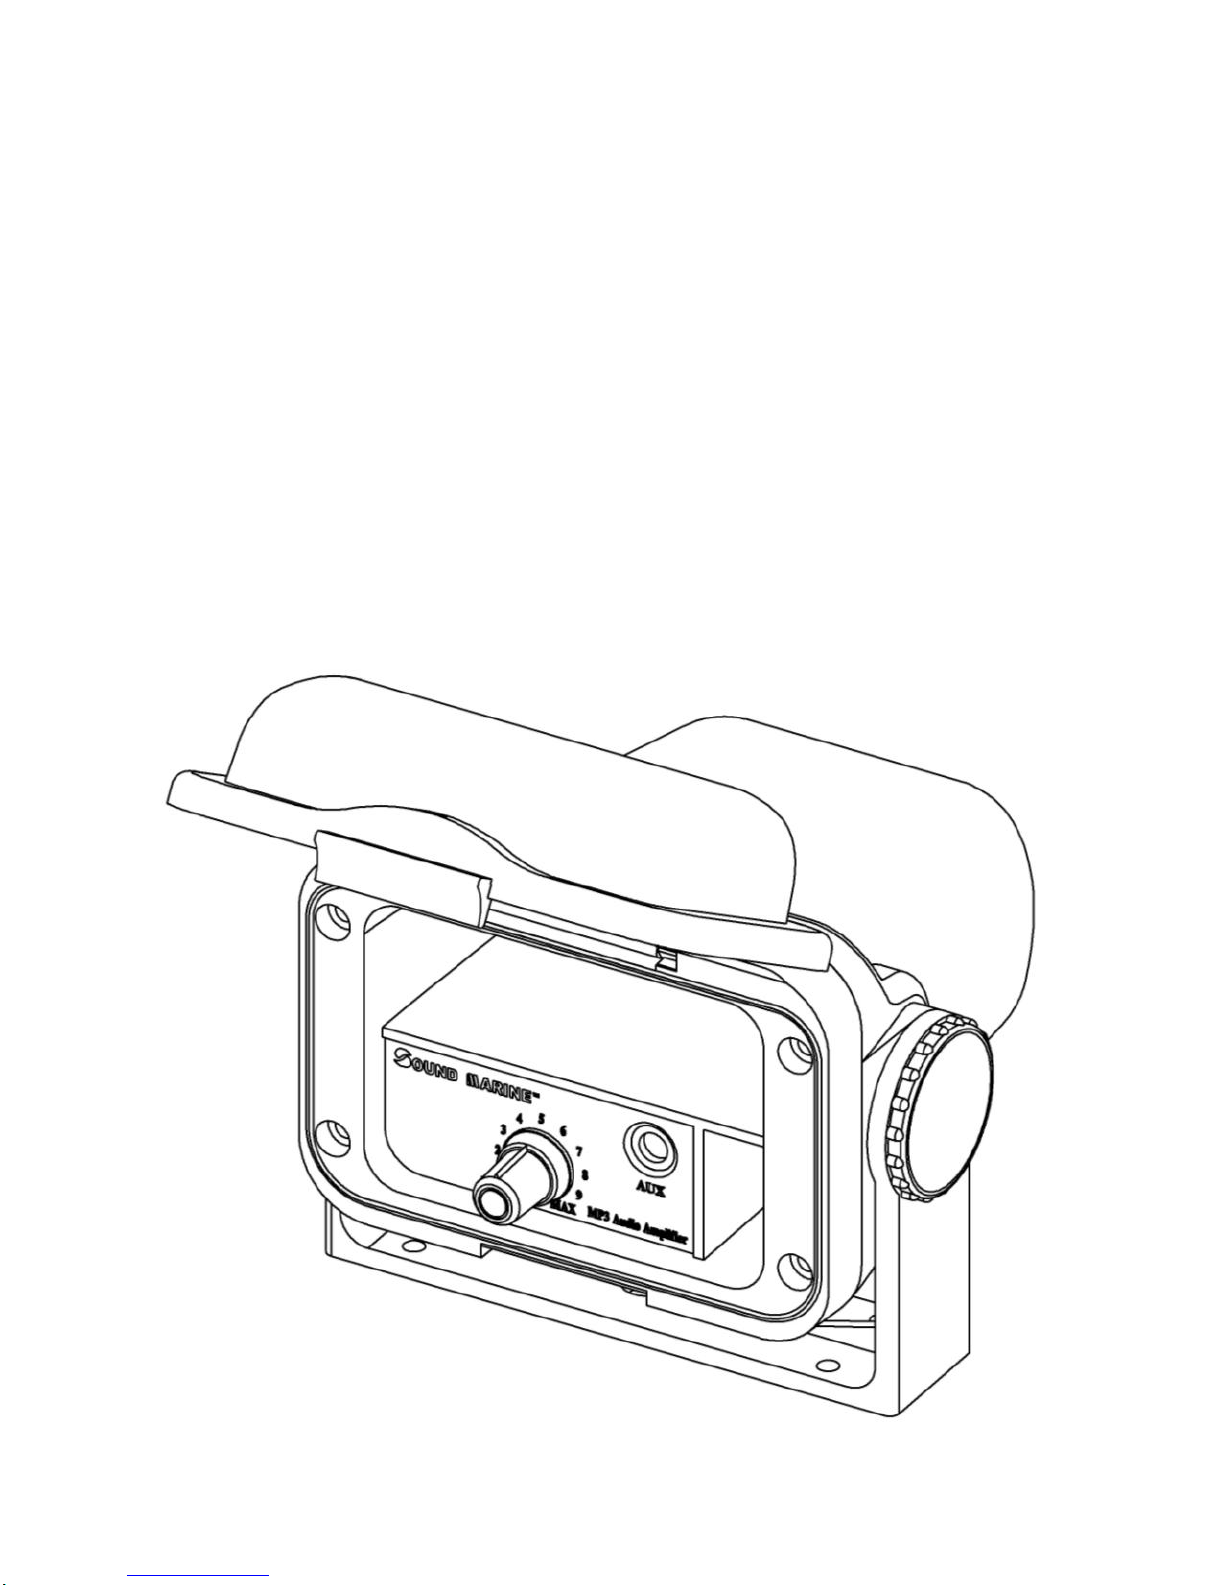
Figure 2. Parts of SM-300. (A) SM-300 audio housing
(B) mounting screw ×4 (C) gasket (D) audio cable with
3.5mm 4-pin plugs
6. Select the best location for mounting
Be aware that SM-200 and SM-300 have different mounting styles and each follows a separate set of
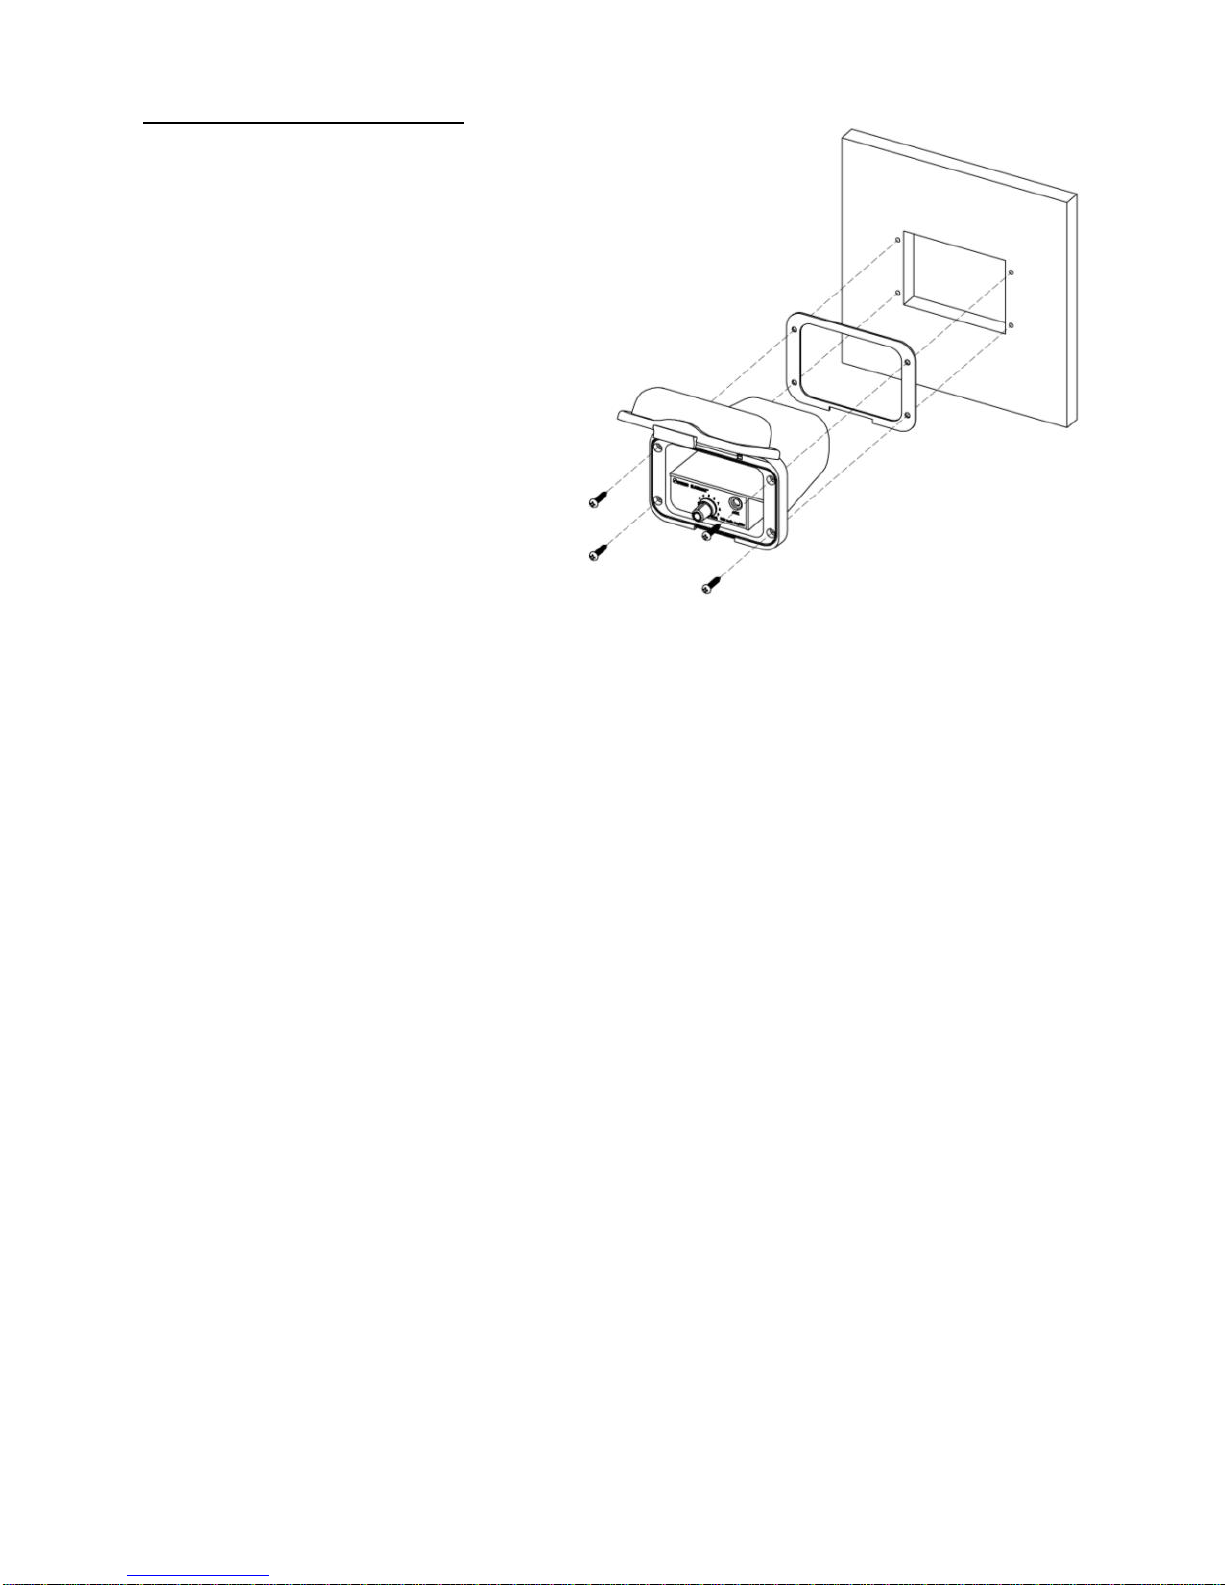
installation instructions. SM-200 is designed to stand on top of a strong surface (Figure 5); SM-300 is
intended to be installed into a sturdy panel (Figure 6).
The surface/panel you select should have the appropriate strength to hold the unit firmly in place
after installation. Apart from the strength, consider the effects of shock, vibration, shear pressure and
movement in different directions have on the mounting surface/panel. If the surface is not sturdy
enough, the housing may be dislocated from its original position and it may be damaged. If you are
uncertain about the location of your choice, contact the local dealer for advice.
7. Installation Manual
Read the following installation manual carefully before proceeding. If you are unfamiliar with wiring
electronic devices, consult your local dealer or contract professionals. False wiring could damage the
amplifier and the rest of audio system.
Figure 3. Wiring diagram of SM-200 /
SM-300. Connect the red and the black wires
to DC 12V the main power supply and
ground respectively. Connect the other wires
to the speakers according to the wiring plan.
Connect the grey wire to the positive terminal
and the grey/white wire to the negative
terminal of the right speaker. Connect the
white wire to the positive terminal and the
white/black wire to the negative terminal of
the right speaker.
SM-200 installation manual
Step 1 –Install the mounting bracket to the
mounting surface
1) Using the mounting bracket as a template,
mark four holes to mount the bracket.
2) Drill the holes using a 1/6”/ 3.2mm drill bit.
3) Hold the bracket against the mounting
surface. Insert and tighten four mounting
screws until the bracket is securely mounted.
If you are in doubt with the stability of the
mounting surface, please consult your local
dealer.
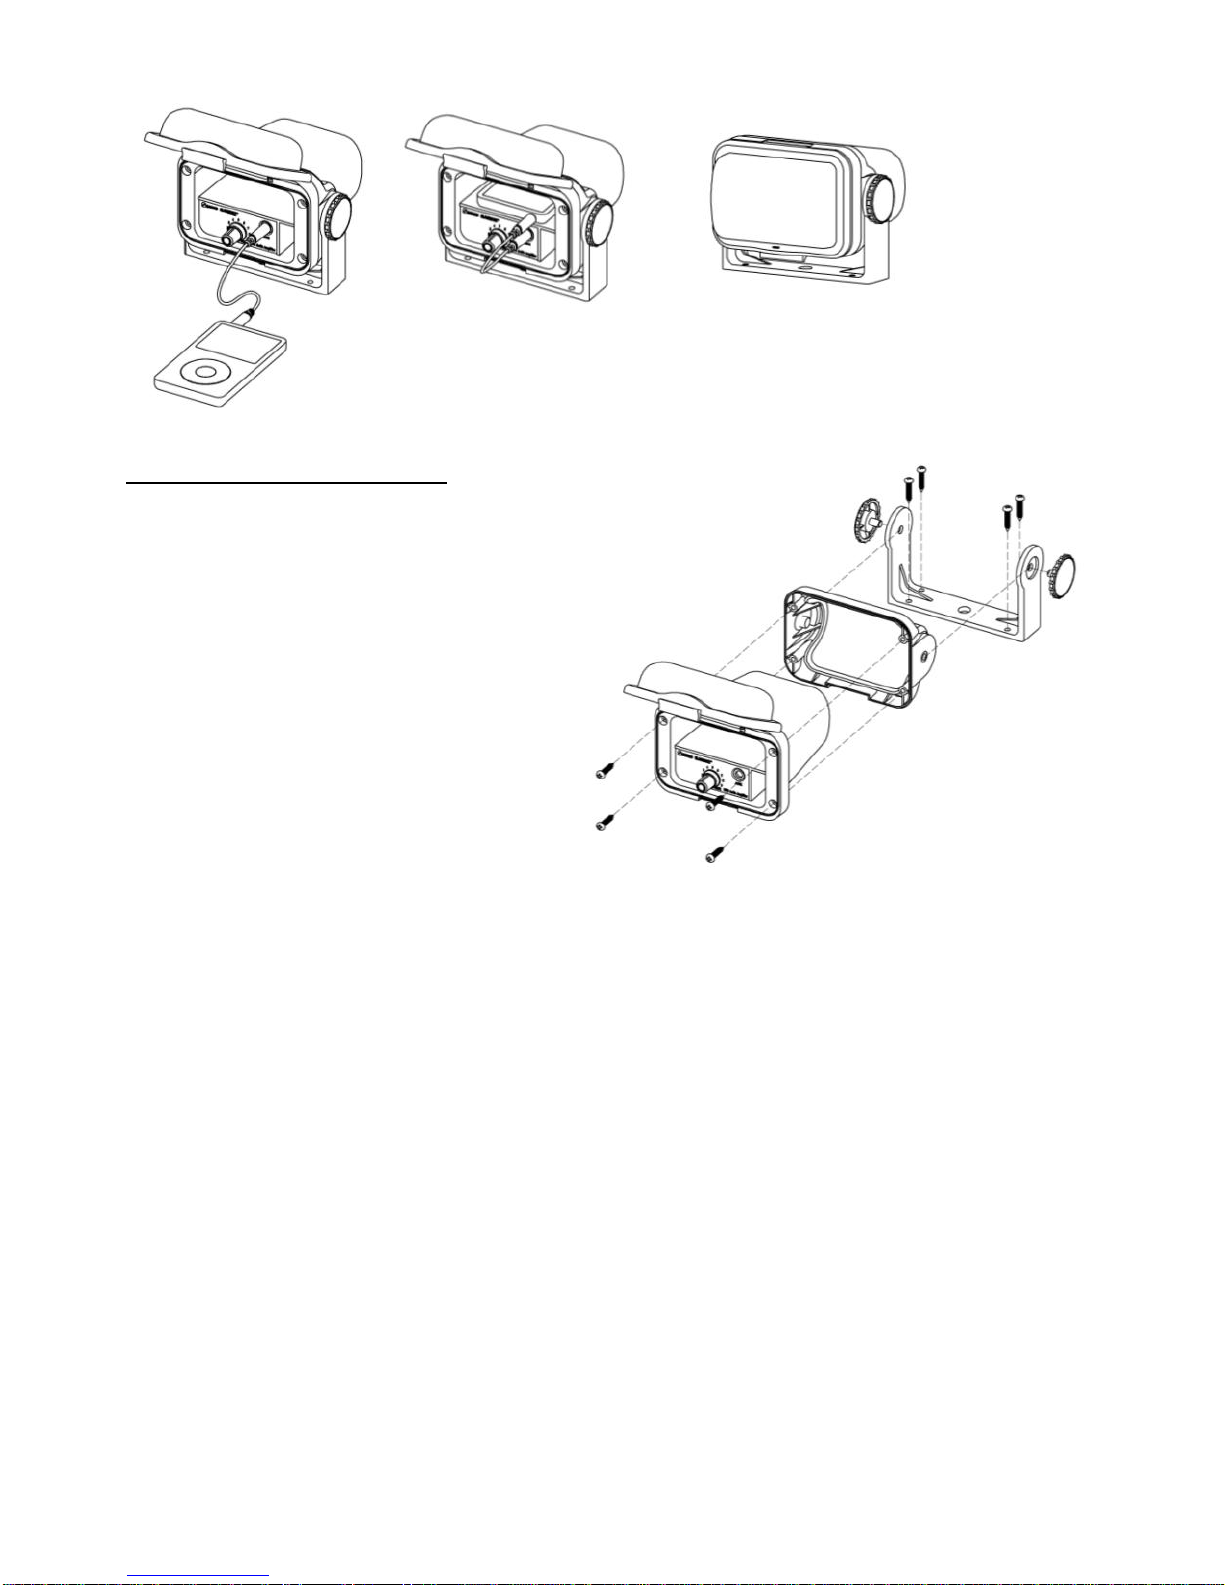
Step 2–Assemble SM-200 audio housing unit with the holder
Insert the housing unit into the housing holder and hold them firmly together. Insert and tighten four
mounting screws via the holes on the front panel of the housing unit as shown in Figure 5.
Step 3 –Assemble SM-200 audio housing unit with its bracket
Align the housing holder with the holes in the mounting bracket as demonstrated in Figure 5. Insert
and tighten the thumbwheel screw into the housing unit.
Step 4 –Wire SM-200 unit to the main power supply and speakers
Identify each color-coded wire and connect each wire to the corresponding terminal as instructed in
Figure 3. Finally use cable ties to secure the wires out of harms way to complete the installation.
Figure 5. A summary of SM-200 installation.
Figure 4. A summary of how to operate SM-200. (A) SM-200 unit (front cover
opened) and MP-3 player out to allow user operation. (B) SM-200 unit (front cover
closed) and MP-3 player positioned on the deck. (C) Close the front cover to provide
the maximum waterproof protection.