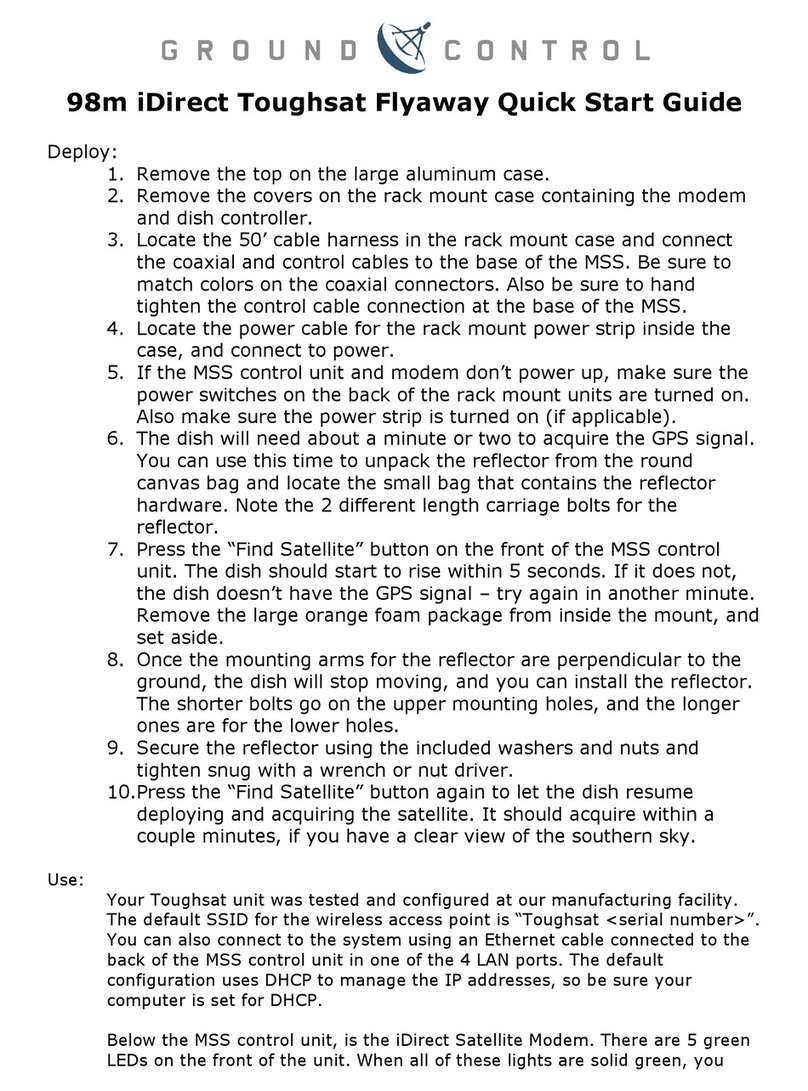
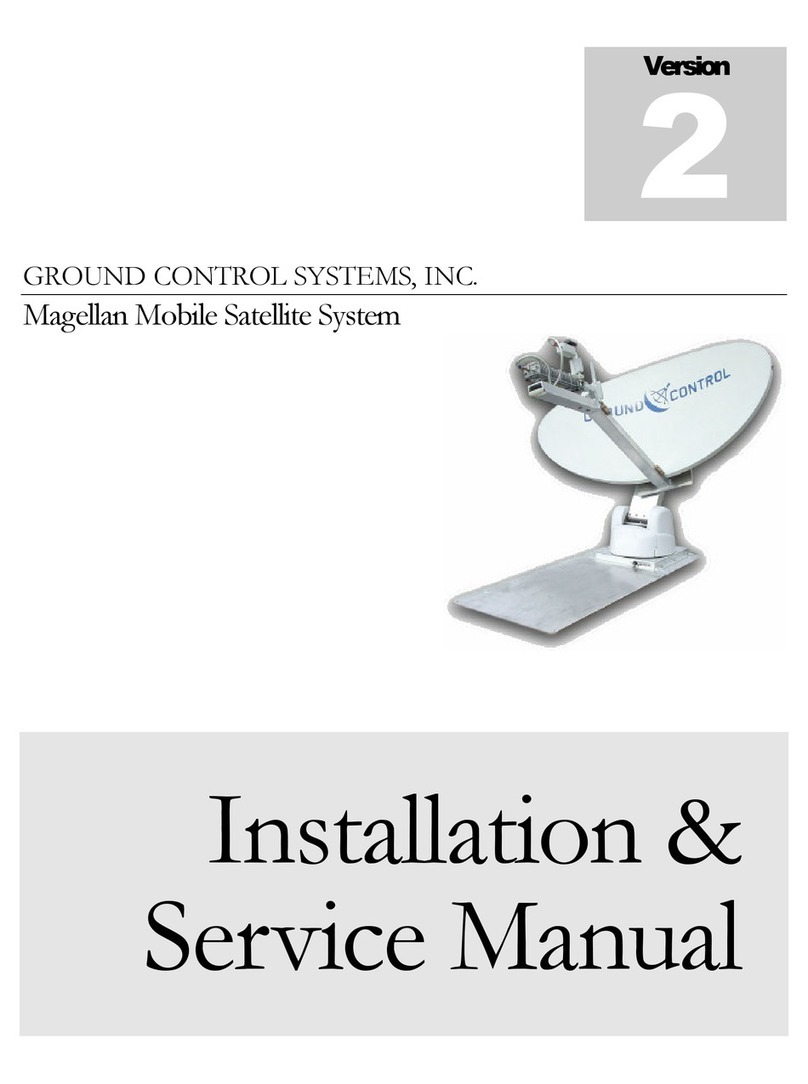
Ground Control Toughsat User manual

Toughsat
Users Manual
TOUGHSAT USERS MANUAL
Ground Control
v5.0

Toughsat Users Manual Ground Control
- 2 -
Important warning regarding your
Ground Control Toughsat System
ALL POWER to ALL system electronics MUST be disconnected if connecting the
control cable from the Toughsat dish to the Toughsat ACU (Controller) and
the iDirect modem.
Permanent damage will occur to the unit causing it to cease functionality
until the unit is returned to Ground Control’s facility for repairs. This damage
is NOT covered under the unit’s warranty.
If you have any questions regarding connecting or operating your Ground Control
Toughsat system, stop and please contact our Technical Support Team
immediately for assistance to prevent damaging your equipment. You can contact
our 24/7 Support Team at the following:
GROUND CONTROL SUPPORT
USA Toll Free: 1-800-931-5559
International: 00-1-805-783-4633
Email: support@groundcontrol.com

Toughsat Users Manual Ground Control
- 3 -
TOUGHSAT Owner Information
Please fill out the information on this page with the account information supplied to you from Ground Control
and keep the manual in the rack-mount electronics case. It will be helpful both for on-site setup as well as
required information if you need to contact Ground Control for support.
Ground Control Account Number: GC____________________
iDirect or CPE Serial Number: _______________________
Modem Static IP Address: _______________________
System Type (Roof Mounted / Flyaway) _______________________
Mobile System IP Address: _______________________
Router IP Address: _______________________
Contacting Ground Control Technical Support
Ground Control technical support representatives are available 24 hours per day for your convenience. Please note that
our standard hours of operation are Monday –Friday, 8AM to 5PM Pacific Standard Time. If you call outside of these
hours, support response may be delayed and certain resources may not be available to the support agent.
For Technical Support, please call 1-800-931-5559 from the U.S. or +1-805-783-4633 from abroad. You may also email
support@groundcontrol.com from a computer connected to working Internet connection.

Toughsat Users Manual Ground Control
- 4 -
Table of Contents
TOUGHSAT OWNER INFORMATION........................................................................................... 3
TOUGHSAT FEATURES GENERAL SYSTEM FEATURES........................................................ 6
TOUGHSAT STANDARD INCLUDED EQUIPMENT..................................................................... 8
USING THE TOUGHSAT ............................................................................................................... 9
WHEN THE TOUGHSAT IS ONLINE........................................................................................... 10
TOUGHSAT WIRING DIAGRAM ................................................................................................. 12
ACCESSING THE WIRELESS ROUTER..................................................................................... 13
ACCESSING THE TOUGHSAT WEB INTERFACE..................................................................... 13
STOWING THE DISH................................................................................................................... 14
LOCATION AND LINE-OF-SIGHT TO SATELLITE..................................................................... 15
ADVANCED OPERATION ........................................................................................................... 17
Gateway Agnostic Setup............................................................................................................................. 17
Web Interface Password Protection............................................................................................................ 17
Configuring Your Toughsat for Remote Control........................................................................................ 17
Updating the Toughsat FLASH file............................................................................................................ 18
How To Adjust The Reference Satellite..................................................................................................... 19
Manual Motor Control Of The Toughsat System....................................................................................... 21
Using The Manual Control Buttons On The Upper Control Board............................................................ 23
FINAL WALK-AROUND CHECKLIST ......................................................................................... 25
TOUGHSAT FACTS..................................................................................................................... 25
THE IDIRECT MODEM LED INDICATORS ................................................................................. 26

Toughsat Users Manual Ground Control
- 5 -
BASIC SYSTEM TROUBLESHOOTING...................................................................................... 28
The dish is online, but I can’t browse the Internet...................................................................................... 28
On Signal But TX Light Not Blinking........................................................................................................ 29
Unable To Access Network –Check IP Settings........................................................................................ 31
Basis Networking Issues............................................................................................................................. 32
Satellite Dish Won’t Search Or Is Stuck..................................................................................................... 34
BUC Power LED Is Red............................................................................................................................. 35
TESTING / BYPASSING / ROLLING COAXIAL CABLES........................................................... 36
TOUGHSAT SPECIFICATIONS................................................................................................... 38
CONTACTING GROUND CONTROL SUPPORT ........................................................................ 39

Toughsat Users Manual Ground Control
- 6 -
Toughsat Features
Manufactured by Ground Control at our plant in California. Supported by us 24x7.
Complete Ready-To-Go System pricing. No other equipment needed to purchase for operation.
Bundled with our High-Performance iDirect Service providing 5Mbps x 2Mbps Internet speeds.
We offer special service pricing for Public Safety Organizations.
One-Button operation. The Toughsat may be deployed and operated by anyone with little or no training.
Establishes a self-contained local area wireless "G" network (100' radius) automatically.
Complete system pricing includes Toughsat TS1 ACU (Antenna Control Unit) & iDirect Evolution X5 Router.
Black anodized billet aluminum construction, UV resistant plastics, sealed all-weather electronics.
System is ideal for our VoIP phone service. Connect 1 or 10 phones that work like any phone.
Typical seek time to find and lock on satellite and establish broadband connectivity is 3.5 minutes.
Computer control is not required. There is no software to install on any computer.
Both .98 & 1.2 systems have low stow heights below 12 inches. Excellent for vehicle clearance issues.
No external equipment (including iDirect router) is required to find and peak on any Ku-Band satellite.
No certification or licensing required for use. System may be operated by anyone.
Dish peaking accuracy is within 0.1° with near zero play using dish braking technology.
Impervious to magnetic interference. Search routines do not use a compass to acquire satellite.
The XP is SNG rated to stream live video at guaranteed 4 x 4 Mbps with our Streaming Services.
Autostow Feature - Dish will automatically stow if rig is moved or dish goes off signal.
Optional UPS. A backup battery for stowing the dish if power is shut off or disconnected. ($299)
6 watt transmitter is standard... required for 5Mb x 2Mb plans or video streaming. (8 watt available).
The Toughsat is capable of locking on any liner polarized Ku-band satellite in orbit.
Modular design - components easily replaced in field, normally within one hour.
Onboard sensors allow quick-search for up to 10° of vehicle/rig tilt (longer times for tilting of > 10°)
No-backlash locking mechanisms for Azimuth and Elevation to stabilize signal in high-wind operation.
Dish arm stabilizing pneumatics maintain radio position in high-wind operation.
The .98m XP is operational in Cat 1 hurricane force winds of up to 75 mph (the 1.2m XP is operational 50 mph).
The XP is operational in temperatures of -20° to 140°F (-29° to 60° C) at 100% humidity.
The XP operates in extreme weather with an IP-66 ingress rated with IP-67 components.
The .98m XP weighs less than 125 lbs (56.7 kg). The 1.2m XP is 133 lbs.
Powered by 100-240 VAC 50-60 Hz with US, UK, EU, AU and Brazil plug types available.
Optional antenna booster extends wireless connectivity up to half a mile. ($299)
One button stowing in less than one minute from fully deployed.
Operates globally in northern or southern hemispheres.
Standard Warranty - 1 year parts and on-site labor.
Extended 12 and 24 month warranties and Lifetime Radio Electronics warranties available. more
Hundreds of Ground Control certified field technicians in the U.S. and Canada for on-site installations.
Free 24-7 U.S. based technical support from Ground Control.

Toughsat Users Manual Ground Control
- 7 -
Toughsat TS2 Controller Features
One-Button "Deploy" and One-Button "Stow" commands. Requires little or no training to operate.
Dual-Matrix Sat 1 & Sat 2 buttons enable powerful redundant technologies for maintaining 100% uptime.
Backlit display on 1RU ACU panel for real time system status.
A 1RU ACU 19"w x 12"d x 1.75"h x with integrated full feature Wi-Fi router and 4 port LAN.
Integrated full feature 4 port router to network up to 256 connected devices.
Wireless 802.11 "G" access point rated at 54Mbps, with 4 port full-duplex 10/100 Ethernet Switch.
Automatically establishes a 100' wireless access point and wiring to computers is optional.
Integrated router is easily bypassed for supporting alternative router.
Integrated high capacity MicroSD card for user manuals and other documents.
Integrated DVB-S2 tuner reduces acquisition time and provides for satellite modem independence.
Designed for communication with all iDirect iNFINITI, Evolution, and Tachyon routers.
Wireless Security TKIP (WPA) and AES (WPA2) security with 128-bit encryption.
SPI Firewall, VPN passthrough, MAC address filtering, NAT, DMZ, Port Forwarding, Port Triggers.
DHCP Server, DHCP Client, QOS, Tos/DiffSerf, UPnP, MAC Address clone, RIP v1, RIP v2.
No internal fan - ACU operates silent. (The iDirect Evolution X5 router operates silent as well).
Multiple Auto-Stow routines, loss of signal, vehicle movement, power loss. to prevent accidental collisions.
Custom TS2 panel and web interface branding available for qualified resellers.
Compatible with all Toughsat mobile systems.
Web Accessible Interface Screen
ACU may be accessed by any connected computer/smartphone with browser. No software to install.
Detailed intuitive screens allow for preference settings and powerful overrides of many system parameters.
Controls to locate any visible satellite using satellite longitude only.
Override GPS with any Lat/Long.
One-button upgrading, with optional auto-update.
System Status - dish location, GPS coordinates, signal strength and connectivity state.
Full control over integrated router via interface screens.
Powerful Diagnostics & Auto Firmware Updating
FREE Lifetime firmware upgrades with one-button simplicity.
ACU automatically checks for firmware updates when connected to the Internet.
System provides accurate technical diagnostics without dispatching a technician to remote site.
Generates detailed running history log files that are kept on SD card and used for diagnostics.

Toughsat Users Manual Ground Control
- 8 -
Toughsat Standard Included Equipment
● The Toughsat XP or SP Mobile Satellite System.
● Toughsat TS2 ACU (Antenna Control Unit) with
integrated 4 port wireless router.
● Evolution X5 Satellite Gateway (or other purchased
VSAT gateway).
● 50 feet of cable run between dish and Controller

Toughsat Users Manual Ground Control
- 9 -
Using The Toughsat
Find A Level Area
If the Toughsat is within three degrees of level, it will
normally find satellite within 3.5 minutes, otherwise
the time to find satellite may be a few minutes longer.
A bullseye level in the driving cab will help. Also make
sure to park in an open sky area where line-of-sight to
the orbiting satellite is possible. (High in the Southern
Sky in the USA). Avoid parking next to trees or tall
structures & carry a compass to help park a rig.
STEP 2 –POWER OFF - Check to see that power to STEP 3 –START THE GENERATOR, or connect to
the electronics is turned off before starting the generator. any power source you may be using.
This is a good practice to avoid any power spikes or low
voltage issues.
STEP 4 –TURN POWER ON for the electronics STEP 5 –PRESS “Deploy”button to deploy the
(using power bar switch) and wait 2 minutes for the dish. It will take about 3.5 minutes for the system to
iDirect gateway to boot up and GPS to be found. automatically find satellite and create a wireless
The iDirect will front display will show solid amber network. There is no other interaction required.
RX (receive) and NET (Network) lights when ready.

Toughsat Users Manual Ground Control
- 10 -
When The Toughsat Is Online
The system is online when the gateway lights (on the iDirect Evolution X5) show solid RX, TX, NET and Power lights are
solid green. Also the Toughsat display will display the current system status. If you do not see this light pattern, it could
be due to bad or incorrect cable connections. Please contact Ground Control support for help. Note that the iDirect does
not have a power switch and turns on when power is present.
PRESS STOP TO STOP ALL DISH MOVEMENT of the Toughsat for any reason. You may press “Deploy” or “Stow” after
pressing the “Stop” button.
Connecting To The Internet
The Toughsat is pre-configured, so connecting to the Internet is as easy as connecting to the LAN via Ethernet or the
wireless access point. The default SSID for the Wi-Fi “Toughsat <serial number>”. There are 4 Ethernet ports on the
back of the ACU that access the LAN. Up to 256 LAN connections can be made. The router default configuration uses
DHCP to manage the IP addresses, so all devices should be set to receive DHCP.
Once the computer is connected to the network, you may simply open any browser and navigate to any web page.

Toughsat Users Manual Ground Control
- 11 -
Areas To Physically Avoid
The transmission strength is strongest between the
radio and the reflector. Do not place any body part in
this zone.

Toughsat Users Manual Ground Control
- 12 -
Toughsat Wiring Diagram
Above is the standard wiring between the Toughsat, the TS2 controller, and the iDirect X5 satellite router.
Input voltage is between 100/240 Volts AC. We strongly recommend using a UPS (Universal Power Supply) in situations
where power is inconsistent, such as fuel powered generators, solar panels, and DC inverters.
NOTE - Commercial grade routers will work with our equipment, however support is limited from Ground Control for
routing issues with unknown equipment.
WARNING –DO NOT PLUG IN CONTROL CABLE IF CONTROLLER IS POWERED ON. Doing so will damage
electronics, which is not covered by the warranty.

Toughsat Users Manual Ground Control
- 13 -
Accessing The Wireless Router
You can reconfigure the wireless settings, add encryption or security, or even disable the wireless completely from the
router interface at http://192.168.1.1 Leave the username blank and the password is “admin”. Do not change the static IP
settings inside the router unless instructed by Ground Control.
Accessing The Toughsat Web Interface
You can view the Toughsat web interface, type in 192.168.1.2 on a connected browser.
There are no logins or passwords for this page, and it contains a large amount of information about your system. Some
menus will even allow you to change configuration settings for your dish. Leave these alone unless instructed or you know
what you are doing. Many of these settings will prevent your dish from working correctly if changed. Contact Ground
Control Technical Support if you have questions about the items on these pages.
First, look to the lower left quadrant of the screen, to the “Input Data” Section: Confirm that it displays “GPS Signal OK”
and has GPS coordinates. Without this information, or if the Toughsat does not display “GPS Signal OK”, it will not
deploy. Once you have confirmed this, look for “Reference Satellite” and make sure it is the same thing as “Target
Satellite”.

Toughsat Users Manual Ground Control
- 14 -
When all of these things are true, click on “Find Satellite”. This dish should lock on satellite and create an Internet
connection automatically.
Now look at the “Signal Quality” section, here: and you will see what the Toughsat is doing at this moment, in the “Status”
line. The Toughsat will search for signal, and when it’s ready, it will display “Passed Test, System Online”.
You are online. Confirm it by connecting to any web page on the Internet with your browser.
Stowing The Dish
Stowing the dish on the Flyaway can either be done by pressing “Stow” on the Toughsat TS2 panel, or by accessing the
controller’s web page at http://192.168.1.2 and pressing on the “Stow Dish” button.
PRESS STOP –TO STOP ALL MOVEMENT OF THE DISH for any reason. Press “Find Satellite” or “Stow Dish” to
resume movement.
NOTE - The Toughsat must be stowed before moving of the vehicle can take place. Failure to stow the system before
moving the vehicle may cause damage to your dish and will void your warranty. When the TOUGHSAT is commanded to

Toughsat Users Manual Ground Control
- 15 -
stow, the unit begins its stowing process automatically, and will not stop until it is stowed, or encounters heavy resistance.
Resistance sufficient to stop the TOUGHSAT from stowing may damage your dish. Make sure that when you are stowing
the TOUGHSAT, the area where it must lower is clear of obstructions.
Location and Line-of-Sight to Satellite
When choosing a place to set up your satellite equipment, please keep the following things in mind. First, all satellite
systems require constant line of sight access to the satellite in the sky, which means that you must choose your location
with care. Small obstructions may sometimes be ignored, but that is never guaranteed. Large obstructions –such as
trees, buildings, power poles, etc –must be avoided. The MSS requires a clear view of the southern hemisphere sky for
operation in the continental US. Second, there are other things that can obstruct your signal through radio-spectrum
interference. High voltage power lines may cause interference with the satellite signal, reducing performance or
preventing access altogether. Radar emitters, such as those found at airports, in police vehicles, and in certain areas as
part of speed-enforcement measures, will also prevent the satellite system from obtaining a signal lock. Further, radar
installations can shut off an already established satellite link by causing harmful interference.
Vehicle Level Considerations
The tilt tensors on the Toughsat can register and compensate for up to 10 degrees of tilt in any direction. However, all
satellite internet radio signals are highly polarized to prevent interference. IF you are more than 3 degrees out of level,
your search times will be longer and your dish may not ever get online. Make sure that your vehicle is less than 3
degrees from level in both directions and attempt your search again.
If your Toughsat GPS is not able to attain GPS coordinates, your GPS receiver or antenna may be malfunctioning or
temporarily unable to obtain a position fix. Click on the “Override” link.
Input your current GPS location, as obtained from an outside GPS receiver or known coordinates. Then click “Calculate”
If your target or reference satellite is incorrect, click on “Satellite Settings”

Toughsat Users Manual Ground Control
- 16 -
From the drop down menus, select the correct satellite for your system (123W for iDirect). Click “Calculate” You should
be able to search again and lock on. If you still cannot lock on, please contact Technical Support.

Toughsat Users Manual Ground Control
- 17 -
Advanced Operation
Gateway Agnostic Setup
The Toughsat is capable of finding the satellite and locking on without the presence of a modem. While this will not allow
you to get online or access any web services, it can be convenient for certain classes of users. The procedure for
deploying the Toughsat is the same in this case as in the basic operation mode, with only a few differences. The Toughsat
Controller is turned on first, and in this case some care must be taken to avoid pressing the One Step buttons before the
controller is fully online. Doing so may cause the Controller to enter a special installation mode, and will not operate
normally. Allow 90 seconds for the Controller to come fully online.
When the Controller is online, the same process is used to deploy the dish. When using the Controller web interface,
instead of saying “Passed Test, System Online” it will display “System Pointed” on the status line. When using the Remote
Keypad, the LED’s will still indicate “On Signal”, but not “Tx Enabled”.
Web Interface Password Protection
Customers who forward the interface, often like to enable password protection on the interface. This prevents those who
are unauthorized from doing stuff to the system (both locally and remotely). To enable this, go to
http://192.168.1.2/password.htm - username is admin and leave the password field blank. From here, you can set an
admin, user and limited password. The page explains the different levels of access to the interface - various levels of
access can be given to the appropriate people who have access to the system. If you do not want to have a password on
a certain access level, then just leave the password field blank, but they'll still have to enter the appropriate user name to
access the interface (so if you only wanted to have admin access to have a password, then put an admin password in and
leave the others alone, but they would still need to enter user as the username when they go to the main interface page
before they could see anything).
Configuring Your Toughsat for Remote Control
Under certain circumstances, you may wish to allow your Toughsat to be controlled remotely. Doing so is possible, but
requires a little bit of set up.
NOTICE: The following instructions are provided for use only with the default hardware configuration. If you are using a
3rd party router, gateway, firewall, or any other 3rd party device these steps may not work for you. Ground Control
recommends that you use your Toughsat with the factory hardware.
First, you’ll need to make sure that Remote Management is enabled on the built-in linksys wireless router. To do so, log
in to the Linksys router at 192.168.1.1; Username field should be left blank, and the default password is “admin”. Click on
the Administration button, and make sure that “Remote Management” is enabled. The default port is set to 8080; if you
are using the default linksys password, you should use a different port (and be sure to write it down). Click on the save
settings button, and then the continue button when prompted.
While still logged into the router, go to the Applications and Gaming tab. Create a new entry with “Toughsat” in the
application line. The Start and End ports should both be 80, and the IP address should be 2. Check the Enable box, then
click on save settings, and continue when prompted.
If you wish to allow remote control of the Toughsat, you may want to increase the refresh rate of the control page. Since
the control page uses Javascript and AJAX elements, they will change their information too fast for a remotely-connected
user to see. To fix this, go to 192.168.1.2/setflash.htm. The user name is “admin” and the password is “skynet2029”.
WARNING: It is very important that you do not change any of the settings on this screen without either confirming them
with Ground Control support or following the direct instructions of this manual. Permanent damage to your system may
result.
Scroll down to the bottom of the page and look for the “Javascript Refresh Rate (ms)” option. It should be set to 500 by
default; change it to 2000 and click on Update. This will reboot your Toughsat and take you back to the main control
page. NOTE: from this point forward, your control page will always take 2 full seconds for information to display, change,

Toughsat Users Manual Ground Control
- 18 -
or update - even when connected locally. If you decide that the delay is not worth the ability to manually control the
Toughsat, follow the above steps and set the refresh rate back to 500.
Please note that anything that takes the antenna offline will also compromise your ability to control it. If you tell it to stow
while remotely connected, it will remain offline and stowed until someone locally commands it to search. If you hit “Find
Satellite” you will lose communication until it again acquires the network. You may also wish to set a _password_ on the
system to control access.
Updating the Toughsat FLASH file
You will receive a file from Ground Control containing a file with the same name as your Toughsat serial number. Make
sure that the file name matches your serial number, then unzip the attachment. Connect a laptop to your system and bring
up an FTP client. Connect to 192.168.1.2., username is “admin” and the password is “boomerang58”.
Make sure the dish is stopped. It doesn't need to be stowed, but it cannot be moving at this time. Upload the file to the
root directory of the FTP server. Turn the controller off, wait 10 seconds and turn it back on. Navigate to 192.168.1.2 and
check to see if the serial number has updated to 10940. If it has, wait 30 seconds for the unit to finish flashing the memory
then try to stow the dish - the dish should stow fully.
If you had any custom satellite settings, you will need to reconfigure them, as well as any custom IP’s that had been set.

Toughsat Users Manual Ground Control
- 19 -
How To Adjust The Reference Satellite
1. Power on the unit
2. Connect to the GC Controller
3. Bring up the dish control page at 192.168.1.2
4. In the top center, there will be a blue button that says “Satellite Settings”. Click on it.
5. There will be two drop-down menus. One says “Target Satellite” and should be set to G18 123w. The second
says “Reference Satellite” and should be set to G16 99w. Click on “Submit” at the bottom, which will return you
to the main page.

Toughsat Users Manual Ground Control
- 20 -
6. After the dish finishes saving flash memory, you can press “Find Satellite”. The dish should then deploy and
begin its search procedure.
Table of contents
Other Ground Control Antenna manuals
Popular Antenna manuals by other brands

Sirius XM RAdio
Sirius XM RAdio Indoor/Outdoor Home Antenna installation guide

Tyco
Tyco WS9-3GEXANT instructions

A.H. Systems
A.H. Systems SAS-517 Operation manual

Shakespeare Electronic
Shakespeare Electronic Style 4328 installation instructions

KVH Industries
KVH Industries TracVision HD7 installation instructions

Wilson Electronics
Wilson Electronics 301130 installation guide