Growing GRENGINE Ultralite User manual

GRENGINETM
Ultralite
USER MANUAL
BEFORE READING THROUGH THIS MANUAL:
PLUG YOUR GRENGINETM INTO AN ELECTRICAL WALL SOCKET AC OUTLET
USING THE CHARGER CORD AND THE #3 PLUG (SEE DIAGRAM ON PG 4)
FOR CHARGING.
YOU SHOULD ALWAYS STORE YOUR GRENGINETM INDOORS.

TABLE OF CONTENTS
This product series is designed to
keep you powered while you are
at work or play. Whether you are
living in your van while you travel
the world, using small power tools,
or backing up home electronics, we
will keep you powered. Welcome
to a smarter, more environmentally
conscious, and emissions-free life!
With your new GRENGINETM,
portable power has never been
easier, and with 480 watt hours
of power, you will be able to
keep electronics, lights, small
tools, and much more powered
for hours. Plus, no need for
earplugs: the GRENGINETM is
silent and emission free!
1. GRENGINETM Components ........................................................... 1
2. Unpacking .................................................................................. 2
3. Charging Your GRENGINETM ......................................................... 3
3.1. Charging from Solar....................................................... 3
3.2. Charging from the Electrical Wall Socket....................... 4
3.3. Charging from Your Car................................................. 4
4. Using your GRENGINETM ............................................................... 5
4.1. What to Power from Your GRENGINETM ............................ 5
4.2. How to Use Your GRENGINETM.......................................... 5
4.3. Best-use Strategy............................................................ 6
4.4. Cold Weather Usage...................................................... 6
4.5. Storage and Downtime Maintenance ........................... 6
4.6. Emergency Car Jump Start............................................ 7
5. Technical Specifications ............................................................. 8
6. Frequently Asked Questions ........................................................ 9
7. Troubleshooting......................................................................... 10
8. Contact .................................................................................... 11

1. Handle
2. Solar charging port
3. Car/adapter charging port
4. Car jump starter port
5. Master power on/o button
6. DC power on/o button
7. AC Power on/o button
8. Power on/o button
9. LCD display
10. USB outputs
11. DC 12 output for LED lamp
12. DC 12.6V car cigarette output
13. AC outputs
1. GRENGINETM COMPONENTS
11

1. GRENGINETM COMPONENTS
2. UNPACKING
22
1. Master power on/o button
2. DC power on/o button
3. AC power on/o button
4. Master power on/o button
5. DC power on/o indicator
6. AC power on/o indicator
7. Battery capacity
8. Charging power
9. DC on/o
10. DC output power
11. AC on/o
12. AC output power
AC CHARGER
CAR CHARGING CABLE
SOLAR CHARGING CABLE
JUMP START CABLE
MANUAL
WARRANTY CARD
GRENGINETM
Before opening the package, please check if the packaging is damaged. After unpacking,
please check if product appearance is damaged or there are missing parts. If so, please
contact us. Your Ultralite includes the following items:

33
3. CHARGING YOUR GRENGINETM
PLEASE NOTE: BEFORE USING OR STORING, PLUG YOUR GRENGINETM INTO THE AN ELECTRONIC WALL SOCKET UNTIL IT IS FULLY
CHARGED. NEVER CHARGE YOUR GRENGINETM WITH SOLAR PANELS AND AN ELECTRONIC WALL SOCKET AT THE SAME TIME.
INSERT THE ANDERSON PLUG INTO THE #2 INPUT PLUG.
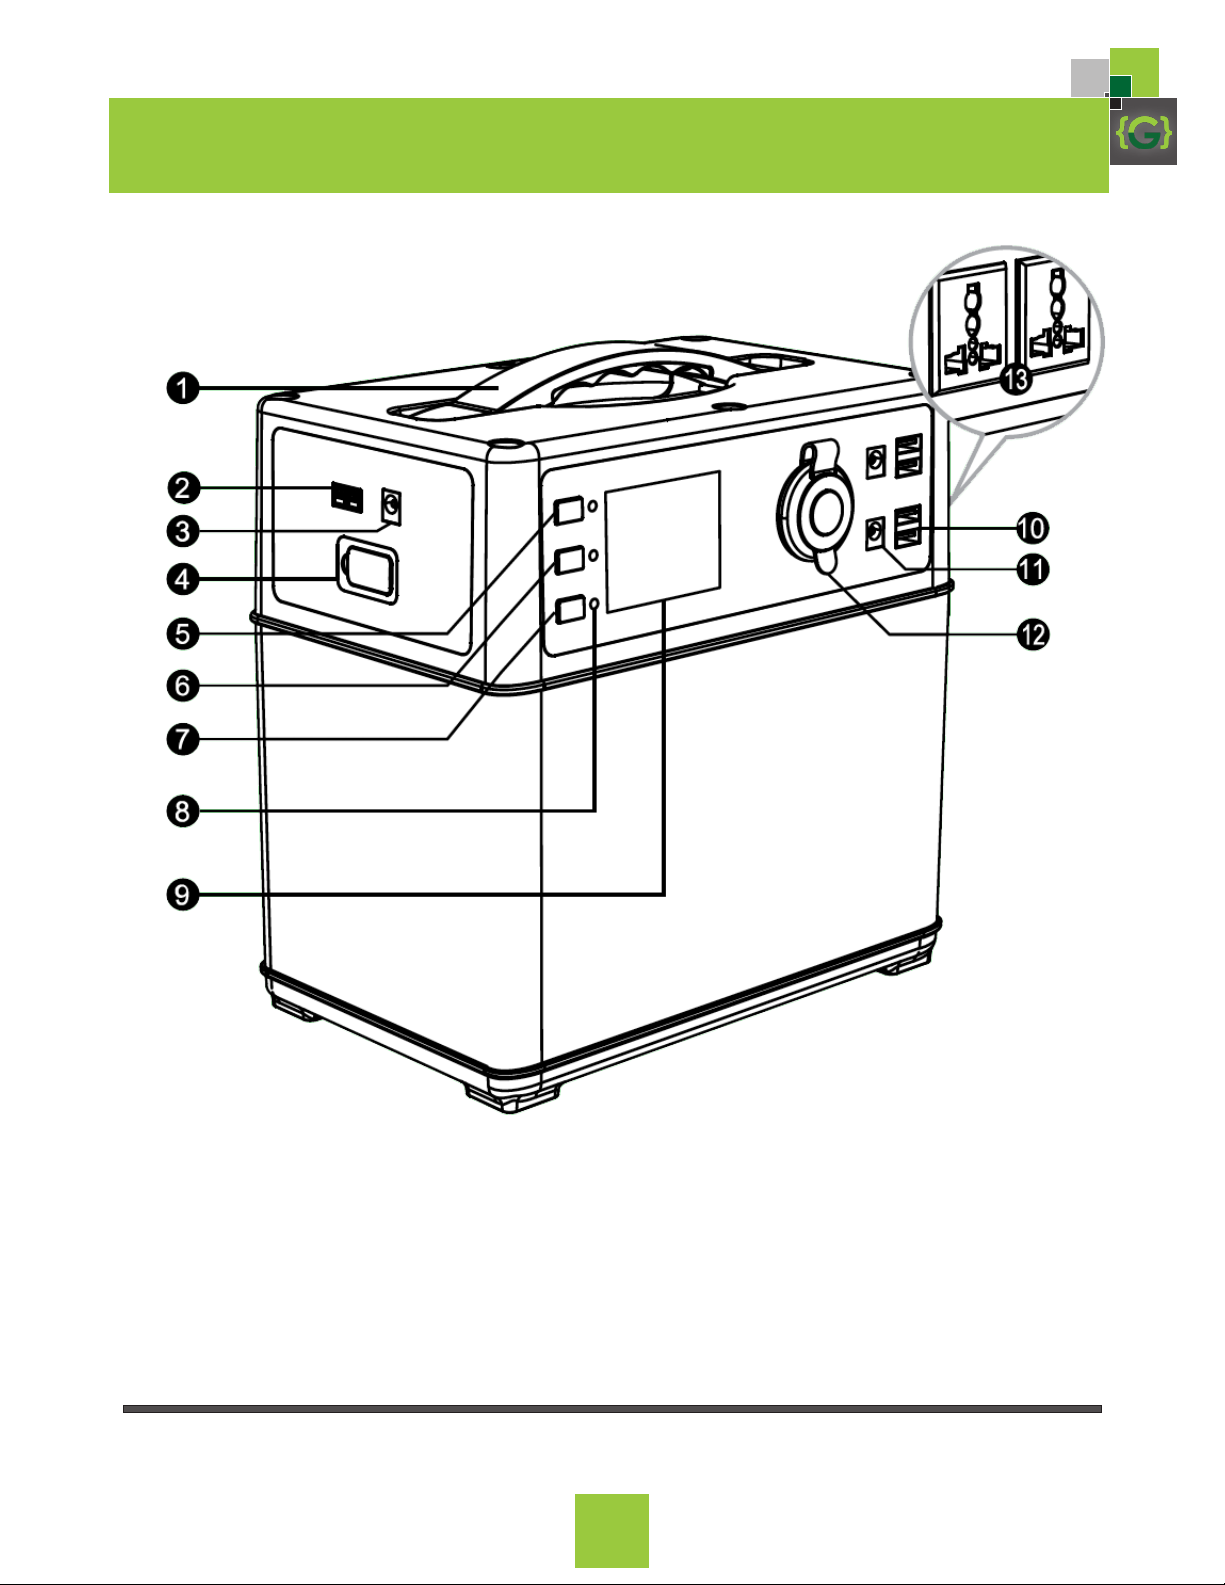
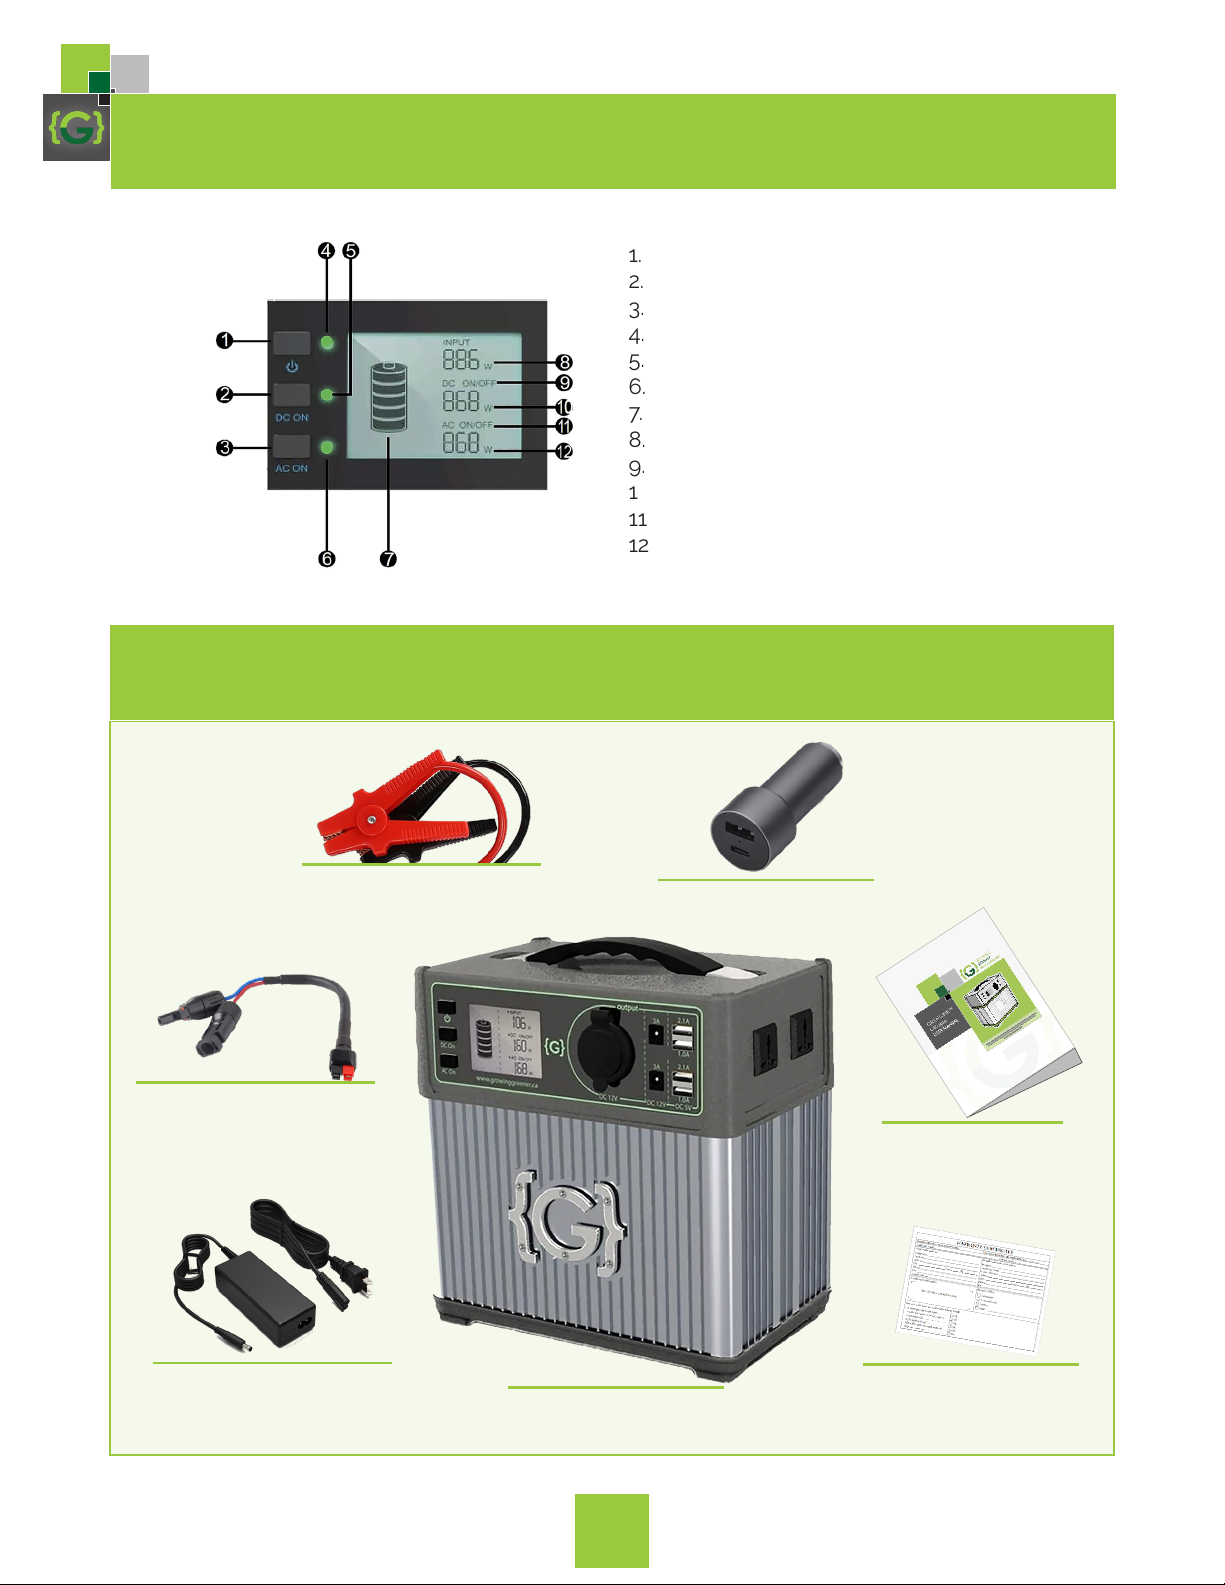
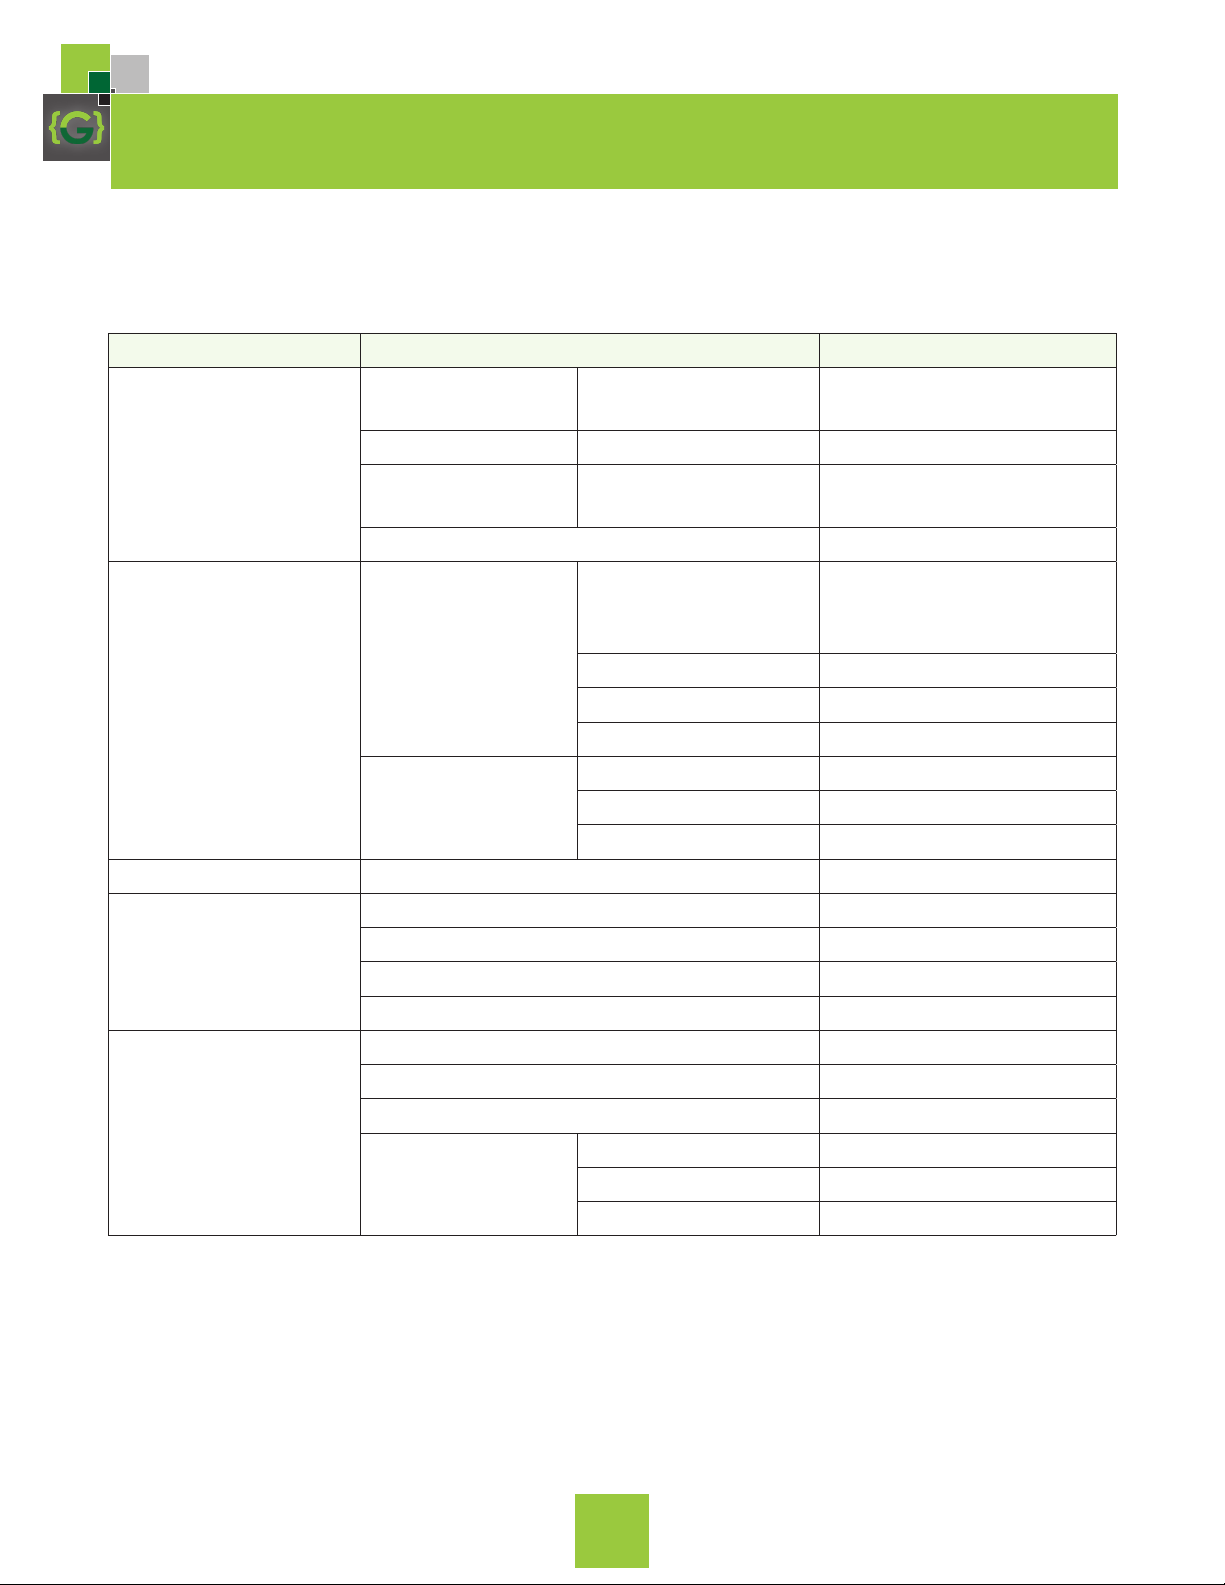
LCD BATTERY DISPLAY
The LCD Battery Display indicates the charge level. There are 5 segments
of the battery, approximating 20%, 40%, 60%, 80%, 100% capacity. During
use, segments will disappear from the display, indicating the remaining
capacity. When charging your GRENGINETM, you will notice a battery
segment blinking at a 1 second interval. This indicates the current charge
status and the number under INPUT shows the real-time charging power.
Once it is fully charged, all battery segments will be lit and remain solid.
3.1 CHARGING FROM SOLAR
1. Power on your GRENGINETM by pressing the
master power button for 2 seconds.
2. Place your solar panel where it will get as much
direct sunlight as possible.
3. Connect the solar panel with the solar charging
cable. Then, insert the Anderson plug into the
INPUT port on the left side of the GRENGINETM.
You will know the GRENGINETM is charging
when the number below INPUT on the LCD
screen changes and the battery segments on
the LCD BATTERY DISPLAY are blinking. The
GRENGINETM is fully charged when all battery
segments stop blinking and remain solid.
4. You can also connect the GRENGINETM to other
brands of solar panels using the Anderson port.
5. You can chain multiple solar panels together to
reduce solar recharge times. Your GRENGINETM
is capable of taking in 120W of solar charging
power. But the solar panel voltage should be
between 14V and 40V
6. NEVER charge your GRENGINETM with solar
panels and an electrical wall socket at the
same time.
7. Thanks to the built-in smart charging system,
your GRENGINETM will stop charging the battery
once the battery is fully charged.
SUN SOLAR PANEL GRENGINETM
4-6 HOURS
DEVICE

3. CHARGING YOUR GRENGINETM
44
3.2 CHARGING FROM THE ELECTRICAL WALL SOCKET
BEFORE USING OR STORING, PLUG YOUR GRENGINETM INTO THE WALL UNTIL IT IS FULLY CHARGED.
GRENGINETM
GRENGINETM
CAR CHARGER
ELECTRICAL WALL SOCKET DEVICE
DEVICE
• The included AC wall charger comes in two pieces. Connect the two
pieces by plugging the cable into the box.
• Using the AC Wall Charger, plug your GRENGINETM into any electrical
wall socket. You will know your GRENGINETM is charging when the
battery segments in the BATTERY DISPLAY are blinking and the
number below INPUT on the LCD screen changes.
• The GRENGINETM is fully charged when all battery segments stop
blinking and remain solid. It should recharge from the electrical wall
socket in 6-8 hours. The GRENGINETM will stop charging when the
battery is fully charged.
Use the car charging cable, plug one end into your car’s cigarette socket and the other end into your
GRENGINETM. You will know your GRENGINETM is charging when battery segments in the BATTERY
DISPLAY are blinking and the number below INPUT on the LCD screen changes.
Note: A car with a 12V starting battery can not charge your GRENGINETM fully, but a car with a 24V battery can.
3.3 CHARGING FROM YOUR CAR
PLUG #3
PLUG #3

55
4. USING YOUR GRENGINETM
1. Press the master POWER button for 2 seconds to turn on your
GRENGINETM. The power indicator and LCD will light up.
2. Press the DC power button under the master POWER button
for 2 seconds to power a DC device. Press the AC power button
(under the DC power button) for 2 seconds to power an AC
device. When not using certain ports, make sure to turn them o
to conserve power.
3. You will know if it is powering a device when the numbers under
DC ON/OFF and AC ON/OFF on the LCD changes. The numbers
indicate the amount of power your devices are pulling from the
GRENGINETM.
4. Plug in your gear for power anywhere life takes you.
5. Press the AC ON, DC ON, master POWER button for 2 seconds to
shut down the AC output, DC output and system, respectively.
6. When the master POWER button is on, but the DC power
button and AC power buttons are o, the system will shut down
automatically after 10 minutes. You will need to press the master
POWER button for 2 seconds again to restart.
7. The system will shut down when the battery capacity is lower
than 10%.
8. Always remember to shut the product down when you are not
using it.
9. If possible, keep your GRENGINETM fully charged before long-
term non-use.
4.2 HOW TO USE YOUR GRENGINETM
• Laptops (10x charges)
• E-Readers & Tablets (12x
charges)
• Lamp (5 hours)
• CPAP Machines (10-16 hours)
• Video Game System/DVD
Player (10 hours)
• Hedge Trimmer (1 hour
continuous use)
• Electric Drill (1 hour continuous
use)
• Orbital Sander (1.5 hours
continuous use)
• And MANY MORE items
4.1 WHAT TO POWER FROM YOUR GRENGINETM

4. USING YOUR GRENGINETM
66
4.5 STORAGE AND DOWNTIME MAINTENANCE
1. Please charge your GRENGINETM fully before storage and fully recharge your
GRENGINETM every 3 months. Store it in a cool, dry place.
2. If the system shuts down automatically because of lower battery capacity (10%), please
charge it as soon as possible.
3. Failure to maintain your GRENGINETM by following these steps can result in battery
damage, which will void the product warranty.
4.4 COLD WEATHER USAGE
Cold temperatures can impact the
GRENGINETM’s battery capacity. If
you will be living o-grid in sub-
zero conditions, your GRENGINETM
may drain power quickly. Never
charge your GRENGINETM in sub-
zero conditions, as doing so will
damage the lithium ion battery, and
the battery capacity may not be
recovered.
4.3 BEST-USE STRATEGY
When charging any gear with your GRENGINETM, take note of the LCD battery display.
If you plug in devices that drain high power (a refrigerator), the charge level of your
GRENGINETM can drop quickly and you may not fully generate 480Wh of energy.
Alternately, if you are recharging devices that draw power more slowly (e.g. a small
TV), you will generate closer to 480Wh from your GRENGINETM. If you are experiencing
shorter runtimes, you may want to check the device’s power requirements. See
TROUBLESHOOTING for help.
LOW TEMPERATURE CHARGING
PROTECTION:
In sub-zero conditions, the GRENGINETM
will stop charging automatically. It
will begin to function again when
temperature is over 5°C.
Low temperature discharging
protection: In -20°C weather, the
GRENGINETM will stop AC and DC
output and shut the product down in 15
seconds automatically. The system will
output again when the temperature is
over -15°C.

77
GRENGINETM
CAR BATTERYCAR
4. USING YOUR GRENGINETM
4.6 EMERGENCY CAR JUMP START
+-
F
U
S
E
CAUTION
1. Before starting the engine, make sure the red and black clips are clamped tightly to
the battery poles. Keep the two clips at a safe distance from each other to prevent
them from falling o or colliding once the engine is vibrating.
2. DO NOT connect the red and black clips directly. This may cause damage or physical
injury.
3. Please keep your distance from the engine when starting the car to avoid any physical
injury that may be caused by the car engine running.
4. Remove the GRENGINETM and clips from the car battery within 30 seconds of the
engine starting. Failure to do so may cause damage to the GRENGINETM or the vehicle.
5. Please follow jump start instructions from the manual specific to your car’s
make and model.
REQUIREMENTS (PLEASE
ENSURE...):
The engine displacement of the
vehicle is no more than 4L.
The power is over 60% (4 battery
segments on).
The clamps on the jump start
cables are in good condition.
STEPS:
• Clamp the red clip to the car battery’s positive
pole and the black clip to the negative pole.
• Plug the other end of the jump start cable into
your GRENGINETM.
• Turn the key to start your car as normal.
• After starting, remove the cable from the
GRENGINETM first, then remove the red and
black clips.

5. TECHNICAL SPECIFICATIONS
ITEM SPECIFICATIONS
APPROXIMATE
CHARGE
TIMES
AC WALL CHARGER
(70W)
6-8 HOURS
DC CAR CHARGER (48W) 10-20 HOURS
SOLAR SOLAR CHARGER
(120W)
4-6 HOURS
CHARGE INPUT VOLTAGE 14 - 40V
OUTPUT AC OUTPUT VOLTAGE 100/110/120V AC±3%
OR 220/230/240V
AC±3%
OUTPUT FREQUENCY 50/60HZ±0.5HZ
OUTPUT POWER 300W (PURE SINE WAVE)
PEAK OUTPUT POWER
DC 4 X USB PORT 2×5V2.1A &2×5V1A
1 X 12.6V CAR PORT 120W
2 X DC 6MM PORT 2 X 12V 3A
JUMP STARTER STARTING CURRENT 200 – 400A @ 12V
BATTERY BATTERY TYPE LITHIUM ION
BATTERY CELL 18650
BATTERY CAPACITY 480
CATTERY VOLTAGE 9 - 12.6V
GENERAL DIMENSION 230 X 140 X 235MM
NET WEIGHT 5.2 KG
WARRANTY 2 YEARS
OPERATING
ENVIRONMENT
CHARGE 0 ~ 45OC
DISCHARGE -10 ~ 60OC
HUMIDITY 10 ~ 90%
PLEASE CHECK THE BATTERY CAPACITY BEFORE EVERY RE-START.
MAKE SURE THE BATTERY IS OVER 50% (THREE BATTERY SEGMENTS ON).
NOTE: SOLAR CHARGING AND AC CHARGING SHOULD NEVER PROCEED AT THE SAME TIME!
88

99
6. FREQUENTLY ASKED QUESTIONS
WHAT TYPE OF BATTERY IS IN MY GRENGINETM?
Your GRENGINETM uses a 11.1V 43Ah lithium ion battery
pack, similar in construction to a Tesla Motor EV battery cell.
Li-ion batteries are much smaller and lighter than lead-
acid batteries and also cycle much longer than lead acid
batteries, including specialty batteries like AGM and Gel
cells. You will get more life out of your Li-ion batteries if you
do not drain them completely.
HOW DO I KNOW IF MY GRENGINETM IS CHARGED?
To check the charge level of your GRENGINETM, refer to
the LCD battery display. When lit up, you will see a battery
outline with five segments, indicating the current charge
level. You can turn on the battery display by pushing the
Master POWER button. It is OK to use your GRENGINETM
even when it is not fully charged.
HOW DO I KNOW IF MY DEVICE WILL WORK WITH THE
GRENGINETM?
1. You will need to determine the amount of power your
device requires. This may require some research on your
end, but using a search engine or examining the user
guide for your device should suce.
2. You will need to check the capacity for the individual
output ports. For example, the AC port is powered by an
inverter that allows for 300 W of continuous power. This
means that if your device is drawing more than 300 W for
an extended period of time, the GRENGINETM’s inverter
will shut o.
3. Once you know your device is compatible, you will want
to determine how long you will be able to power your
gear from the GRENGINETM.
?

10
7. TROUBLESHOOTING
FAILURE
CODE
FAILURE CAUSE TROUBLESHOOTING
E01 SYSTEM OVERTEMPERATURE PROTECTION CHECK IF THE AMBIENT TEMPERATURE IS HIGHER THAN 45°C.
OUTPUT WILL START AGAIN WHEN IT COOLS DOWN.
E02 BATTERY OVER VOLTAGE PROTECTION DISCONNECT THE CHARGER AND RESTART IT.
E03 BATTERY DAMAGE PROTECTION CONTACT THE CUSTOMER SERVICE CENTRE.
E04 1ST BATTERY STRING OVER VOLTAGE DISCONNECT THE CHARGER AND RESTART IT.
E05 2ND BATTERY STRING OVER VOLTAGE DISCONNECT THE CHARGER AND RESTART IT.
E06 3RD BATTERY STRING OVER VOLTAGE DISCONNECT THE CHARGER AND RESTART IT.
E07 1ST BATTERY STRING LOW VOLTAGE CHARGE THE UNIT FULLY, THEN RESTART IT.
E08 2ND BATTERY STRING LOW VOLTAGE CHARGE THE UNIT FULLY, THEN RESTART IT.
E09 3RD BATTERY STRING LOW VOLTAGE CHARGE THE UNIT FULLY, THEN RESTART IT.
E10 LOW TEMPERATURE DISCHARGING PROTECTION CHECK IF THE AMBIENT TEMPERATURE IS LOWER THAN -20°C.
E11 BATTERY LOW VOLTAGE PROTECTION CHARGE THE UNIT FULLY, THEN RESTART IT.
E12 INVERTER OVER CURRENT PROTECTION CHARGE THE UNIT FULLY, THEN RESTART IT.
E13 INVERTER OVERLOAD PROTECTION CHECK IF THE AC OUTPUT IS OVERLOADED.
E14 INVERTER SHORT CIRCUIT PROTECTION CHECK IF THE AC OUTPUT IS OVERLOADED OR SHORT-
CIRCUITED.
E16 CHARGING OVER VOLTAGE PROTECTION CHECK IF THE INPUT VOLTAGE EXCEEDS THE MAXIMUM.
E17 LOW TEMPERATURE CHARGING PROTECTION CHECK IF THE AMBIENT TEMPERATURE IS LOWER THAN 0°C.
E19 12.6V10A OUTPUT OVER CURRENT PROTECTION CHECK IF THE OUTPUT IS OVERLOADED OR SHORT-CIRCUITED.
E20 12.6V10A OUTPUT OVERLOAD PROTECTION CHECK IF THE OUTPUT IS OVERLOADED.
E21 12V6A OUTPUT OVER CURRENT PROTECTION CHECK IF THE OUTPUT IS OVERLOADED OR SHORT-CIRCUITED.
E22 12V6A OUTPUT OVERLOAD PROTECTION CHECK IF THE OUTPUT IS OVERLOADED.
E23 USB5V NO. 1 OR 2 OUTPUT OVER CURRENT PROTECTION CHECK IF THE OUTPUT IS OVERLOADED OR SHORT-CIRCUITED.
IF YOUR DEVICES ARE NOT RECHARGING FROM YOUR GRENGINETM,
FOLLOW THESE STEPS:
1. Make sure the master POWER button is turned on.
2. Ensure the Output Port has been turned on. The green LED light on the power button
should light up.
3. Check the Battery Display. If it is at 20% or below, charge your GRENGINETM.
4. Verify your device is suitable for use with the GRENGINETM. All of the GRENGINETM output
ports have their own max power capacity. Check the GRENGINETM’s tech specs to ensure
your device is compatible.
NB: IF YOU ARE STILL EXPERIENCING TROUBLE WITH YOUR GRENGINETM AFTER
CHECKING AND TROUBLESHOOTING AS SUGGESTED IN THE BELOW FORM, PLEASE
CALL OUR CUSTOMER SERVICE CENTER.

Growing Greener Innovations
13311 146 Street NW
Edmonton, AB
T5L 4S8
info@growinggreener.ca
+1.888.400.1383
grengine.com
8. CONTACT
Should you have any technical questions,
please contact your installer.
Please note that the following information
will be needed:
1. Purchasing Date
2. Model Number
3. Failure Code
You will be required to provide a
statement of how the failure occurred and
failure details. Thanks in advance.
11
Table of contents
Popular Inverter manuals by other brands

Enchlor
Enchlor GASBLASTER user guide

Fuling Inverter
Fuling Inverter DZB200 Series user manual

MAER IDROPULITRICI
MAER IDROPULITRICI BYTURBO instruction manual

ABB
ABB UNO-2.0-TL-OUTD product manual

Leroy-Somer
Leroy-Somer DIGIDRIVE Series Installation and commissioning

Chicago Electric
Chicago Electric Power Systems 95596 Set up and operating instructions