GUITAR KIT WORLD Solid-body ST-style Guitar Kit User manual

Solid-body ST-style Guitar Kit Assembly
Manual
This guide provides step-by-step instructions to build a solid-body ST-style DIY guitar using
a kit. Even if you have never built a DIY guitar before, you can learn how to get started by
reading this tutorial.
There’s nothing more satisfying than playing a guitar you have put together yourself!
1

Project Toolbox
Before we get started check the list below and ensure you have the necessary tools and
consumables required to complete the project.
Tools
● 2 X Timber clamps (*set neck guitar only)
● Electric jigsaw or coping saw (*If shaping the headstock)
● Steel ruler (at least 40cm)
● Hard sanding block
● Center punch (or similar tool for marking hole locations)
● Electric drill and assorted drill bits
● Large and small screwdrivers (phillips head and flat head)
● Pliers (needle nose preferably)
● Soldering iron
Consumables
● Disposable gloves
● Titebond, PVA, or similar wood glue (*set neck guitar)
● Small paintbrush
● Wood grain filler (If open grain timber such as Mahogany or Oak)
● Sandpaper. Various grades, from 120 up to 1500 (*depends on finish)
● Finishing supplies. (This depends on your choice of finish)
● Painters masking tape
● Assortment of clean rags and paper towel
● Denatured alcohol (or cleaning product with degreasing ability)
● 0000 fine grade steel wool
● Solder (and sponge for cleaning tip of iron)
● Container for storing finishing supplies.
2

Next, check that all parts have been included.
Parts List
Below are the parts you will find included in your packaging to complete an ST guitar kit.
● ST body and neck
● Neck plate, neck plate cushion and screws
● 2 x Strap buttons
● 6 x inline tuners
● Floating tremolo bridge and tremolo bar
● Tremolo claw and springs
● Pre-mounted pickguard (3 x single coil pickups, 1 x volume and 2 x tone controls, 1 x
5 way pickup selector)
● Input jack
● 2 x string trees
● Cable and hex wrench (for adjusting truss rod)
● Tone and volume knobs
● Assorted screws and washers
Safety Precautions
To complete your guitar kit safely, also ensure you have the following on hand, and a well
ventilated work space to work in.
Protective eyewear
Use protective safety glasses or a genuine face shield, not regular prescription, reading, or
sunglasses.
Disposable gloves
Use disposable gloves if applying stains or oil finishes directly to the guitar.
Masks
Use an N95 rated dust mask for sanding and an R95 rated particle mask for finishing. If
using water based finishing products an N95 dust mask may suffice for both sanding and
finishing, but be sure to check the finishing suppliers recommendations first. Paint fumes
are dangerous.
3

A well ventilated work area
Ensure your work space is well ventilated, especially when finishing to prevent a build up of
potentially toxic fumes.
Making your Guitar Kit play and sound great
There are four stages to building a great kit guitar, these are:
1. Preparation and finishing
The finished surface appearance of your guitar e.g. staining, painting, or applying a hand
rubbed oil finish.
2. Hardware Installation
Fitting the tuners, strap buttons, bridge, and pickups.
3. Connecting the electronics
Connecting the pickups to the input jack, and incorporating a pickup selector and volume
and tone potentiometers.
4. Final Setup
Adjusting the neck relief, action, intonation and pickup height. We’ll cover each of these
below, starting with preparation and finishing.
4

1. Preparation and finishing
Inspecting and prepping the body
Once unboxed, remove the pickguard by removing the two screws holding it in place on
either side of the bridge cutout. Next, carefully inspect the guitar body and neck under good
light.
Identify problem areas, as these should be addressed early on before commencing the
project.
This includes large dents that require filling, deep scratches that require sanding and glue
residue on the surface of the guitar that will prevent your finish from being absorbed evenly.
Glue stains are only a potential issue for guitars with binding, and/or a veneer top.
5

Once you have identified problem areas you can begin prep sanding the guitar. Start by
sanding the entire body using 180 grit sandpaper.Follow that up with 240 grit paper. If you
are applying a stain directly to the
raw wood sand up to 400 grit, but sanding any smoother than this may begin to affect how
well the stain is absorbed.
Once you have completed sanding up to 240 grit, wipe a small amount of moisture on the
surface of the guitar. Using denatured alcohol is a good option here as it evaporates before
it is absorbed into the timber, but water will also raise the grain of the timber which can then
be sanded flat. Generally grain will only raise once, so you can be confident by taking care
of it now, you won’t have any problems during the finishing process.
Dry Fitting the Neck
You should also check the neck fit. While the ST is a bolt-on neck guitar, it’s still important to
dry fit the neck and check how well it fits the neck pocket, along with neck alignment, neck
angle and scale length.
6

Insert the Neck
First push the heel gently into the back of the neck pocket, then push the neck down flat.
This reduces the risk of chipping the thin edges of the neck pocket before the neck has
been installed.
Check the scale length
You can check the location of your bridge with regard to scale length by loosely installing
the bridge and measuring the distance from the edge of the nut closest to the fretboard and
the middle of the 12th fret and then doubling that number. An ST guitar kit should have a
scale length of 25.5” or 650mm.
If your scale length appears out by a few mm, keep in mind the individual saddles can be
adjusted forward or back via the intonation adjustment screws.
Check the neck fit
The neck, once inserted into the neck pocket, should have very little sideways movement. If
there is a gap on either side of the neck, you may need to shim the neck by cutting small
sections of scrap wood with a craft knife and gluing these to the sides of the neck pocket.
Otherwise smaller gaps can be filled prior to finishing using a filler.
7

Check the neck angle
Run a steel ruler along the fretboard and over the bridge. The steel ruler should sit just
above the saddles on the bridge when the bridge is sitting flat against the body.
Cutting the Headstock
If shaping your headstock, start out by sketching out some rough concepts before
transferring the chosen design to paper at the correct size.
When designing your headstock be sure to leave a margin of at least 15mm from the last
tuning hole and the edge of the headstock (the equivalent distance between the tuning peg
holes).
1. Once you have a completed design at the correct size cut the shape out and glue it
to a thin scrap piece of timber to be used as a template. (You can also use
cardboard which in many cases will be easier to work with).
2. Using a coping saw, jigsaw, or ideally a bandsaw cut out the headstock shape and
sand the edges of your template smooth.
3. Taking a small clamp, clamp the template to the headstock and carefully trace the
outline.
From there you can either cut the new headstock shape using the template as a guide, or
remove the clamps and cut following the outlines you just made.
When cutting out your headstock shape protect the neck of the guitar when cutting, cut well
outside the lines to allow room for sanding and keep your saw as vertical as possible to
ensure straight lines on your headstock.
If unsure keep the design simple. A well executed simple design is better than a poorly
executed complex one. Once complete, sand the edges until as smooth as the rest of the
body and neck.
8

Masking
Before we start grain filling and finishing we should mask the neck pocket, and body cavities
of the guitar.
Mask the tuning peg holes on the headstock to keep the holes clean, along with the holes
for the bridge and tailpiece and pay special attention to the truss rod. You should also mask
the fretboard when spraying the back of the neck.
If your guitar has binding you can either attempt to mask off the binding, which in most
cases will mean some finish still permeates the masking tape and will need to be removed,
or not masking, and scraping the binding clean with a razor blade before spraying your clear
coats.
I’d normally scrape the binding as this is a more effective use of time, rather than attempting
to mask. But it’s best to mask the binding if you notice any cracks as the finish you apply will
permeate the binding staining it permanently.
9

Grain Filling
Grain filling is optional, and mostly depends on the wood your guitar is made from and
whether you are aiming for a flat finish.
If your guitar is made from an open grain timber such as Oak or Mahogany, the open pores
of the timber will prevent a flat finish unless filled.
Basswood for the most part is optional. In most cases it’s advisable to grain fill but if
painting a solid color (which we are in this case) you can get by using a primer which will
level and seal the surface.
If you are staining, depending on the product you are using, you can grain fill either before
or after. In most cases I’ve found grain filling first results in a more even application, and a
better result.
There are a number of different grain fillers available, including solvent, water and oil based
options, along with pre-tinted options. Oil based grain fillers penetrate deeper into the wood,
but water is obviously easier to work with with regard to drying times and clean up.
Using a tinted grain filler is a great option if you want to accentuate the grain pattern of the
guitar, as the excess will be removed when sanding but the filler used to pack the pores of
the wood will remain in place, emphasizing the grain pattern of the wood under a
transparent finish.
Below are the steps required for applying grain filler:
1. Mix up enough product to grain fill the entire guitar. Follow the recommendations for
the product you are using in terms of application, cleanup and safety, then mix your
grain fill into a workable paste in a spare container.
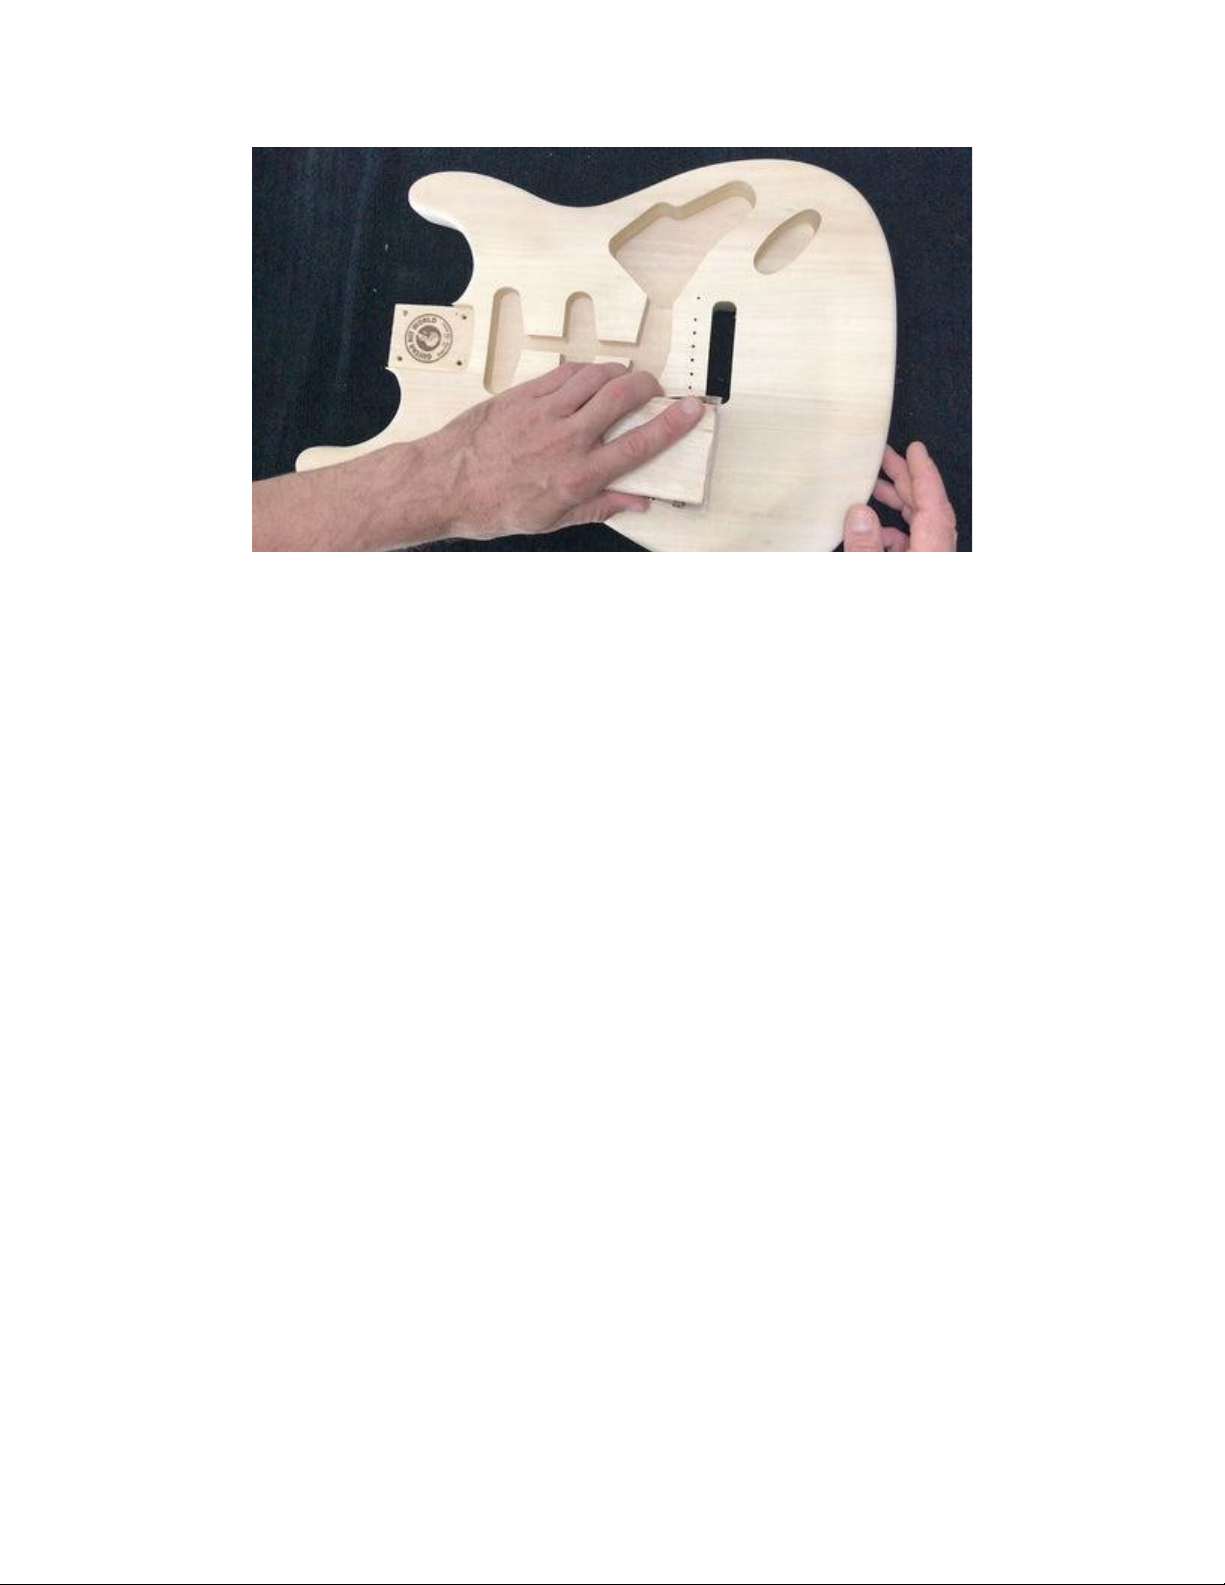
2. Apply to the guitar using a clean rag, working in line with the grains pattern of the
wood. Next, work across the grain really pushing the grain fill into the wood, making
several passes.
3. Once finished applying, leave the guitar for ten minutes and then wipe away any
excess using a clean damp rag.
4. Once dry, sand back to the surface level of the guitar, working through the grades of
sandpaper from 120 grit to 240. Sand sufficiently to remove the excess grain fill but
not enough to dig into the wood and create more open pores.
5. Inspect the surface of the guitar and repeat the process if required.
10

Finishing
It’s beyond the scope of this guide to cover every available way to finish an electric guitar
but below are a few rules that apply to almost all finishing options:
● Carefully consider your finishing options with regard to how protective they are and
how they might affect tone along with aesthetics.
● Choose your type of finish based on the wood itself. For example, it would be a
shame to cover up a beautiful grain pattern with a solid color finish. Alternatively,
staining a less figured piece of basswood for example may not provide a great
aesthetic either.
● Wear gloves and a mask and work in a well ventilated area as required. Fumes from
some finishing products can be toxic.
● Clean the body of the guitar using a product that includes a degreasing agent
● Wear disposable gloves when handling the guitar after cleaning.
● Make sure you are working in a relatively dust free environment and make sure to
clean the cavities of the guitar body thoroughly after sanding. Dust accumulates in
the cavities of the guitar, and when turning the guitar over that dust will become
airborne.
● If staining, make sure to wipe away any excess that hasn't been absorbed after
approximately ten minutes.
● Be aware of the compatibility of the products you use. If painting using spray cans I’d
recommend using the same brand and type of paint for your seal coat, color coat
and clear coats.
● If you have to spray outside avoid spraying on windy days.
11

● Spray the sides of the body first. That way when spraying the front and back you will
be spraying over any overspray from the sides of the guitar.
● Don’t spray heavy coats. In many cases, several lighter coats are a better option
than 1-2 heavy coats due to the potential for runs.
● Check your binding for cracks. If cracks are present, mask the binding prior to
applying a colored finish or the finish will penetrate the binding and become
impossible to restore to its original state.
● Don’t apply too many coats within recommended drying times. If you spray more
than 3 coats in a day for example, your first coat may have trouble curing.
● If you are using steel wool on the body of the guitar prior to finishing ensure you
remove all fibers from the steel wool.
● Always hang your guitar in a cool dry environment. Do not leave your guitar outside
to dry, it will attract dust.
● In most cases, you can respray within an hour. If you leave it longer than this, you
may need to leave the guitar for 24 hours and then lightly scuff up the paint with 600
- 800 grit sandpaper to ensure the ensuing coats will adhere to the previous coats.
(This depends on the product you are using, so check the label). If you’re looking for
a resource that covers guitar finishing in great detail, check out Guitar Finishing
Step-by-Step by Dan Erlewine and Don MacRostie.
Installing the neck
Now that the finishing stage is complete we can safety install our neck.
Within your packaging there will be a neck plate, neck plate cushion and four long screws.
12

Place the neck into the neck pocket and ensure it is pushed right up into the back of the
cavity.
Place the black neck plate cushion followed by the chrome neck plate and then loosely
place the 4 screws, but don’t begin tightening these yet.
Next, double check your alignment and begin installing the screws. Install the top left screw
first, followed by the bottom right screw, working diagonally. Once all screws are in place,
tighten and double check the neck alignment.
2. Hardware Installation
Next we’ll install our hardware, the pre-mounted pickguard, tuners, strap buttons, string
trees and floating tremolo bridge.. There are some best practices to follow including drilling
pilot holes and aligning your hardware correctly which we’ll cover in more detail below.
Pilot Holes
Drill pilot holes for all screws used on the body and neck of the guitar.
The small screws used for securing your tuners for example are small, fragile and easily
stripped.
13

Whenever installing hardware:
1. Use masking tape on the guitar to mark the location of the hole using a pen (pencils
usually don’t result in sharp lines on masking tape).
2. Mark the location of the hole making an indentation in the wood through the masking
tape using a hole punch or similar tool.
3. Decide on the correct size drill bit (⅔ thickness of the screw) and mark the drill bit
depth using a small piece of masking tape at approximately 2/3 the depth of the
screw to be installed.
4. Always aim to drill your holes straight. If you have a drill press this is preferred.
5. Use a countersink drill bit (or similar) to chamfer the edges of any holes in the cody
of the guitar, especially if painted using a solid color finish, to prevent chipping. You
may want to drill less than ⅓ depth on less dense timbers such as Mahogany and
Basswood.
Installing the pickguard
We’ll start by installing the pre-mounted pickguard. The pickguard already has the pickups
and controls pre-mounted so the first thing we need to do is identify the wires for the input
jack and ground wire for the tremolo claw.
The wire connected to the middle lug (output) of the volume pot will go to our input jack, and
either of the remaining two wires can be the ground for the input jack. I’m using the black
wire for the ground of the input jack, and the white wire for the ground for the bridge in this
instance.
14

Once you have threaded the wires, including the ground wire for the bridge, install the
pickguard. Check the alignment and then mark indentations in the timber for each screw
hole using a hole punch or similar object and the pickguard as a template.
Once you have marked the location of your pilot holes select a drill bit approx. ⅔ the size of
the screws being used for the pickguard and mark the drill bit at ⅔ the depth of the screw
using a small piece of masking tape to indicate the depth of your holes. Drill the pilot holes,
keeping the drill straight. Then position the pickguard and secure with the smaller screws
found in your packaging.
15

Installing the Tuners
ST guitar kits utilize inline tuners, so you won’t need to separate your tuners into left and
right.
1. Start by inserting the tuner in the back of the headstock with the mounting hole
facing back toward the body.
2. Place the washers over the tuning posts, then place the bushings and install the
tuners by hand tightening.
3. Align the tuners using a steel ruler (see image below).
4. Mark the location of the mounting screws, drill your pilot holes and install the small
screws.
5. Remove the protective covering by firmly pressing masking tape onto the back of
each tuner and removing both the covering and masking tape in one action.
16

You can also install the first and last tuner, and using a steel ruler mark a straight line
between them on masking tape to ensure a straight line to mark out the location of the pilot
holes.
Installing strap buttons
Strap buttons not only support your guitar when playing standing up, the placement of the
strap buttons also affects the balance of the guitar.
17

On an ST guitar, the rear strap button is located in the center of the lower bout. The front
strap button is inserted into the top horn on a downward facing angle.
Follow the method described above for all hardware installation including using
painters marking tape for marking the location of pilot holes, and drilling to the
correct size and chamfering the edges of the holes.
Installing and floating tremolo bridge
Start by inserting the bridge into the bridge cavity and positioning within the cutout in the
pickguard. The holes for the screws that secure the bridge at the front are pre-drilled, so
taking 6 of the smaller screws secure the bridge in place.
Installing the input jack
Place the input jack in the cavity and align until satisfied with the placement. Mark your pilot
hole location, remove the jack and drill pilot holes. Next, warm up your soldering iron as
we’ll quickly connect the ground and hot wire to the jack.
18

3. Connecting the electronics
Soldering
If you haven’t soldered before you’re going to need a soldering iron, solder, and a damp
sponge to clean the tip of your iron. I’d also recommend practicing before committing solder
to your electrical components.
Most entry level soldering irons will do the job, and your kit will come with more than enough
solder. Be careful when soldering. Solder won’t melt until it reaches 185°C (365°F) and
soldering irons get very hot, up to 392°-896° F in some cases.
When soldering there are two key areas to keep in mind.
1. Tinning
Tin your soldering iron and the components you are connecting to. Tinning refers to
maintaining a light coating of solder over the tip of your soldering iron and prevents the iron
tip from oxidizing.
2. Preheating
Soldering is really about transferring heat. The lug or component you are connecting to
should be preheated so the solder is drawn to it rather than staying on the already hot iron.
Wiring
Next we’ll connect the electronics. There’s only three connections to make when wiring an
ST guitar kit, all other wiring is taken care of courtesy of the pre-mounted pickguard.
19

20
Table of contents
Other GUITAR KIT WORLD Musical Instrument manuals