Tone
Bank
MIT-750
KEYBOARDS
ELECTRONIC
MUSICAL
INSTRUMENT
:
Contents
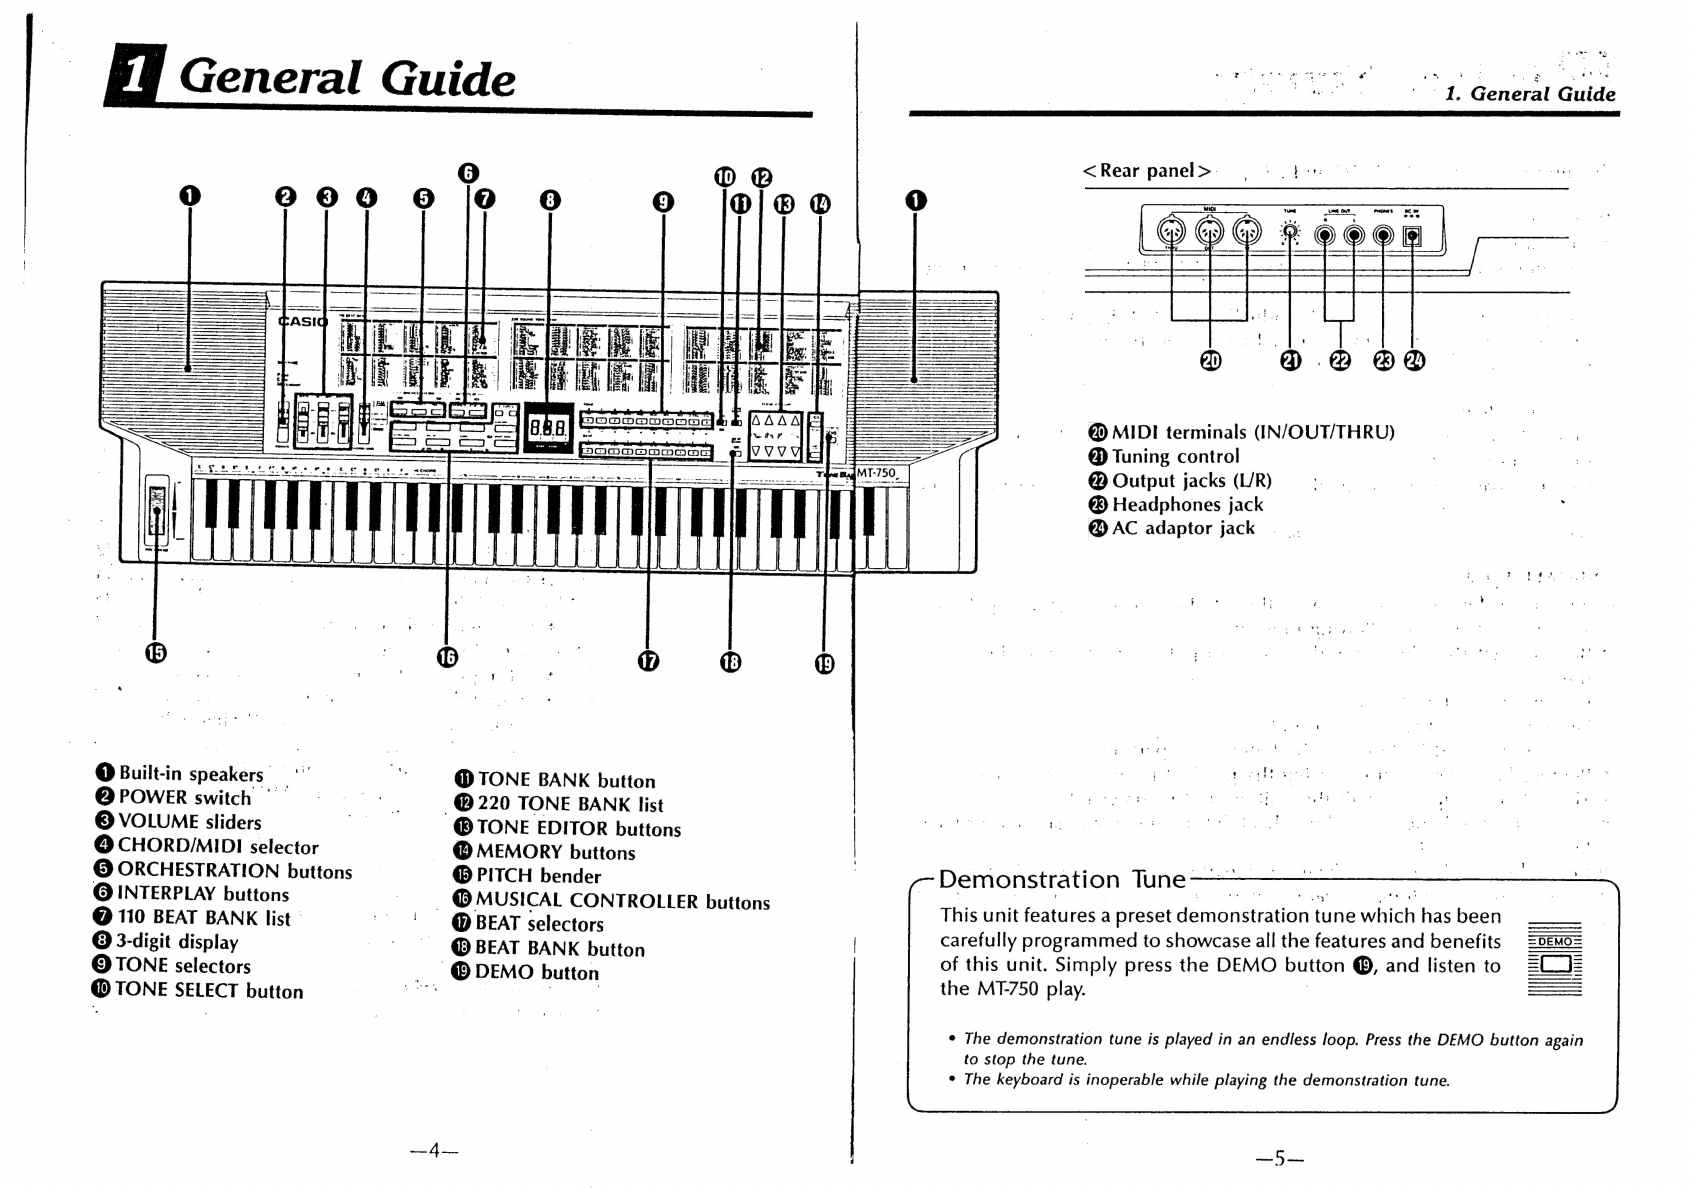
1.
General
Guide
«0.000.000...
cee
cc
cce
cece
eee...
4
7.
Tone
Editor
.....
Sere
ere
eer
ee
rabtevlid
orci
20
m™
Demonstration
tune..........
0...
cece
cece
cece.
5
-
;
|
@
Using
the
TONE
EDITOR
buttons
fig
BILE
wre
ol
Si
-20
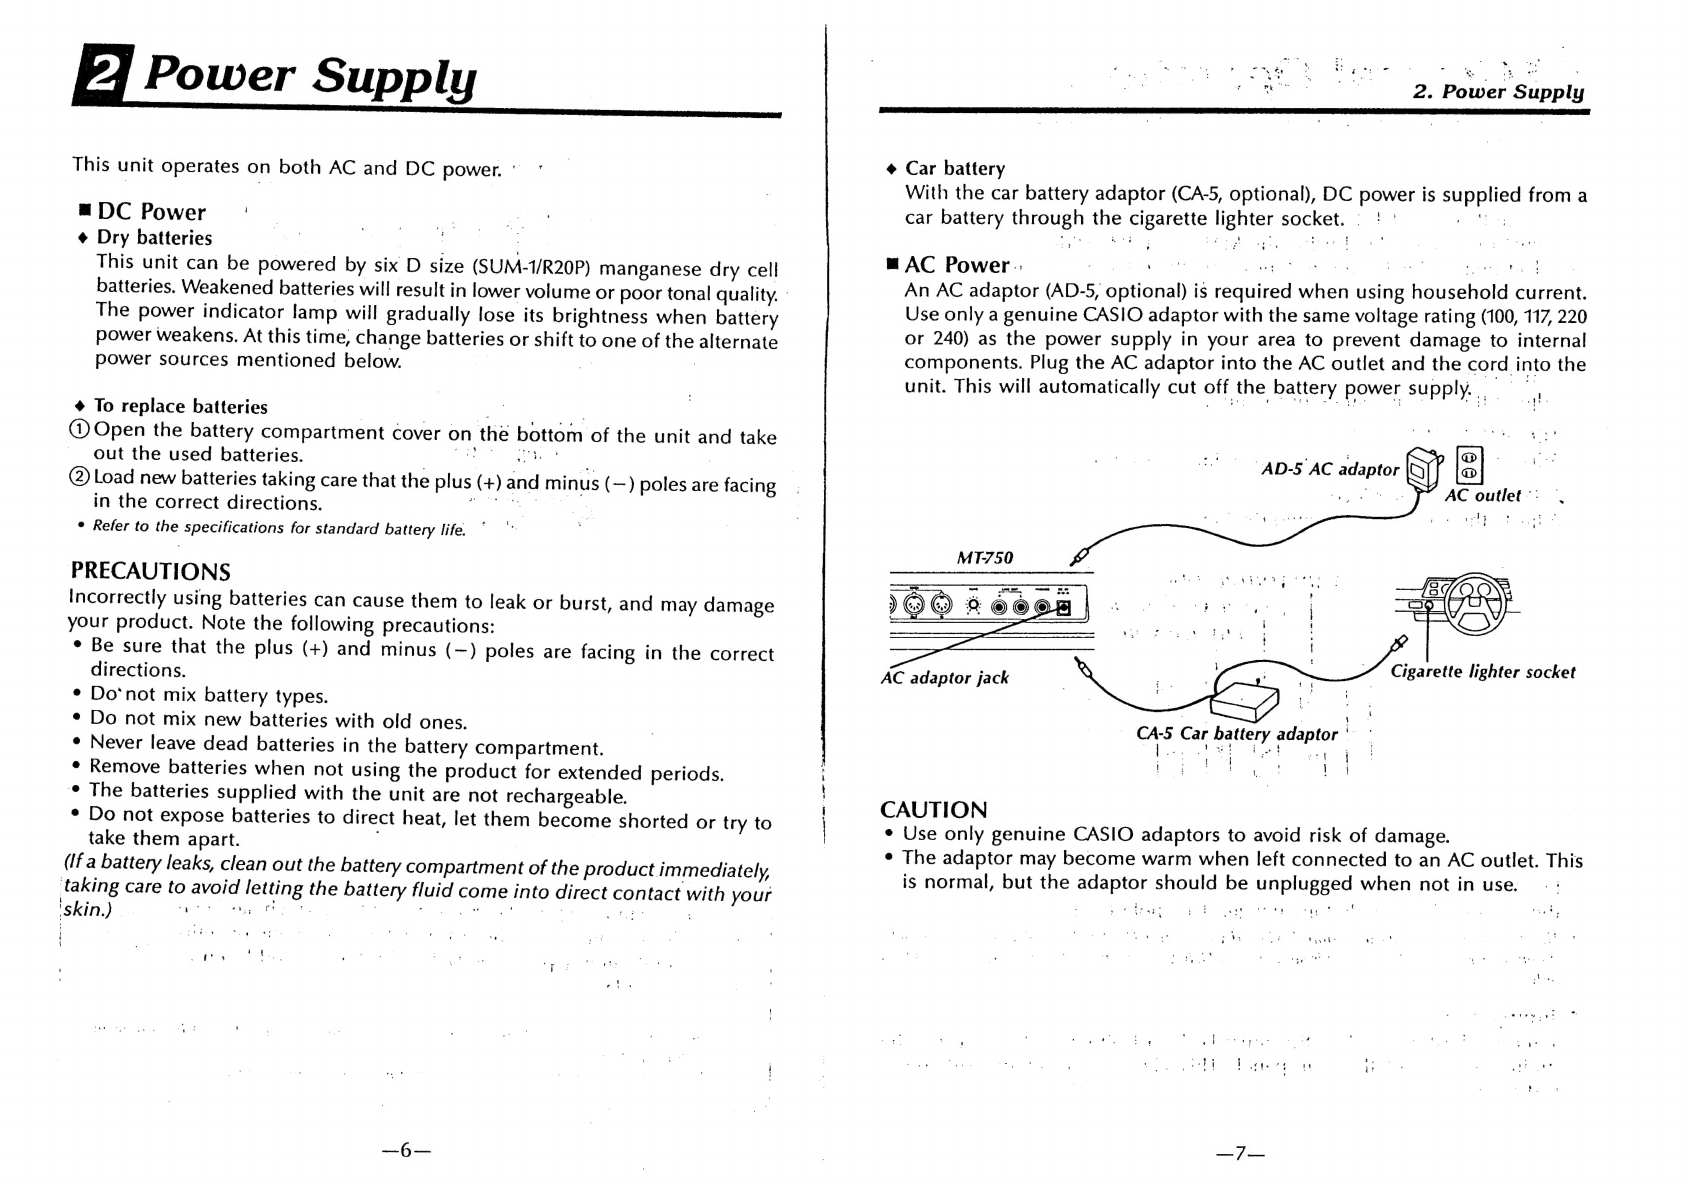
2.
Power
Supply
...........
0...
ccc
cece
cence
ee
eeee
6
«8,
Performance
Memory
Function
eee
eee
21
DG
POWe
raises
cnosx
eats
maa
dieandddtoedoseacnd
6
*
W@
Recording
:.......02...0..000.
Males
ent
chaatets
2
|
BING
DOWED
a
ios
oe
sreateries
ons
aeeiiiie
pale
Ake
3
7
_™
Playing
back
memory
contents..:........
nave
doe
3.
General
Operations
.......................
pinta
8
9.
MIDI
Functions.....................0..
Seas
eee
es
™
Getting
started.
.........
ccc
cece
cece
wccecce
8
2
Mat
1S
AIDE
ig
4
sacs
eee
xis
etalon
23
M
Volume
sliders.
......
00...
cece
cease
caucececce
8
-
@
MIDI
terminal
functions
...............004.
23
PIGIY
DENOOE
ase
oid
acd
ioc
Speen
tents
turddend
aceaie
8
_™
MT-750
MIDI
settings
.................0000008%
23
MUNIN
COMO)
aioe
cite
es
bel
2
od
eacer
hitb
aisld
ahaneaars
8
@
Setting
the
MIDI
mode
....................
23
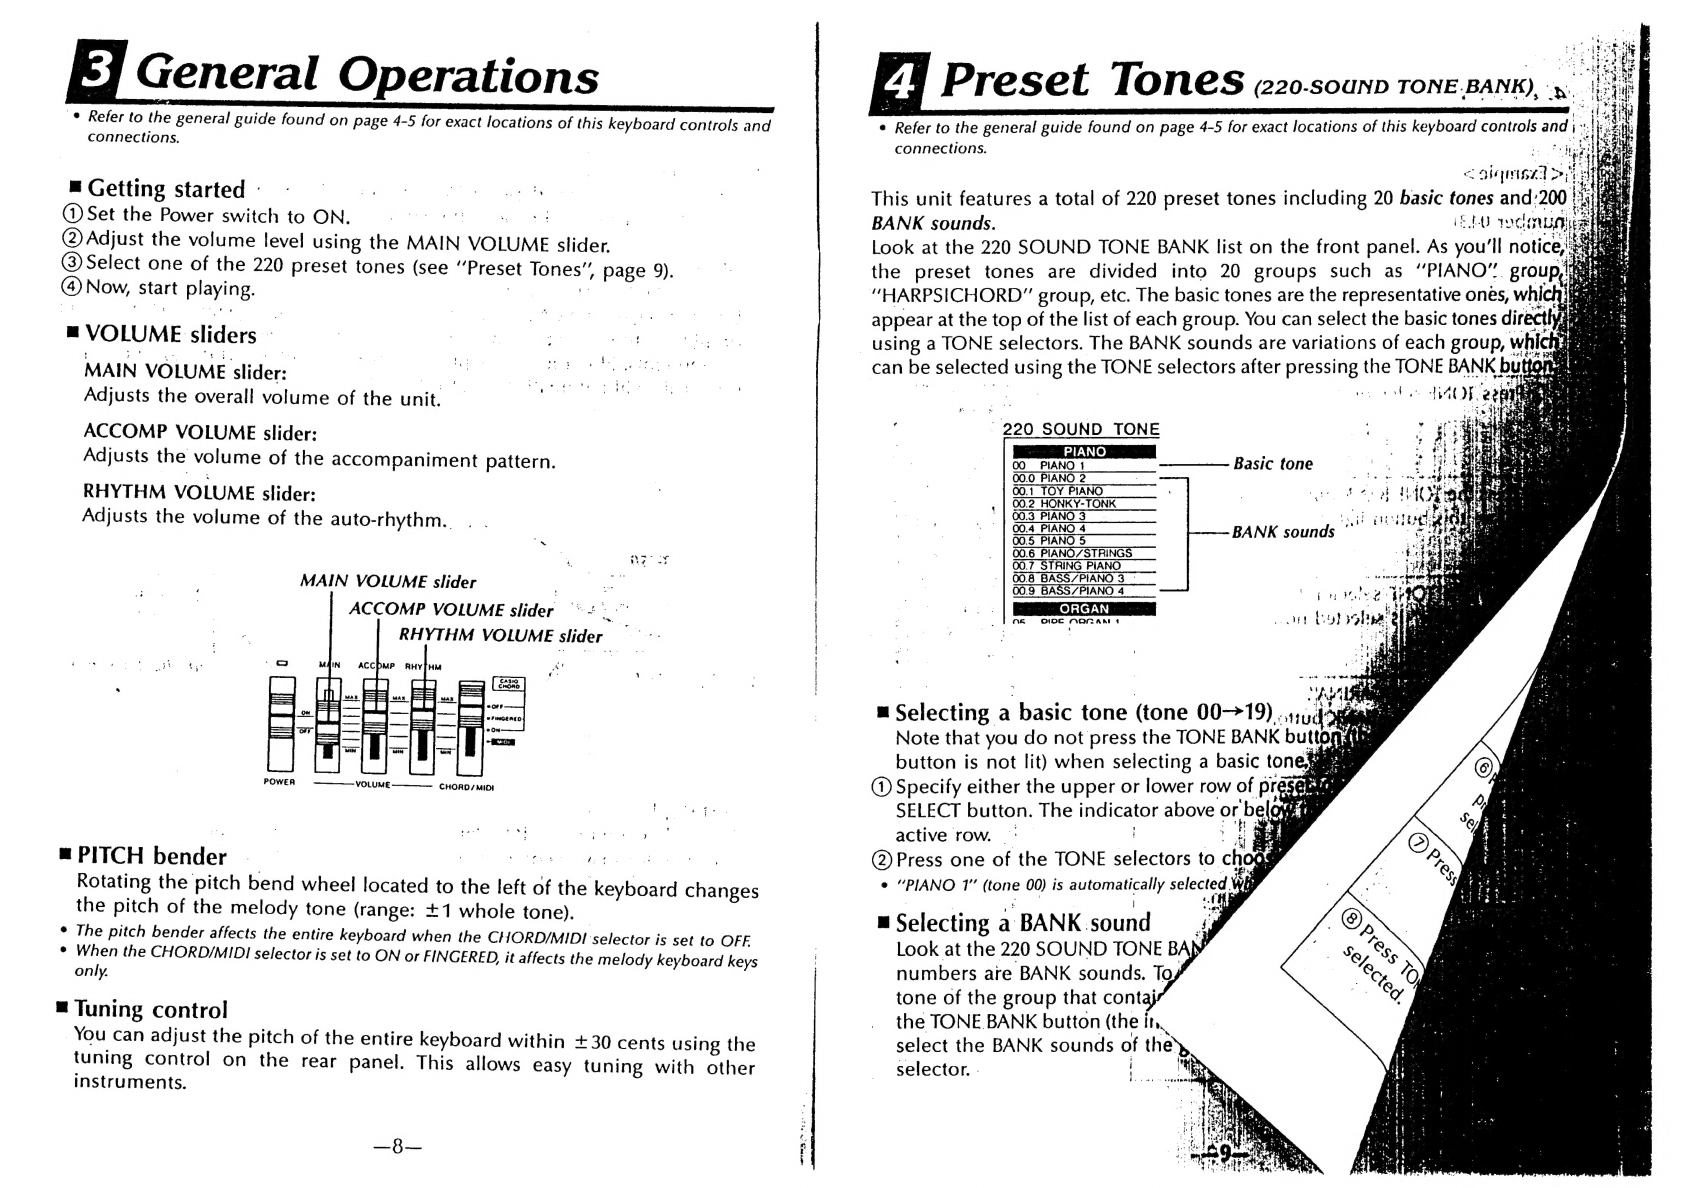
4,
Preset
Tones
(220-SOUND
TONE
BANK)...........
9
:
@
Setting
the
MIDI
channel
..................
24
..
@
Selecting
a
basic
tone
.........0.0
0...
cece
eee
9
¢
Assigning
preset
tones
to
MIDI
channels
m
Selecting
a
BANK
sound........
Se
Cee
i
|
(MODE
Doin
ente
aoe
256 eit
sot
dees
meu
ceautads
25
'
@
Keyboard
split
tones
.............ccc
cece
eee.
11
_.
@
Setting
the
MIDI
clock
(internal/external)
....25
|;
5.
Auto-Rhythms
(110
BEAT
BANK)
..................
12
_-:
@
Setting
the
volume
in
the
MID!
mode...:....25
“i
Selecting
a
basic
rhythm
.....................
12
|
-.
+.
|
MTE-750
MIDI
applications
.....................
26
vast
i
Selecting
a
BANK
POV
ORIM
saat
hak
nt
oso
12
+
Connecting
to
another
MIDI
keyboard
.
ees
.26
gis
ae
Playing
an
auto-rhythm
...............0.c0
cee.
14
:
|
|
.
.
@
Use
as
multi-timbral
sound
source.......
ya
26
ps
6.
&.
Multi
"accompaniment
System.....................
1S.
i,
2
.™@
Technical
reference
..............
0c
0000
ces
es
28
es
;
B
Accompaniment
keyboard
...........0.....08.
15
_-
@
Program
change
reference.
:......
ies
an
08
oi
Playing
an
accompaniment
using
CASIO
_.'
«
@
Polyphony
reference
............
ee
ere
29
3
ie
DCHORD
scohstesuus
nasueatiaua
teenies
demain
15
10.
Troubleshooting
.................
Pee
reomeees
30
eeaiewe
|
™
Playing
an
accompaniment
using
FINGERED
|
11.
Care
of
Your
Keyboard
......
ee
eee
eeoanen
31
PP
CHORD
0
16
12.
Specifications
............
0.00.
cece
cece
e
ec
eee,
32
Pageeg™
Using
the
MUSICAL
CONTROLLER
buttons
....17
to
“Foy
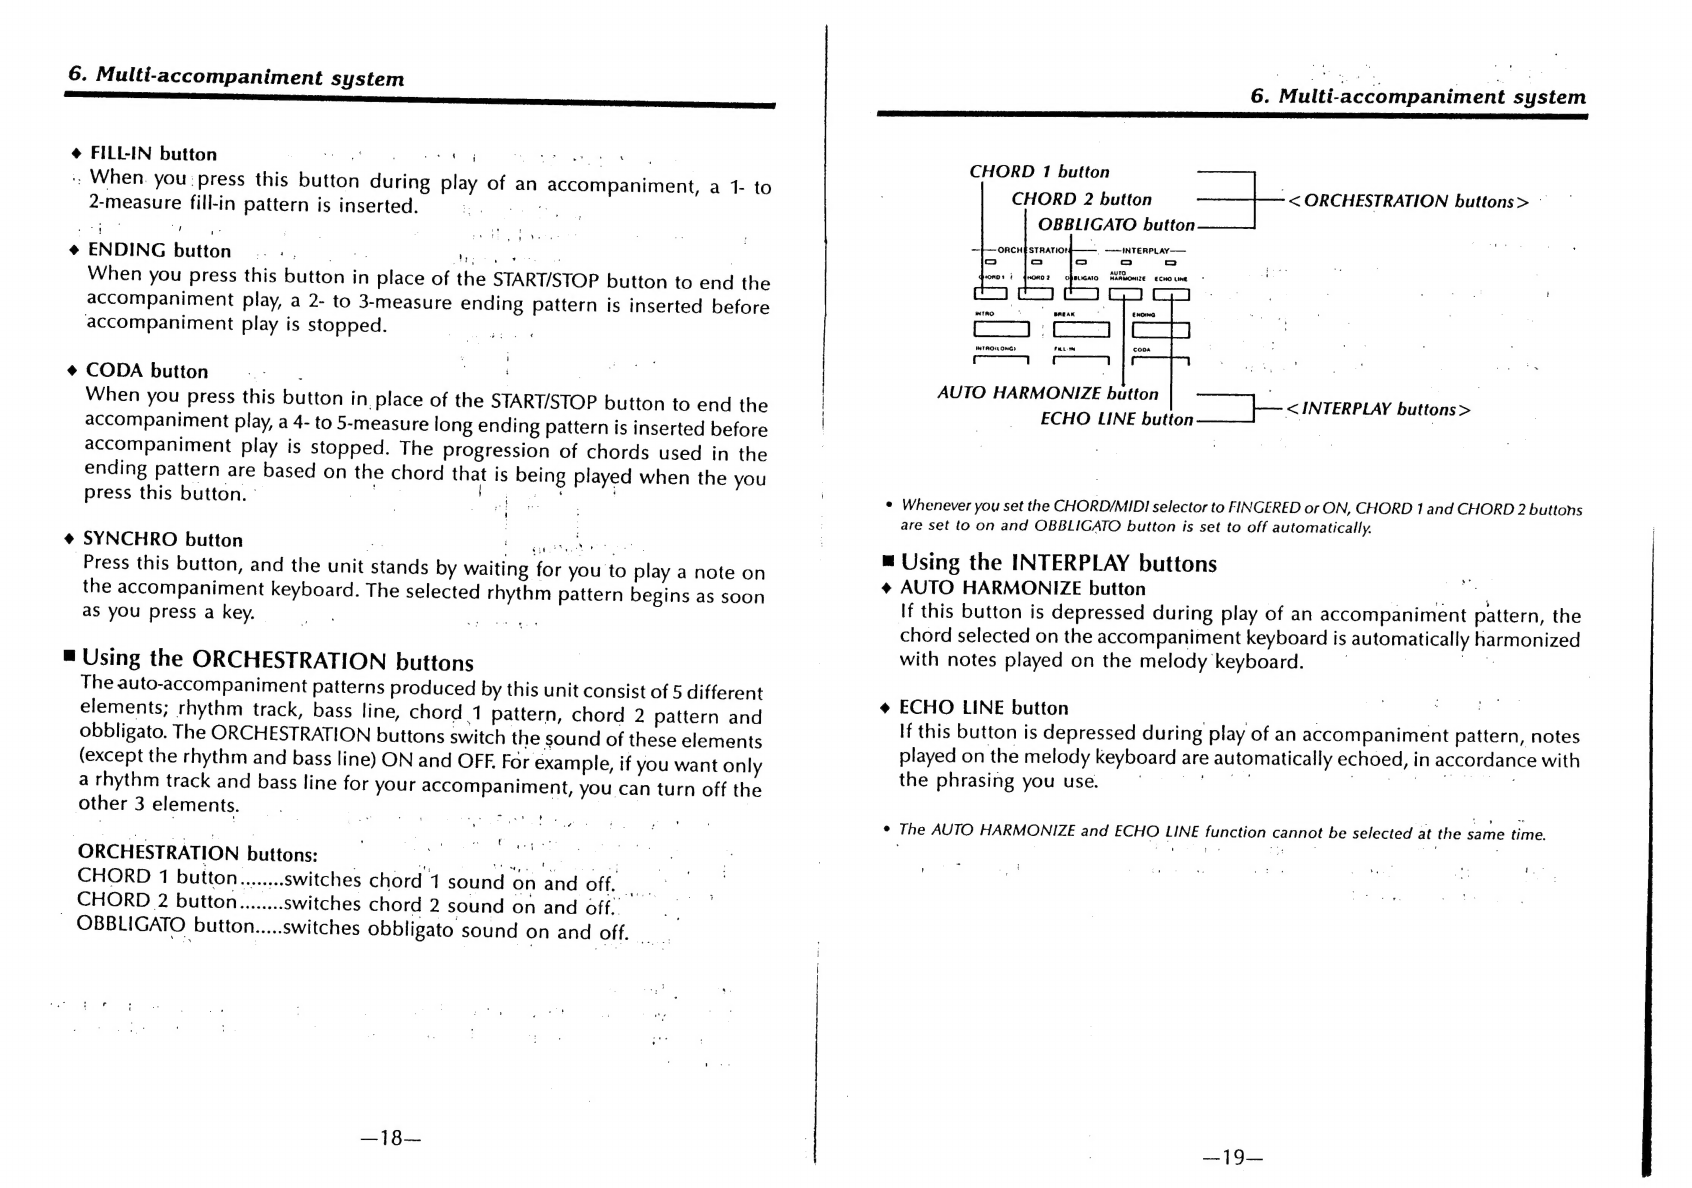
the
ORCHESTRATION
buttons
..........
18