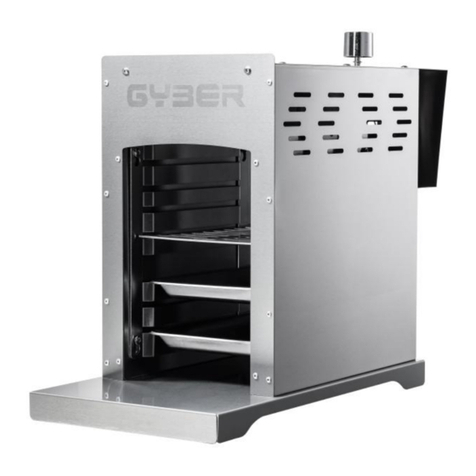
GYBER Alder User manual


Product Instruction
●This product is for household use only.
●Please read the instructions carefully before use and keep them properly.
●The above information has been carefully checked. If there is any printing error
or misunderstanding, please contact us as soon as possible.
Safety precaution
Before using this high temperature oven, please read the instructions carefully and keep
them for future reference .If the equipment is used by others, the instruction manual shall
accompany it.
Usage
The high temperature oven can only be used for heating and baking foods such as meat,
fish and materials.Do not use on dry foods such as bread.
The device is intended for personal home use only and is not intended for commercial
use.
The product is intended for use in well-ventilated and sheltered indoor environments,
but cannot be embedded for use.
Risks to the general population and to children
Persons with mobility disabilities, cognitive impairment, mental problems and lack of
experience and knowledge should not operate the equipment unless accompanied by
an experienced understanding of their responsibility for their safety.
Keep children away from packaged materials, if ingestion may cause suffocation. At the
same time, make sure the bag does not cover your head.
Children should be kept away from the device.
Get an electric shock risk
The device should not be immersed in water or liquid and is at risk of electric shock.
The device cannot be splashed with water or liquid and is at risk of electric shock.
Do not eat in a moist environment, such as near a sink.
When the equipment is connected to power, it shall ensure that the input electrical
parameters are consistent with the parameters of "technical specification".
Make sure the socket is easily accessible and can be quickly removed if necessary.
Do not use the equipment again if the product is damaged, the heating tube is
damaged, the power cord or plug is damaged, the product has fallen, or other damages
occur.

Before each use, completely loosen the power cord to ensure that the power cord is not
damaged.
Make sure to remove the plug after each use, when not in use, before cleaning and
placing, when the product is in error and during thunderstorms.
Pull out the power supply should focus on the plug, not the power cord.
The equipment shall not be modified without authorization.
Take out the maintenance should find a qualified business maintenance.
Do not barge the power cord without authorization.
If the power line is damaged, it is necessary to contact manufacturers, manufacturers
after sales or qualified businesses for repair.
Cannot connect external timer, or remote control device.
The product needs to be used in a grid environment with a leak trip switch less than
30mA. If you are not sure, consult a qualified electrician.
The appliance is to be connected to a socket-outlet having an earthing contact.
the supply cord should be regularly examined for signs of damage and the appliance is
not to be used if the cord is damaged.
If the power is cut off while using the equipment, follow the following steps:
1. Remove food from the grill.
2. Make sure no one touches the product. The case of the product will be very hot before it
cools down .
3. If power is lost for an extended period of time, unplug the plug, ventilate the room and
keep monitoring the product until it is completely cooled .
Risk of burns and scalds
Warning
There is a risk of burns. The shell of the product is in high temperature during use. Do not
touch it during use.
Care should be taken when placing or removing food. Use thick cloth or heat-resistant
gloves.
Do not place items such as rags or packaged food on or inside the product. There is a
risk of fire .
Do not leave during heating and cooling .
Overheated food or hot oil can cause a fire.
Allow product to cool completely before moving, cleaning and storing.
Both sides and upper part of the product for heat dissipation, the bottom for air intake.
The above holes should not be blocked, otherwise there is a risk of fire.
It is very hot above the heating tube during use, and there is a risk of burns if it is
touched.
Food should not touch the heating tube, otherwise the food will overheat and risk of
fire.

The barbecue area is very hot. Do not touch it.
The attached separate handle does not connect to the grill during grilling.
Use the handle only when placing or removing the net.
Wear heat-proof gloves when using handles.
Grill after the grill net and oil pan are in place.
A small amount of water should be placed on the oil pan to avoid high oil temperature
fire, and the amount of water should be continuously observed.
If the water evaporates, turn off the equipment and remove the oil pan for rehydration.
Remove the baking net after the equipment has cooled down completely.
Grease and oil may catch fire when not handled properly.
Do not use water to extinguish fire.
Power should be removed and appropriate fire extinguishing equipment used.
Use environment and instructions.
Place the product on a smooth and heat resistant surface to ensure that there is no
other source of high temperature nearby.
Avoid using the product in areas where heat is concentrated and where no heat is
allowed .
Floor MATS are used to cushion the product and place the plane and cannot be
removed.
Pay attention to safety when barbecue food, do not allow to bake dry food.
Cannot be placed in the closet and corner of the use, use with carpet and tablecloth and
other flammable goods keep a distance.
Keep the product at a distance from the water.
Only parts supplied by the manufacturer are allowed, or additional parts are available
on the manufacturer's website for a fee.
There are foot pads at the bottom of the product, which may be corroded or loosened
due to different conditions of placement.
If necessary, place an anti-skid pad at the bottom of the product during use.
Do not use aggressive cleaners, abrasive cleaning tools, hard sponges or other cleaning
products.
When cleaning, do not spray liquid directly on the surface or inside of the product.
Products should be cleaned with a soft cloth and a mild detergent.

Product part name

Part:
serial
number
Part name
serial
number
Part name
1
cover
11
plug
2
glass window
12
power cable
3
handle
13
switch
4
display
14
power button
5
time knob
15
Easy to clean plate
6
oil pan
16
Reflective plate
7
Frame post
17
Heating pipe protection net
8
casters
18
Heating pipe protection net
fixing frame
9
side table
19
grill
10
temperature knob

First use
Open the package
1. Take out products and accessories.
2. Keep packing cases and foam well.
You need to repackage the product if you need to return it.
3. Remove the accessories from the product.
4. Carefully remove all packaging from the product and carefully check the product,
especially the heating tube and power cord.
Setting up
Before starting, make sure there is no strong source of heat nearby.
Avoid using the product in areas where heat is concentrated and where no heat is
allowed.
The bottom should not be occluded.
For the first time, smoke and odor are generated on the surface of the product.
Please install the accessories in the ventilated environment first, and start baking for 10
minutes without food.
Cannot be placed in the closet and corner of the use, use with carpet and tablecloth and
other flammable goods keep a distance.
Place the product on a smooth and heat resistant surface.
Cleaning
Dust on the surface of the product or residues from the packaging and production process
should be cleaned prior to first use.
Then turn the machine on to bake the product and clean it again.
1. Clean all accessories with warm water and let dry. Note that corrosive cleaners may cause
stainless steel clothing.
2. Clean the surface and interior of the product with a small amount of water and a flexible
cleaner.
3. Completely dry the product. Plug in the power cord.
Install grill and pan
Daily simple cleaning can remove the grill. When installing the grill, be careful not to touch
the heating tube to avoid product damage. Make sure the grill is installed in the correct
position and you are ready to install. Grills and nets are necessary when used. Remove the
grill only when t
he product is fully cooled .
When removing the grill, lift the grill gently and remove. Please pay attention to safety when
in contact with the product. When barbecuing meat products, gravy often spills. But you
need to make sure that the gravy doesn't get into the product. Therefore, oil pan must be

installed when used.
Usage
1. Confirm that the product is connected to the power supply in accordance with the product,
and the rated voltage of the product is 220-240V ~ 50/60Hz,The rated power is 2800W.
2. Press which side of the digital "I" on the power switch on the right side of the product to
start the machine. A short time after starting up, the display screen will be displayed and the
buzzer will make a "drop" sound, which means the product will enter the standby state.
3. Temperature rotation function:
A Press the temperature knob, the display screen will display and the digital value of
temperature and time will flicker, and the oven will be turned on by default The surface
temperature of the rack is 380℃, and the barbecue time is 30 minutes.
B rotate the temperature knob clockwise. The gear temperature of the product increases by
50℃ every time, and the highest gear temperature of the product is 380 ℃. (Note: The gear
temperature of the product is 50-380 ℃, and every 50 degrees is a gear, only 350-380
Except for this tap.)
C. Rotate the temperature rotation counterclockwise. The gear temperature of the product
decreases by 50℃ every time, and the lowest gear temperature of the product is 50 ℃.
D Set the surface temperature of the grill, then press the temperature knob and twist it
Degree setting is completed;
E When the temperature is set, the barbecue is finished or the barbecue is suspended, press
the temperature knob again and the product will stop immediately Work or go into standby
mode.
3. Time button switch function
A. Rotate the time twist clockwise, increasing the time by 30 seconds per rotation;
the product setting time is 30 seconds to 60 minutes ;
B. Counterclockwise rotation time rotation, each rotation time reduced by 30 seconds ;
C. After the time setting is completed, press the time knob to stop the digital flashing of
the time display, indicating that the time setting is completed;
D. It is necessary to adjust the working time of the product during use. Press the time
knob to display the digital picture ;You can adjust the working time. After the adjustment,
press the time knob to enter the working state.
4. After setting the gear temperature and working time, the product will automatically enter
the working state: the heating tube starts to work, and the digital value of the temperature
display starts to increase, indicating that the temperature of the product grill gradually rises.
At the same time, the value of the time display began to decrease, indicating the start of the
product, the timing method is countdown .
5. When the time value displayed on the time screen is "0", the product will shut down
automatically.
6. Turn off the power switch and unplug the power cord after use or when the product is not

used for a long time.
Preheating
The monitor displays the current temperature while the product is working. When the preset
temperature is reached, there will be an audio prompt. Note that the temperature display
will have an error of ±20℃. The product will reach the highest thermal efficiency after
preheating. However, it is recommended to preheat the product for 5-10 minutes before
adding food for best results.
Barbecue
Generally, each side of the food needs only 4 to 8 minutes to bake. The baking time of
different foods can be referred to the "Food Baking time Comparison Table". The frozen
meat should be removed from the refrigerator 1 to 2 hours in advance to thaw at room
temperature before baking.
Cancel barbecue
If you need to stop the equipment during the barbecue, press the temperature knob once.
Cleaning and maintenance
Clean the equipment only after it has cooled down completely, and ensure that the master
switch is turned off and power off.
Remove the baking net, oil pan, plate and reflector, and clean the oven with a suitable
cleaner.
When choosing a cleaner, choose one that can be used with metal.
If barbecue accessories are very dirty, spray the cleaner several times and use a plastic brush
to clean them thoroughly.
Do not clean with abrasive, wire brush, etc.
For the inside and surface of the oven, wipe with a soft, damp cloth.
Avoid heating mechanical load when cleaning.
Note: Grease residue may cause fire and should be thoroughly cleaned.
Remark: Removable oven fittings are made of high quality stainless steel and dishwasher
safe.

Product exploded view:

serial
number
Part name
serial
number
Part name
1
grill
11
casters
2
Easy to clean plate
12
M4*10 cross round head
machine wire
3
Reflective plate
13
Heating pipe protection net
fixing bracket
4
Side table fixing bracket
14
Heating pipe protection net
5
side table
15
Heating tube protection
cotton
6
oil pan
16
front gate
7
Platen
17
door handle
8
backboard
18
curb plate
9
side table
19
After standing oneself
10
Caster Alignment Plate
20
Left column
21
Right column

Product installation:
Assemble the four frame uprights, bottom plate, and platen of the product.
Install the casters and the caster positioning plate on the bottom plate.

Install the side panels and rear panels
Put the door handle

Install the front door: install the lower shaft, then press the upper shaft and align the upper
shaft with the positioning hole, loosen the upper shaft and install the front door
Install the M6*10 round head wire in the hole at the bottom of the product. The M6*10
round head wire only needs to be screwed in about 1/2. It cannot be screwed in place.

Align the bottom screw of the product with the positioning hole of the platen and insert it in
place to make the body fit the frame completely;
Push the fuselage back in place so that the rear panel of the fuselage is flush with the rear
panel of the frame;
Tighten the screws with a screwdriver, so that the installation of the fuselage and the frame is
completed ;
Fix the side table fixing bracket
Install the side table on the side table fixing bracket;
Tighten the screws with a screwdriver;

Install the reflector onto the support plate at the bottom of the product

Install the easy-clean board to the inside of the fuselage
Install the grill on the top surface of the easy-to-clean plate and the installation is complete.

How to remove the heating tube protective cotton:
Take out the grill, easy-to-clean plate and reflector;
Remove the two fixing bracket screws that fix the heating pipe protection net with a
screwdriver;
Remove the fixing bracket of the heating pipe protection net;
Repeat the above steps to remove the other three heating pipe protection net fixing
brackets;
Remove the heating pipe protection net;

Remove the heating tube protective cotton;
Install the heating pipe protection net;
Install the heating pipe protection net fixing bracket and tighten the screws;
Table of contents
Other GYBER Grill manuals
Popular Grill manuals by other brands

GardenGrill
GardenGrill Premium 2.1 Original instruction manual

HAEGER
HAEGER Cool Dinner User instructions

KitchenAid
KitchenAid KFRS271TSS Technical education

KitchenAid
KitchenAid 740-0780 Installation Instructions and Use & Care Guide

Bifinett
Bifinett KH 1141 operating instructions

DeLonghi
DeLonghi BG410 manual