manuals.online logo
Brands
  1. Home
  2. •
  3. Brands
  4. •
  5. H3C
  6. •
  7. Switch
  8. •
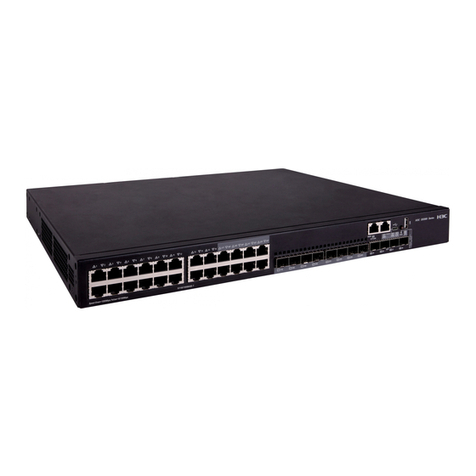
  9. H3C S12500 Series User manual

H3C S12500 Series User manual

H3C S12500 Routin
g
Switch Series
Installation Guide
Hangzhou H3C Technologies Co., Ltd.
http://www.h3c.com
Document version: 6W115-20130308
Copyright © 2008-2013, Hangzhou H3C Technologies Co., Ltd. and its licensors
All rights reserved
No part of this manual may be reproduced or transmitted in any form or by any means without prior
written consent of Hangzhou H3C Technologies Co., Ltd.
Trademarks
H3C, , H3CS, H3CIE, H3CNE, Aolynk, , H3Care, , IRF, NetPilot, Netflow,
SecEngine, SecPath, SecCenter, SecBlade, Comware, ITCMM and HUASAN are trademarks of
Hangzhou H3C Technologies Co., Ltd.
All other trademarks that may be mentioned in this manual are the property of their respective owners
Notice
The information in this document is subject to change without notice. Every effort has been made in the
preparation of this document to ensure accuracy of the contents, but all statements, information, and
recommendations in this document do not constitute the warranty of any kind, express or implied.
Environmental protection
This product has been designed to comply with the environmental protection requirements. The storage,
use, and disposal of this product must meet the applicable national laws and regulations.
Preface
The H3C S12500 Routing Switch Series Installation Guide describes how to install the H3C S12500
switches.
This preface includes:
•Audience
•Conventions
•About the H3C S12500 documentation set
•Obtaining documentation
•Technical support
•Documentation feedback
Audience
This documentation is intended for:
•Network planners
•Field technical support and servicing engineers
•Network administrators working with the S12500 switches
Conventions
This section describes the conventions used in this documentation set.
Command conventions
Convention Descri
p
tion
Boldface Bold text represents commands and keywords that you enter literally as shown.
Italic Italic text represents arguments that you replace with actual values.
[ ] Square brackets enclose syntax choices (keywords or arguments) that are optional.
{ x | y | ... }
Braces enclose a set of required syntax choices separated by vertical bars, from which
you select one.
[ x | y | ... ]
Square brackets enclose a set of optional syntax choices separated by vertical bars, from
which you select one or none.
{ x | y | ... } *
Asterisk marked braces enclose a set of required syntax choices separated by vertical
bars, from which you select at least one.
[ x | y | ... ] *
Asterisk marked square brackets enclose optional syntax choices separated by vertical
bars, from which you select one choice, multiple choices, or none.
&<1-n> The argument or keyword and argument combination before the ampersand (&) sign can
be entered 1 to n times.
# A line that starts with a pound (#) sign is comments.
GUI conventions
Convention Descri
p
tion
Boldface Window names, button names, field names, and menu items are in Boldface. For
example, the New User window appears; click OK.
> Multi-level menus are separated by angle brackets. For example, File > Create > Folder.
Symbols
Convention Descri
p
tion
WARNING An alert that calls attention to important information that if not understood or followed can
result in personal injury.
CAUTION An alert that calls attention to important information that if not understood or followed can
result in data loss, data corruption, or damage to hardware or software.
IMPORTANT An alert that calls attention to essential information.
NOTE An alert that contains additional or supplementary information.
TIP An alert that provides helpful information.
Network topology icons
Represents a generic network device, such as a router, switch, or firewall.
Represents a routing-capable device, such as a router or Layer 3 switch.
Represents a generic switch, such as a Layer 2 or Layer 3 switch, or a router that supports
Layer 2 forwarding and other Layer 2 features.
Port numbering in examples
The port numbers in this document are for illustration only and might be unavailable on your device.
About the H3C S12500 documentation set
The H3C S12500 documentation set includes:
Cate
g
or
y
Documents
Pur
p
oses
Product description and
specifications
Marketing brochures Describe product specifications and benefits.
Technology white papers
Provide an in-depth description of software features
and technologies.
Card datasheets Describe card specifications, features, and
standards.
Cate
g
or
y
Documents
Pur
p
oses
Hardware specifications
and installation
Regulatory compliance
and safety information
Provides regulatory information and the safety
instructions that must be followed during installation.
Installation guide Provides a complete guide to hardware installation
and hardware specifications.
Quick Start Guide Guides you through initial installation and
configuration.
H3C Pluggable SFP
[SFP+][XFP] Transceiver
Modules Installation
Guide
Guides you through installing SFP/SFP+/XFP
transceiver modules.
Adjustable Slider Rail
Installation Guide
Guides you through installing adjustable slider rails
to a rack.
H3C High-End Network
Products Hot-Swappable
Module Manual
Describes the hot-swappable modules available for
the H3C high-end network products, their external
views, and specifications.
Software configuration
Configuration guides Describe software features and configuration
procedures.
Command references Provide a quick reference to all available
commands.
Operations and
maintenance
System log messages Explains the system log messages.
Trap messages Explains the trap messages.
MIB Companion Describes the MIBs for the software release.
Release notes
Provide information about the product release,
including the version history, hardware and software
compatibility matrix, version upgrade information,
technical support information, and software
upgrading.
Obtaining documentation
You can access the most up-to-date H3C product documentation on the World Wide Web
at http://www.h3c.com.
Click the links on the top navigation bar to obtain different categories of product documentation:
[Technical Support & Documents > Technical Documents] – Provides hardware installation, software
upgrading, and software feature configuration and maintenance documentation.
[Products & Solutions] – Provides information about products and technologies, as well as solutions.
[Technical Support & Documents > Software Download] – Provides the documentation released with the
software version.
Technical support
servi[email protected]
http://www.h3c.com
Documentation feedback
You can e-mail your comments about product documentation to info@h3c.com.
We appreciate your comments.
i
Contents
Product overview·························································································································································· 1
Physical architecture ·························································································································································1
S12504 chassis view···············································································································································2
S12508 chassis views·············································································································································4
S12518 chassis views·············································································································································6
Backplane ··········································································································································································8
Fan tray ··············································································································································································8
Power supply system·························································································································································9
AC power supply ·················································································································································· 10
DC power supply··················································································································································· 13
Preparing for installation ···········································································································································15
Safety recommendations ··············································································································································· 15
General safety recommendations························································································································ 15
Electricity safety ····················································································································································· 15
ESD prevention ······················································································································································ 15
Switch moving ······················································································································································· 16
Laser safety····························································································································································· 16
Examining the installation site ······································································································································ 17
Weight support······················································································································································ 17
Temperature ··························································································································································· 17
Humidity ································································································································································· 17
Cleanness······························································································································································· 18
EMI·········································································································································································· 18
Grounding······························································································································································ 18
Power supply·························································································································································· 19
Cooling··································································································································································· 19
Space······································································································································································ 21
Rack-mounting ································································································································································ 22
Installation tools······························································································································································ 23
Installing the switch····················································································································································25
Confirming installation preparations···························································································································· 26
Installing an impedance carrier (optional) ·················································································································· 26
Installing a chassis air filter (optional) ························································································································· 27
Installing an expansion cable management bracket (optional) ················································································ 28
Installation preparation········································································································································· 28
Installation procedure ··········································································································································· 29
Installing the switch in a rack········································································································································ 31
Installation preparation········································································································································· 31
Installing slide rails and cage nuts to the rack ··································································································· 31
Installing the mounting brackets··························································································································· 33
Mounting the switch in the rack··························································································································· 34
Verifying the installation ······································································································································· 35
Installing the switch on a workbench··························································································································· 35
Installation preparation········································································································································· 35
Installation procedures·········································································································································· 36
Grounding the switch ···················································································································································· 37
Installing a power supply ·············································································································································· 38
Installation preparation········································································································································· 38
ii
Installing a DC power supply······························································································································· 39
Installing an AC power supply····························································································································· 39
Installing a fan tray ························································································································································ 41
Installing a card······························································································································································ 42
Installation preparation········································································································································· 43
Installation procedure ··········································································································································· 43
Connecting power cords··············································································································································· 45
Connecting an AC power cord ··························································································································· 45
Connecting a DC power cord······························································································································ 46
Verifying the installation················································································································································ 48
Connecting the switch to the network·······················································································································49
Cable routing recommendations ·································································································································· 49
Logging in to the switch················································································································································· 49
Connecting the console cable······························································································································ 49
Setting up a configuration environment·············································································································· 51
Powering on the switch·················································································································································· 54
Powering on the switch········································································································································· 54
Verification after power-on··································································································································· 56
Connecting the switch to the network ·························································································································· 56
Connecting the switch to the network through the AUX port············································································ 56
Connecting the switch to the network through a copper Ethernet port ··························································· 57
Connecting the switch to the network through a fiber Ethernet port································································ 57
Hardware management·············································································································································61
Displaying the electrical label data for your switch ··································································································· 61
Displaying the card information for your switch········································································································· 61
Rebooting your switch ··················································································································································· 63
Managing the power supply system ···························································································································· 64
Displaying the electrical label data for the power monitoring module ··························································· 64
Enabling power supply management·················································································································· 65
Configuring the number of redundant power supplies ····················································································· 65
Manually starting or stopping power supply to a card····················································································· 66
Allocating IDs for AC power supplies················································································································· 66
Displaying the power supply system information about your switch ······························································· 68
Configuring temperature thresholds for a card··········································································································· 73
Configuring temperature thresholds for a card·································································································· 74
Displaying the temperature information on your switch···················································································· 74
Isolating a card and locating card faults····················································································································· 75
Configuration restrictions and guidelines ··········································································································· 75
Configuration procedure ······································································································································ 75
Configuring in-service hardware failure diagnosis and failure protection ······························································ 76
Configuration restrictions and guidelines ··········································································································· 76
Configuration procedure ······································································································································ 77
Displaying the operating state of fans························································································································· 77
Displaying alarms present on a card··························································································································· 80
Verifying and diagnosing transceiver modules ·········································································································· 80
Verifying transceiver modules······························································································································ 80
Diagnosing transceiver modules·························································································································· 82
Troubleshooting··························································································································································85
Configuration terminal problems·································································································································· 85
No terminal display ·············································································································································· 85
Garbled terminal display······································································································································ 85
Power supply system failure·········································································································································· 86
Power monitoring module····································································································································· 86
iii
Power supplies······················································································································································· 86
Fan failure······································································································································································· 88
MPU failure····································································································································································· 88
LPU failure······································································································································································· 89
Switching fabric module failure···································································································································· 89
Interface failure······························································································································································· 90
Technical support ··························································································································································· 90
Replacement procedures ···········································································································································92
Cleaning the air filters ··················································································································································· 92
Cleaning the chassis air filters for an S12508 ·································································································· 92
Cleaning the chassis air filter for an S12518···································································································· 93
Cleaning a power frame air filter························································································································ 93
Replacing a power supply ············································································································································ 95
Preparing for the replacement ····························································································································· 95
Replacing a power supply···································································································································· 95
Replacing a PEM (applicable to only an AC power supply)············································································ 96
Replacing a card···························································································································································· 97
Preparing for the replacement ····························································································································· 97
Replacement procedure········································································································································ 98
Replacing a fan tray ····················································································································································100
Preparing for the replacement ···························································································································100
Replacement procedure······································································································································100
Replacing a CF card····················································································································································102
Replacing a transceiver module ·································································································································103
Regulatory Compliance and Safety Information··································································································· 105
Regulatory Compliance Information···························································································································105
Regulatory Compliance Standards····················································································································105
European Directives Compliance ······················································································································106
USA Regulatory Compliance ·····························································································································106
Canada Regulatory Compliance ·······················································································································107
Japan Regulatory Compliance···························································································································107
CISPR 22 Compliance ········································································································································107
Safety Information Sicherheits informationen安全信息 ····························································································107
Overview Überblick 概述 ···································································································································107
Electricity Safety Elektrische Sicherheit 用电安全 ····························································································111
Lithium Battery Lithiumbatterie 锂电池···············································································································113
Fuse Sicherung保险丝·········································································································································114
Laser Laser激光辐射············································································································································114
Appendix A Technical specifications····················································································································· 115
Environment requirements ···········································································································································115
Power consumption/weight/dimensions···················································································································115
Switches································································································································································115
Cards ····································································································································································116
Fan trays·······························································································································································118
Power components ··············································································································································119
Expansion cable management brackets ···········································································································119
Switch ordering guide ·················································································································································119
Card specifications and compatibility ·······················································································································120
MPUs·····································································································································································122
Switching fabric modules ···································································································································123
Ethernet interface card specifications················································································································123
OAA cards···························································································································································124
iv
Power components·······················································································································································125
Appendix B LEDs····················································································································································· 129
Power system LEDs ·······················································································································································129
Monitoring module LEDs·····································································································································129
Power supply LEDs ··············································································································································129
Fan LEDs········································································································································································130
MPU LEDs······································································································································································130
CF card status LED···············································································································································131
Network management port LEDs ·······················································································································131
Switching fabric module LED ·····························································································································131
LPU status LED ······················································································································································131
Fan status LED ······················································································································································132
Power status LED··················································································································································132
MPU LEDs ·····························································································································································132
LPU LEDs········································································································································································132
Interface LEDs·······················································································································································133
RUN LED·······························································································································································134
Switching fabric module LEDs·····································································································································134
Appendix C Transceiver modules·························································································································· 135
10-GE XFP transceiver modules··································································································································135
10-GE SFP+ transceiver modules ·······························································································································137
10-GE SFP+ cables ······················································································································································137
100/1000 Mbps SFP transceiver modules···············································································································137
Appendix D Lightning protection ··························································································································· 140
Connecting the AC power supply to a power strip with lightning protection ·······················································140
Installing a lightning protector for a network port····································································································141
Appendix E Engineering labels······························································································································ 143
Labels for cables···························································································································································143
Labels for signal cables ······································································································································143
Labels for power cords ·······································································································································143
Generic labels······················································································································································144
Labels for devices·························································································································································145
Filling in labels ·····························································································································································145
Affixing labels·······························································································································································145
Affixing a label to a signal cable······················································································································145
Affixing a label to a power cord·······················································································································146
Affixing a generic label······································································································································147
Affixing a label to a device································································································································148
Guidelines·····································································································································································148
Examples·······································································································································································148
Engineering labels for network cables··············································································································148
Engineering labels for optical fibers··················································································································149
Engineering labels for DC power cords ···········································································································151
Engineering labels for AC power cords ···········································································································152
Engineering labels for devices···························································································································153
Appendix F Cable management···························································································································· 155
Cable management guidelines···································································································································155
Cable management examples····································································································································156
Index ········································································································································································ 159
1
Product overview
The H3C S12500 Routing Switch Series includes the models in Table 1.
Table 1 S12500 models
Model MPU slots LPU slots
Switchin
g
fabric module slots
S12504-AC 2 4 4
S12504-DC 2 4 4
S12508-AC 2 8 9
S12508-DC 2 8 9
S12518-AC 2 18 9
S12518-DC 2 18 9
NOTE:
•The line processing unit (LPU) slots are for both Ethernet interface cards and OAA cards. For card
specifications, see "Appendix A Technical specifications."
•Unless otherwise specified, the confi
g
uration and installation procedures in this document apply to all
S12500 switches.
Physical architecture
The DC power supply and the AC power supply of a chassis look the same.
The diagrams in this guide are for illustration only.
2
S12504 chassis view
Figure 1 S12504 front view
(1) MPU slots (slots 0 to 1) (2) LPU slots (slots 2 to 5) (3) Power frame cover
(4) Power switch cover (5)
ESD-preventive wrist strap port
NOTE:
The power frame cover protects the power frame air filter and the power frame slots.
3
Figure 2 S12504 rear view
(1) Fan tray (2) Power entry module
(PEM)
(3)
Groundin
g
screw
(4) Ventilation panel (5) ESD-preventive wrist strap port (6) Switching fabric module slots (slots 6 to 9)
The S12504 chassis has the following slots and components:
•Two MPU slots and four LPU slots at the front, and four switching fabric module slots at the rear.
•One power frame, at the bottom of the chassis, can accommodate up to six power supplies.
•One vertically oriented fan tray at the rear of the chassis. For the ventilation direction inside the
chassis, see "Preparing for installation."
4
S12508 chassis views
Figure 3 S12508 front view
(1) Power frame cover (2) Upper cabling rack (3) MPU slots (slots 0 and 1)
(4) Lower cablin
g
rack (5) Chassis air intake vents
(6) ESD-preventive wrist strap port
(7) LPU slots (slots 2 to 9) (8) Power switch cover
NOTE:
The power frame cover protects the power frame air filter and the power frame slot. See "Power supply
system."
5
Figure 4 S12508 rear view
(1) Power entry module (PEM) (2) Upper fan tray
(3) Lower fan tray
(4) Ventilation panel
(5) Groundin
g
screw (6) ESD-preventive wrist strap port
(7) Switching fabric module slots (slots 10 to 18) (8) Chassis air exhaust vents
(9) Power supply air exhaust vents
The S12508 chassis has the following slots and components:
•Two MPU slots and eight LPU slots at the front, and nine switching fabric module slots at the rear.
•One power frame, at the top of the chassis, can accommodate up to six power supplies.
•Two horizontally oriented fan trays at the rear of the chassis. For the ventilation direction inside the
chassis, see "Preparing for installation."

6
S12518 chassis views
Figure 5 S12518 front view
(1) Power frame cover (2) Upper cablin
g
rack
(3) MPU slots (slots 0 and 1)
(4) LPU slots (slots 2 to 19) (5) Lower cablin
g
rack
(6) Chassis air intake vents
(7) ESD-preventive wrist strap port (8) Power switch cover

7
Figure 6 S12518 rear view
(1) Power entry modules (PEMs) (2) Upper fan tray
(3) Switchin
g
fabric module slots (slots 20 to 28)
(4) Lower fan tray
(5) Ventilation panel (6) Groundin
g
screw
(7) ESD-preventive wrist strap port (8) Chassis air exhaust vents
(9) Power supply air exhaust vents
The S12518 chassis has the following slots and components:

8
•Two MPU slots and 18 LPU slots at the front, and nine switching fabric module slots at the rear.
•Two power frames at the top, and each power frame can accommodate up to six power supplies.
•Two horizontally oriented fan trays at the rear. For the ventilation direction inside the chassis, see
"Preparing for installation."
Backplane
The backplane of an S12500 switch is located inside the chassis. It provides high-speed data switching
between switching fabric modules and LPUs, and exchanges management and control signals between
MPUs and LPUs/switching fabric modules. The backplane provides the following capabilities:
•Provides communication channels for signal exchange between cards.
•Supports hot-swapping of cards.
•Identifies card type.
•Connects to the power frame, provides distributed power for MPUs, LPUs, switching fabric modules,
fan trays and power supplies, and provides monitoring channels for MPUs to monitor power frame
status.
Fan tray
A fan tray contains fan units. The dimension of each fan unit is 120 × 120 × 38 mm (4.72 × 4.72 ×1.50
in).
An S12504 uses one fan tray, which comprises eight fan units and one fan monitoring board.
An S12508 or S12518 uses an upper fan tray at the top and a lower fan tray at the bottom. Each fan tray
comprises 12 fan units and one fan monitoring board.
S12500 fan trays provide the following functions:
•Effective heat dissipation and single-point of failure protection.
•Status monitoring, including fan rotation speed monitoring and fault alarming.
•Fan speed can be controlled by the MPU or automatically adjusted based on temperature. An
S12504 has two groups of fans. An S12508 or S12518 has four groups of fans. Speed adjustment
is done on a per-group basis to decrease noise and improve energy efficiency.
•Each fan tray has two LEDs on the front panel to show its operating status.
•Hot swappable. The fans receive DC power from the backplane.
IMPORTANT:
The S12504, S12508, and S12518 use different fan trays, which cannot be replaced by one another.
Figure 7 shows the S12504 fan tray, and Figure 8 shows the S12508 fan tray. The S12508 fan tray and
S12518 fan tray look similar.
9
Figure 7 S12504 fan tray
Figure 8 S12508 fan tray
Table 2 Fan LED description
LED Status Descri
p
tion
RUN Off The fan tray has failed.
Flashing The fan tray is operating properly.
ALM
Off The fan tray is in a normal state.
Flashing The fan tray is faulty.
Steady on The fan tray is faulty.
Power supply system
The S12500 switches provide both AC powered chassis and DC powered chassis. You can select the
type of power supply system and the number of power supplies as needed. The following takes the power
frame for the S12508 as an example.
10
Figure 9 Power frame appearance (without any power supply)
AC power supply
The AC-powered chassis of the S12500 switches use the PSE9000-A1 AC power supply system, which
comprises an AC power frame, a power monitoring module, a power entry module (PEM), and up to six
power supplies.
AC power frame
Each AC power frame can have one power monitoring module and up to six AC power supplies.
Figure 10 Front view of an AC power frame
(1) to (6) AC power supplies (the serial numbers are identical to the slot numbers)
(7) Power monitorin
g
module (8) Power monitorin
g
module
LED
(9) Power frame switch
Table 3 Power monitoring module LED description
LED Status Descri
p
tion
RUN Steady on The power monitoring module is operating properly.
Off The power monitoring module is faulty.

Other manuals for S12500 Series

19

This manual suits for next models

6

Other H3C Switch manuals

H3C S6520X-EI Series User manual

H3C

H3C S6520X-EI Series User manual

H3C S5500-EI series User manual

H3C

H3C S5500-EI series User manual

H3C H3C S3600 Series User manual

H3C

H3C H3C S3600 Series User manual

H3C S5130-EI Series User manual

H3C

H3C S5130-EI Series User manual

H3C S5560-EI series User manual

H3C

H3C S5560-EI series User manual

H3C S9500 Series User manual

H3C

H3C S9500 Series User manual

H3C S9500 Series User manual

H3C

H3C S9500 Series User manual

H3C S7500 Series User manual

H3C

H3C S7500 Series User manual

H3C S7500 Series User manual

H3C

H3C S7500 Series User manual

H3C S9500 Series User manual

H3C

H3C S9500 Series User manual

H3C S9500 Series User manual

H3C

H3C S9500 Series User manual

H3C UniServer BX608FE User manual

H3C

H3C UniServer BX608FE User manual

H3C S9500 Series User manual

H3C

H3C S9500 Series User manual

H3C S7500E-XS Series User manual

H3C

H3C S7500E-XS Series User manual

H3C S10500 Series User manual

H3C

H3C S10500 Series User manual

H3C S9500E Series User manual

H3C

H3C S9500E Series User manual

H3C S3100V2 Series User manual

H3C

H3C S3100V2 Series User manual

H3C WX3000 Series User manual

H3C

H3C WX3000 Series User manual

H3C S6826 Series User manual

H3C

H3C S6826 Series User manual

H3C S7500 Series User manual

H3C

H3C S7500 Series User manual

H3C S12500X-AF Series User manual

H3C

H3C S12500X-AF Series User manual

H3C S5500-EI series User manual

H3C

H3C S5500-EI series User manual

H3C S3610 Series User manual

H3C

H3C S3610 Series User manual

H3C S5560X-HI Series User manual

H3C

H3C S5560X-HI Series User manual

Popular Switch manuals by other brands

NETGEAR GS308P Installation

NETGEAR

NETGEAR GS308P Installation

StarTech.com POEINJ4G instruction manual

StarTech.com

StarTech.com POEINJ4G instruction manual

Comtech EF Data RADYNE RRS11 Installation and operation manual

Comtech EF Data

Comtech EF Data RADYNE RRS11 Installation and operation manual

Aerosport RV-10 installation guide

Aerosport

Aerosport RV-10 installation guide

Icy Box IB-HUB1423CR-C3 manual

Icy Box

Icy Box IB-HUB1423CR-C3 manual

ABB OTM C 21D Installation and operating instructions

ABB

ABB OTM C 21D Installation and operating instructions

Pakedge Device & Software SE-5P2-EP user manual

Pakedge Device & Software

Pakedge Device & Software SE-5P2-EP user manual

Cisco IE 4010 Hardware installation guide

Cisco

Cisco IE 4010 Hardware installation guide

Ruckus Wireless ICX 8200 Hardware installation guide

Ruckus Wireless

Ruckus Wireless ICX 8200 Hardware installation guide

NETGEAR GS110TP - ProSafe Gigabit Smart Switch installation guide

NETGEAR

NETGEAR GS110TP - ProSafe Gigabit Smart Switch installation guide

iNeo Rally Storage user manual

iNeo

iNeo Rally Storage user manual

Ubisys Power Switch S1-R quick start guide

Ubisys

Ubisys Power Switch S1-R quick start guide

Nortel 70 Series Installation and reference guide

Nortel

Nortel 70 Series Installation and reference guide

schmersal TV8S 521 operating instructions

schmersal

schmersal TV8S 521 operating instructions

REGATRON TC.ACS Device manual

REGATRON

REGATRON TC.ACS Device manual

MikroTik CRS317-1G-16S+RM quick start guide

MikroTik

MikroTik CRS317-1G-16S+RM quick start guide

Ekinex EK-FA1-TP manual

Ekinex

Ekinex EK-FA1-TP manual

Blue Sea Systems 3001 manual

Blue Sea Systems

Blue Sea Systems 3001 manual

manuals.online logo
manuals.online logoBrands
  • About & Mission
  • Contact us
  • Privacy Policy
  • Terms and Conditions

Copyright 2025 Manuals.Online. All Rights Reserved.