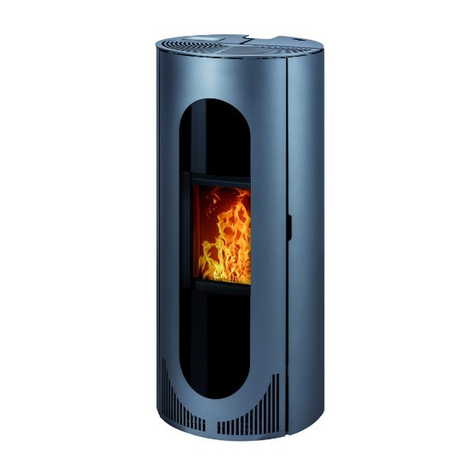
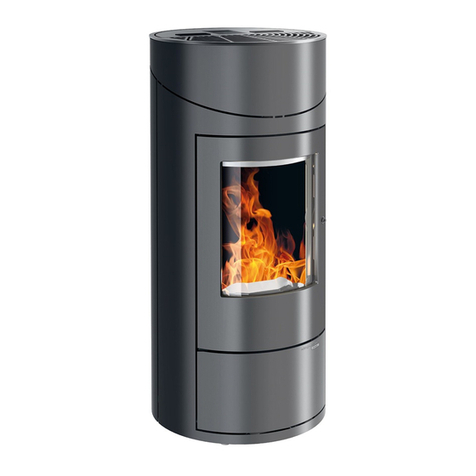
Haas+Sohn HSP 8 Lucca-II-RLU 442.08-ST Technical Document

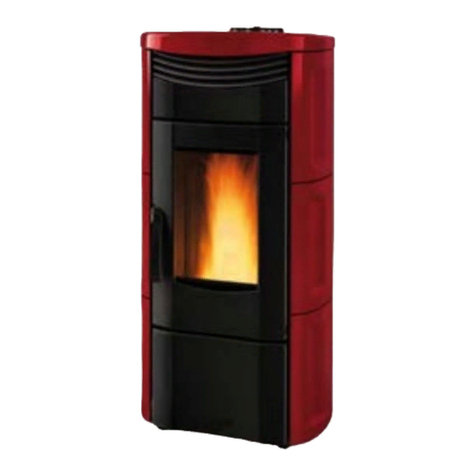
HSP 8 Lucca-II-RLU 442.08–ST
HSP 8 Catania-II-RLU 443.08–ST
Geräteblatt
Pelletofen DE
Fiche technique
Poêle à pellets FR
Scheda tecnica
Stufe pellet IT
Equipment sheet
Pellet stove GB
Tehnički list
Kotel na pelete HR
Tehnični list
Kotel na pelete SLO
0544208009039.1
HSP 8 Lucca-II-RLU 442.08–ST
HSP 8 Catania-II-RLU 443.08–ST
Technical documentation
HSP 8 Lucca-II-RLU 442.08–ST
HSP 8 Catania-II-RLU 443.08–ST
V17 J31

Notes in the text
Of utmost importance there are the notes entitled WARNING. The notes entitled WARNING advise you on
serious danger of damage to the heating device or of an injury.
The note entitled Notice advises you on possible damage to your heating device.
The note entitled Important calls your attention to the information important for the operation of your heating
device.
The note itself calls your attention to the information important for the operation of your heating device in
general.

Contents
Contents
1. Technical data.............................................................................................................................. 1
2. Dimensions................................................................................................................................... 2
3. Cleaning work .............................................................................................................................. 3
3.1. Cleaning the surface ................................................................................................................. 3
3.2. Cleaning the glass panel .......................................................................................................... 3
3.3. Clean combustion chamber “function instruction” error F040 ............................................. 3
3.4. Cleaning the combustion pot -weekly ..................................................................................... 3
4. Maintenance work....................................................................................................................... 5
4.1. Cleaning the pellet container - annual maintenance ............................................................ 5
4.2. Cleaning the flue gas passes - annual maintenance............................................................ 6
4.3. Cleaning the induced draught housing and fan..................................................................... 8
5. Replacement parts list............................................................................................................... 9
5.1. Replacement parts list HSP 8 Lucca-II-RLU 442.08–ST, HSP 8 Catania-II-RLU
443.08–ST (without trim parts) ................................................................................................. 9
5.2. Replacement parts list HSP 8 Lucca-II-RLU 442.08–ST, HSP 8 Catania-II-RLU
443.08–ST ................................................................................................................................. 11
5.3. Detail A1.................................................................................................................................... 12
6. Circuit diagram .......................................................................................................................... 13


Technical data
1
1. Technical data
HSP 8 Lucca-
II-RLU 442.08–
ST
HSP 8 Catania-II-
RLU 443.08–
Sandstein
HSP 8 Catania-
II-RLU 443.08–
Speckstein
Heat output range: 2,5 – 8,5 kW 2,5 – 8,5 kW 2,5 – 8,5 kW
Nominal heat output: 8,0 kW 8,0 kW 8,0 kW
Height: 1082 mm 1082 mm 1082 mm
Width: 795 mm 795 mm 795 mm
Depth: 434 mm 434 mm 434 mm
Weight: 161 kg 159 kg 171 kg
Diameter of flue elbow: 80 mm 80 mm 80 mm
Flue gas temperature: 201°C 201°C 201°C
Test nominal supply pressure: 11 Pa 11 Pa 11 Pa
Test minimum supply pressure: 6 Pa 6 Pa 6 Pa
Flue gas flow rate in g/s 5,8 g/s 5,8 g/s 5,8 g/s
CO level in flue gas (%) (min./max.) 0,004/0,026 % 0,004/0,026 % 0,004/0,026 %
Efficiency: 90 / 97 % 90 / 97 % 90 / 97 %
CO level in flue gas: 50 mg/Nm³ 50 mg/Nm³ 50 mg/Nm³
NOx level in flue gas: 144/- mg/Nm³ 144/- mg/Nm³ 144/- mg/Nm³
OGC level in flue gas: <5 mg/Nm³ <5 mg/Nm³ <5 mg/Nm³
Proportion of dust in flue gas: 24/- mg/Nm³ 24/- mg/Nm³ 24/- mg/Nm³
Contents of storage container (pellet tank): ca.32 kg ca.32 kg ca.32 kg
Duration of burn with one charge (min./max.): ca. 20 h / 60 h ca. 20 h / 60 h ca. 20 h / 60 h
Permitted fuel: Low-dust wood pellets Durchmesser: 6
mm
Durchmesser: 6
mm
Durchmesser: 6
mm
to Ö-Norm M 7135, DIN plus, EN plus-A1 Länge: max. 30
mm Länge: max. 30 mm Länge: max. 30
mm
Room heating capacity to Ö-Norm M 7521: max. 230 m³ max. 230 m³ max. 230 m³
Room heating capacity to DIN 18893, Dauerheizung: 250m³/145m³/
98m³ 250m³/145m³/98m³ 250m³/145m³/
98m³
Room heating capacity to DIN 18893, Zeitheizung: 165m³/95m³/65m³ 165m³/95m³/65m³ 165m³/95m³/65m³
Electricity supply: 230 V (50 Hz) 230 V (50 Hz) 230 V (50 Hz)
Electricity supply input (min./max.) 30 bis 50 W 30 bis 50 W 30 bis 50 W
in normal operation:
Electric ignition (for max. 15 minutes on ignition): 400 W 400 W 400 W
Electronics fuses: (F3) T 0,315 A, 250 V T 0,315 A, 250 V T 0,315 A, 250 V
Fuses for the ignition, screw conveyor motor, induced
draught, (F1,) (F2 reserve) T 3,12 A, 250 V T 3,12 A, 250 V T 3,12 A, 250 V
Cleaning work
3
3. Cleaning work
WARNING
Before starting any cleaning work, the stove must be cool down and set to "Off"!
Once the cleaning work is completed, the correct operating status of the device must be re-
established: Put the combustion pot in correctly, close the combustion chamber door.
3.1. Cleaning the surface
Dirt on the upper surface of the stove may be cleaned off with a damp cloth or if necessary with mild soapy
water. You are advised against using corrosive cleaning agents and solvents since these might damage the
surfaces.
3.2. Cleaning the glass panel
To clean the viewing panel, you must first open the stove door. Dirt on the glass panel can be removed with a
glass cleaner or with a damp sponge on which you have sprinkled some of the wood ash present.
(Environmentally friendly). Cleaning the glass panel may only be done with a cooled down stove in the OFF
operating mode.
3.3. Clean combustion chamber “function instruction” error
F040
• The entire combustion chamber is to be cleaned with an ash vacuum cleaner at intervals of no longer than
30 operating hours.
• However, this instruction to clean the combustion chamber (display flashing) does not trigger an error
message during Heating mode.
• If the combustion chamber is now cleaned, then the “Clean combustion chamber” error message will
thereafter be cleared automatically. A precondition for the automatic clearance of this error message is that
the combustion chamber door is open for longer than 60 seconds. This time is required for cleaning the
combustion chamber including the burner thoroughly with an ash vacuum cleaner. If the door is open longer
than 60 seconds in “Off” operating status, then the operating hours counter, which is responsible for the
“Clean combustion chamber” instruction, is automatically reset to zero.
• This reset of the operating hours counter occurs even if the cleaning of the combustion chamber is
performed before the 30 operating hours have run provided that the stove is in “Off” operating status and the
door is open for longer than 60 seconds during cleaning.
3.4. Cleaning the combustion pot -weekly
During operation, deposits may form in the combustion pot. How quickly the combustion pot becomes dirty
depends solely on fuel quality. The deposits or encrustations must be removed from time to time.

Cleaning work
4
WARNING
If this is not done, the clinker will continue to accumulate. Then the device will no longer be able to ignite
properly. Pellets can pile up in the combustion pot. In extreme cases, this can reach all the way back to the
pellet chute. Backfire in the pellet container and smouldering in the pellet tank might possibly result.
This will destroy your device and is not covered in your guarantee.
WARNING
Cleaning the combustion pot may only be done with a cooled down stove in “OFF” operating mode.
Otherwise there is a risk of burns!
• Take out the burner bowl from the stove.
• Remove the remains of ashes and slag.
• After the cleaning, mount the burner bowl back to its proper position on the burner rest.
• Re-check the proper seating of the burner bowl, in order to avoid any lack of tightness.

Maintenance work
5
4. Maintenance work
WARNING
During the maintenance tasks, the mains plug must be pulled out of the power supply socket (always in
advance)!
The frequency of maintenance in turn depends to a large extent on the pellet quality (ash content). Quality
pellets have a low ash content of about 0.2-0.3%. However, if the ash content is higher (0.5% and over), the
interval from maintenance to maintenance is reduced and the accumulation of ash increases by 2 or 3 times.
WARNING
Devices that are not maintained in accordance with our specifications must not be operated. Failure to
observe this point will invalidate all guarantee claims.
4.1. Cleaning the pellet container - annual maintenance
• Heat the pellet stove until the storage tank is completely empty.
• Then the protective grille (1) in the pellet tank may be removed.
• Then clean the tank and the intake of the screw conveyor housing with a vacuum cleaner.
• After cleaning, it is essential to put back the protective grille. When doing this, make sure that no screws fall
into the pellet tank so as to avoid consequential damage to the screw conveyor.
Figure 7: Pellet tank
1Protective grille
2 Tank cover

Maintenance work
6
4.2. Cleaning the flue gas passes - annual maintenance
CAUTION
We therefore recommend checking and/or cleaning the flue gas passes after 1,000 kg of pellets at the latest.
To clean the flue gas passes, proceed as follows:
• Disconnect the flue baffle (1) from the guide by lifting it. Draw the right cladding (2) down out of the guide
and place it down in the ash space. Then the flue baffle can be removed and the upper part of the
combustion chamber can be cleaned. (See Figure 8a).
• Then remove the right side wall. This is fixed with screws (1) at the back and at the front with 3 connectors.
Remove the screws from the back and pull the side wall off sideways. (See Figure 8b).
Figure 8a: Removing the flue baffle

Maintenance work
8
4.3. Cleaning the induced draught housing and fan
• This housing is made accessible for cleaning by undoing the 4 nuts shown in Figure 9. (See arrows).
• Remove the induced draught motor by pulling it out.
• Now clean the flue gas passes, the induced draught fan and the flue tubes with a brush and an ash vacuum
cleaner.
• Then reassemble the components in reverse order.
CAUTION
Make sure that the seal is seated in the right position again. It is essential to replace defective seals.
• Make sure of the electrical connections on the fan motor and their correct positions.
Figure 9: Induced draught fan
1 Screw
2 Blower motor
3 Seal
CAUTION
Also the flue pipe must be cleaned.

Replacement parts list
10
Pos. Description Piece No. PR
Replacement parts list HSP 8 Lucca-II-RLU 442.08–ST, HSP 8 Catania-II-RLU 443.08–ST
(without trim parts)
A1
Complete combustion chamber door/pearly-
black 1 piece 0544208005300
1Burner cast 1 piece 0544208006762
2Protection grate 1 piece 0544208006713
3Combustion chamber cladding left 1 piece 0544208005507
4Combustion chamber cladding back 2 piece 0544208005505
5Combustion chamber cladding right 1 piece 0544208005506
6Flame temperature sensor 1 piece 0544008007511
7Bottom temperature sensor 1 piece 0544008007539
8Draught baffle plate 1 piece 0544208005752
9Door contact switch 1 piece 0089500040005
10 Door hinge pearly-black 1 piece 0544008005450
11 Complete control unit 1 piece 0541908005569
12 Backup battery CR 2032 1 piece —
13 Stand 6 piece 0082000105000
14 Ignition 1 piece 0541908005202
15 Room temperature sensor 1 piece 0089500390005
16 Flue gas thermosensor 1 piece 0561008005540
17 STB 1 piece 0089500080005
18 Cover hinge 2 piece 0544008006229
19 Protective grille 1 piece 0544008005093
20 Cover pearly-black 1 piece 0544208006125
21 Flue pipe cover pearly-black 1 piece 0544208006195
23 Tank cover pearly-black 1 piece 0544008006124
24 Operator console 1 piece 0541908005569
25 Seal, tank cover 1000 mm 0544008005929
26 Handle 1 piece 0544008005929
27 Induced draught fan 1 piece 0561008005807
28 Heat exchanger 1 piece 0544008006000
29a Seal - set 15 piece 0544208005111
29b Seal - set cleaning 3 piece 0544008005012
30 Tank cover + screw DIN 7981 ST 4,8x13 - set 1+4 piece 0544008005019
31 Screw conveyor motor 1 piece 0089500000006
32 Motor plate - set 1 piece 0561008007080
33 Conveyor 1 piece 0544008005938
34 Screw conveyor 1 piece 0544008007090
35 Lower screw conveyor bearing 1 piece 0544008007047
36 Collet 1 piece 0089000340005
37 Screw UN5950 M5x10 4 piece —

Replacement parts list
11
5.2. Replacement parts list HSP 8 Lucca-II-RLU 442.08–ST, HSP
8 Catania-II-RLU 443.08–ST
Pos. Description Piece No. PR
Replacement parts list HSP 8 Lucca-II-RLU 442.08–ST, HSP 8 Catania-II-RLU 443.08–ST
38 Side wall complete left pearly-black 1 piece 0544008006123
41 Side wall complete right pearly-black 1 piece 0544008006122
49 Front part ST Woodstone Lucca 1 piece 0544008106101
49 Front part ST Teakwood Catania 1 piece 0544108006101
49 Front part ST Serpentino Catania 1 piece 0544108016101
50 Front plate/email black 1 piece 0544008006193
51 Back wall 1 piece 0544008007257

Replacement parts list
12
5.3. Detail A1
Pos. Description Piece No. PR
Detail A1
A1.1. Screwing door 1 piece 0544208005221
A1.2. Door hinge - Set 1 piece 0544208005222
A1.3. Glass holder 1 - Set 1 piece 0544208005223
A1.4. Glass holder 2 - Set 1 piece 0544208005224
64 Combustion chamber door/black 1 piece —
65 Seal glass 10x2 mm 2300 mm 0040210020005
66 Door glass (795x335x5) 1 piece 0544208005301
67 Seal door 8 mm 1400 mm 0040008005001
68 Seal door 8 mm 800 mm 0040008005001
69 Seal glass 10x2 mm 1500 mm 0040210020005
70 Door glass (257x400x4) 1 piece 0544208005302

Circuit diagram
13
6. Circuit diagram
Anschlussplan IO33.3
+
0
12
CAN
F2
35 45 47
N
48
46 49 50
H7
3
MMI
N
5
N4 910
F3
ON
N
3736
N
72
44
S1
4342
27
4140
26
39
- weiss
38
N
MMI Var.
N
51 52 53
S3
-
+
6
H L SH
F1
18
H2 H1
IO33B
Batterie ext.
H5 H6 µ-SD
337960
erstellt: bu, 2017-10-24
freigegeben:
weiss
Türkontaktschalter
+ grün
Drehzahl
Saugzug
weiss
Flammen-
Temp.
unten
Raumtemperatur
schwarz
Abgastemp.
(ungepolt)
+ grün
rot
rot
weiss
blau
rot
- weiss
braun
W-LAN
Modul
8041311833_B
weiss
Schnecke
Reserve
Eingang 230VAC
weiss
ge/gn
Netz
STB
Zündelement
braun
Saugzug
blau
rot
braun
blau
schwarz/blau
braun
weiss
Flammen-
Temp.
oben
I2C-Anz. 3.0
USB Mini

Circuit diagram
14
Description Circuit diagram:
No.: Description Cable harness
3Mains plug / mains filter
5Electric ignition
6Screw conveyor motor
7Induced draught
8.IX OC
35/36 Flue gas temperature sensor
37/38 Flame temperature sensor
39/40 Room temperature sensor
41/42 Bottom flame temperature sensor
43/44 Door contact switch
48-50 Flue gas fan rotation speed
F1 Fuse T 3,15A ignition, induced draught fan, screw
conveyor motor
F2 Fuse T 3,15A reserve
F3 Fuse T 0,315A operator console
This manual suits for next models
1
Table of contents
Other Haas+Sohn Pellet Stove manuals
Popular Pellet Stove manuals by other brands

Bosca
Bosca SPIRIT 500 Pellet Installation and operating instructions

MCZ
MCZ MUSA 2.0 installation guide

Quadra-Fire
Quadra-Fire MT VERNON E2-C installation manual

Dansons Group
Dansons Group CAN/CSA B365 Operation guide

Hudson River Stove Works
Hudson River Stove Works Chatham owner's manual

Enviro
Enviro M55C-FPI owner's manual

Harman
Harman Advance 1 Installation & operating manual

Quadra-Fire
Quadra-Fire SANTA FE owner's manual

Ferroli
Ferroli SALERNO PELLET Assembly and exploitation manual

Palazzetti
Palazzetti Pellet In-IDRO Instructions for use and maintenance

RIKA
RIKA Domo operating manual

Quadra-Fire
Quadra-Fire MTVERNON-AE-MBK owner's manual