INTRODUCTION
Upon receiving the goods check the conditions of the product, especially the packaging, and if there is any visual damage, make it known directly to the
carrier. The manufacturer disclaims any responsibility for shipping.
FOR THE INSTALLER
Check the conditions of the product before proceeding with installation. The hydromassage tub must be handled only by the edges or the frame,
avoiding shock to both the tub and pipes. During installation it is advisable to protect the tub with paper or nylon, in order to avoid abrasive substances or
chemical agents (paints, solvents, etc..) from coming into contact with the surface.
During installation, avoid placing tools in the tub.
ELECTRICAL CONNECTION
Refer to the electrical safety notes when making the electrical connections.
Remove the cover by unscrewing the four screws on the box marked with the POWER SUPPLY label, pass the cable through its cable gland, and connect
them to their L- N earth terminals. When the connections are complete tighten the cable glands in order to maintain the level of electrical equipment
protection against water jets.
The cables and electrical connections that have already been wired by the manufacturer must not be tampered with.
EQUIPOTENTIAL CONNECTION
The equipment must be connected to the equipotential system as required by standard 64.8
via the dedicated terminal located on the frame, duly indicated by the symbol.
WATER SUPPLY CONNECTION
The plumbing system must be installed by qualified personnel in accordance with statutory provisions and safety standards. For the location of the water
connection and drain fittings refer to the electrical information sheet attached. For tubs equipped with taps and faucets, connect the pipes leading out from
the taps and faucets on the edge of the tub to the connections on the wall, be careful to follow the warnings found on the BLUE cold water and RED hot
water flexible pipes. If the length of the pipes provided is not sufficient, lengthen them with 1/2" flexible pipes. You should install a stopcock with a filter
between the connecting flexible pipes and the connections on the wall.
PLACEMENT
To ensure tank safety and correct operation, it must be placed on a flat, levelled surface that is capable of supporting the load on the ground indicated in the
technical data sheet. See the maximum total weight of the tub and check the load capacity of the support surface of the tub. We recommend using a
qualified installer. Before placing the tub on flooring, make sure said flooring is suitable for supporting its weight (total weight of the tub full of water + total
weight of the persons inside).
During use, water may come out from the tub which could expand around the tub. The floor must ensure good adhesion (anti-slip) when it is wet. The
moisture content increases naturally when the tub is installed in a closed room. Provide adequate room ventilation when installing the tub in a closed
environment.
Keep the tub away from rain and snow. It must therefore be installed on verandas or terraces with a roof (flooring is necessary as it has no tray). It is
important to arrange a solid foundation to withstand the maximum weight of the tank. Provide a draining bottom around it. The tub cover must be fixed with
special straps that can guarantee sealing in case of wind. The tub must be installed on a structurally solid, strong surface. Consider the following when
choosing the most suitable place to install the tub:
- Doors, steps, stairs, etc. can create obstructions and difficulties during tub transport to the desired location.
- Trees, lawns, can more easily soil tub.
The intrusion of debris in the water can cause damage to the equipment and to the surface of the tub. These types of damage are not covered by the
warranty.
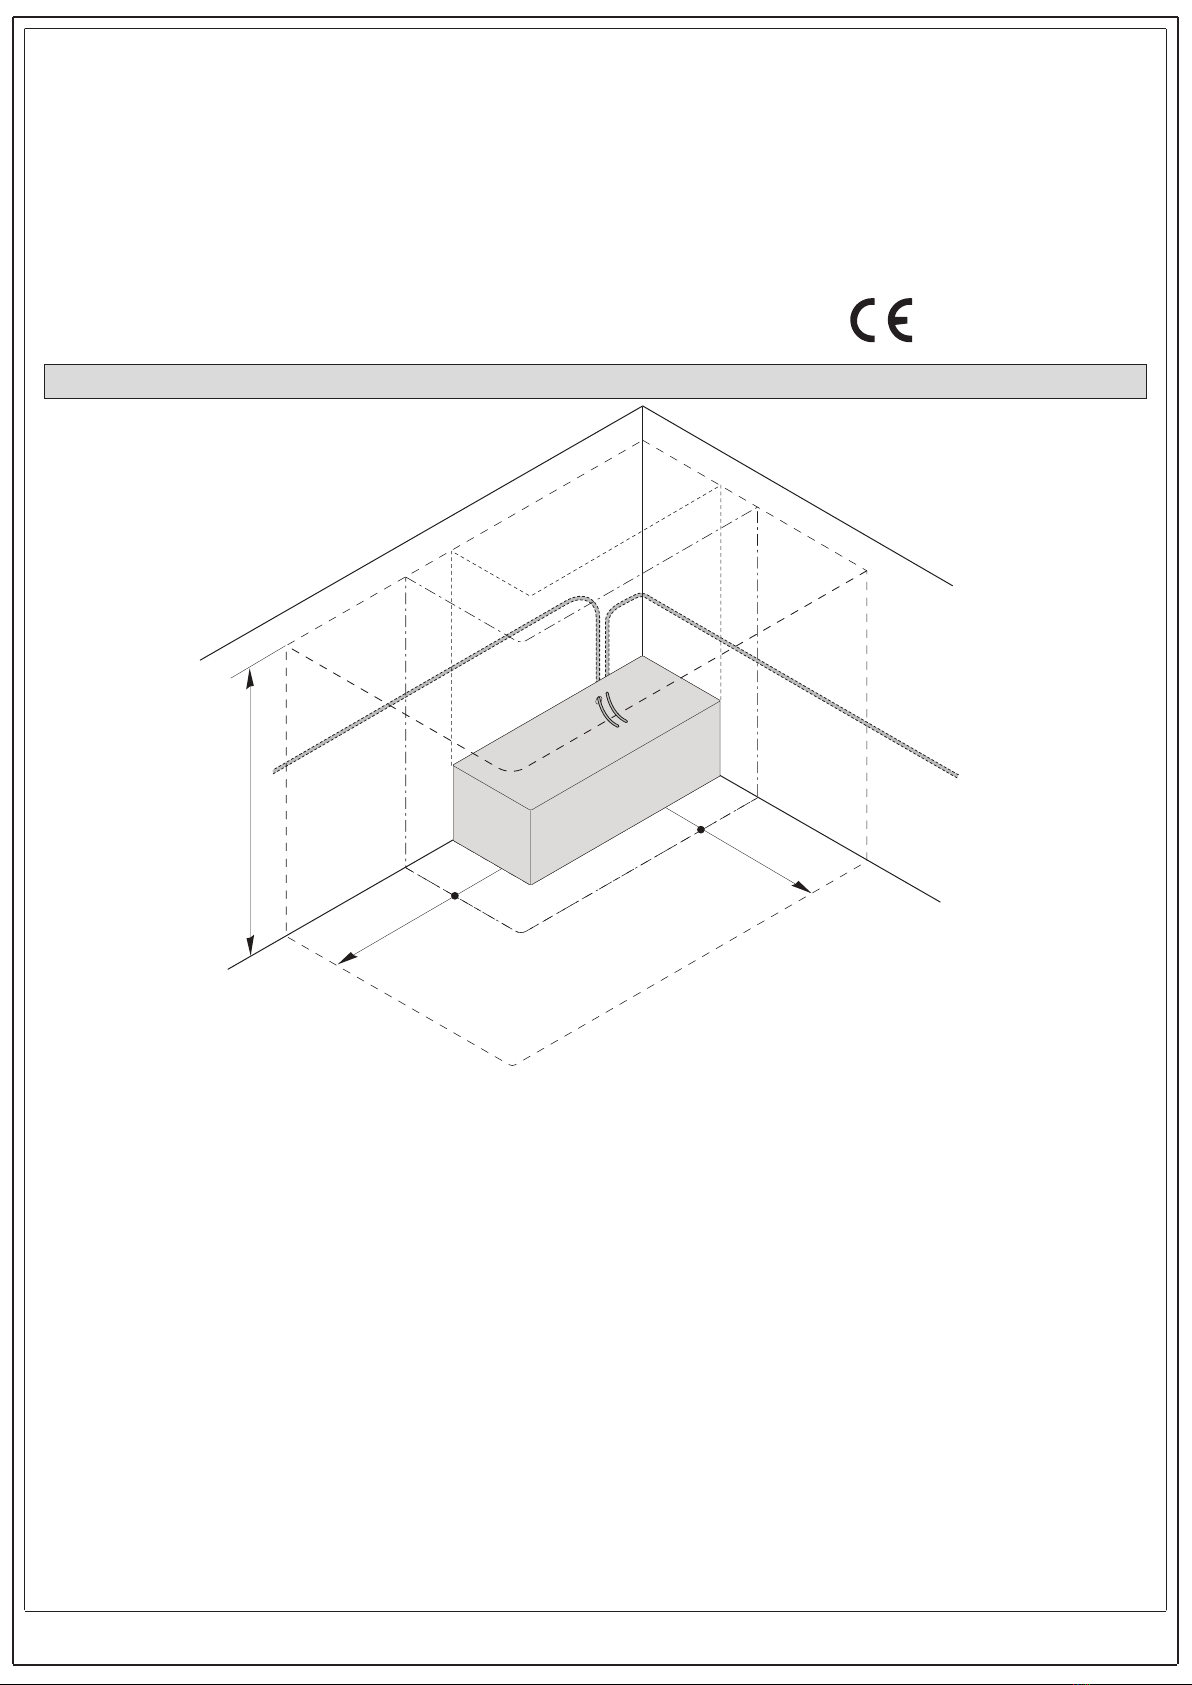
INSTALLATION
The tub should always be installed with the controls facing outwards for technical accessibility. If the tub is recessed, the masonry-work or material that will
be used to close off the walls cannot be more than 1 cm in from the edge of the tub. For this type of installation, always provide an inspection panel to
check the electrical parts (electric pump, electronic card, keyboard, any valves), in any case, the tub must be readily removable without having to resort to
breaking the walls.
Provide an air intake vent inside the "pit" where the tub will be placed.
Place the tub in the prepared position, make sure the top edge is level, to facilitate this operation it is advisable to adjust only the feet located in the
corners of the frame. At the end of this operation it is a good idea to ensure that the height of the tub will allow for panel installation.
Mark the place where holes will have to be drilled on the floor to fasten the tub (fasten the tub by the outer feet at the end). Move the tub and drill the holes
with a 6mm bit, before drilling make sure there are no plumbing or electrical pipes located under the floor in those points. Insert the plugs, position the tub and
secure it. Adjust the central feet so that they are resting firmly on the floor.
03