manuals.online logo
Brands
  1. Home
  2. •
  3. Brands
  4. •
  5. Haier
  6. •
  7. Air Conditioner
  8. •
  9. Haier AD122ALEAA Administrator Guide

Haier AD122ALEAA Administrator Guide

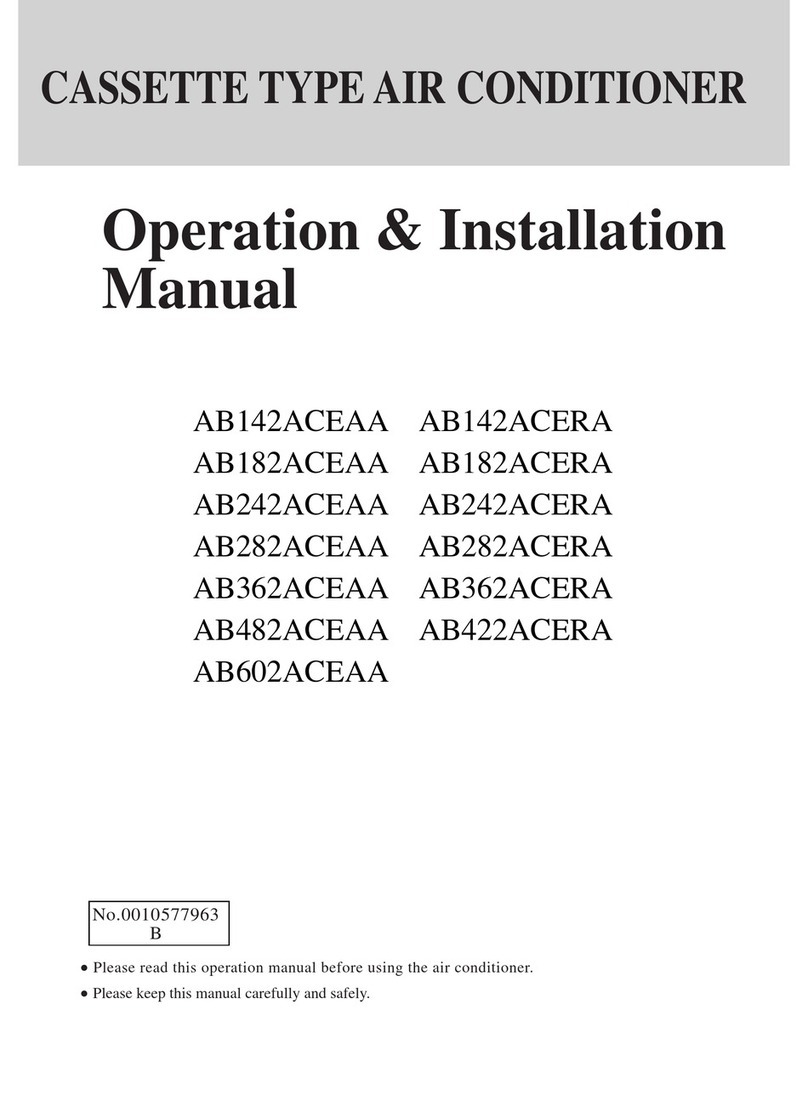
Operation & Instruction
Manual
No. 0010577975
B
DUCT TYPE AIR CONDITIONER
AD122ALERA
AD182ALERA
AD242ALERA
AD122ALEAA
AD182ALEAA
AD242ALEAA
Please read this operation anual before using the air conditioner.
Please keep this anual carefully and safely.
1
Table of Contents
Malfunction 7-8
Care and Maintenance 9
For Preparation of Heating 10
Is The Unit Installed Correctly 11
Installation Manual For Indoor Unit 12-21
Safety Precautions 3-5
Parts and Functions 6
Cautions 2
22-23
Failure Code
Cautions
2
All electrical ropairs ust be carried out
by qualified electricians. Inadequate repairs
ay result in a ajor source of danger for
the user of the air conditioner.
Do not da age any parts of the air
conditioner that carry refrigerant by piercing
or perforating the air conditioner's tubes with
sharp or pointed ite s, crushing or twisting
any tubes, or scraping the coatings off the
surfaces. If the refrigerant spurts out and gets
into eyes, it ay result in serious eye injuries.
Do not obstruct or cover the ventilation
grille of the air conditioner. Do not put fingers
or any other things into the inlet/outlet and
swing louver.
Do not allow children to play with the air
conditioner. In no case should children be
allowed to sit on the outdoor unit.
Disposal of the old air conditioner
Before disposing an old air conditioner that
goes out of use, please ake sure it's
inoperative and safe. Unplug the air
conditioner in order to avoid the risk of
child entrap ent.
It ust be noticed that air conditioner
syste contains refrigerants, which require
specialized waste disposal. The valuable
aterials contained in an air conditioner
can be recycled. Contact your local waste
disposal center for proper disposal of an
old air conditioner and contact your local
authority or your dealer if you have any
question. Please ensure that the pipework
of your air conditioner does not get
da aged prior to being picked up by the
relevant waste disposal center, and
contribute to environ ental awareness by
insisting on an appropriate, anti-pollution
ethod of disposal.
Disposal of the packaging of your new
air conditioner
All the packaging aterials e ployed in
the package of your new air conditioner
ay be disposed without any danger to the
environ ent.
The cardboard box ay be broken or cut
into s aller pieces and given to a waste
paper disposal service. The wrapping bag
ade of polyethylene and the polyethylene
foa pads contain no fluorochloric
hydrocarbon.
Consult your local authorities for the na e
and address of the waste aterials collecting
centers and waste paper disposal services
nearest to your house.
Safety Instructions and Warnings
i portant observations relating to the
asse bly, operation and aintenance of the
air conditioner.
Installation shall be done by professional
people, don't install unit by yourself.
All these valuable aterials ay be taken to
a waste collecting center and used again
after adequate recycling.
Da aged air conditioners are not to be put
into operation. In case of doubt, consult your
supplier.
Use of the air conditioner is to be carried
out in strict co pliance with the relative
instructions set forth in the User's Guide.
For the purpose of safety, the air conditioner
ust be properly grounded in accordance
with specifications.
Always re e ber to unplug the air
conditioner before opening inlet grill. Never
unplug your air conditioner by pulling on the
power cord. Always grip plug fir ly and pull
straight out fro the outlet.
The anufacturer does not accept
responsibility for any da ages that ay arise
due to non-observation of the following
instruction.
Before starting the air conditioner, read the
infor ation given in the User's Guide
carefully. The User's Guide contains very
Safet Precautions
Before starting to use the syste , read carefully this"SAFETY PRECAUTIONS" to ensure a proper operation of the syste .
Safety precautions described here are classified to " WARNING" and " CAUTION". Precautions which are shown in the colu n of
" WANING" eans that an i proper handing could lead to a grave result like a death, serious injury, etc. However, even if precautions
are shown in the colu n of " CAUTION", a very serious proble could occur depending on situation. Make sure to observe these safety
precautions faithfully because they are very i portant infor ation to ensure the safety.
Sy bols which appear frequently in the text have following eanings.
Strictly prohibited. Observe instructions faithfully. Provide a positive grounding.
When you have read through the anual, keep it always at hand for read consultation. If the operator is replaced, ake sure to hand over
this anual to the new operator.
ON
OFF
WARNING
CAUTION
WARNING
CAUTION
CAUTIONS FOR INSTALLATION
The syste should be applied to places as
office, restaurant, residence and the like.
The syste should be installed by your
dealer or a professional installer.
When you need so e optional devices such as a hu-
idifier, electric heater, etc., be sure to use the products
which are reco ended by us. These devices should
be attached by a professional installer.
Application to inferior environ ent such as an engi-
neering shop, could cause equip ent alfunction and
serious injury or death.
Installation by yourself is not encouraged because
it could cause such proble s as water leakage,
electrical shock or fire accident by so e i proper
handing.
Installation by yourself is not encouraged because it
could cause such proble s as water leakage, electrical
shock or fire accident by so e i proper handing.
Do not install nearby the place where ay
have leakage of fla able gas.
Depending on the place of installation, a
circuit breaker ay be necessary.
Drain pipe should be arranged to provide a
positive draining.
If the gas leakes and gathers around, it ay cause the
fire.
Unless the circuit breaker is installed, it could
cause elecrical shocks.
Where strong winds ay prevail, the
syste should be fixed securely to prevent
a collapse.
Install on the place where can endure
the weight of air conditioner.
Make sure the syste is grounded.
If the pipe is arranged i properly, furniture or the
likes ay be da aged by leaked water.
Bodily injury could result by a collapse.
Bodily injury could result by a careless installation.
Grounding cable should never be connected to a gas
pipe, city water pipe, lightning conductor rod or
grounding cable of telephone. If the grounding cable
is not set properly, it could cause electric shocks.
CAUTIONS FOR OPERATION
You should refrain fro exposing your body
directly to cool wind for a long ti e.
Do not poke the air inlet or outlet with a
bar, etc.
When any abnor al condition (scorching s ell or oth-
ers) is found, stop the operation i ediately and turn
off the power switch. Then consult your dealer.
It could affect your physical condition or cause so e
health proble s.
Since the internal fan is operating with a high
speed, it could cause an injury.
If you continue the operation without re oving the
cause, it could result in a trouble, electric shock or fire.
The syste should never be used for any
other purposes than intended such as for
preservation of food, flora and fauna, pre-
cision deices or work of art.
Do not handle switches with a wet hand.
Co bustion apparatus should not be placed
allowing a direct exposure to wind of air con-
ditioner.
Inco plete co bustion could occur on the apparatus.
It could cause electric shocks.
It could cause deterioration of food or other proble s.
3
4
CAUTION
Do not wash the air conditioner with water.
Do not install the syste where the air outlet
reaches directly the flora and fauna.
Make sure to use a fuse of proper electric
rating.
Do not operate the syste while the
air outlet grill is re oved.
It is strictly prohibited to place a container of
co bustible gas or liquid near the air condi-
tioner or to spray it directly with the gas or liquid.
Neither stand on the air conditioner nor
place so ething on it.
Do not use the power switch to turn on or
off the syste .
Do not touch the air outlet section while
the swing louver is operating.
Do not use such equip ent as a water
heater, etc. around the indoor unit or the
wire controller.
ON
OFF
It could cause electric shocks. It will not be good for their health.
Use of steel or copper wire in place of a fuse is strictly
prohibited because it could result in a trouble or fire
accident.
There is a risk of injury.
It could cause a fire accident.
There are risks of falling or injury by collapsed object.
It could cause a fire or water leakage. There is a risk of injury.
If the syste is operated at the vicinity of such equip-
ent which generates stea , condensed water ay
drip during cooling operation or it could cause a fault
current or short-circuit.
When operating the syste si ultaneously with a co bustion
apparatus, indoor air ust be ventilated frequently.
Check occasionally the support structure of the unit for any da age
after a use of long period of ti e.
Insufficient ventilation could cause an oxygen deficiency accident. If the structure is not repaired i ediately, the unit could topple down to cause
a personal injury.
When cleaning the syste , stop the operation and turn off the
power switch.
Do not put water containers on the unit such as a flower vase, etc.
Cleaning should never be done while the internal fans are running with high
speed.
If the structure is not repaired i ediately, the unit could topple down to cause
apersonal injury.
WARNING
CAUTIONS FOR TRANSFER OR REPAIR
Modification of the syste is strictly prohibited. When the syste
needs a repair, consult your dealer.
When the air conditioner is relocated, contact your dealer or a pro-
fessional installer.
I proper practice of repair could cause water leakage, electric shock or fire. I proper practice of installation could cause water leakage, electric shock or fire.
Safet Precautions
5
2. If the supply cord is da aged, it ust be replaced by the anufacturer or its service agent
or a si ilar qualified person.
3. If the fuse on PC board is broken please change it with the type of T 3.15A /250VAC.
4. The wiring ethod should be in line with the local wiring standard.
1. Applicable a bient te perature range:
The machine is adaptive in following situation
5. The power cable and connecting cable are self-provided.
For series 122, 182, the power cable should be H05RN-F 3G 2.5 2.
For series 242, the power cable should be H05RN-F 3G 4.0 2.
For 122, 182(*EAA), the connecting cable should be H05RN-F 3G 2.0 2 + 1x0.75 2.
For the others the connecting cable should be H05RN-F 4G 0.75 2.
All the cables shall have got the European authentication certificate. During installation,
when the connecting cables break off, it ust be assured that the grouding wire is the last
one to be broken off.
6. The breaker of the air conditioner should be all-pole switch; and the distance between its
two contacts should not be no less than 3 . Such eans for disconnection ust be
incorporation in the fixed wiring.
7. The indoor unit installation height is at least 2.5 .
8. The distance between its two ter inal blocks of indoor unit and outdoor unit should not
be over 5 . If exceeded, the dia eter of the wire should be enlarged according to the local
wiring standard.
9. The waste battery shall be disposed properly.
Safet Precautions
Rated Maxi u Mini u
27 32 18
19 23 14
35 43 10
24 26 6
20 27 15
14.5 -- --
7 24 -7
6 18 --
Cooling
Heating
Indoor
outdoor
DB C
WB C
DB C
WB C
Indoor
outdoor DB C
WB C
DB C
WB C
Cooling
Heating
Indoor
outdoor
Rated Maxi u Mini u
27 32 18
19 23 14
35 43 -5
24 26 --
20 27 15
14.5 -- --
7 24 -10
6 18 --
DB C
WB C
DB C
WB C
Indoor
outdoor DB C
WB C
DB C
WB C
For *EAA :
For *ERA :
Parts and Functions
6
Electrical co ponents Case
Drain pan
Evaporator
Air outlet fra e
please check the following things about your air conditioner before aking a servie call.
Unit fails to start
ON
OFF
Is the power source
switch adjust cut in?
Is cit suppl power in
normal?
Power
stoppage?
Isn't the signal receiving
section exposed to the
direct sunlight or strong
illumination?
Isn't the earth leakage
breaker in action?
It is dangerous. Turn off
the power supply switch
i ediately and contact
the sales dealer.
Power supply switch is
not ON.
Cooling or heating is not sufficient
Is the thermostat adjust
as required?
Isn't the air filter dirt ?
Isn't an doors or windows
left open?
Doesn't an obstacle
exist at the air inlet or
outlet?
Cooling is not sufficient
Isn't sun-shine invading
direct?
Isn't an unexpected
heating load generated?
Isn't the room much
crowded?
The wind does not blow
during heating operation
Isn't it war ing up?
When the air conditioner does not operate properly after you have checked the above entioned
ite s or when the following pheno enon is observed, stop the operation of the air conditioner
and contact your sales dealer.
The fuse or breaker often shuts down.
Water drops off during cooling operation.
There is an irregularity in operation or abnor al sound is audible.
Malfunction
7
8
The followings are not malfunction
Shuru
Shuru
When the air conditioner is started, when the co pressor starts or
stops during operation or when the air conditioner is stopped, it
so eti es sounds "shuru shuru" or "gobo gobo". It is the flowing
sound of the refrigerant, and it is not a trouble.
Water flowing
sound is heard.
This is caused by heat expansion or contraction of plastics.
Cracking sound is heard.
It s ells. Air which blows out fro the indoor unit so eti es s ells.
The s ell results fro residents of tobacco s oke or cos etics
stuck inside of unit.
When the air conditioner is used at restaurant etc. where dense
edible oil fu e is always exists, white fog so eti es blows out
of air outlet during operation.
In this case consult sales dealer for cleaning the heat exchanger.
During operation,
white fog co es
out of indoor unit.
Unit does
not start
Wait for
three
inutes
It is switched into the FAN ode
during cooling.
To prevent frost fro being accu ulated on the indoor unit heat
exchanger, it is so eti es auto atically switched to the FAN ode
but it will soon return to the cooling ode.
Even if the operation switch is turned on, cooling, dehu idifying
or heating is not operable for three inutes after the conditioner is
stopped. Because the protecting circuit is activated.
(During this ti e air conditioner operates in fan
ode.)
The air conditioner can not be
restarted soon after it stops.
Air does not blow or the fan
speed can not be changed during
dehu idifying
During operation, operation ode
has changed over auto atically.
Water or stea generates fro
the outdoor unit during heating.
When it is excessively cooled during dehu idifying, the blower
auto atically repeats reducing and lowering the fan speed.
Isn't the AUTO ode selected?
In the case of AUTO ode, operation ode is changed auto ati-
cally fro cooling to heating or vise-versa according to the roo
te perature.
This results when frost accu ulated on the outdoor unit is re oved
(during defrosting operation).
Malfunction
9
Care and Maintenance
Points to observe
Turn off the power supply switch. Do not touch with wet hand.
Do not use hot water or volatileliquid.
ON
OFF
Thinner
Do not
use!
Benzine
Tooth powder
Cleaning
CAUTION
Do not dry the air filter with fire.
Do not run the air conditioner without the air filter.
Do not open the inlet grill until fan stops co pletely.
Fan will continue rotating for a while by the law of inertia after operation is being stopped.
CAUTION
Pre-Season Care
See that there are no obstacles blocking the air inlet and air outlet of both indoor and outdoor units.
Make sure that the air filter is not dirty.
Turn on the power supply switch 12 hours before starting run.
Post-Season Care
Operate the unit with FAN ode on a fair day for about half a day to dry the inside of the unit well.
Stop operation and turn off the power supply switch. Electric power is consu ed even the air conditioner is in stop.
Clean the air filter and set it in the place.
Care and Cleaning of the unit
Clean with soft and dry cloth.
If it is very dirty, dissolve neutral detergent in the lukewar water and ake the cloth wet with the water.
After wiping, clean off the detergent using clean water.
10
For Preparation of Heating
"HOT KEEP"is operated in the following cases.
When heating is started:
In order to prevent blowing out of cool wind, the indoor unit fan stopped
according to the roo piping te perature when heating operation is started.
Wait for approx. 2 to 3 inute, and the operation will be auto atically changed
to the ordinary heating ode.
Defrosting operation (in the heating ode):
When it is liable to frost. the heating operation is stopped auto atically
for 5 to 12 inutes once per approx. one hour, and defrosting is operated.
After defrosting is co pleted, operation ode is auto atically changed
to ordinary heating operation.
When the roo ther ostat is actuated:
When roo te perature increases and roo te perature controller actu-
ates, the fan speed is auto atically changed to stop under low te perature
condition of indoor heat exchanger. When roo te perature decreases,
air conditioner auto atically changes over to ordinary heating operation.
WARMING OPERATION
Heat pu p type war ing
Defrosting operation
At ospheric te perature and war ing capacity
Period of war -up
With the heat pu p type war ing, the echanis of heat pu p that concentrate heat of outdoor
air with the help of refrigerant to war the indoor space, is utilized.
When a roo is war ed with a heat pu p type air conditioner, frost accu ulates on the heat ex-
changer of outdoor unit along with the drop of indoor te perature. Since the accu ulated frost re-
duces the effect of war ing, it is necessery to auto atically switch the operation to the defrosting
ode. During the defrosting operation, heating operation is interrupted.
War ing capacity of heat pu p type air conditioner decreases along with the
drop of outdoor te perature.
When the war ing capacity is not sufficient, it is reco ended to use another
heating i ple ent.
Since the heat pu p type air conditioner e ploys a ethod to circulate war
winds to war the entire space of a roo , it takes ti e before the roo te -
perature rises.
It is reco endable to start the operation a little earlier in a very cold orning.
11
Is The Unit Installed Correctl
For inspection and maintenance
When ou change our address or the installation place
Electric work
Confir the following ite s for safe and co fortable use of air conditioner.
The installation work is to be burden on the sales dealer, and do not conduct it by yourself.
Installation place
Avoid installing the air conditioner
near the place where possibilit of
inflammable gas leakage exists.
Install the unit at well ventilated
place.
Install the air conditioner firml on
the foundation that can full support
the weight of the unit.
If not, it ay cause vibration or noise.
If so e obstacle exist, it ay cause
capacity reduction or noise increase.
Explosion (Ignition) ay occur.
Select the place so as not to anno
neighbor with the hot air or noise.
Snow protection work is necessar
where outdoor unit is blocked up
b snow.
It is advisable not to install the air con-
ditioner at the following special place.
It ay cause alfunction, consult the
sales dealer when you have to install
the unit on such a place.
The place where corrosive gas generates
(Hot spring area etc.)
The place where salt breeze blows
(Seaside etc.)
The place where dense soot s oke exists
The place where hu idity is extraordina-
rily high
The place where near the achine which
radiates the electro agnetic wave
The place where voltage variation is con-
siderably large
For details consult your sales dealer.
The electric work ust be burden on the authorized engineer with qualification for electric work and
grounding work, and the work ust be conducted in accordance with electric equip ent technical standard.
The power source for the unit is to be of exclusive use.
An earth leakage breaker should be installed.(This is necessary to prevent electric shock.)
The unit ust be grounded.
Special technology is required for re oval or reinstallation of air conditioner, consult the sales dealer.
Besides, construction expense is charged for re oval or reinstallation.
The capacity of air conditioner will decrease by conta ination of inside of unit when it is used for about
three years although depending upon the circu stances under which it is used, and so in addition to the
usual aintenance service, special inspection/ aintenance service is necessary. It is reco ended to
ake a aintenance contract (charged) by consulting your sales dealer.
In the place with uch dust, the condenser is easy to be blocked, which will result in the low cooling
efficiency. So please clean in period.
12
Installation Manual For Indoor Unit
1. Safet precautions
WARNING
Please read these "Safety Precautions" first then accurately execute the installation work.
Though the precautionary points indicated herein are divided under two headings,
and , those points which are related to the strong possibility of an installation done in error
resulting in death or serious injury are listed in the section. However, there is also a
possibility of serious consequences in relationship to the points listed in the section as well.
In either case, i portant safety related infor ation is indicated, so by all eans, properly observe all that is
entioned.
After co pleting the installation, along with confir ing that no abnor alities were seen fro the operation
tests, please explain operating ethods as well as aintenance ethods to the user (custo er) of this equip ent,
based on the owner's anual.
Moreover, ask the custo er to keep this sheet together with the owner's anual.
This syste should be applied to places as office, restaurant, residence and the like. Application to inferior
environ ent such as engineering shop could cause equip ent alfunction.
Please entrust installation to either the co pany which sold you the equip ent or to a professional contractor.
Defects fro i proper installations can be the cause of water leakage, electric shocks and fires.
Execute the installation accurately, based on following the installation anual. Again, i proper installations
can result in water leakage, electric shocks and fires.
When a large air-conditioning syste is installed to a s all roo , it is necessary to have a prior planned
counter easure for the rare case of a refrigerant leakage, to prevent the exceeding of threshold concentration.
In regards to preparing this counter easure, consult with the co pany fro which you perchased the equip ent,
and ake the installation accordingly. In the rare event that a refrigerant leakage and exceeding of threshold
concentration does occur, there is the danger of a resultant oxygen deficiency accident.
For installation, confir that the installation site can sufficiently support heavy weight. When strength is
insufficient, injury can result fro a falling of the unit.
Execute the prescribed installation construction to prepare for earthquakes and the strong winds of typhoons
and hurricanes, etc. I proper installations can result in accidents due to a violent falling over of the unit.
For electrical work, please see that a licensed electrician executes the work while following the safety standards
related to electrical equip ent, and local regulations as well as the installation instructions, and that only
exclusive use circuits are used.
Insufficient power source circuit capacity and defective installation execution can be the cause of electric
shocks and fires.
Accurately connect wiring using the proper cable, and insure that the external force of the cable is not conducted
to the ter inal connection part, through properly securing it. I proper connection or securing can result in
heat generation or fire.
Take care that wiring does not rise upward, and accurately install the lid/service panel. Its i proper installation
can also result in heat generation or fire.
When setting up or oving the location of the air conditioner, do not ix air etc. or anything other than the
designated refrigerant within the refrigeration cycle.
Rupture and injury caused by abnor al high pressure can result fro such ixing.
Always use accessory parts and authorized parts for installation construction. Using parts not authorized by
this co pany can result in water leakage, electric shock, fire and refrigerant leakage.
CAUTION
WARNING
WARNING
CAUTION
CAUTION
Execute proper grounding. Do not connect the ground wire to a gas pipe, water pipe, lightning rod or a
telephone ground wire. I proper place ent of ground wires can result in electric shock.
The installation of an earth leakage breaker is necessary depending on the established location of the unit.
Not installing an earth leakage breaker ay result in electric shock.
Do not install the unit where there is a concern about leakage of co bustible gas.
The rare event of leaked gas collecting around the unit could result in an outbreak of fire.
For the drain pipe, follow the installation anual to insure that it allows proper drainage and ther ally insulate
it to prevent condensation. Inadequate plu bing can result in water leakage and water da age to interior
ite s.
13
Installation Manual For Indoor Unit
The indoor unit shall be installed at locations where cold and hot air could evenly circulated.
The following locations should be avoided:
Places with rich saline atters (seaside regions).
Places with plenty of gas sulfides ( ainly in war spring areas where the copper tube and
braze weld is prone to corrosion).
Locations with uch oil (including echanical oil) and stea .
Locations using organic solvents.
Places where there are achines generating HF electro agnetic waves.
Positions adjacent to door or window in contact with high-hu idity external air. (Easy to
generate dew).
Locations frequently using special aerosols.
Indoor unit
1. Select suitable places the outlet air can be sent to the
entire roo , and convenient to lay out the connection
pipe, connection wire and the drainage pipe to outdoor.
2. The ceiling structure ust be strong enough to support
the unit weight.
3. The connecting pipe, drain pipe and connection wire
shall be able to go though the building wall to connect
between the indoor and outdoor units.
4. The connecting pipe between the indoor and outdoor units as well as the drain pipe shall be
as short as possible. (See Figure 1)
5. If its necessary to adjust the filling a ount of the refrigerant, please refer to the installation
anual attached with the outdoor unit.
6. The connecting flange should be provided by the user hi self.
7. The indoor unit has two water outlets one of which is obstructed at the factory (with a rubber
cap). Only the outlet not obstructed (liquid inlet and outlet side) will be generally used during
installation. If applicable, both the outlets should be used together.
I portant
An access port ust be provided during installation of indoor unit for aintenance.
Fig 1
Please do not install the unit in places where fla able gases ay be leaked. In case
that gas is leaked and accu ulated around the unit, it ay cause dangers of fire etc.
! Caution
14
Installation Manual For Indoor Unit
a
b
c
d
e
f
g
h
i
Fig 2
After selecting the unit installation location, proceed the following steps:
1. Drill a hole in the wall and insert the connecting pipe and wire through a PVC
wall-through tube purchased locally. The wall hole shall be with a outward down
slope of at least 1/100. (See Figure 2)
2. Before drilling check that there is no pipe or reinforcing bar just behind the drilling
position.
Drilling shall avoid at positions with electric wire or pipe.
3. Mount the unit on a strong and horizontal building roof. If the base
is not fir , it will cause noise, vibration or leakage.
4. Support the unit fir ly.
5. Change the for of the connection pipe, connection wire and drain
pipe so that they can go through the wall hole easily.
Unit odel a
1002
538
b
483.5
483.5
c
131
131
d
1105
610
e
255
255
f
105
105
g
880
418
h
970
508
i
220
220
For series 122
For series 182 242
15
Installation Manual For Indoor Unit
Each of the air sending duct and air return duct shall be fixed on the prefabricated panel of the floor
by the iron bracket.
The reco ended distance between the edge of the air return duct and the wall is over 150 .
The gradient of the condensate water pipe shall keep over 1%.
The condensate water pipe shall be ther al insulated.
When installing the ceiling Concealed type indoor unit, the air return duct ust be designed and
installed (as figure shown).
Air distributary
Air return duct
Air return blind
Suspending hook
Drain pipe
Transition duct
Air out duct
Note: When connecting the long ducts, use the iddle static ter inals, which color is red.
The sketch ap of long duct
Tie-in of air
distributary
M8 wide expansion bolt
M8 suspender screw
M8 wide lock washer
M8 screw nut
Air conditioner
Note: When connecting the short ducts, use the low static ter inals, which color is white.
The distance L fro the air outlet of the duct to the air outlet of the sir conditioner shall
be no ore than 1 .
The distance L fro the air outlet of the duct to the air outlet of the sir conditioner shall
be no ore than 5 .
1.0 (use white otor plug)
5.0 (use red otor plug)
Ceiling
Air supply
A
Building roof of installation
Return air
Return air box
Unit
There should be
no obstacles
within 1 Unit
Return air
Return air box
Air outlet grille
Air supply
16
Installation Manual For Indoor Unit
Installation of indoor unit duct
1. Installation of air sending duct
This unit uses rounded duct, the dia eter of the duct is 180 .
The rounded duct needs to add a transition duct to connect with the air-sending duct
of indoor unit, then connect with respective separator. As Fig. 1 shown, all the fan speed
of any of the separators air outlet shall be adjusted approxi ately the sa e to eet
the require ent for the roo air conditioner.
2. Installation of air return duct
Use rivet to connect the air return duct on the air return inlet of the indoor unit, then
connect the other end with the air return blind. As Fig. 2 shown.
Indoor unit Soft connection
or static box Transition duct Rounded duct
Unit:
3 Ther al insulation of duct
Air-sending duct and air return duct shall be ther ally insulated. First stick the gluey
nail on the duct, then attach the heat preservation cotton with a layer of tinfoil paper
and use the gluey nail cap to fix. Finally use the tinfoil adhesive tape to seal the
connected part. As Fig. 3 shown.
Fig. 1
Fig. 2
Fig. 3
Air distributary
Tie-in of air
distributary
Indoor unit
rivet
Air return duct
Air return blind
gluey
nail
gluey
nail cap adhesive tape
tinfoil
heat preservation
cotton
17
Installation Manual For Indoor Unit
Installing the suspension screw:
Use M8 or M10 suspension screws (4,prepared in the field)(when the suspension screw
height exceeds 0.9 ,M10 size is the only choice).These screws shall be installed as
follows with space adapting to air conditioner overall di ensions according to the original
building structures.
Wooden structure
A square wood shall be supported by the bea s and then set the suspension screws.
New concrete slab
To set with e bedded parts,foundation bolts etc.
Original concrete slad
Use hole hinge,hole plunger or hole bolt.
Steel reinforce ent structure
Use steel angle or new support steel angle directly.
Hanging of the indoor unit
Fasten the nut on the suspension screw and then hang the suspension screw in the T
slot of the suspension part of the unit.
Aided with a level eter,adjust level of the unit within 5
Hanging bolt
Suspension screw Support steel angle
Guide plate e bedded part
Knife e bedded part
Foundation bolt
Pipe suspension foundation bolt
Iron reinforce ent
Square wood
Bea
Suspension screw
18
Installation Manual For Indoor Unit
In order to drain water nor ally, the drain pipe shall be processed as specified in the installation
anual and shall be ther al insulated to avoid dew generation. I proper hose connection ay
cause indoor water leakage.
Require ents
The indoor drain pipe shall be ther al insulated.
The connection part between the drain pipe and the indoor unit shall be insulated so as to
prevent dew generation.
The drain pipe shall be slant downwards (greater than 1/100). The iddle part shall not be of
S type elbow, otherwise abnor al sound will be produced.
The horizontal length of the drain pipe shall be less than 20 . In case of long pipe, supports
shall be provided every 1.5  2 to prevent wavy for .
Central piping shall be laid out according to the following figure.
Take care not to apply external force onto the drain pipe connection part.
Pipe and insulation aterial
Rigid PVC pipe VP20 (internal dia eter)
Foa ed PE with thickness above 7
Pipe
Insulation
Hose
Drain pipe size: (3/4") PVC pipe
The hose is used for adjusting the off-center and angle of the rigid PVC pipe.
Directly stretch the hose to install without aking any defor ation.
The soft end of the hose ust be fastened with a hose cla p.
Please apply the hose on horizontal part
Insulation treat ent:
Wrap the hose and its cla p until to the
indoor unit without any clearance with
insulating aterial, as shown in the figure.
Drain confir ation
During trial run, check that there is no leakage at the pipe connection part during water
draining even in winter.
Wall
Outside
Slant
Drain pipe (supplied
by the user)
VP30
To the largest (app. 10c )
Down slope above 1/100
S type elbow
1.5 ~2
Support
Insulation
(supplied by the user)
Down slope
above 1/100
! Caution
Hose Hose cla p
Subsidiary insulation Insulation
Rigid PVC pipe
19
Installation Manual For Indoor Unit
Double-spanner
operation
For series 122 182
For series 242
In installation, if there is refrigerant gas leakage, please take ventilation easures i ediately.
The refrigerant gas will generate poisonous gas upon contacting fire.
After installation, please verify that there is no refrigerant leakage. The leaked refrigerant gas
will produce poisonous gas when eeting fire source such as heater and furnace etc.
Allowable pipe length and drop
These para eters differ according to the outdoor unit. See the instruction anual attached
with the outdoor unit for details.
Pipe aterial and size
Pipe aterial Phosphorus deoxidized copper sea less
pipe (TP2M) for air conditioner
Pipe size
( )
Gas side Ø12.70
Liquid side Ø6.35
Supple entary refrigerant
The refrigerant supple entation shall be as specified in the installation instructions attached with
the outdoor unit.
The adding procedure shall be aided with a easuring eter for a specified a ount of supple ented
refrigerant.
Requirement
Overfilling or underfilling of refrigerant will cause co pressor fault. The a ount of the
added refrigerant shall be as specified in the instructions.
Connection of refrigerant pipe
Conduct flared connection work to connect all refrigerant pipes.
The connection of indoor unit pipes ust use double spanners.
The installing torque shall be as given in the following table.
Wall thicknessof connection pipe ¡ 0.8
Connecting pipe
O.D.( )
Ø6.35
Ø9.52
Ø12.70
Ø15.88
Installing torque
(N- )
11.8 (1.2kgf- )
24.5 (2.5 kgf- )
49.0 (5.0 kgf- )
78.4 (8.0 kgf- )
! Caution
Type
Pipe size
( )
Gas side Ø15.88
Liquid side Ø9.52

This manual suits for next models

5

Other Haier Air Conditioner manuals

Haier HPNFD14XCT User manual

Haier

Haier HPNFD14XCT User manual

Haier AU182AFERA User manual

Haier

Haier AU182AFERA User manual

Haier HW-18L2H User manual

Haier

Haier HW-18L2H User manual

Haier 2U50S2SM1FA-3 User manual

Haier

Haier 2U50S2SM1FA-3 User manual

Haier AB094FAAHA Manual

Haier

Haier AB094FAAHA Manual

Haier ESAD4089 User manual

Haier

Haier ESAD4089 User manual

Haier HW-18HI03 Instruction Manual

Haier

Haier HW-18HI03 Instruction Manual

Haier AB072MRERA User manual

Haier

Haier AB072MRERA User manual

Haier AD072MQERA User manual

Haier

Haier AD072MQERA User manual

Haier 1U24GS4ERA User manual

Haier

Haier 1U24GS4ERA User manual

Haier 2U14CS2ERA User manual

Haier

Haier 2U14CS2ERA User manual

Haier HPAC99ER User manual

Haier

Haier HPAC99ER User manual

Haier HSU-12HI04 User manual

Haier

Haier HSU-12HI04 User manual

Haier AB212XCEAA Specification sheet

Haier

Haier AB212XCEAA Specification sheet

Haier HSU-18LV03 User manual

Haier

Haier HSU-18LV03 User manual

Haier ESA415K User manual

Haier

Haier ESA415K User manual

Haier HSU-26H03/R2 - annexe 1 User manual

Haier

Haier HSU-26H03/R2 - annexe 1 User manual

Haier AS12TA2HRA-TH2 User manual

Haier

Haier AS12TA2HRA-TH2 User manual

Haier AW-YHDM009-H91 User manual

Haier

Haier AW-YHDM009-H91 User manual

Haier 3HUM18HB03-R2 User manual

Haier

Haier 3HUM18HB03-R2 User manual

Haier AV08IMVEVA User manual

Haier

Haier AV08IMVEVA User manual

Haier HPU-44C13 User manual

Haier

Haier HPU-44C13 User manual

Haier ESA3109 Instruction Manual

Haier

Haier ESA3109 Instruction Manual

Haier 3HUM20HA03/R2 User manual

Haier

Haier 3HUM20HA03/R2 User manual

Popular Air Conditioner manuals by other brands

Celair Profile Series owner's manual

Celair

Celair Profile Series owner's manual

Daikin FDA125A5VEB Installer and user reference guide

Daikin

Daikin FDA125A5VEB Installer and user reference guide

S2P KS2P-18C210 owner's manual

S2P

S2P KS2P-18C210 owner's manual

Panasonic CU-QE12MKE Service manual

Panasonic

Panasonic CU-QE12MKE Service manual

Mitsubishi Electric MSZ-DM25VA operating instructions

Mitsubishi Electric

Mitsubishi Electric MSZ-DM25VA operating instructions

Friedrich WallMaster WS10 Installation and operation manual

Friedrich

Friedrich WallMaster WS10 Installation and operation manual

Samsung AR**HV5D series User's installation guide

Samsung

Samsung AR**HV5D series User's installation guide

York DJ 300 Technical guide

York

York DJ 300 Technical guide

TemperZone OSA 840RKTB installation guide

TemperZone

TemperZone OSA 840RKTB installation guide

Samsung AQV12NSA Service manual

Samsung

Samsung AQV12NSA Service manual

Daikin GTKY50UV16V2 Operation manual

Daikin

Daikin GTKY50UV16V2 Operation manual

Roller DHN 401 N EC Mounting instructions

Roller

Roller DHN 401 N EC Mounting instructions

Fujitsu AGYG09LVCB Service manual

Fujitsu

Fujitsu AGYG09LVCB Service manual

Frigidaire FAA063P7A16 Use & care manual

Frigidaire

Frigidaire FAA063P7A16 Use & care manual

Honeywell CL48PM user manual

Honeywell

Honeywell CL48PM user manual

Whynter MSFS-024H23016-01NE instruction manual

Whynter

Whynter MSFS-024H23016-01NE instruction manual

dirna Bergstrom bycool green Series Troubleshooting

dirna Bergstrom

dirna Bergstrom bycool green Series Troubleshooting

Carrier AQUASNAP JUNIOR 30RA installation manual

Carrier

Carrier AQUASNAP JUNIOR 30RA installation manual

manuals.online logo
manuals.online logoBrands
  • About & Mission
  • Contact us
  • Privacy Policy
  • Terms and Conditions

Copyright 2025 Manuals.Online. All Rights Reserved.