Haier HRF10WNBLWW User manual

Two Door Auto Defrost
Refrigerator
Le Manuel de Deux Portes
Dégivrent le Réfrigérateur
El Manual de Dos Puertas
Descongela el Refrigeradore
User Manual-
(Features May Vary per Model)
Guide de l’Utilisateur-
(Les caractéristiques Peuvent Varier par le Modèle)
Manual del Usuario-
(Las características Pueden Variar por el Modelo)
Model #
Modèle
Para Modelo de
HRF10WNB
HRF08WNB
®
What The World Comes Home To
TM
115V, 60 Hz
Made in China
Fabriqué en Chine
Hecho en China
Haier America
New York, NY 10018
Printed in China
®
What The World Comes Home To
TM
IMPORTANT
Do Not Return This Product To The Store
If you have a problem with this product, please contact the "Haier Customer
Satisfaction Center" at 1-877-337-3639.
DATED PROOF OF PURCHASE REQUIRED FOR WARRANTY SERVICE
IMPORTANT
Ne pas Réexpédier ce Produit au Magasin
Pour tout problème concernant ce produit, veuillez contacter le service des
consommateurs ‘Haier Customer Satisfaction Center’ au 1-877-337-3639.
UNE PREUVE D’ACHAT DATEE EST REQUISE POUR BENEFICIER DE LA GARANTIE.
IMPORTANTE
No regrese este producto a la tienda
Si tiene algún problema con este producto, por favor contacte el "Centro de Servicio al
Consumidor de Haier" al 1-877-337-3639 (Válido solo en E.U.A).
NECESITA UNA PRUEBA DE COMPRA FECHADA PARA EL SERVICIO DE LA GARANTIA
HRF08/10WNB
Issued: January 04 Part# RF9999-99


SAFETY PRECAUTIONS
Read all of the instructions before using this appliance.
When using this appliance, always exercise basic safety
precautions, including the following:
1) Use this appliance only for its intended purpose as described in this use
and care guide.
2) This refrigerator must be properly installed in accordance with the
installation instructions before it is used. See grounding instructions in the
installation section.
3) Never unplug your refrigerator by pulling on the power cord. Always
grasp the plug firmly and pull straight out from the outlet.
4) Repair or replace immediately, all electric service cords that have become
frayed or otherwise damaged. Do not use a cord that shows cracks or
abrasion damage along its length, the plug or the connector end.
5) Unplug your refrigerator before cleaning or before making any repairs.
Note:
If for any reason this product requires service, we strongly
recommend that a certified technician performs the service.
6) Do not use any electrical device or any sharp instrument in defrosting your
refrigerator.
7) If your old refrigerator is not being used, we recommend that you remove
the doors and leave the shelves in place. This will reduce the possibility of
danger to children.
8) After your refrigerator is in operation, do not touch the cold surfaces in
the freezer compartment, particularly when hands are damp or wet. Skin
may adhere to these extremely cold surfaces.
9) Do not refreeze foods, which have been thawed completely. The United
States Department of Agriculture in Home and Garden Bulletin No. 69
reads: "…You may safely refreeze frozen foods that have thawed if they
still contain ice crystals or if they are still cold-below 40˚F".
"…Thawed ground meats, poultry, or fish that have any off-odor or
off-color should not be refrozen and should not be eaten. Thawed ice
cream should be discarded. If the odor or color of any food is poor or
questionable, discard it. The food may be dangerous to eat."
"…Even partial thawing and re-freezing reduce the eating quality of
foods, particularly fruits, vegetables, and prepared foods. The eating
quality of red meats is affected less than that of many other foods. Use
refrozen foods as soon as possible, to save as much of its eating quality
as you can."
1
English

2
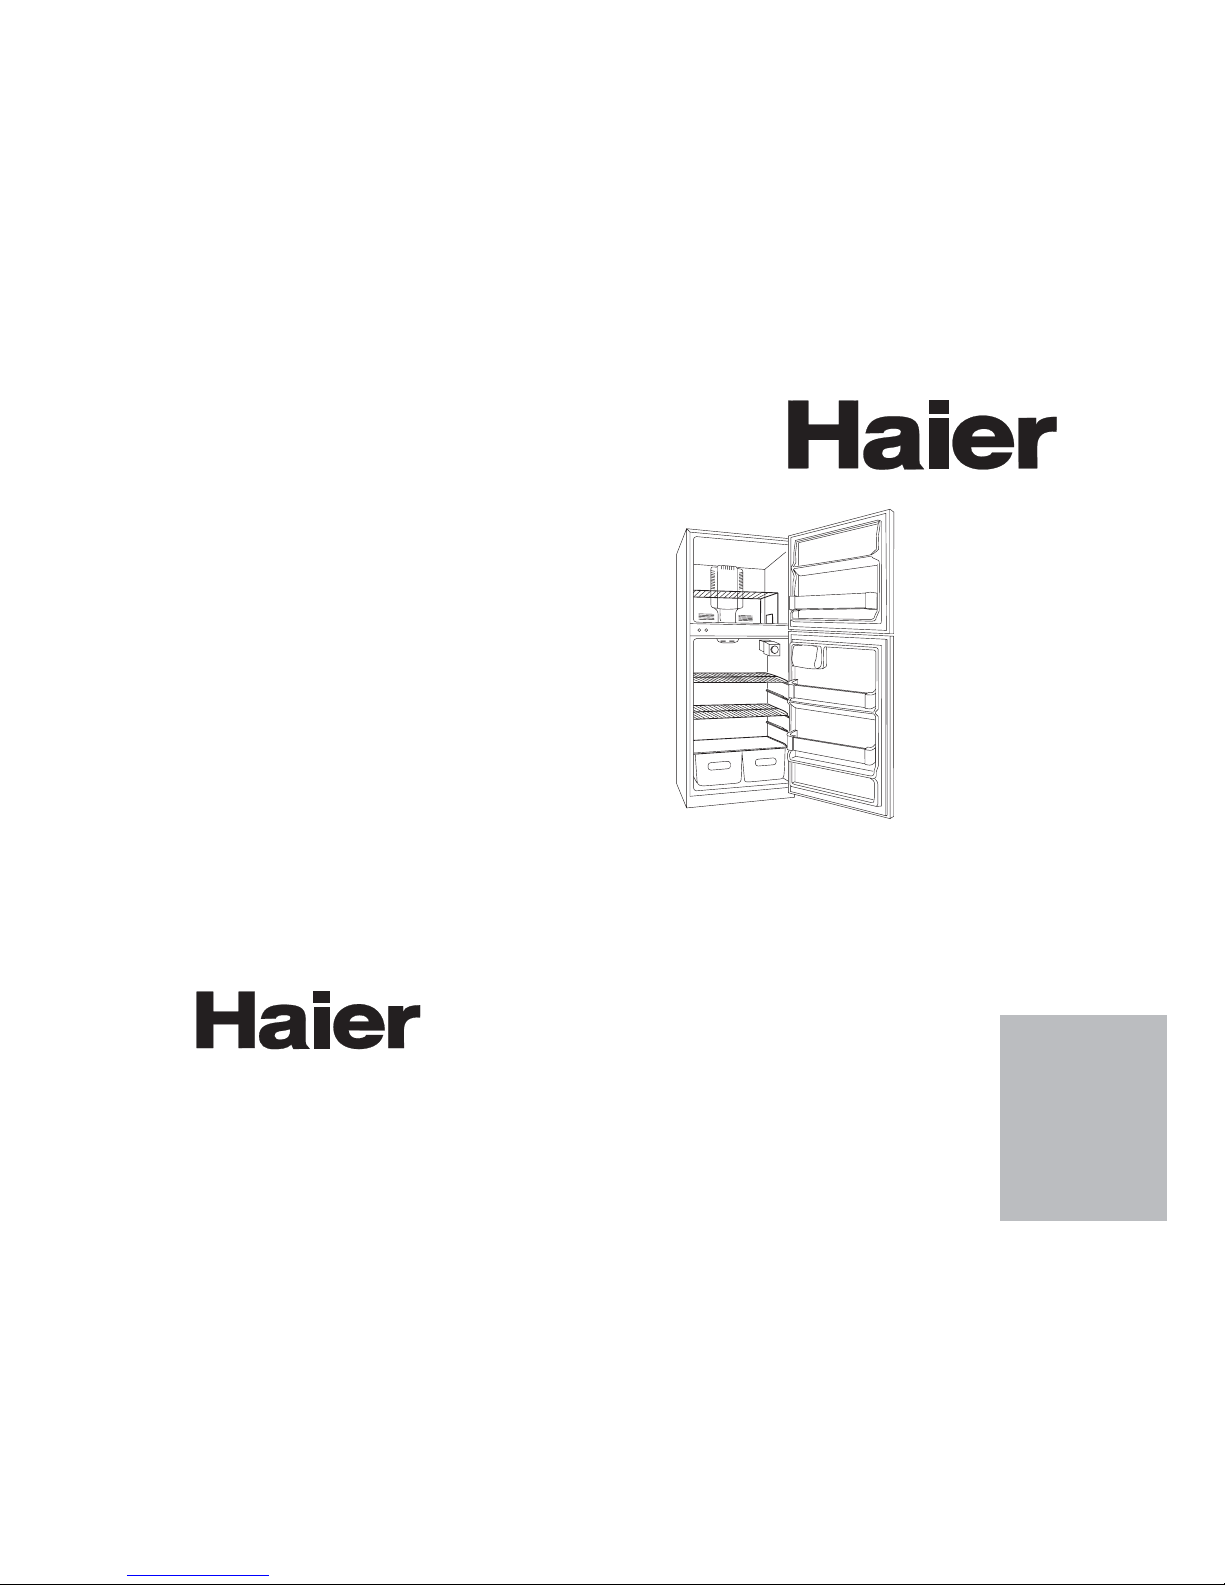
Thank you for using our Haier
product. This easy-to-use manual will
guide you in getting the best use of
your refrigerator.
Remember to record the model and
serial number. They are on a label in
back of the refrigerator.
Model number
Serial number
Date of purchase
Staple your receipt to your manual. You will need it to obtain
warranty service.
10) This refrigerator should not be recessed or built-in an enclosed cabinet. It
is designed for freestanding installation only.
11) Do not operate your refrigerator in the presence of explosive fumes.
SAVE THESE INSTRUCTIONS
for future use
DANGER
Risk of child entrapment. Before you throw away your old
refrigerator or freezer, take off the doors. Leave the shelves
in place so that children may not easily climb inside.
As per UL 250 Standards
English
Español
19
Garantía Limitado
¿Qué está cubierto y por
cuánto tiempo?
Esta garantía cubre cualquier defecto en
la manufactura o empleo de materiales
por un plazo de:
12 meses de mano de obra
12 meses en componentes
5 años en el sistema sellado
La garantía comienza en la fecha de
compra del artículo, y la factura original
de compra debe presentarse al centro
de servicio autorizado para poder
efectuar cualquier reparación que esté
bajo garantía.
EXCEPCIONES: Garantía por Uso
Comercial o Bajo Arrendamiento
90 meses en mano de obra
(únicamente en taller)
90 días en componentes
Ninguna otra garantía es válida
¿Qué está cubierto?
1. Los componentes mecánicos y
eléctricos que cumplen con alguna
función de este aparato durante un
plazo de 12 meses. Esto incluye
cualquier componente con excepción
de acabados y molduras.
2. Los componentes del sistema sellado,
como por ejemplo: compresor
hermético, condensador, y
evaporador, por defectos de
manufactura durante un plazo de 5
años a partir de la fecha de compra.
Cualesquier daños a tales
componentes causados por abuso
mecánico o manejo o transportación
inadecuada no serán cubiertos.
¿Qué se hará?
1. Repararemos o reemplazaremos, a
discreción nuestra, cualquier
componente mecánico o eléctrico que
se muestre defectuoso por uso normal
durante el plazo así especificado.
2. No habrá cargos para el comprador
por las partes y la mano de obra en
cualesquier artículos cubiertos
durante el periodo inicial de 12
meses. Al término de este periodo
solo las partes son cubiertas en la
garantía restante. La mano de obra
no está provista y debe ser cubierta
por el cliente.
3. Localice su centro de servicio
autorizado más cercano.
Para conocer el nombre del centro de
servicio más próximo a su domicilio,
por favor llame al 1-877-337-3639
(Válido solo en E.U.A).
ESTA GARANTIA CUBRE
APARATOS DENTRO DEL
TERRITORIO CONTINENTAL DE
LOS ESTADOS UNIDOS, PUERTO
RICO Y CANADÁ.
Daños por instalación inadecuada.
Daños por transportación.
Defectos que no sean por manufactura.
Daños por negligencia, abuso,
accidente, alteraci-ón, falta de cuidado
adecuado y de mantenimiento, o
conexión a tensión eléctrica incorrecta.
Daños que no sean por uso doméstico.
Daños por servicio que no sea
proporcionado a través de un
distribuidor o centro de servicio
autorizado. Molduras decorativas o
focos reemplazables.
Envío y transportación.
Mano de obra (después de los primeros
12 meses).
ESTA GARANTIA LIMITADA ES
PROVISTA EN SUSTITUCION A
CUALQUIER OTRA GARANTIA
EXPRESADA O QUE IMPLIQUE LAS
GARANTIAS MERCANTILES SUJETAS A
CIERTO PROPOSITO.
El amparo provisto por esta garantía es
de uso exclusivo y se otorga en
sustitución a cualquier otro amparo.
Esta garantía no cubre daños
incidentales o sus derivados, por lo que
las anteriores restricciones pueden serle
ajenas. En ciertos estados no se
permiten restricciones en lo que se
refiere a la duración implícita de una
garantía, por lo que las anteriores
restricciones pueden serle ajenas.
Esta garantía le otorga ciertos derechos
legales y es posible que usted goce de
otros derechos, los cuales varían de
estado a estado.
Haier America Trading, L.L.C.
New York, NY 10018

3
Table Of Contents
PAGE
Safety Precautions ...........................................................................1
Parts And Features ..........................................................................4
Installing Your Refrigerator............................................................5
Unpacking Your Refrigerator ..................................................................5
Adjusting Your Refrigerator......................................................................5
Proper Air Circulation ............................................................................5
Electrical Requirements............................................................................6
Door Alignment......................................................................................7
Reversing the Door Swing ......................................................................8
Refrigerator Features And Use....................................................10
General Features..................................................................................10
Refrigerator Interior Shelves ..................................................................10
Crisper and Crisper Cover....................................................................11
Door Shelf Bottle Huggers.....................................................................11
Food Storage Information......................................................................12
Normal Operating Sounds....................................................................13
Proper Refrigerator Care and Cleaning ....................................14
Cleaning and Maintenance ..................................................................14
Light Bulb Replacement ........................................................................15
Power Interruptions ..............................................................................15
Vacation and Moving Care ..................................................................15
Troubleshooting..............................................................................16
Warranty Information ..................................................................18
English
Español
18
Acumulación de humedad en el interior o exterior
del refrigerador:
• Esto es normal durante periodos de alta humedad.
• Apertura constante o prolongada de la puerta.
• Revise que los empaques de la puerta estén bien sellados.
El refrigerador despide un olor:
• Necesita limpiar el interior.
• Los alimentos envueltos o sellados inadecuadamente están
despidiendo los olores.
La luz del refrigerador no funciona:
• Revise el suministro eléctrico.
• Apriete el foco en el zócalo.
• Reemplace el foco fundido.
La puerta del refrigerador/congelador no
cierra correctamente:
• Nivele el refrigerador.
• Vuelva a alinear la puerta del refrigerador/congelador.
• Revise que no haya obstrucciones como contenedores de alimentos, la
cubierta del cajón para frutas y verduras, entrepaños, recipientes, etc.

Parts And Features
4
1
1. 2 Ice Cube Trays
2. 2 Full-Width Freezer Door Shelves
3. Clear Covered Dairy Compartment
4. 2 Full-Width Door Shelves
(Shelves May Vary per Model)
5. Shelf Huggers
6. Adjustable Front Leveling Legs
(not shown)
7. 2 Clear Crispers
8. Clear Glass Crisper Cover
9. 2 Adjustable Full-Width Wire Shelves
(Shelves May Vary per Model
Purchased)
10. Adjustable Temperature Control
11. Automatic Interior Light
12. Freezer Shelf
2
3
4
5
6
7
8
9
10
11
English
Español
17
El Refrigerador no Funciona:
• Revise que el control del termostato no esté en la posición de "OFF"
(apagado).
• Revise que el refrigerador esté conectado.
• Revise que haya corriente eléctrica en el tomacorriente de
corriente alterna, revisando el interruptor de circuito.
La temperatura de los alimentos parece estar
demasiado tibia:
• Apertura constante de la puerta.
• Dele tiempo a los alimentos tibios para que puedan alcanzar una
temperatura fresca o de congelación.
• Revise que los empaques estén bien sellados.
• Ajuste el control de temperatura al ajuste más frío.
La temperatura de los alimentos es demasiado fría:
• Si el ajuste del control de temperatura es muy frío, ajústelo a una
temperatura más cálida y permita que pasen varias horas hasta
que la temperatura se ajuste.
El refrigerador se enciende frecuentemente:
• Esto puede ser normal para mantener una temperatura constante
durante temperaturas altas y días húmedos.
• Las puertas pudieron haberse abierto frecuentemente o durante un
largo periodo de tiempo.
• Revise que el empaque esté bien sellado.
• Revise que las puertas estén completamente cerradas.
Verificación de Problemas

1. Remove all packaging material. This includes the foam base and all
adhesive tape holding the refrigerator accessories inside and
outside. Slide out and remove plastic or foam guard used to
secure the compressor from shipping damage due to vibration
and shock.
2. Inspect and remove any remains of packing, tape or printed
materials before powering on the refrigerator.
Leveling Your Refrigerator:
• Your refrigerator has two leveling legs which are located in the
front corners of your refrigerator. After properly placing your
refrigerator in its final position, you can level your refrigerator.
• Leveling legs can be adjusted by turning them clockwise to raise your
refrigerator or by turning them counterclockwise to lower
your refrigerator. The refrigerator door will close easier when the
leveling legs are raised.
• To assure your refrigerator works at the maximum efficiency it
was designed for, you should install it in a location where there
is proper air circulation, plumbing and electrical connections.
• The following are recommended clearances around the refrigerator:
Sides……………3/4 "(19mm)
Top....................1" (25mm)
Back..................1" (25mm)
Installing Your Refrigerator
Unpacking Your Refrigerator
Adjusting Your Refrigerator
Proper Air Circulation
5
English
Español
16
1. Apague el interruptor del refrigerador.
2. Saque el entrepaño más alto.
3. Permita que el foco se enfríe antes de quitarlo.
4. Pellizque la cubierta plástica entre dedos y pulgar y estire suavemente
a la izquierda.
5. Quite el foco destornillándolo hacia la izquierda.
6. Siempre reemplácelo con el tipo de foco incluido con la unidad,
que tenga una capacidad de 40 watts o de menor potencia.
7. Nunca exceda los 40 watts de potencia.
8. Para reemplazar la cubierta, la adición clipes traseros en primero y
suavemente clip de frente de empujón en hasta los cierres de la
cubierta en el lugar.
• Pueden ocurrir ocasionalmente interrupciones de energía debido a
tormentas eléctricas u otras causas. Desenchufe el cable eléctrico del
tomacorriente de corriente alterna cuando ocurra una interrupción en el
sistema eléctrico. Cuando la electricidad haya regresado, vuelva a
conectar el cable eléctrico a un tomacorriente de corriente alterna.
Si ocurre una interrupción en el sistema eléctrico durante un periodo
prolongado, inspeccione y deseche los alimentos descongelados o
echados a perder en el refrigerador o congelador.
Limpie el refrigerador antes de volver a usarlo.
• Durante ausencias largas o vacaciones, vacíe la comida del
refrigerador y congelador, coloque el DIAL de temperatura a la posición
de "OFF" (apagado) y limpie el refrigerador y los empaques de la
puerta de acuerdo a la sección de "Limpieza general". Mantenga las
puertas abiertas para que el aire pueda circular en el interior.
Al mudarse, siempre traslade el refrigerador verticalmente. No lo
traslade con la unidad colocada horizontalmente. Pudiera ocurrir un
posible daño el sistema sellado.
Reemplazo del Foco
Interrupciones de Energía
Vacaciones y Mudanza

Electrical Requirement
• Make sure there is a suitable power Outlet (115 volts, 15 amps outlet)
with proper grounding to power the refrigerator.
• Avoid the use of three plug adapters or cutting off the third grounding in
order to accommodate a two plug outlet. This is a dangerous practice
since it provides no effective grounding for the refrigerator and may
result in shock hazard.
• Do not install your refrigerator in any location not properly insulated or
heated e.g. garage etc. Your refrigerator was not designed to operate in
temperature settings below 55˚ Fahrenheit.
• Select a suitable location for the refrigerator on a hard even
surface away from direct sunlight or heat source e.g. radiators,
baseboard heaters, cooking appliances etc. Any floor unevenness
should be corrected with the leveling legs located on the front bottom
corners of the refrigerator.
Install Limitations
6
English
Español
15
Para evitar una descarga eléctrica siempre
desenchufe su refrigerador antes de limpiarlo.
El ignorar esta advertencia puede causar
esiones o la muerte.
Antes de usar productos de limpieza, siempre lea y
siga las instrucciones y advertencias del fabricante
para evitar lesiones personales o daños al producto.
• Prepare una solución de limpieza de 3-4
cucharadas de bicarbonato de sodio mezclado
con agua tibia. Use una esponja o un trapo
suave, humedecidos con la solución de limpieza,
para limpiar su refrigerador.
• Enjuague con agua limpia tibia y seque con un
trapo suave.
• No use químicos fuertes, abrasivos, amoniaco,
cloro, detergentes concentrados, disolventes o
estropajos metálicos. ALGUNOS de estos
químicos pueden disolver, dañar y/o
decolorar su refrigerador.
• Limpie los empaques de la puerta cada tres meses
de acuerdo a las instrucciones generales. Los
empaques deben mantenerse limpios y flexibles
para asegurar un sellado apropiado.
• El aplicar un poco de vaselina en el lado
articulado de los empaques mantendrá el
empaque flexible y asegurará un
sellado apropiado.
Cuidados y Limpieza Asecuada
del Refrigerador
Limpieza y Mantenimiento
Advertencia:
Precaución:
En general:
Empaques de la puerta:

Freezer Door: (see fig. # 1)
1. Remove hinge cover screw.
2. Remove the top hinge cover.
3. Loosen the top hinge screws using a phillips head screwdriver.
4. Adjust the door or put a spacer in between and then tighten the screws.
5. Replace the top hinge cover.
Refrigerator Door: (see fig. # 2)
1. Loosen and remove the bottom hinge using a
phillips head screwdriver.
2. Adjust the door, or put a spacer in between and
then tighten the screws.
Door Alignment
7
fig. # 1
Hinge box
cover
Top hinge
fig. # 2
lower bracket
lower pivot pin
lower pivot pin hole
bottom hinge pad
English
Español
14
Alimentos Congelados
• Un almacenamiento adecuado en el congelador requiere un embalaje
correcto. Todos los alimentos deben estar en paquetes que no permitan
el flujo de aire o la humedad interior o exterior. Un almacenamiento
incorrecto resultará en la contaminación de olores y sabores y hará que
los alimentos empacados inapropiadamente se sequen.
• Siga las instrucciones del paquete o contenedor para un
almacenamiento adecuado.
• Recomendaciones de Empacamiento:
Contenedores plásticos con tapas herméticas
Papel de aluminio reforzado
Envoltura plástica hecha de una capa de saran
Bolsas plásticas resellables
• No vuelva a congelar los alimentos descongelados.
• Se recomienda anotar la fecha de congelación en el paquete.
• El ventilador circulando el aire en el interior de su unidad para
mantener la temperatura que ha seleccionado.
• Agua hirviendo, ruidos gorgoteantes o ligeras vibraciones que son el
resultado del gas refrigerante circulando a través del serpentín
de enfriamiento.
• Ambos el temporizador de descongelación y el control del
termostato harán "clic" cuando se enciendan y se apaguen.
Ruidos de Operación Normales

Español
13
Alimentos Frescos
• Cuando almacene alimentos frescos que no estén preempacados,
asegúrese de envolver o almacenar los alimentos en un material
hermético y a prueba de humedad a menos que se indique de otra
manera. Esto asegurará la vida útil de los entrepaños y prevendrá la
contaminación de olores y sabores.
• Limpie los contenedores antes de almacenarlos para evitar
derrames innecesarios.
• Los huevos deben ser almacenados en su caja original para
aumentar la vida útil del entrepaño.
• Las frutas deben ser lavadas y secadas y luego almacenadas en el
cajón para frutas y verduras en el ajuste de baja humedad para
mantener su frescura. Si no tiene cajones con control de humedad,
coloque las frutas en bolsas plásticas selladas antes de
almacenarlas en el cajón.
• Los vegetales con piel deben ser almacenadas en bolsas o contenedores
de plástico y luego ser almacenadas en el cajón para frutas y verduras
con un ajuste de baja humedad.
• Los vegetales frondosos deben ser lavados y escurridos y luego
almacenados en bolsas o contenedores de plástico en el cajón
para frutas y verduras con un ajuste de alta humedad.
• Debe esperar a que los alimentos calientes se enfríen antes de
almacenarlos en el refrigerador. Esto prevendrá el uso
innecesario de energía.
• Los mariscos frescos deben ser usados el mismo día que se compren.
• Cuando almacene carnes en la sección de alimentos frescos,
manténgala en el paquete original o vuélvala a empacar
conforme sea necesario. Siga las sugerencias de abajo para un
almacenamiento seguro:
• Pollo 1-2 Días
• Carne Molida de Res 1-2 Días
• Carnes Frías 3-5 Días
• Bistecs/Asados 3-5 Días
• Carnes Ahumadas/Curadas 7-10 Días
• Todas las demás 1-2 Días
Si se requieren periodos de almacenamiento más largos, almacénelas
inmediatamente en la sección del congelador.
Información sobre el
Almacenamiento de Alimentos
8
Left/right door opening method:
This product provides the reversing of the left/right door opening. You
can select your preference of door opening by following the procedure to
make the change.
Dismantling:
(see fig. # 1 and fig. # 3)
1. Fix refrigerator and freezer door by sticking adhesive tape on both
sides to hold doors in place.
2. As shown in fig. 1, dismantle the hinge box cover on the upper part of
freezer door with a phillips head screwdriver. Then remove the three
screws from the hinge. Take out the hinge by pulling it vertically, and
keep it in a safe place.
3. Remove the adhesive tape on freezer door, lift and take the door down,
and carefully put it aside.
4. Dismantle two screws of the central hinge, lift and take down the central
hinge, and keep them in a safe place. (see fig # 3)
5. Remove the adhesive tape on refrigerator door, lift and take down
refrigerator door, and carefully put it aside.
6. Remove the door stoppers from the freezer and refrigerator doors and
install them on the opposite side of the door. (Not on all Models)
Reversing the Door Swing
fig. # 3
screw holes
stop of freezer door (Not on all Models)
middle pivot pin
stop of refrigerator door (Not on all Models)
middle bracket
(central hinge bracket)
English
fig. # 3
screw holes
stop of freezer door (Not on all Models)
middle pivot pin
stop of refrigerator door (Not on all Models)
middle bracket
(central hinge bracket)

9
Reinstallation: (see fig. # 4 and fig. # 5)
1. Remove the lower pivot pin from the bracket of the lower
hinge by turning counter clockwise. Move the pin to the
opposite hole and tighten.
2. Loosen the screws holding the lower hinge bracket
and remove the hinge.
3. Align the holes in the lower hinge bracket to the
corresponding holes in the opposite side of the cabinet.
Insert and tighten the screws.
4. To install refrigerator door: make the left bottom hole of the
refrigerator compartment door fall over the lower hinge axle, move
door forward to make it straight and in alignment with central hinge.
Install the central hinge again, turn the hinge axle until it
completely enters the door body, then fix it with screws.
5. To install freezer door: make the left bottom hole of freezer door fall
over the central hinge axle; raise upper hinge, so that hinge axle can
be installed in the upper hole of the upper part of the freezer door;
adjust door to make it straight and level.
6. As shown in Fig. 1, install the upper freezer hinge to the left
corresponding position. (tighten the screws of upper hinge)
7. Replace the hinge cover as shown in Fig. 1.
stop of freezer door
(Not on all Models)
middle pivot pin
middle bracket
(central hinge bracket)
screw holes
stop of refrigerator door
(Not on all Models)
lower bracket
lower pivot pin
bottom hinge pad
fig. # 4
English
lower pivot pin hole
fig. # 5
Español
12
Para sacar e instalar el cajón para frutas y verduras:
(vea fig. # 7)
1. Sujete firmemente el cajón y deslícelo hacia afuera completamente.
2. Vuelva a meter el cajón colocándolo correctamente dentro de las guías
y deslizándolo cuidadosamente a su lugar.
Para sacar e volver el cajón para frutas y verduras:
(vea fig. # 8)
1. Sujete cuidadosamente la cubierta del cajón y deslícela
hacia afuera para sacarla.
2. Vuelva a colocar los cajones para frutas y verduras
como se indica anteriormente.
fig. # 7
fig. # 8
Cajón para Frutas y Verduras y Cubierta
Para ajustar el retenedor de botellas del
entrepaño de la puerta:
(Vea fig #10)
1. Sujete el retenedor firmemente y deslícelo a la derecha o izquierda
hasta que quede ajustado contra los artículos almacenados en el
entrepaño.
fig. # 9
retenedor de botellas del entrepaño
La Botella del Estante de la puerta Huggers

10
Refrigerator Features And Use
The refrigerator shelves of your refrigerator were designed with you in
mind. Their varied adjustability allows you to satisfy your personal
storage needs.
To remove or adjust a full-width
slide-out shelf: (see fig. # 6)
1. Gently tilt the shelf up and slide forward until the shelf has been
completely removed.
2. To replace the shelf, select the desired setting and gently slide the
shelf back until it rests in the locking position.
General Features
Adjustable temperature dial:
Your refrigerator will automatically
maintain the temperature level you
select. The temperature control dial has
7 settings plus off. 1 is the warmest. 7
is the coldest. Turning the dial to OFF
stops cooling in both the refrigeration
and freezer sections. At first, set the
dial to 4 and allow 24 hours to pass
before adjusting the temperature to your
needs.
(Note: If the refrigerator has
been placed in a horizontal or
tilted position for any period
of time wait 24 hours before
plugging the unit in.)
Refrigerator Section
Interior Light:
Your refrigerator is equipped with an
automatic interior light in the fresh
food section for you to easily locate
your food.
Refrigerator Interior Shelves
(Shelves May vary per Model Purchased)
fig. # 6
English
Español
11
Los entrepaños del refrigerador fueron diseñados pensando en usted. Su
variada ajustabilidad le permite satisfacer sus necesidades personales de
almacenaje. Su modelo puede incluir entrepaños de alambre, vidrio o
vidrio antiderrames. Su modelo puede incluir entrepaños de ancho
completo o ancho medio. Solo el tipo de modelo y su imaginación
limitan las posibilidades.
Para sacar o ajustar un entrepaño deslizable no
voladizo de ancho completo: (vea la figura # 6)
1. Levante ligeramente el entrepaño y deslícelo hacia el frente hasta
sacarlo completamente.
2. Para volver a colocar el entrepaño, seleccione la ubicación deseada y
deslice cuidadosamente el entrepaño hasta que quede enganchado.
Uso y Funciones del Refrigerador
Entrepaños Interiores del Refrigerador
(Los estantes pueden variar por el Modelo)
Funciones Generales
Dial de Temperatura
Ajustable
Su refrigerador mantendrá automática-
mente el nivel de temperatura que selec-
cione. El dial de control de temperatura
tiene 7 ajustes además del ajuste "off"
(apagado). El ajuste 1 es el más tibio.
El ajuste 7 es el más frío. El girar el dial
hasta "OFF" (apagado) detiene el enfri-
amiento en ambas secciones del
refrigerador y congelador. Primero,
ajuste el dial a 4 y permita que pasen
24 horas antes de ajustar la
temperatura a sus necesidades.
(Nota: Si el refrigerador a sido
colocado en una posición hori-
zontal o inclinada durante
algún periodo de tiempo,
espere 24 horas antes
de enchufar la unidad.
Sección del Refrigerador
Luz Interior:
Su refrigerador está equipado con una
luz interior automática en la sección de
alimentos frescos para que pueda
localizar los alimentos con facilidad.
fig. # 6

11
To remove and install the crisper: (see fig. # 7)
1. Grip the crisper firmly and slide out completely.
2. Replace the crisper by placing the crisper properly in position and
gently sliding it back into place.
Removing or replacing the crisper cover: (see fig. # 8)
1. Carefully grasp the crisper cover and slide out to remove.
2. To replace, slide the rear of the crisper cover into the right and left slots
above the crisper area and gently slide back into place.
To adjust the door shelf bottle huggers: (see fig #9)
1. Grasp the hugger firmly and slide right or left until it is snug against the
items stored on the shelf.
Crisper and Crisper Cover
fig. # 7
fig. # 8
fig. # 9
shelf bottle hugger
English
Door Shelf Bottle Huggers
Español
10
Reinstallation:
(see fig. # 4 and fig. # 5)
1. Remueva el inferior para el pasador- pivote del soporte del gozne infe-
rior, girándolo en la dirección opuesta a las manecillas del reloj.
Coloque luego el perno en el agujero opuesto y apriételo.
2. Remueva los tornillos que sostienen el soporte del
gozne inferior y quite el soporte.
3. Alinee los agujeros del soporte del gozne inferior con los
agujeros correspondientes en el costado opuesto del gabinete,
para luego insertar y apretar sus tornillos.
4. Instale la puerta del refrigerador: haga que el orificio izquierdo de la
puerta del compartimento del refrigerador caiga sobre el eje de la
bisagra inferior, mueva la puerta hacia atrás y hacia adelante para
enderezarla y alinearla con la bisagra central. Instale la bisagra
central de nuevo, gire el eje de la bisagra hasta que entre
completamente al cuerpo de la puerta, luego fije con los tornillos.
5. Para instalar la puerta del congelador: haga que el agujero del fondo
izquierdo de puerta del congelador cae sobre el árbol central de la
bisagra; levante la bisagra superior, para poder instalar el árbol
de la bisagra en el agujero superior de la parte superior de la puerta
del congelador; ajuste la puerta para hacerla recta y llana.
6. Como se muestra en la figura 1, instale la bisagra superior del
congelador a la posición correspondiente izquierda
(apriete los tornillos de la bisagra superior).
7. Vuelva a colocar la cubierta de la bisagra como se
muestra en la Figura 1.
tapón de la puerta
del congelador
pasador- pivote
en el centro fijación en el centro
agujeros del tornillo
tapón para la puerta
del refrigerador
baje la fijación
pasador- pivote inferior
Placa de la bisagra inferior
fig. # 4
agujero inferior para el pasador- pivote
fig. # 5

12
English
Fresh Food
• When storing fresh food, which is not prepackaged, be sure to wrap or
store food in airtight and moisture proof material unless otherwise
noted. This will ensure proper shelf life and prevent the transfer of
odors and tastes.
• Wipe containers before storing to avoid needless spills.
• Eggs should be stored in an upright position in their original carton to
maximize shelf life.
• Fruit should be washed and dried then stored in sealed plastic bags
before storing in the refrigerator.
• Vegetables with skins should be stored in plastic bags or containers.
• Leafy vegetables should be washed and drained and then stored in
plastic bags or containers.
• Hot food should be allowed to cool before storing in the refrigeration.
This will prevent unnecessary energy use.
• Fresh seafood should be used the same day as purchased.
• When storing meats in the fresh food section, keep in the original
packaging or rewrap as necessary. Follow the suggestions below for
safe storage:
• Chicken 1-2 Days
• Ground Beef 1-2 Days
• Cold Cuts 3-5 Days
• Steaks/Roasts 3-5 Days
• Smoked/Cured Meats 7-10 Days
• All others 1-2 Days
If longer periods of storage are required, store immediately in the freezer
section.
Food Storage Information
Español
9
Método de apertura de la puerta izquierda/derecha:
Este producto le ofrece la opción de invertir la apertura de la puerta
izquierda/derecha. Puede seleccionar su preferencia de apertura de la
puerta siguiendo el procedimiento para hacer el cambio.
Desmantelamiento: (Vea fig. # 1 y #3)
1. Fije las puertas del refrigerador y congelador pegando cinta
adhesiva en ambos lados para mantener las puertas en su lugar.
2. Como se muestra en la figura 1, desmantele la cubierta de la
bisagra en la parte superior de la puerta del congelador con un
destornillador de punta de cruz. Después retire los dos tornillos
de la bisagra. Saque la bisagra jalándola verticalmente
y guárdela en un lugar seguro.
3. Quite la cinta adhesiva de la puerta del congelador, levante y
quite la puerta y póngala cuidadosamente adentro.
4. Como se muestra en la figura 3, desmonte dos tornillos de la bisagra
central, levante y tome abajo la bisagra y la pista centrales,
y manténgalas un lugar seguro. (vea fig # 3)
5. Quite la cinta adhesiva en puerta del refrigerador y del congelador,
levante y tome abajo la puerta del refrigerador, y póngala
cuidadosamente a un lado.
Cómo Invertir las Manijas de la Puerta
agujeros del tornillo
tapón para la puerta del congelador
pasador- pivote en el centro
tapón para la puerta del refrigerador
fijación en el centro
fig. # 3

13
Frozen Food
• Proper freezer storage requires correct packaging. All foods must be in
packages, which do not allow the flow of air or moisture in, or out.
Improper storage will result in odor and taste transfer and will result in
the drying out of the improperly packaged food.
• Follow package or container instructions for proper storage.
• Packaging Recommendations:
Plastic containers with air tight lids
Heavy duty aluminum foil
Plastic wrap made from saran film
Self-sealing plastic bags
• Do not refreeze defrosted/thawed foods.
• It is recommended that the freezing date be marked on the packaging.
• The fan circulating air inside the interior of your unit to maintain the
temperature you have selected.
• Boiling water, gurgling sounds or slight vibrations that are the result of
the refrigerant circulating through the cooling coils.
• The thermostat control will click when it cycles on and off.
Normal Operating Sounds You May Hear
English
Español
8
Puerta del congelador:
(vea fig. # 1)
1. Quite la cubierta de los tornillos.
2. Quite la cubierta de la bisagra superior.
3. Afloje los tornillos de la bisagra superior usando un
destornillador de punta de cruz.
4. Ajuste la puerta o coloque un espaciador entremedio
y luego vuelva a apretar los tornillos.
5. Vuelva a colocar la cubierta de la bisagra superior.
Puerta del Refrigerador:
(vea fig. # 2)
1. Afloje los tornillos de la bisagra inferior usando un
destornillador de punta de cruz.
2. Ajuste la puerta o coloque un espaciador entremedio
y luego vuelva a apretar los tornillos.
Alineación de la Puerta
fig. # 1
cubierta de
la bisagra
bisagra superior
fig. # 2
baje la fijación
baje el pasador- pivote
agujero para el pasador-
pivote más bajo
Placa de la
bisagra inferior

14
English
Warning:
To avoid electric shock always unplug your
refrigerator before cleaning. Ignoring this warning
may result in death or injury.
Caution:
Before using cleaning products, always read and
follow manufacturer’s instructions and warnings to
avoid personal injury or product damage.
General:
•Prepare a cleaning solution of 3-4 tablespoons of
baking soda mixed with warm water. Use sponge or
soft cloth, dampened with the cleaning solution, to
wipe down your refrigerator.
• Rinse with clean warm water and dry with a soft cloth.
• Do not use harsh chemicals, abrasives, ammonia,
chlorine bleach,concentrated detergents, solvents or
metal scouring pads. SOME of these chemicals may
dissolve, damage and/or discolor your refrigerator.
• Clean door gaskets every three months according to
general instructions. Gaskets must be kept clean and
pliable to assure a proper seal.
•Petroleum jelly applied lightly on the hinge side of gas-
kets will keep the gasket pliable and assure a good
seal.
Proper Refrigerator Care and Cleaning
Cleaning and Maintenance
Door Gaskets:
Refrigerators:
We recommend that you clean the rear of the refrigerator at least twice a year.
Some operating environments may require more frequent cleaning.
• Slowly pull the refrigerator straight out away from the wall.
Note: Do not move the refrigerator sideways as this may cause damage to the
floor covering of your refrigerator.
• Unplug the refrigerator.
• Use a vacuum or a brush to clean coils.
• When cleaning has been completed, plug the cord back into the outlet and slide
the refrigerator straight back to its original position.
Note: When pushing it back, be sure not to roll over the power cord.
Español
7
• Asegúrese de que haya un tomacorriente apropiado (115 V, 15 A) con
una conexión a tierra apropiada para hacer funcionar el refrigerador.
• Evite el uso de adaptadores de tres patas o el cortar la tercer pata de
conexión a tierra para poder conectar en un tomacorriente bifásico.
Esto sería una práctica muy peligrosa ya que no proveería al
refrigerador con una conexión a tierra adecuada y podría resultar un
riesgo de descarga eléctrica.
• No instale su refrigerador en ningún lugar que no tenga el
aislamiento o la calefacción apropiada, por ejemplo una cochera,
etc. Su refrigerador no fue diseñado para funcionar en temperaturas
abajo de los 12°Centígrados (55°F).
• Seleccione un lugar adecuado para el refrigerador sobre una superficie
sólida y nivelada alejado de los rayos directos del sol o de una
fuente de calor como la de los radiadores, rejillas de calefacción,
estufas, etc. Cualquier desnivelación del piso debe ser corregido
con las patas niveladoras ubicadas en las esquinas inferiores
frontales del refrigerador.
Requerimientos Eléctricos
Limitaciones de Instalación

15
English
1. Switch off power to refrigerator.
2. Remove the highest shelf.
3. Allow light bulb to cool before removing.
4. Pinch the plastic cover between fingers and
thumb and gently pull to the left.
5. Remove the bulb by screwing it counter-clockwise.
6. Always replace with appliance type light bulb rated at 15 watts
or lesser wattage.
7. Do not exceed the 15 watts rating at any time.
8. To replace cover, insert rear clips in first and gently push front
clip in until the cover snaps into place.
• Occasionally there may be power interruptions due to thunderstorms or
other causes. Remove the power cord from AC outlet when a power
outage occurs. When power has been restored, replug power cord to
AC outlet. If outage is for a prolonged period, inspect and discard
spoiled or thawed food in freezer and refrigerator. Clean
refrigerator before reusing.
• For long vacations or absences, empty food from refrigerator and
freezer, move the temperature DIAL to the OFF position and clean the
refrigerator and door gaskets according to "General cleaning" section.
Prop doors open, so air can circulate inside.When moving always move
the refrigerator vertically. Do not move with the unit lying down. Possible
damage to the sealed system could occur.
Light Bulb Replacement
Power Interruptions
Vacation and Moving Care
Español
6
1. Retire todo el material de embalaje. Esto incluye la base de espuma y
toda la cinta adhesiva que sostiene los accesorios del refrigerador en el
interior y exterior. Deslice y saque la protección de plástico o espuma
usada para proteger al compresor de daños durante el envío debido a
la vibración y los golpes.
2. Inspeccione y retire cualesquier restos del embalaje, la cinta adhesiva o
los materiales impresos antes de encender el refrigerador.
Nivelación de su Refrigerador:
• Su refrigerador tiene dos patas niveladoras que están ubicadas en las
esquinas frontales de su refrigerador. Después de colocar correctamente
su refrigerador en la posición definitiva, puede nivelarlo.
• Puede ajustar las patas niveladoras girándolas a la derecha para elevar
el refrigerador y girándolas a la izquierda para bajarlo.
La puerta del refrigerador cerrará con más facilidad cuando
las patas niveladoras se elevan.
• Para asegurar que su refrigerador funcione con la eficiencia
máxima para la que fue diseñado, éste debe ser instalado en
un lugar donde haya una circulación de aire adecuada,
conexiones eléctricas y de tubería.
• Estas son las distancias recomendadas que deben dejarse
alrededor del refrigerador:
Lados…………........19 mm
Parte Superior……..25 mm
Parte Posterior……..25 mm
Instalación de su Refrigerador
Desempaquetado de su Refrigerador
Ajustamiento de su Refrigerador
Circulación Adecuada del Aire

16
English
Refrigerator Does Not Operate
• Check if thermostat control is not in the “OFF” position.
• Check if refrigerator is plugged in.
• Check if there is power at the ac outlet, by checking the circuit breaker.
Food temperature appears too warm
• Frequent door openings.
•Allow time for recently added warm food to reach fresh food or
freezer temperature.
• Check gaskets for proper seal.
• Adjust temperature control to colder setting.
Food temperature is too cold
• If temperature control setting is too cold, adjust to a warmer setting
and allow several hours for temperature to adjust.
Refrigerator runs too frequently
• This may be normal to maintain constant temperature during
high temperature and humid days.
• Doors may have been opened frequently or for an extended
period of time.
• Check gasket for proper seal.
• Check to see if doors are completely closed.
TroubleShooting
Español
5
Partes y Funciones
1. 2 Charolas para Cubos de Hielo
2. 2 Compartimientos Fijos de la
Puerta del Congelador de la
Anchura Completa
3. Compartimiento Cubrió Claramente
para la Lechería
4. 2 Compartimientos Fijos De la Puerta
De la Anchura Completa
(Los estantes pueden variar por el
Modelo)
5. El Estante Huggers
6. Frente Ajustable que Nivela las
Piernas (no mostradas)
7. 2 Rizadores Claros
8. Cubierta Plástica Clara Del Rizador
9. 2 Estantes Llenos Ajustables Del
Alambre De la Anchura
(Los estantes pueden variar por el
Modelo)
10. Control De la Temperatura Ajustable
11. Luz Interior Automática
12. Estante Del Congelador
1
2
3
4
5
6
7
8
9
10
11
12

English
17
Moisture build up on interior or exterior
of the refrigerator:
• This is normal during high humidity periods.
• Prolonged or frequent door openings.
• Check door gaskets for proper seal.
Refrigerator has an odor:
• Interior needs cleaning.
• Foods improperly wrapped or sealed are giving off odors.
Refrigerator light does not work:
• Check power supply.
• Tighten bulb in socket.
• Replace burned out bulb.
Refrigerator/Freezer door does not shut properly:
• Level the refrigerator.
• Re align refrigerator/freezer door.
• Check for blockages e.g. food containers, crisper cover,
shelves, bins etc.
Español
4
Indice
PAGINA
Instrucciones Precautorias ............................................................1
Partes y Funciones..........................................................................5
Instalación de su Refrigerador ....................................................6
Desempaquetado de su Refrigerador ....................................................6
Ajustamiento de su Refrigerador ............................................................6
Circulación Adecuada del Aire ..............................................................6
Requerimientos Eléctricos ......................................................................7
Alineación de la Puerta..........................................................................8
Cómo Invertir las Manijas de la Puerta ..................................................9
Uso y Funciones del Refrigerador ............................................11
Funciones Generales ..........................................................................11
Entrepaños Interiores del Refrigerador ................................................11
Cajón para Frutas y Verduras y Cubierta ............................................12
La Botella del Estante de la puerta Huggers ........................................12
Información sobre el Almacenamiento de Alimentos ............................13
Ruidos de Operación Normales ..........................................................14
Cuidados y Limpieza Adecuada del Refrigerador................15
Limpieza y Mantenimiento ..................................................................15
Reemplazo del Foco ............................................................................16
Interrupciones de Energía....................................................................16
Vacaciones y Mudanza ......................................................................16
Verificación de Problemas ..........................................................17
Información de la Garantía ......................................................19

18
English
Limited Warranty
What is covered and for how
long?
This warranty covers all defects in work-
manship or materials for a period of:
12 months labor (In-Home Service)
12 months parts
5 years sealed system
The warranty commences on the date
the item was purchased and the original
purchase receipt must be presented to
the authorized service center before
warranty repairs are rendered.
EXCEPTIONS: Commercial or
Rental Use warranty
90 days labor (carry-in only)
90 days parts
No other warranty applies
What is covered.
1. The mechanical and electrical parts,
which serve as a functional, purpose
of this appliance for a period of 12
months. This includes all parts except
finish, and trim.
2. The components of the sealed system
e.g. hermetic compressor, condenser
and evaporator from manufacturing
defects for a period of 5 years from
the date of purchase. Any damages
to such components caused by
mechanical abuse or improper
handling or shipping will not be
covered.
What will be done?
1. We will repair or replace, at our dis-
cretion any mechanical or electrical
part which proves to be defective in
normal usage during the warranty
period so specified.
2. There will be no charge to the
purchaser for parts and labor on any
covered items during the initial 12
month period. Beyond this period
only parts are covered in the remain-
ing warranty. Labor is not provided
and must be paid by the customer.
3. Contact your nearest authorized
service center. For the name of the
nearest service center please call
1-877-337-3639
THIS WARRANTY COVERS
APPLIANCES WITHIN THE
CONTINENTAL UNITED STATES,
PUERTO RICO AND CANADA.
IT DOES NOT COVER
THE FOLLOWING:
Damages from improper installation.
Damages in shipping.
Defects other than manufacturing.
Damage from misuse, abuse, accident,
alteration, lack of proper care and
maintenance or incorrect current or
voltage.
Damage from other than household use.
Damage from service by other than an
authorized dealer or service center.
Decorative trims or replaceable
light bulbs.
Transportation and shipping.
Labor (after the initial 12 months).
THIS LIMITED WARRANTY IS GIVEN IN
LIEU OF ALL OTHER WARRANTIES,
EXPRESSED OR, INCLUDING THE
WARRANTIES OF MERCHANTABILITY
AND FITNESS FOR A PARTICULAR
PURPOSE
The remedy provided in this warranty is
exclusive and is granted in lieu of all
other remedies.
This warranty does not cover incidental
or consequential damages, so the above
limitations may not apply to you. Some
States do not allow limitations on how
long an implied warranty lasts, so the
above limitations may not apply to you.
This warranty gives you specific legal
rights, and you may have other rights,
which vary, from state to state.
Haier America Trading L.L.C.
New York, NY 10018.
Español
3
PELIGRO
Existe el riesgo de que los niños puedan quedar atrapados
dentro. Antes de tirar su refrigerador o congelador, quite las
puertas. Deje los anaqueles en su lugar para que los niños no
puedan entrar fácilmente en el interior."
De acuerdo a UL 250 Estándares
Agrafer le ticket de caisse au guide. Il devra être présenté pour tout
service après-vente sous garantie.
Gracias por utilizar nuestro
producto Haier. Este sencillo
manual le orientará con respecto al
mejor uso que puede darle a
su refrigerador.
Recuerde tomar nota del modelo y
número de serie. Ambos se
encuentran impresos en una
etiqueta en la parte posterior del
refrigerador.
Número de Modelo
Número de Serie
Fecha de Compra
This manual suits for next models
3
Table of contents
Other Haier Refrigerator manuals

Haier
Haier HRC3251AC User manual

Haier
Haier HRF-660S User manual

Haier
Haier HB18FGSAAA User manual

Haier
Haier HRF420BHS User manual

Haier
Haier HRF-285AA User manual

Haier
Haier HFD635WISS User manual

Haier
Haier HB16FMAA User manual

Haier
Haier HSP02WNB User manual

Haier
Haier HRF-265F User manual

Haier
Haier HRF-633ISB2R User manual

Haier
Haier HRF505VW User manual

Haier
Haier HRFN-245E User manual

Haier
Haier HRF-265F User manual

Haier
Haier HTW5618DNMG User manual

Haier
Haier HBC-70 User manual

Haier
Haier HB21FWRSS User manual

Haier
Haier HRF-260 User manual

Haier
Haier HSB03VS - 2.7 Cu Ft Compact User manual

Haier
Haier HR-175U User manual

Haier
Haier HB22FWRSSAA User manual