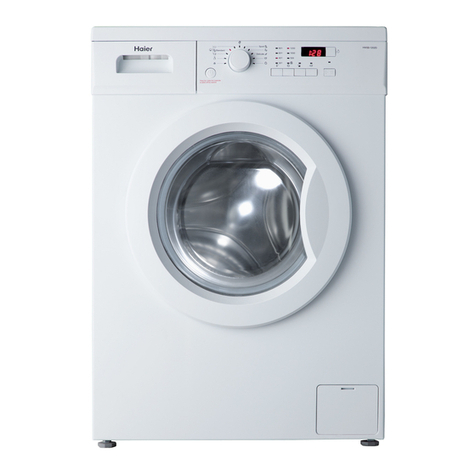
Haier SBM600T User manual

SBM600T
Automatic Drum Was hing Machine
OperationManual
T able of C onte nts
Beforeusing
Names of P arts--------------inside front cover
Matte rs Needing Atte ntion--------------------1--3
Ins tallation----------------------------------------4-5
C ontrol P anel---------------------------------------6
O pera tional F unctions------------------------6-7
During using
P rogram S election--------------------------------8
P reparation-----------------------------------------9
Was hing Methods---------------------------10-11
Maintenance
Maintenance -------------------------------------12
Trouble S hooting---------------------------------13
Technical S pecification---- ---------------------1
4
W iring C ircuit-------------------------------------15
S BM600T
All manuals and user guides at all-guides.com
all-guides.com

Names of Pa
rts
D ra inage hos e clip
Backplate
Earthterminal
P owe r s upply c able
Backplate screw(3) Packingbolt(3)
C aution and Warning s ymbols
F or y our s afe ty a nd to pr e ve nt da m a ge s to th e wa s hin g m a c hin e ,
any instructions in this manualwith this “Stop” sign shall be
s tric tly followe d.
Foryoursafety,anyinstructions inthis manualwiththis “Warning”
signshallbe strictlyfollowed.
T his dia gram ma y vary slightly with the la yout of the was hing mac hine you ha ve jus t purchas ed due
to te c h n ic a l i m p r o v e me nts .
D ra inage hos e
Detergentdis tributor Top
program k nob
Operationbutton
Door
Porthole
Temperature knob
All manuals and user guides at all-guides.com

1
Matters Needing Attention
1 . A s epa rate e arthed s oc ke t is require d for th e
po we r s uppl y. A fte r in s ta lla ti on o f th e wa s hin g
machine,the power plug s hould be accessible
during the norma l was h.
3. Fuses in the powercircuitshould be rated
for 15A. R eferto a was hing machine techni-
cianor a Haier designatedservice pointfor
power c able repla ce me nt.
5. D o not use fla mmable detergent or dry cle an-
ing a gent; do not us e fla mmable s pray in c lose
v i c in ity to th e w a s hi n g m a c hi n e ; d o n o t r e m o v e
or ins ert the plug in the presence of flammable
gas .
2. Hold the plug and notthe electric cable when
unplugging the was hing machine .
4. F or your s afety, dry hands before touching
the washing machine and wear appropriate
footwea r .
6. T he door of the was hing machine will be-
come hot during the water heating proces s .
A vo i d c o n ta c t w i th th e do o r d u r i n g th e h e a tin g
proces s .F or s afety, keepchildren away from
th e wa s hi n g m a c hi n e .
7 . D o n o t a ll o w c hi ld r e n p la y w ith th e p a c k in g m a te r i a ls a fte r u n pa c k in g .
Safety
1
All manuals and user guides at all-guides.com

2
Matters Needing Atten tion
9.Thewashingmachineshouldbeplacein
a well ventila te d a re a mainta ing a s pa ce
betweenwalls or furniture.
10. Keep away from heatsources and direct
s unlight to pre ve nt pla stic a nd rubber c om-
ponents from a ging.
8.Thewashingmachinemustnotbeusedin
th e o pe n o r i n a re a o f h ig h m o is tu r e a s w a te r
droplets may form on e le ctr ica l c ompone nts ,
A ir dry the applia nce if th e was hing mac hine
compone nts become wet.
1 . M a k e s ur e th a t th e w a s hin g ma c hin e is s e-
curely connected to the water supply,take the
necessory precautions or con-tactthe local
s ervice c ente r if th e c on-nec tion is poor or th e re
is a wa te r le a ka ge .
2 . A fte r tu r n i n g th e po we r o f f, tu r n th e p r o gr a m
knob c lockwis e to s et was hing program.
1 1. D ur ing ins ta lla tion, e ns ure th a t th e e le c-
tr ic c abl e is n ot tr a ppe d by th e wa s hing ma -
c hine a nd a void da ma ge to the ele ctric
cable.
Use
2
All manuals and user guides at all-guides.com

3
Matters Needing Attention
9 . Ke e p th e door s lightly ope n whe n th e wa s hing ma c hine is not be ing us e d. N ev er c ove r
the machine with a plastic sheet.
4. Do not was h foa m rubber or s imilar
sponge materials.
5 . B efore wa s hing, do up z ippers , butto ns , la ce s
and repair damagedareas ,underwear ors ma ll
a rti c als s hould be pla ce d in th e la undry ba g
or a pillows lip.
D o not was h c lothes c onta ining wire fra me s.
6. Donot open the detergent box during
th e wa s h c yc le .
7. T he door is fitte d with a s elf-lock device
a nd will not ope n until 2 ~3 minute s a fte r
the was hing mac hine s tops . D o not force
the door open. D o not open the door whe n
wate r level rea ches the port hole.
8 . A fte r wa s hin g, tu rn off th e ta p to pr e ve nt
lea ka ge ; unplug the was hing mac hine a nd
wipe c le an th e lower pa rt of th e port hole.
3. Never pla ce hea vy obje cts , a hea ting
a pp li a n c e or a wa te r c onta in e r on th e to p
pa ne l of th e wa s hing ma c hine .
3
All manuals and user guides at all-guides.com

Ins tallation
4
Fig1
As shown in figure1 remove all the packing materials
(including the foam base).
R emove the packing screws asshown in figure 2.
Thepackingboltsprotecttheappliancefromshockduring
tr a ns po r ta ti on T he s te ps be low s hou ld be fo llo we d be fo r e
us ing th e a pplia nce ,
1.Removetherearpanelofthewashingmachine;
2.removethethreepackingboltsfromtherearpanelofthe
was hing machine,the rubber hos e a nd then the s hock a b-
sorption channel steel;
3 . reins ta ll th e ba c k pla te ;
4. fill th e holes le ft by the pac king bolts with pla stic plugs .
( A tte ntio n : th e pa c kin g bo l ts a nd r u bb e r h os e s ho uld be k e p t
in a s afe pla ce for la te r us e )
Fig2
Adjusting the position ofthe washing machine .There are
adjustable feetunder the bottom of the was hing machine. B e-
foreuse,thewashingmachineshouldbeadjusted,asshownin
figure 3, s o th a t it is level.
Fig3
4
All manuals and user guides at all-guides.com
all-guides.com

5
Ins tallation
C onnec tion o f water inlet hos e a nd was hing m ac hine
1. P la ce the wate r inlet hos e nut on the c onnec tor
of the water inlet valve.
2 . slightly s ha ke th e wa te r inle t hos e nut to se e if
it is tightly a nd prope rly fix ed.
c onne c tor of wa te r inle t v alve
wa te r inle t hos e nut
Water drainagehos e
T he h e ig ht of the te r min a l o f th e wa te r dr a ina g e h os e s ho uld
be between 80cm-100cm, the water dra inage hos e mus tbe
s ec urely pla ce d on the c lip on th e ba c k of th e wa s hing ma c hine .
Use the water drainage supportsupplied as an accessory
forproperinstallationofthewaterdrainagehose.fixthewater
drainage hosesupportwith waterproofsring.Donotuse an
exces sively long water drainage hos eand contractthe autho-
riz ed te chnic ia n if the wa te r dra inage hos e ne eds to be
extended.the water drainage hos e s hould not be extended
more th a n2 5 0 cm. ( lo nge r e xte n s io n wi ll r e s ult in c on c ur r e nt
w a te r i n f lo w a nd o u tf l o w) . T h e di a me te r o f th e e xte n s i o n h o s e
s hould be the s ame a s the origina l hos e.
c aution: wate r dra ina ge hos e mus t not be imme rs e d in wa te r.
th e o ri gin a l a nd e x te n s i o n h o s es s ho u l d b e ti g h tl y c o n n e c te d .
C onnec tion ofpower s upply
C he c k th e fo ll o wi n g i te ms b e f o re c on n e c ti o n to th e p o we r s up pl y .
T he s ocket c onforms to the maximun power loa d( The max imum current loa d of the
socketandpowersupply cable shouldnotbe less than15A).
P ower s upply volta ge conforms to the required value .
The powersupplysocketandthe plugofthe washingmachine compatible,iftheyare
c ompa tible , R e fe r to a wa s hing ma c hine te chnic ia n or a H aie r des igna te d s ervic e point
for power cable replacement.The washing machine should be connectedto anearth
be fore us e .
S upplementary earth cable s hould not be neces sary if the s ocketis connected to the
earth.
S upple me nta ry e arth c able s hould be ins ta lle d on th e uppe r ba c k of th e wa s hing
mac hine a ndconnec te d to a n earth if the power s upply s oc ket has no e arth c onnec tion.
80cm
100cm
80cm
100cm
5
All manuals and user guides at all-guides.com

All manuals and user guides at all-guides.com

7
Operational Functions
GPowerlight
T he light will illumina te s whe n th e powe r s upply is c onne c te d.
F P ower button
P re s s th e bu tto n , wa s h in g m a c hi n e wil l wo r k i n g ; r e l e a s e th e b u tto n ,
the wa s hing mac hine will s top.
ON
OFF
ENospinbutton
W he n th is bu tto n is pr e s s ed, th e s pin c yc le will be s pa re d b u t wa te r
dra in is s till a va ila ble . T his function is use ful for hard ironing fa bric s ,
s uch as chemical fiber and wool fabrics.
H Door L ock L ight
R emember thatonly when the washer doesn’t work, we can open the
d o o r. A fte r th e wa s hi n g pr o g r a m f i n is h, a f te r 3 mi n ute s , w h e n th e s e lf - l o c k
m e te r tu r n o f f, we c a n o p e n th e d o o r.
ON
OFF
7
ccc
u
All manuals and user guides at all-guides.com

8
Program S election
Note:
"O" means softener liquid detergent can be added when necessary .
" " means detergent can be added when neccessary .
"X" means no deter ent can be added.
X
8
cotton
cycle
Synth etic
cycle
Wo ol
cycle
Po sit io n
Program
knob
ƽ
ƽ
ƽ
ƽ
ƽ
ƽ
ƽ
ƽ
ƽ
ƽ
ƽ
ƽ
ƽ
ƽ
ƽ
ƽ
ƽ
ƽ
ƽ
ƽ
ƽ
ƽ
ƽ
ƽ
ƽ
ƽ
ƽ
ƽ
ƽ
ƽ
ƽ
ƽ
ƽ
ƽ
ƽƽ
Type of fabric & degree of
dirti ness
1
6
2
7
11
3
8
12
4
9
13
5
10
14
15
16
17
18
Intense
Intense
Softeners
in
compart A
Bleach
in
compart C
Description of wash cycle
(Press cold-wash button, then
a c ol d w ash i s av ail ab le )
Wa sh-rinses-sof tener-spin-unwind
R in s es- sof te ne r-s pi n-un wi n d
So ft en er-s p in - unw ind
Spin-unwind
Unwind
D ete rg ent
in
compart 2
Normal
Normal
Normal
Delicate
Delicate
Delicate
Quick wash
Quick wash
Quick wash
Super-quick wash
Super-quick wash
Super-quick wash
Rinse
Soften ing
Spin
Unwind
All manuals and user guides at all-guides.com

9
1. P ower s upply
P lug in the power s upply
220V~/50Hz.
3. L aundry treament
2. Water s upply
T ur n o n th e ta p e ns ure th a t th e wa te r is c le a r.
C aution: B efore s ta ring the wa s hing ma c hine turn on the
w a te r f a u c r t to e ns ur e th a t th e w a te r f a u c e t a nd th e w a te r
inle t hos e a re c onnec te d c orre c tly a nd do not lea k.
s ort out c lothes a ccording to ty pe a nd exte nt of dirt.
T here are three types of clothes: cotton, s ynthetical and
woole n ( s ilk ) fa brics .
s epa ra te white c lothes from c olored. I f white s a nd
coloreds a re c ombined for one loa d, make s ure the
coloreds are colorfast.
-R e move all obje cts from pockets tha t may c ause dam-
age to the machine, such as keys and coins.
-C lothing with fra ye d e dge s or yarns s hould be put in a
washbagorspecial bagbeforewashing.
-R e pa ire da ma ged c lothing, los e butto ns or da ma ge d z ips
a nd hooks before was hing.
-Bed s heets and table ware should be loosely loaded
and not folded.
T his was hing mac hine is for hous e hold use a nd de -
signed for mechanically washable clothes. When
washing, separate unwashable clothes with reference to
clothes labels.
4. Deter ge nt s elec tion
O nly s pe cia l low foa m de te rge nt
s hould be us e d in a uto ma ti c drum
wa s hing ma c hine , form ble nde d or
wool fabrics s pe cial detergent
s hould be use d. dry cle aning s olve nt
should not be used such as
tr ichhloroe th yle ne or a lik e ( ca ution :
loa d the require d a mount of dete r-
gent only).
P reparation
9
All manuals and user guides at all-guides.com
all-guides.com

Was hing Methods
10
1. L aundry loading
E ve nly loa d th e la undry in th e wa s hing
ma c hin e a nd th e n ti g h tl y c lo s e th e do o r
of the was hing machine
N ote : 1) W he n first using the was hing ma -
c hine , let it run unloa de d for one progra m
to prevent the laundry from being tainted
by oil or dirty wa te r from th e wa s hing ma-
c hine . 2 ) D o not ove rloa d th e wa s hing ma -
chine.
2. Useofdetergent
Pulloutthe detergentdrawer, putrequireddetergent, softening
agentandbleaching agentinto the correspondingboxes.Push
ba c k th e dra we r ge ntly.
C aution: 1 ) D o not a dd liquid dete rge nt into box 1 a nd 2
2 ) F or p r e -wa s hin g pr o g r a m, de te r ge nt s ho u ld
be added to both box 1 a nd 2; for other
programs , do not a dd de te rge nt to box 1
3 ) D o not ove rus e s ofte ning a ge nt a s th is ma y
da ma ge a rti fic ia l fa bric s .
3. W as hi ng p ro gr am s ettin g
S et th e wa s h pr o gra m c or r e c tly in a c c or da nc e wi th th e la un dry lo a d. th e me th ods fo r s et-
ti n g w a s h pr o g r a m s a re i n d ic a te d o n th e h a n d le o f th e d i s tr i b u to r o n th e wa s hin g m a c hi n e .
tu r n th e p r o g r a m k n o b c lo c k wi s e to th e d e s ir e d pr o g r a m .
C aution: Turn off the power before s etti ng the was h program.
Overalls
(cotton 950g) J eans (800g)
Blended
fa bric c lothes
(800g)
shirt
( c otto n
300g)
S ingle bed sheets
( c otto n 8 0 0 g) Woolen
blankets (3000g)
Jackets
( c otto n 8 0 0 g)
S hirts (300g)
P ajamas (200g)
Socks
( blende d fa bric s 5 0 g)
Underwear
( blende d fa bric s 7 0 g)
Referenceloading
10
All manuals and user guides at all-guides.com

11
Was hing Methods
7. E nd
W a i t 2 -3 m i nu te s a fte r th e wa s hi n g pr o c e s s i s f i ni s he d , p r e s s th e p o we r bu tto n a ga in to c ut o f f
th e powe r s uppl y. O pe n th e d oo r to ta k e o ut th e la u ndr y. T ur n off th e ta p a nd u npl ug th e
wa s hing ma c hine .
5. S elec ting the function button
S ele c t functi on butto ns a s re quire d ( re fe r to the direc tions printe d on the ope ra tion
pa nel) , oth e rwis e ke e p all th e butto n rele a se d.
6. Was hing
P re s s th e powe r butto n a nd th e wa s hing ma c hine will a uto ma ti c ally c ommenc e
th e pr og r a mme d wa s hin g pr o c e s s .
4.Was hing temperature S etting
S et th e wa s hing te mpe ra ture a s re quire d, othe rwis e , s et a t pos ition * whe n hea ting is not
needed.
Energy andwatersaving during was h process
1 . C olle c t c lothes for one full wa s h loa d.
2. Do not overloa d the was hing machine.
3. P re -wa s h hea vily s oile d c lothes .
4. R educ e the a mount of detergent or choose fas tor minimal was hing programs for lightly
soiledclothes dirty.
5. C hoose a proper was hing temperature. O nly exceed 60 OC for hea vily s oile d c lothes .
6. Donotuse more detergentthanrequired.
7 . S ofte ning a ge nt ma kes c lothe s fe e l s ofte r a nd e as ie r to iron.
Additional information
11
All manuals and user guides at all-guides.com

12
Maintenance
6 . I f th e mac hine is to be moved a dis ta nc e loc ati on,
repla ce th e vibra tion mounting loc ks which were re-
moved during ins tallation a s s hown below.
1. Turn of the water a nd electricity s upply
after every wash. Openthe door to pre-
v e n t th e f o r m a ti o n o f m o is tu r e a nd o d o rs .
Ifthewashingmachineisleftidlefora
long period, dra in a ny re maining wa te r in
th e ma c hin e a nd r e p la ce th e dr a ina ge
hos e.
2. U nplug the mac hine during cleaning a nd
mainte nance . U se a s oft c loth dampened with
soapyliquidto cleanthemachinecaseandrub-
ber components . D o not us e c orros ive or a bra -
sive chemicals orsolvents.
3. C lean the detergent compartment
regularly. F or the dete rgent compa rtme nt
s imila r to figure ( a) , ra is e th e c ompa rtm e nt
s lightly to remove a nd repla ce a fte r c le aning.
7. If the was hing machine is left idle
fo r a l o n g p e r i o d tu r n of f th e wa te r
and electricity supply and open the
door s lightly to pre ve nt th e forma tion
of moisture a nd odors .
5. To prevent block-
a ge s to th e wa te r s up -
ply or the ingre s s of
contaminants, clean
the wa te r inle t a nd in-
le t wa te r filte r
regularly.
4. C le aning the Filter ( once a month)
P res s the lower edge of the filter compartment
cover to open; (Fig1-2)
R emove th e filte r by turning c ounte rcloc kwis e;
(Fig3)
F la sh c le an with running wate r;
Filterreplacementis the reverse ofremoval. C au-
ti on: A tte ntio n s ha ll be pa id to e ns ur e th a t th e fil-
te r is repla ce d correctly to a void pos s ible lea ka ge .
fig.1
Replacetheback
cover.
Removethe
back cover.
R epla ce the rubber
plugs .
Ins ert the bolts .
T ighten the bolts with the
spannerprovided.
fig.2 fig.3
Fig(a)
12
All manuals and user guides at all-guides.com

13
Trouble s hooting
T he following c ircums ta nc es do not c ons titute problems . D o not c onta ct the main-
te nance s ervice until the problem has be en confirmed.
Problem PossibleCause
P oor connec tion to power s upply
Powerfailure
Door is not prope rly clos ed
Machine has not been s witched on
W as hing ma c hine doe s not fill
with wa te r
Water is notturnedon
Water pressure is lessthan0.05MPa
T he inlet hos e is kinke d
Water supply failure
T he program knob is not properly s et
T he door is not prope rly c lose d
The water supply and
dra inage do not s top
C he ck tha t the height of the wate r hos e is below
80cm
Drainage failure D ra ina ge hos e is blocked
D ra ina ge hos e e nd is below 100 cm a bove the
floor level
Excessivefoaminthedrum The detergentis nota low foamtype
Excessivedetergenthasbeenused
O pe ra tion s tops be fore c omple tion
of the was h cyc le W ater or e le ctr icity fa ilure
Strongvibrationduringspin S ome pac king fixing bolts removed
Washing machine on a unevensurface
Thewashingmachinefailstooperate
13
All manuals and user guides at all-guides.com
Other manuals for SBM600T
1
Table of contents
Other Haier Washer manuals

Haier
Haier HWM70-113S User manual

Haier
Haier HWM65-728 User manual

Haier
Haier HWM50-23BS User manual

Haier
Haier HWM90-L287S User manual

Haier
Haier HWM95-187S User manual

Haier
Haier HW80-B1486 User manual

Haier
Haier XQB50-10 User manual

Haier
Haier HLP21N User manual

Haier
Haier HWM80-0528 User manual

Haier
Haier WMS656 User manual

Haier
Haier XQJ50-31 User manual

Haier
Haier HBF600TE User manual

Haier
Haier HW80-BP1439N User manual

Haier
Haier HDS1055TVE User manual

Haier
Haier GWT950AW Assembly instructions

Haier
Haier HW-C1270TVEME User manual

Haier
Haier XPB50-23BS User manual

Haier
Haier THERMOCOOL TLSA13B User manual

Haier
Haier HMS1260TVE User manual

Haier
Haier XPB65-113S User manual