Halcyon Streamline P-Valve User manual

1
Streamline P-Valve
Halcyon
DIR Dive Systems
Installation
manual

2

3
C
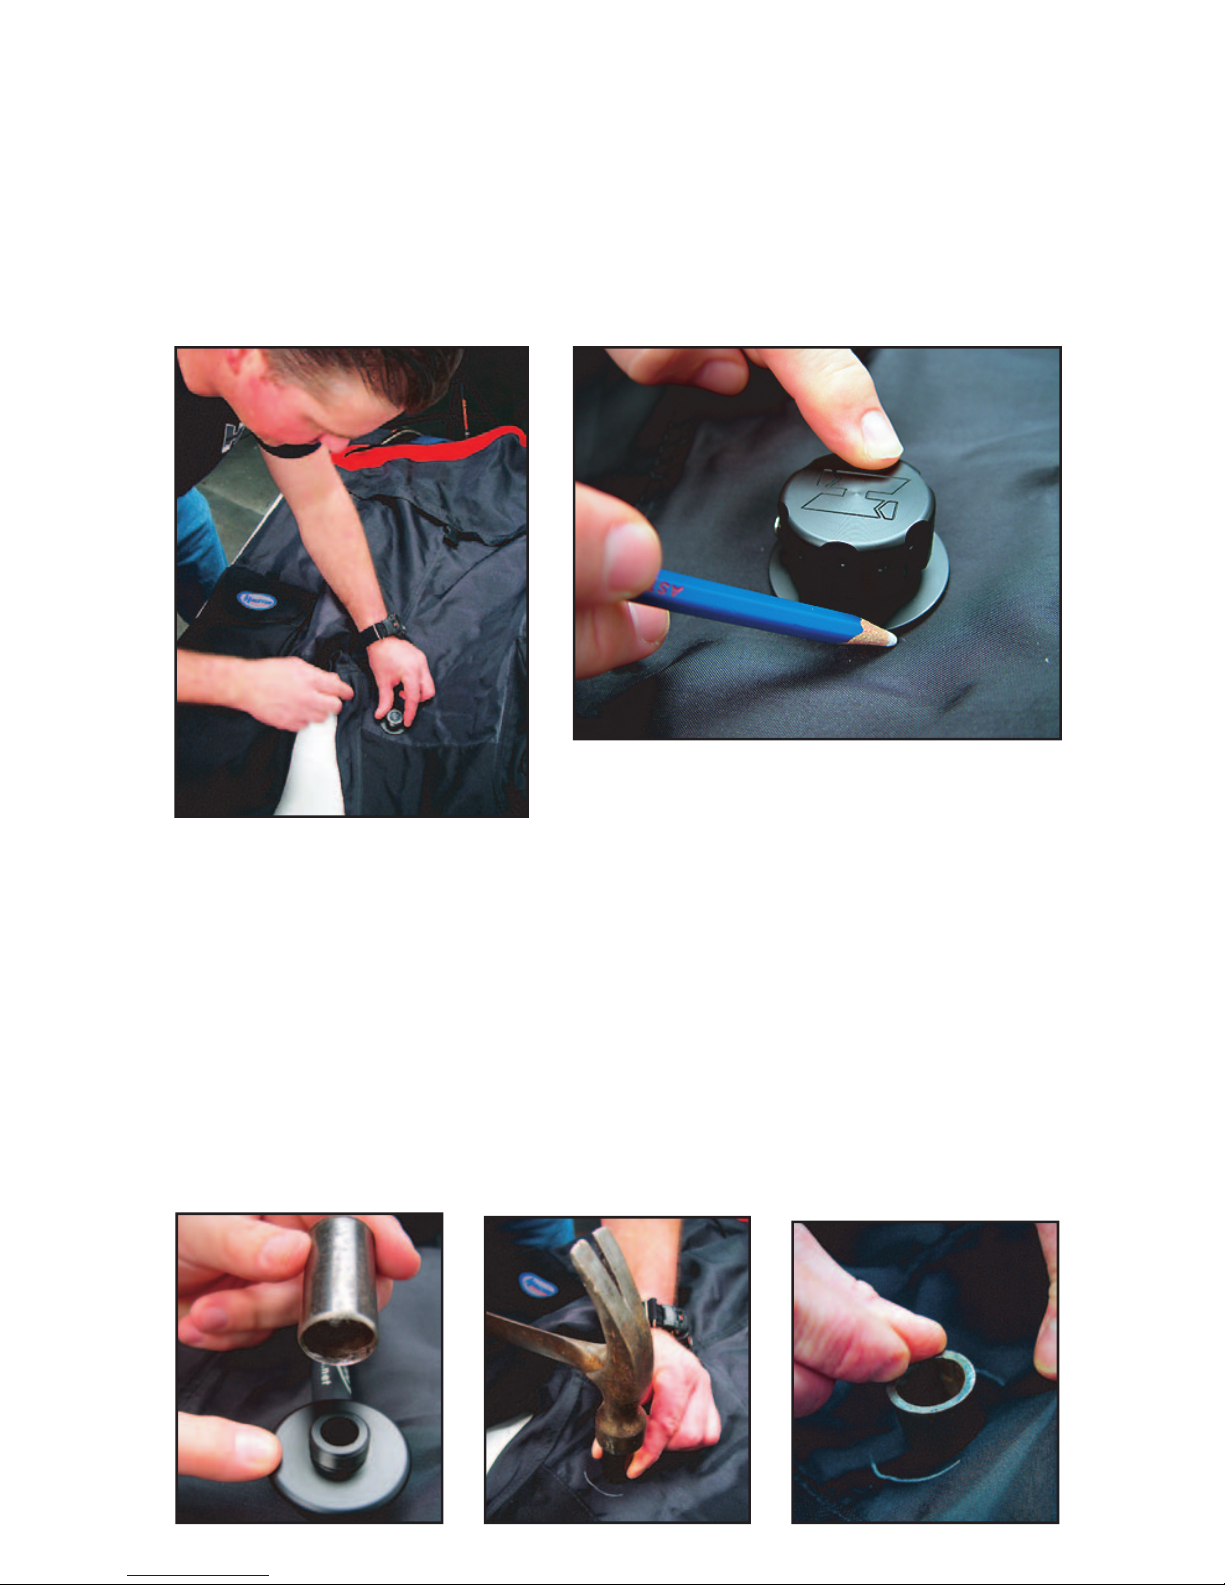
ongratulations on your purchase of the Halcyon P-Valve. You can be confi dent
that every effort has been made to ensure that it will function fl awlessly in
every diving condition. The Streamline design is the result of several years of
testing and refi nement; it is the culmination of a design process that draws inspi-
ration from thousands of dives by Halcyon staff, test divers, and explorers around
the world.
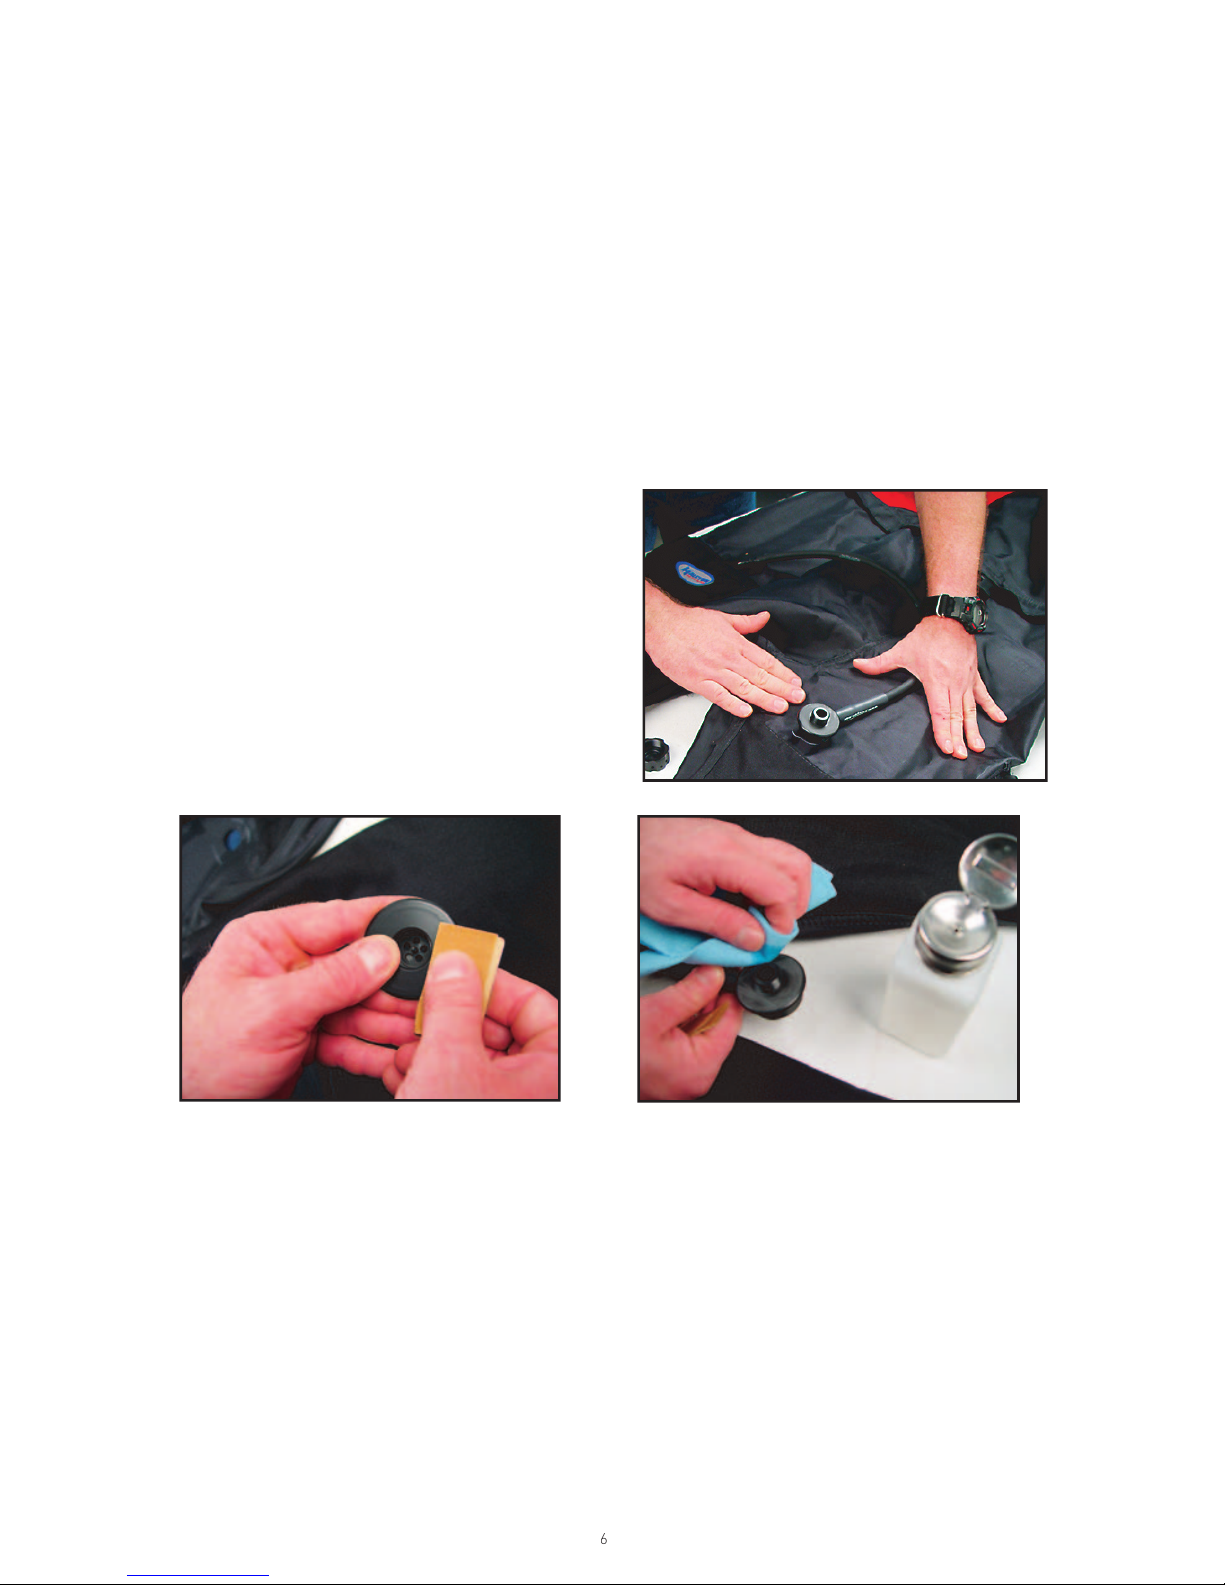
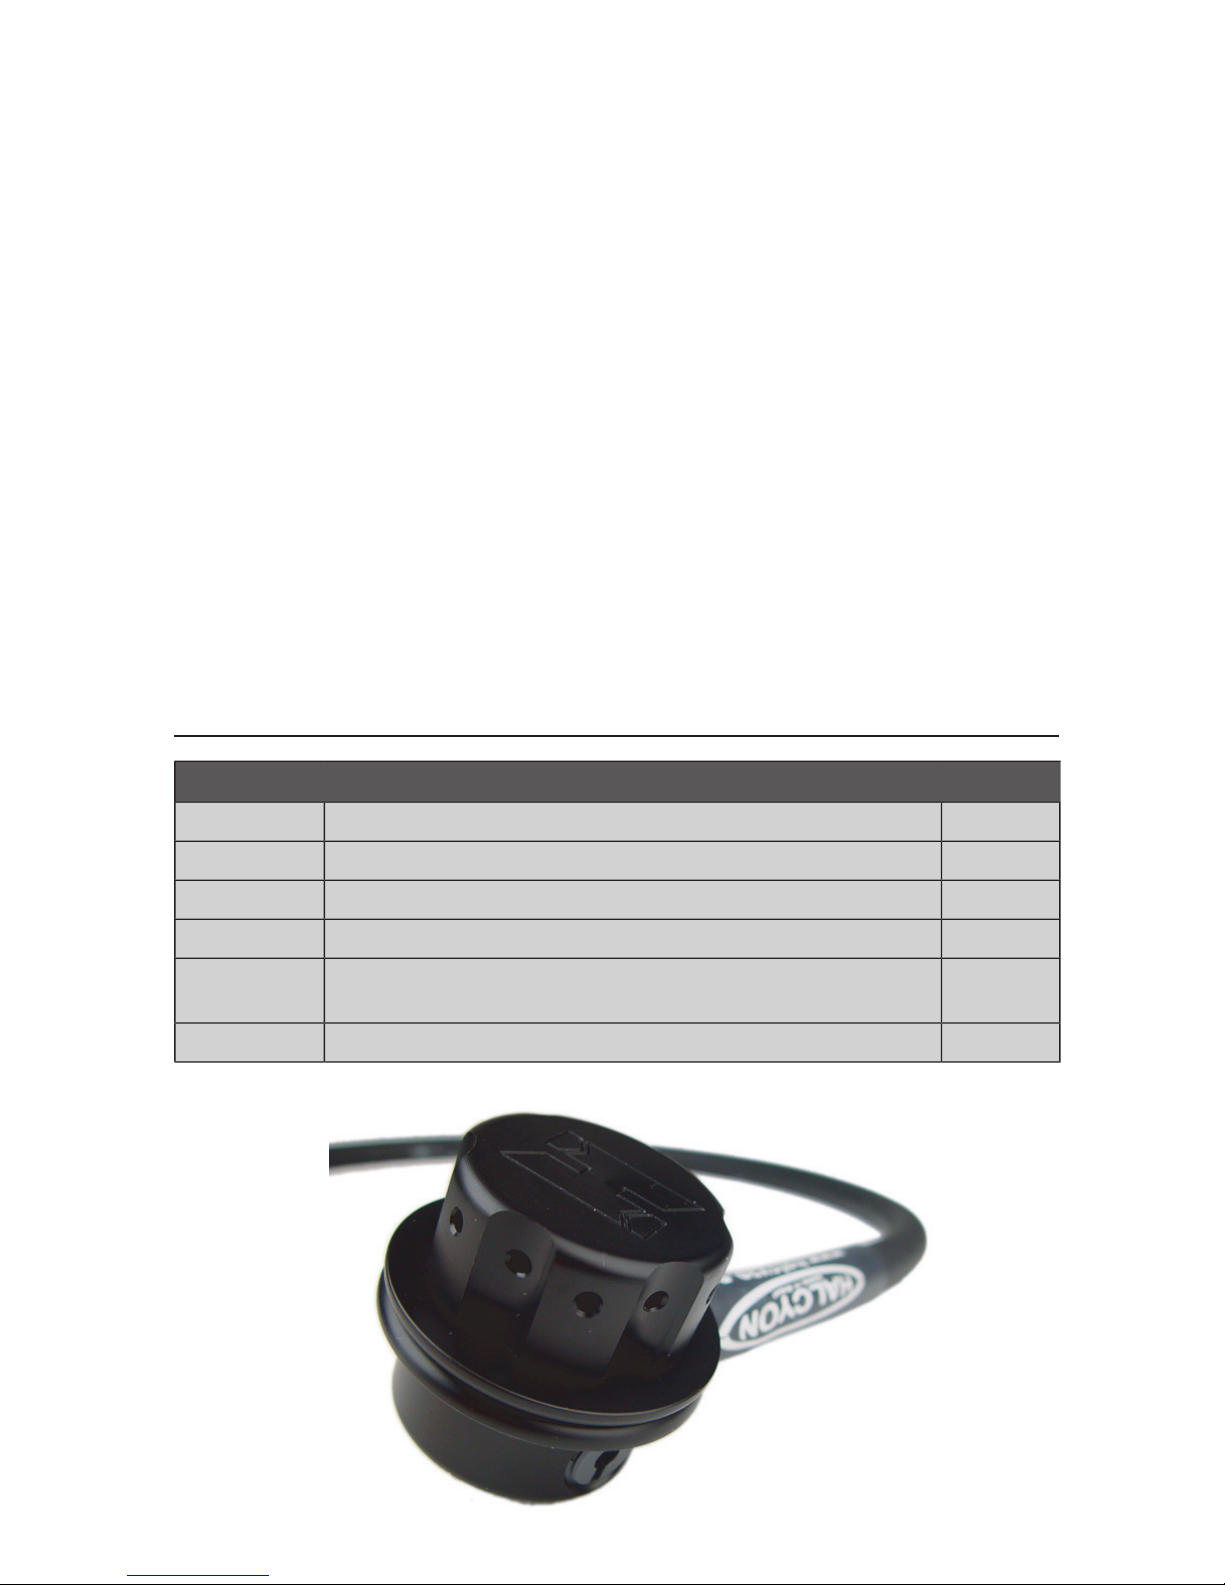
The Halcyon Streamline P-Valve is a bal-
anced system, machined from a solid piece
of Delrin®, with a threaded cap that pro-
trudes 5/8” (15 mm) from the surface of
the suit. The internal and external compo-
nents screw together and are united with
Aquaseal to ensure watertight reliability.
The external cap allows individuals to
vent out of the suit through a condom
catheter and fl exible tubing, or to easily
seal off the outside water by turning the
cap down to seal the captured o-ring,
preventing water from entering the suit.
The external cap can be left open during
the dive for immediate availability, or left
sealed and only opened prior to use.
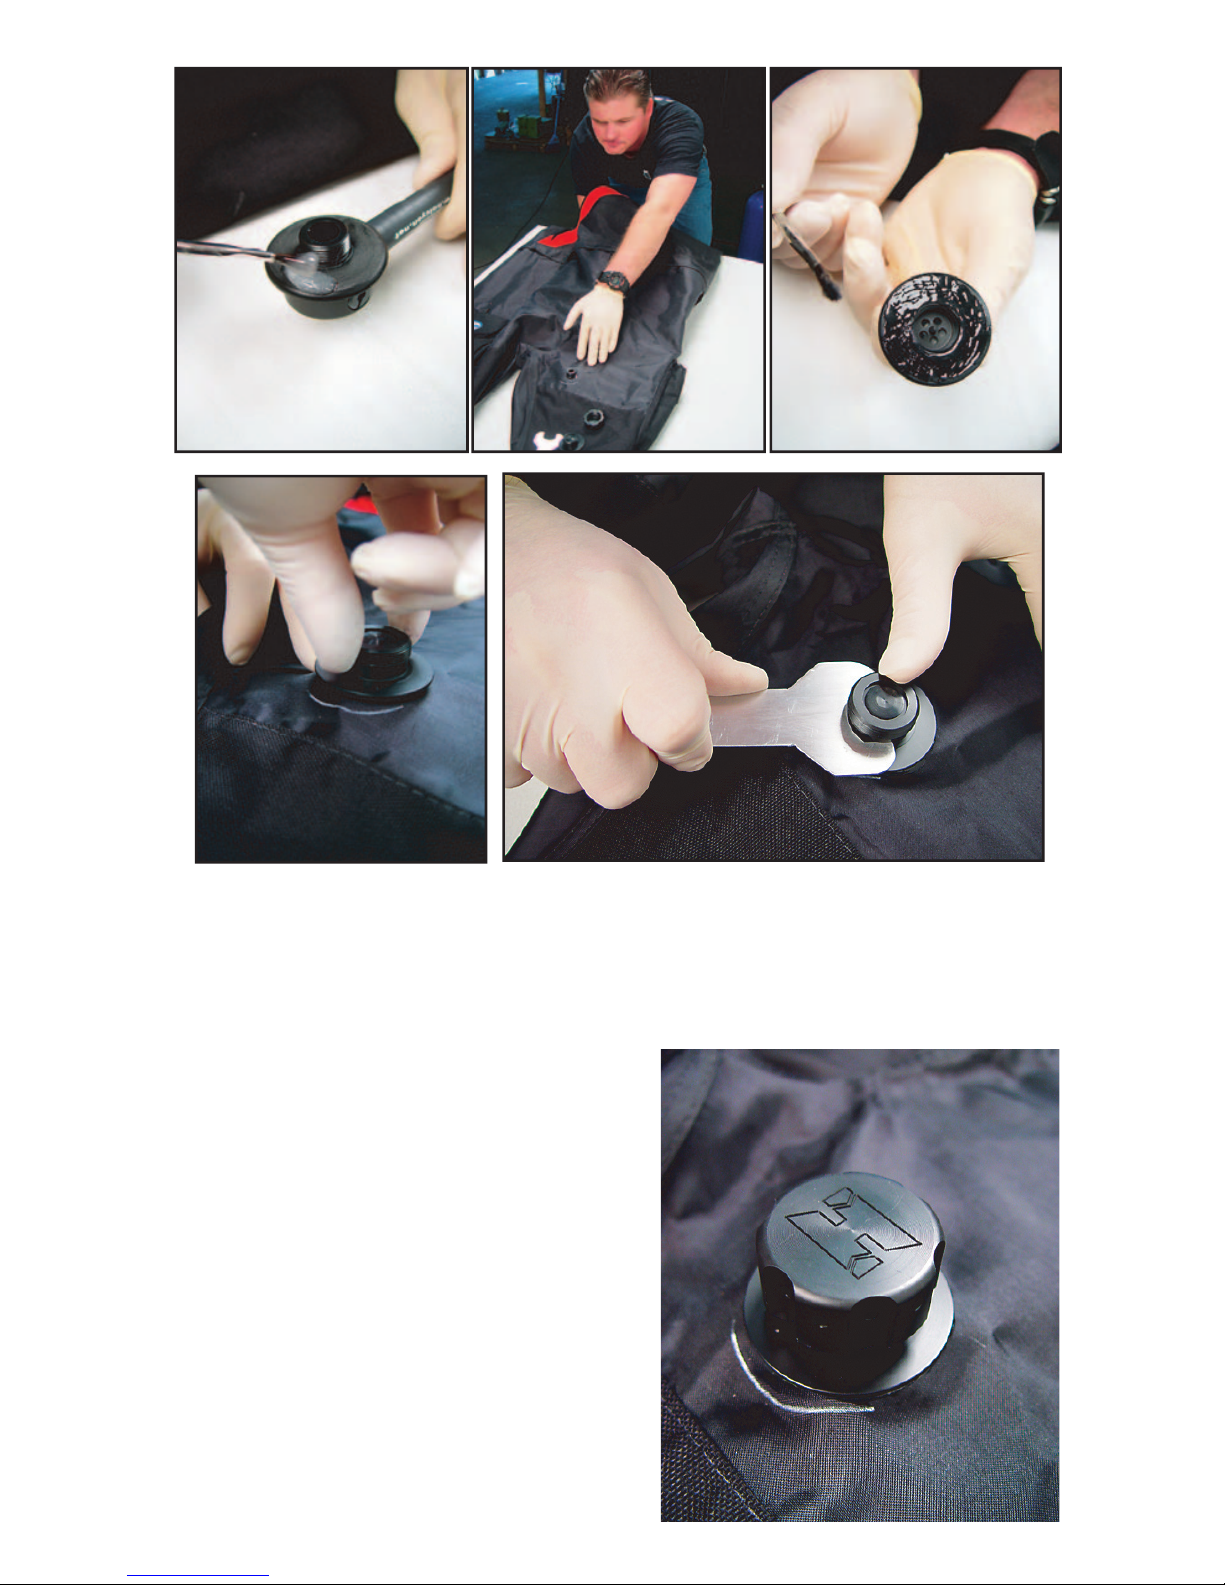
The Halcyon P-Valve’s one-way check valve
is designed to prevent any water from entering the connection assembly and to
reduce the resistance of water pressure. The check valve, mounted in the Delrin
base, only allows fl uid to fl ow out of the suit, preventing water from entering the
connection assembly– even if condom attachment has failed. As a fi nal fail-safe,
should the check valve malfunction the exterior cap can be locked down to seal
off surrounding water. However, the need to seal the cap is unlikely since the
connection hardware AND the check valve must fail to allow water into the suit.
A second check valve in the Delrin base allows gas in the drysuit to equalize with
air in the connection/catheter assembly. This check valve eliminates the resis-
tance of water pressure while the diver expels, reducing the risk of a connection
failure. The balanced check valve assembly not only allows for greater redundancy
and ease of operation, but prevents ambient water from entering the connection/
catheter system. The elimination of ambient water in the connection system is
particularly benefi cial in cold water or questionable water sources. Additionally,
the low-pressure design increases the viability of the Streamline valve for use by
women when paired with an external female catheter.
Extreme exploration dives, such as
the 14-hour immersion in the Chip’s
Hole cave system, are made possi-
ble with the Streamline P-valve

4
Installation
You will need the following:
Halcyon Streamline P-Valve
Aquaseal (supplied)
Applicator suitable to spread Aquaseal, such as a clean, thin rod etc.
Halcyon P-Valve installation wrench (supplied)
Device capable of creating a hole in your suit such as a 3⁄4” (19mm)
punch or pencil soldering iron
60 or 80 grit sandpaper (supplied)
Isopropyl (Rubbing) alcohol
Dry or Wet Suit
Assistant (very helpful, though not necessary)
Gloves (when handling sealant)
1) Deciding on a Location
Installation of the assembly is a fairly simple process once one overcomes the
resistance to putting a hole in your dry or wet suit.
Carefully choose the area where the valve body will be installed. Location is most
commonly on the inner thigh. It is recommended that you don your suit fully
(including undergarments) while determining valve placement. Mark your posi-
tion of choice with chalk or fabric marker.
It is important to note that divers vary in their preference for the connection
tube location. Some individuals prefer to “dress left” or “dress right.” This prefer-
ence would dictate a location on the left or right thigh. You will also need to
decide if you want to angle the valve up with the connection tube running over
the underwear and down to the Delrin base.

5
Most drysuit divers use undergarments with a front zip design, and therefore will
either have to cut another hole in the insulation (not particularly recommended)
or run the tubing up over the lowest part of the zipper and down to the base
unit. In any case, care should be taken to choose the location of the base unit so
that unnecessary holes do not have to be repaired later.
The hose that comes with your Halcyon valve will be too long for most users, but
is designed to allow individuals to trim the length in accordance with the dis-
charge location.
Mark the location of the valve after carefully
deciding on where you want to make the cut
into the suit.
2) Creating a Hole
Halcyon recommends using a professional punch (such as a 3⁄4” grommet punch)
to create the hole for the valve installation. When using a punch, place a small
length of board on the inside of the suit to create a strike surface for the tool. Be
careful not to damage the inside of the suit with the support board. A small hand
towel can be used under the board to protect the inside of the suit. Make sure
that the suit’s internal suspenders are pulled clear of the valve’s location, and run
your hand along the inside of the suit to verify that you are not cutting through
the extended edge of a sealed seam. With a hammer, use the punch to place a
very neatly sized hole into the suit. This method is especially recommended for
fabric-style drysuits, although it is very effective for neoprene as well.

6
If you choose not to use a punch, many divers have successfully used a variety
of methods. Be certain that the method you choose gives you control over the
size and shape of the hole. A hole may be burned into the suit with a pencil-style
soldering iron, but great care should be taken not to burn any other areas of the
suit. For this method, place a small hole in the mark made during the location
selection from step one. Slowly work that hole outward by making ever-widening
circles in the material. Remember that most materials will stretch, so the hole
should be a little smaller than the actual size of the threaded nipple of the Delrin
base (especially with neoprene).
3) Installing the Valve
Before actually installing the valve, verify
that the connection assembly will point in
the desired direction and that the tubing
will be comfortably placed on its path to
the condom catheter connection. Once the
location of the base unit is established,
the unit should be prepared for installa-
tion. All surfaces that will touch the suit
are to be glued and should be prepared
with a light sanding and then a good
cleaning with alcohol.
This valve is intended to be installed using the supplied tube of Aquaseal. Wa-
tertight integrity cannot be assured when using other compounds as a sealant.
Prepare the base unit for installation by applying a liberal fi lm of Aquaseal on the
upper surface of the Delrin base (the part that will be touching the inside of the
suit) and up to the fi rst threads of the nipple. For faster cure, mix the Aquaseal
with Cotol-240 Accelerator. Gloves and proper vetilation are recommended when
working with sealants and solvents. Installation will not require the use of the
entire tube of Aquaseal supplied with the valve; apply only enough to establish
a seal without creating drips or runs from overfl ow. Push the threaded nipple
through the hole in the suit, being careful not to brush off the glue onto the in-
side of the suit. Once the base unit is installed, apply a thin layer of Aquaseal to
the lower surface of the outer portion of the valve (to be in contact with the out-
side of the suit), and align it with the threaded nipple of the base unit protrud-

7
ing through the hole in the suit. Apply a small dab of Aquaseal to the threads
of the nipple with the tip the applicator.
Screw the outer portion onto the threaded
nipple until it is tightened against the
base unit. Using the supplied installation
wrench, hand-tighten the assemblies to-
gether. Be careful not to over-tighten this
connection. Position the suit so that none
of the Aquaseal areas will rest on the suit
while it is drying to the manufacturer’s
specifi cations, two hours.
Once the valve installation is complete
and the sealant is dry, carefully thread
the external cap and screw it down until
snug at the suit shoulder. If you want to
After applying Aquaseal to the base of the valve (top left), work quickly to
position the valve assembly in the desired direction within the suit and then press
to seal the fabric on the base. Apply Aquaseal to the top seating surface, thread,
then use the supplied wrench to hand-tighten valve.

8
use the optional set screw to make sure that the external cap cannot be removed
from the valve, gently tighten the set screw with an Allen wrench until the head
almost touches the cap body. Test to ensure that the external cap is able to be
loosened approximately two full turns and then stops. If the cap seems to bind,
back the set screw out slightly until the movement is unimpeded. Use of the set
screw is optional– however it can prevent accidental loss of the cap.
Valve Operation
When the cap is turned clockwise and snug against the suit shoulder, the valve is
completely closed and inoperable. No fl uids can be discharged or enter the suit.
When the cap is turned counterclockwise approximately two turns, the valve is
operational and fully automatic. Fluids can be discharged at will, but water can-
not re-enter the valve due to the one-way check valve.
The valve is designed to be used with the cap in the open position during diving,
and really need only be closed in the event of failure. Normal valve travel is ap-
proximately two turns from the closed to fully open position.
Failure Modes
Kinked Hose
The use of the norprene tubing has drastically reduced the likelihood of a kinked
hose. The valve is best positioned to avoid sharp bends in the hose routing to
further reduce the risk of kinking. Use only Halcyon P-Valve hose for any replace-
ments.
Kinked/blocked Condom Catheter
This may occur in the event that the catheter was not properly/completely in-
stalled. Blockages in fl ow may be due to a sharp bend at the end of the catheter,
or a restriction created by the adhesive within the catheter. Be sure to follow the
catheter instructions carefully.
Check Valve Failure
Debris or deposits can build up on the check valves over time and interfere with
their function. Follow a periodic maintenance and cleaning schedule as recom-
mended in this manual. Replace any worn or damaged check valves.
Maintenance and Cleaning
The Halcyon Streamline P-Valve, like all valves used in scuba diving, should have
a basic maintenance check on regular intervals. If not cleaned properly, organic
and inorganic deposits will, over time, reduce the valve’s ability to function
properly. Additionally, regular cleaning of the Streamline P-Valve is essential in
preventing bacterial growth that could contribute to a urinary tract infection.

9
Several careful rinses of the p-valve with a mild vinegar/water solution are rec-
ommended periodically. Many users have found that a standard restaurant style
squeeze bottle or large bore medical syringe work well to introduce the solution
through the catheter interface, and fl ush the valves thoroughly.
Check valve replacement
To inspect or replace the main umbrella valve, unscrew the button cap set screw
(if used) and remove the threaded cap. Lift the edges of the umbrella valve to
expose the center stem. Grasp the stem fi rmly, and gently work it free with a
side-to-side rocking motion.
To install a new umbrella valve, slip the center stem into the retaining hole in
the middle of the valve face. Apply gentle pressure to the center of the umbrella
valve, until it becomes fully seated.
To inspect or replace the balance check valve within the internal valve body, use
a coin to unscrew the retainer. The duckbill valve can then be removed for inspec-
tion/replacement. When reinstalling the retainer, be sure not to over-tighten the
fi tting.
P-valve Parts FTP
80.000.199
Streamline P-Valve stainless set screw
1.00
40.044.012
Streamline P-Valve umbrella “fl apper” valve
2.00
40.044.009
Streamline P-Valve duckbill check valve
5.00
40.044.002
P-Valve hose (cost per/ ft), for any Halcyon P-valve
7.00
40.044.003
P-Valve connector for catheter, for any Halcyon P-
valve
3.00
40.041.028
Medium 28mm condom catheter for P-Valve
5.00

10
Warranty Information
All warranty requests must be accompanied by proof of original purchase from an Au tho -
rized Halcyon Dealer. Be sure to save your sales receipt, and present it when ev er return-
ing your Halcyon gear for warranty service.
HALCYON warrants, to the original purchaser only, that the HALCYON Streamline P-
Valve will be free of defects in materials and/or craftsmanship under normal diving use
for one year from the date of purchase, provided proper care is per formed on all materi-
als as described within this manual. Should your P-valve prove to be defective for any
reason it will be repaired or replaced (at HALCYON's discretion) free of charge excluding
shipping and handling charges. All correspondence concerning this warranty must be
accompanied by a copy of the original sales receipt. Repair or replacement is HALCYON’s
only responsibility and your only remedy under this warranty.
ALL WARRANTIES, INCLUDING, BUT NOT LIMITED TO, IMPLIED WARRANTIES OF
MERCHANTABILITY AND FITNESS FOR A PARTICULAR PURPOSE ARE LIMITED IN
DURATION TO A PERIOD ENDING ONE YEAR FROM THE DATE OF PURCHASE.
Some states in the U.S. and certain foreign countries do not allow limitations on the dura-
tion of implied warranties, so this may not apply to you. This warranty gives you specific
legal rights. You may have rights which vary from state to state and country to country.
HALCYON MANUFACTURING DISCLAIMS AND EXCLUDES ANY LIABILITY FOR IN CI -
DEN TAL OR CONSEQUENTIAL DAMAGES. SOME STATES IN THE U.S. AND CERTAIN
FOREIGN COUNTRIES DO NOT ALLOW EXCLUSIONS OR LIMITATIONS OF LIABILITY
FOR IN CI DEN TAL OR CONSEQUENTIAL DAMAGES, SO THIS MAY NOT APPLY TO YOU.
The following restrictions apply to this warranty:
1. This warranty does not extend to damages caused by improper use, improper
main te nance, neglect, unauthorized repairs, modifications, accidents, fire, or casualty.
2. Cosmetic damage, such as scratches, fraying, and nicks are not covered by this
warranty.
3. This warranty does not extend to equipment used for rental, commercial,
gov ern men tal or military purposes.
4 . This warranty covers products purchased in the United States. For warranties that
may apply elsewhere, please contact your local representative.
5. Failure to meet any of the above requirements will render the warranty null and void.

11

12
Table of contents
Other Halcyon Diving Instrument manuals