Halcyon Explorer User manual
1
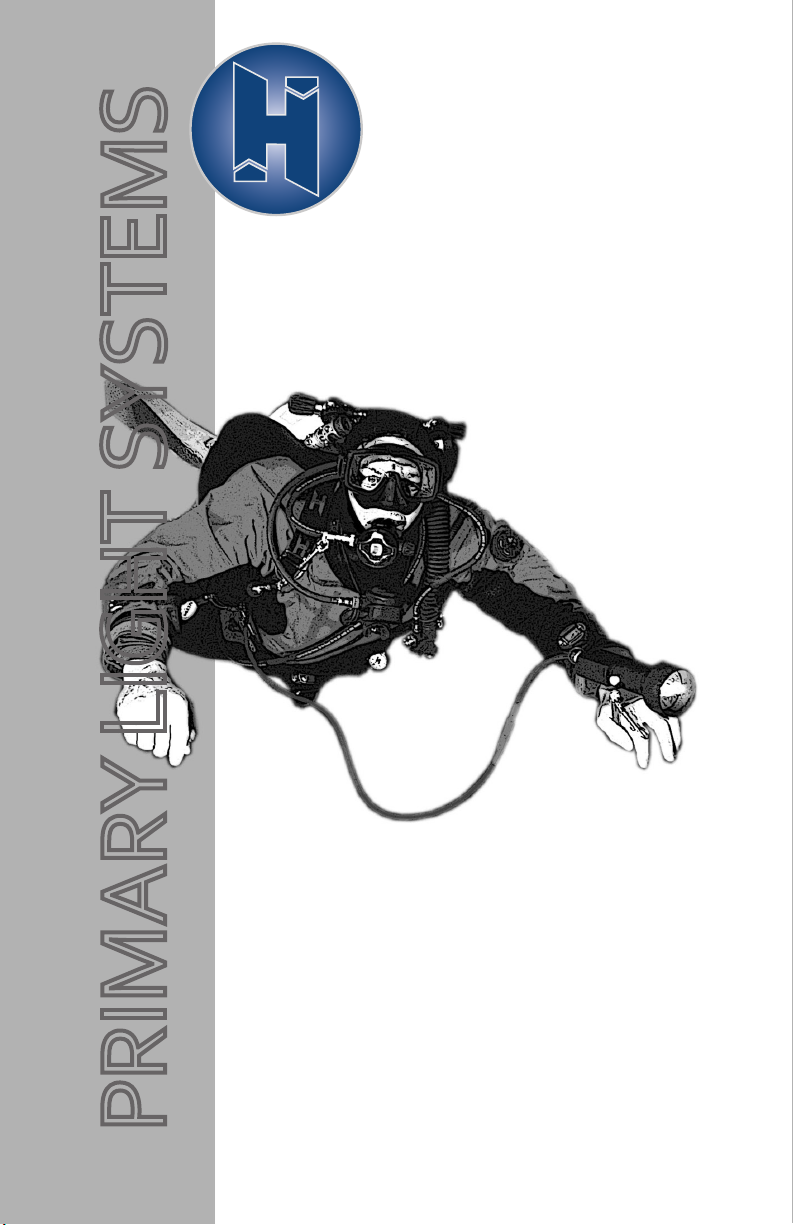
PRIMARY LIGHT SYSTEMS
Explorer/Eos/Apollo
Lighng Systems Manual
HALCYON
DIVE SYSTEMS

2
Halcyon HID & LED Primary Light Owner's Manual
Trademark Noce
Halcyon, BC Keel, Mulfuncon Compensator, ACB, DLR, Explorer Pro, and
Scout Light are registered trademarks of Halcyon Manufacturing, Inc.
Warnings, Cauons and Notes
Pay special aenon to informaon provided in warnings, cauons, and
notes accompanied by these icons:
A WARNING indicates a procedure or situaon that, if not avoided,
could result in serious injury or death to the user.
A CAUTION indicates any situaon or technique that could cause
damage to the product, and could subsequently result in injury to
the user.
WARNING: This manual provides essenal instrucons for the
proper operaon, inspecon, and care of your new Halcyon lighng
product. Because Halcyon's lighng systems ulize patented tech-
nology, it is very important to take the me to read these instruc-
ons in order to understand and fully enjoy the features that are
unique to your specic model.
Copyright Noce
This owner's manual is copyrighted, all rights reserved. It may not, in
whole or in part, be copied, photocopied, reproduced, translated, or
reduced to any electronic medium or machine readable form without
prior consent in wring from Halcyon Manufacturing, Inc.
©2010 Halcyon Manufacturing, Inc.
r
!
p
!
p
!

3
Halcyon Explorer, Eos & Apollo Lighting Systems
Halcyon Lighting Overview 4
Primary Lighting Systems 5
21 w HID Light Head Operation 8
12w LED Light Head Operation 9
Bulb Replacement: 21 w HID 10
Canister & Lid 11
Halcyon Power Systems 12
Battery Charging 13
Battery Storage 15
Burn Testing 16
Transporting 17
TroubleshootingYour Halcyon Light 18
Halcyon NiMH Battery FAQ 22
HMI Instructions and Troubleshooting 24
Appendex 1: System Burn Times 25
Appendex 2: Halcyon Warranty Information 26

4
Congratulaons on your purchase of a Halcyon primary light. At Halcyon
we appreciate the faith your choice places in our products. Like the rest
of the Halcyon line, the Explorer, Eos and Apollo lights were created out
of a very real need for a lighng instrument capable of withstanding the
rigorous demands of exploraon diving. Formed by some of the world's
leading explorers, Halcyon is dedicated to establishing a link between acve
underwater explorers and the manufacture of precision diving equipment.
Who beer than leading explorers to design and test your life support
equipment? We've spent more than a decade of careful renement and real
world tesng in developing your Halcyon light, and we are proud to count
you among our select group of demanding customers. It is an instrument
that we would not hesitate to take from the storeroom shelf directly to the
water for an exploraon dive.
Every Halcyon primary light is individually inspected and pressure tested to
300 feet/91 meters.
Halcyon's three primary light lines meet the needs of every level diver
and every imaginable dive environment. The Explorer HID line ulizes a
reliable and brilliant 21-wa HID light head with NiMH baery technology
and tougher-than-steel Delrin to produce an exploraon grade system that
is the benchmark for underwater lighng instruments. The Eos LED line
incorporates a powerful LED light head with all the unique features of our
Explorer canister and baery pack to create a system that is as much at
home at the back of a cave as on a Caribbean reef. Halcyon's Apollo line of
video systems provides high-power HMI and HID illuminaon in combinaon
with our indestrucble Delrin canisters to complete your video, lm or
photographic package.
Explorer, Eos and Apollo light canisters are designed to be mounted on a
diver's waist belt, while the hands-free Goodman-style light head allows
you maximum dexterity during the dive. Manufactured from a single solid
piece of black Delrin, the tough Goodman-style head of our HID Explorer
line allows for hands-free operaon while sing cleanly on top of the diver's

5
hand. The nearly indestrucble Aluminum Eos LED light head is coated with a
robust Mil-Spec hardcoat. Both light heads use a fully adjustable handle that
is hard-coated aluminum, can be sized for cold water dry gloves,and can be
ordered with an oponal reserve mini-knife aached.
Lighng Systems Features
Halcyon Canister Features
• Industry-first sealed, watertight, Delrin lid design isolates battery
compartment from cord/light head
• Proprietary switch design with captured, silicon switch boot and
ergonomic Delrin switch protector
• Machined from solid Delrin, our canisters are sized to ease stowing of
the long hose
• Proprietary canister water trap and raised battery tray help protect the
battery pack
• Solid battery to lid connection with corrosion resistant, solid-core, gold-
plated plugs
• O-ring sealed electrical connections
• Secure battery tray with Stainless Steel rods for additional protection
• Strain-relief fittings on all Explorer cords
• Nickel-plated brass sealing glands
• Larger diameter, hands-free Goodman handle; easy to use with dry
gloves
• Stainless Steel locking latches
• Dual-voltage 110 or 220v, 4-amp charger with built-in cooling fan
• NiMH batteries
• Lifetime canister warranty
• Depth rated to 300-ft / 90-m
• One-piece canister maintains maximum
reliability
Explorer 21-wa HID Light head
• The Halcyon 21-watt HID shares all the
quality features common to our range
of Explorer canisters with a uniquely
designed HID light head.
• Locking bulb design eliminates the risk
of dislodged bulbs and sporadic ignition
problems.
• High-temperature polymer (PEEK)
nearly eliminates risk of socket damage
common within the competition.
• New, brighter bulb with a shorter stem
and protection sleeve reduce risk of breakage.
• Includes the time-tested Goodman handle and Halcyon reflector.

6
• Adjustable light beam
• Choice of NiMH battery pack size (4.5, 9, or 13.5 amp)
• Goodman handle with optional Exploration upgrade with mini-knife
available
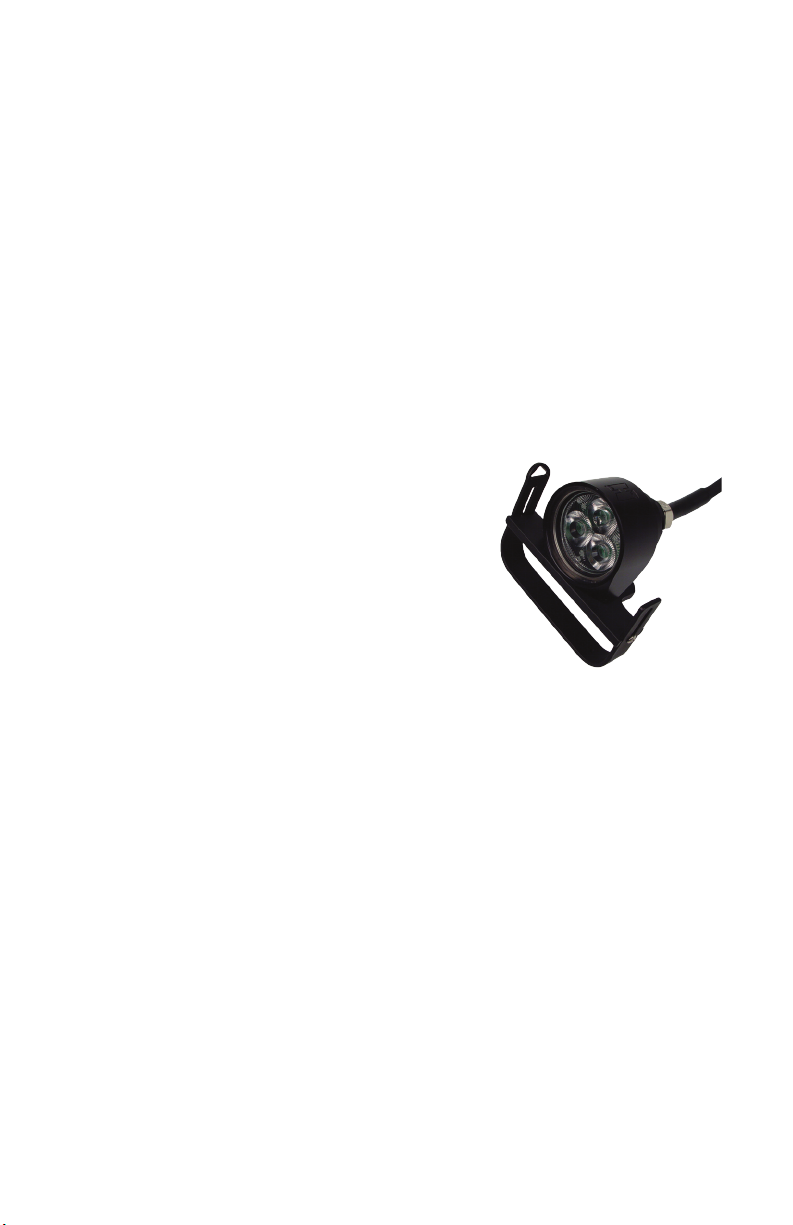
Eos LED Light head
• The Eos Explorer shares all the quality features common to our range of
Explorer canisters while enjoying a uniquely designed LED light head.
• Advanced LED array provides powerful
output in a small, attractive form; full
power output equals 600 Lumen.
• Lux rating at one meter is 10,700 at three
meters, 1,450 and at five meters, 530.
• High-quality, aluminum light head with a
Type 3, Class 2 Mil-Spec hard coat.
• Aluminum light head optimizes heat
dissipation while protecting LED
electronics.
• High-quality LEDs are rated for
approximately 20,000 hours and protected
by a nearly indestructible light head.
• The dual-intensity LED allows an option
to double battery run time (see run time
chart in Appendix 1). Simply flip the power
switch on/off quickly to toggle between
intensities.
• The built-in thermal protection circuit prevents the LED array from
overheating when out of the water.
• The Eos Goodman handle features an innovative bolt snap attachment
point.
• The light head body provides a rear bolt snap
attachment option.
Apollo HID and HMI
• Apollo series includes the Halcyon canister features.
• HMI has been fully upgraded with hardcoat aluminum
ballast housing, Delrin battery canister, 24v 13.5ah
NiMh battery pack and nearly neutral design.
• HMI and HID light heads specifically crafted for video,
film and photographic applications.
HID Lighting Systems
High Intensity Discharge lamps produce a brilliant white light while drawing
7
a fracon of the power of a halogen lamp. HID has quickly become the
standard for exploraon-grade lighng systems. Halcyon's Explorer and
Apollo lights require very lile aenon beyond the care given to a halogen
light. Although it produces 5% of its output when rst ignited, the HID light
requires a few seconds (usually 15-20) to produce full output. Also, if power
to the lamp is lost or turned o (such as with an underwater pluggable
cord), the light ballast must be allowed a brief period to reset before being
reignited. Halcyon HID lights only require a brief 5 - 10 seconds.
The ballast in an HID lighng system provides the proper starng voltage to
strike and maintain the arc, and it regulates the proper current to the lamp
once the arc is established. Ballasts are not interchangeable among dierent
types of HID lamps. A ballast design incorporates electronic circuitry to
provide specic lamp/ballast operang characteriscs.
With adequate care as outlined in this manual, your HID lamp should last
approximately 750 hours.
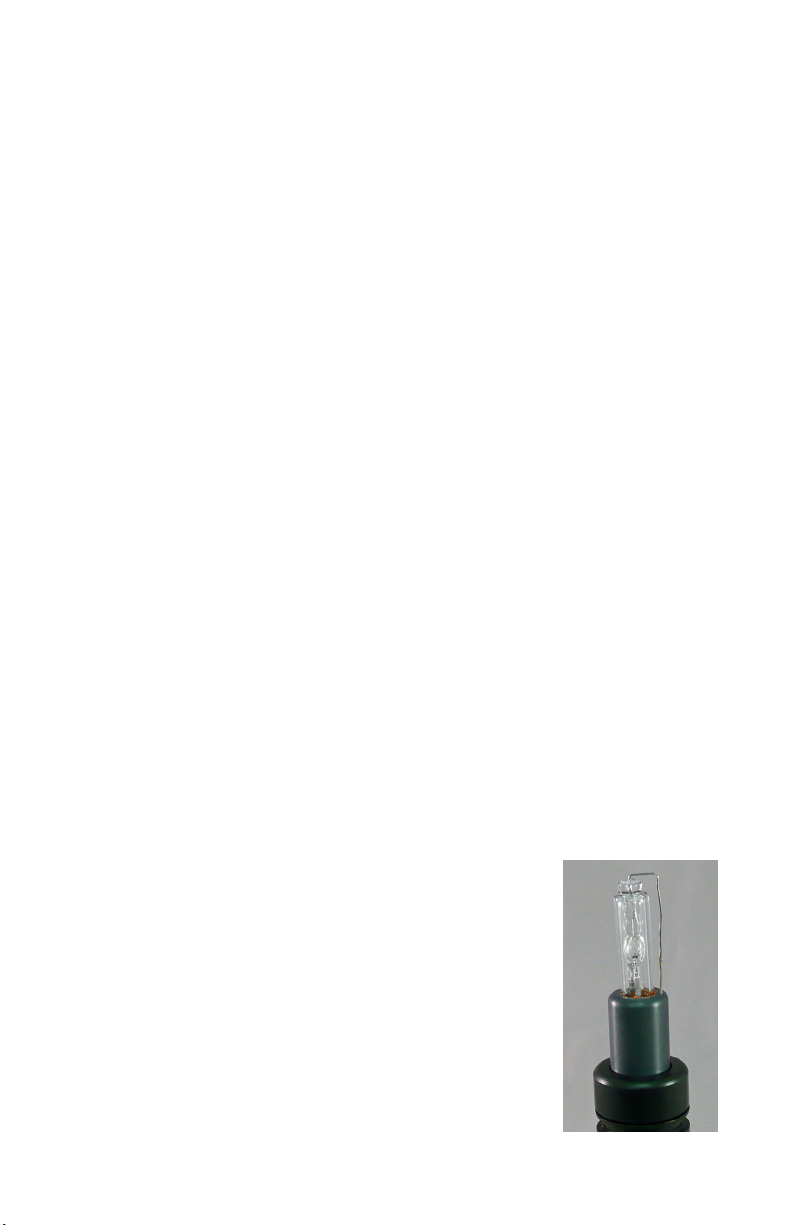
Special Considerations for HID Lighting Systems
The light emied from the HID arc tube is intense and appropriate safety
precauons relang to exposure protecon are required. Metal halide
bulbs operate at very high temperatures and pressures. The glass lamps
should be handled with care giving special aenon to the quartz arc tube.
The Halcyon HID light is a DC lamp; proper electrical wiring polarity must
be observed to prevent damage to the lamp. Only cered Halcyon repair
technicians are authorized to work on Halcyon products; non-cered work
voids your Halcyon warranty.
CAUTION: Ultraviolet, visible and infrared radiaon is emied from metal ha-
lide lamps. Possible skin or eye irritaon can result from exposures exceeding
15 minutes. Do not stare at exposed lamp in operaon. During operaon, the
bulb should be enclosed in a housing to prevent injury. Do not remove bulb
from equipment unl it has cooled. Never handle the bulb when it is operat-
ing. Keep your face away from the light head during ignion and operaon.
Protect the arc tube when handling the lamp. Keep
the arc lamp clean. Do not touch the arc tube of the
21 wa HID, the inside surface of the reector and
the connecng wires. Contaminaon can degrade
lamp performance or cause premature failures. If
necessary, clean the lamp by wiping with a lint-
free towel. Any interacon with the bulb should be
conducted very carefully. Bulbs break easily when
handled improperly and are not covered by warranty.
While HID bulbs last considerably longer than
halogen bulbs, you should be aware of several
r
!
21 watt HID Bulb

8
characteriscs that indicate a bulb is approaching the end of its lifespan.
Inial symptoms of end-of-life are characterized by low light output and/
or intermient starng. Visual signs include blackening at the ends of
the arc tube and electrode p deterioraon. Note that HID bulbs contain
metals, including mercury, that are harmful to the environment. Please be
responsible in arranging for proper disposal of an HID bulb.
The bulb and ballast are sensive to external operang temperature.
Although HID light technology doesn't generate heat equal to that of a
halogen light, it should be treated like any other dive light. The HID lamp
should only be operated while in the water, to provide proper cooling for the
lamp assembly. While transporng your HID light, please don't leave the light
in direct sunlight or in a car's interior on a hot day.
21 watt HID Light Head
Halcyon's workhorse light, the 21 wa HID, allows full adjustability and easy
bulb changes in a convenonal test tube style design. Light output is similar
to a 100 wa halogen light at a fracon of the power consumpon. Halcyon
21 wa HID lights include our exclusive ultra-bright reector. We’ve designed
the parabola of the reector specically for diving applicaons, where a
sharp spot is benecial for signaling. The surface is spun and polished to
our specicaons and will not chip or ake like metal lm vacuum-coated
reectors. Combined with the extended protecve cowling on our light head,
the Explorer lights throw out an intensely focused beam of bright, white light
that you can rely on in the most challenging of situaons.
21 watt HID Light Head Operation
The one-piece machined Delrin slug is temperature resistant and completely
non-corrosive. The slug assembly consists of a bulb socket, bulb, test tube
and cord. The bulb slug contains three O-rings. The two O-rings closest to the
bulb actually provide the water-ght seal while the base ring cushions the
glass tube.
The focus of your light may be set by loosening the locking screw on
the Goodman Light head and moving the bulb slug assembly backward
or forward in the light head. To avoid the potenal of breaking the bulb
covering, be careful not to ghten the screw down on the glass tube. The
focus should be set so that the beam forms a ght circle several feet in front
of you, allowing for brightest illuminaon and more convenient signaling to
one's dive buddy.
Never leave your light on while at the surface! Without the dissipang eect
of the water, the heat generated by the bulb can accumulate in the light
head, damaging the assembly's components.
Should the bulb assembly become dicult to focus, make certain that
the nylon adjustment screw is loose and not binding the assembly's
9
movement. Dirt may become trapped along the focusing barrel, creang
fricon between the test tube and light head. To clean the dirt from the
bulb assembly, simply loosen the locking screw and push the bulb assembly
out toward the cord. Clean the light head and bulb assembly. Be careful not
to pull a stuck assembly out by the cord while underwater as the tube may
come free from the assembly, ooding the light. The groove on your light
head's bulb assembly will prevent the unit from being accidentally pulled out
from the light head by an entangled cord.
LED Lighting Systems
The promise of LED technology that can fully replace HID lighng just took a
step forward with Halcyon’s Eos primary light. The new Eos capably blends
numerous desirable features with a focused light output exceeding the
10-wa HID. The Eos also reduces baery consumpon with an ecient
array of dual-intensity LEDs and a quick ip of the switch more than doubles
the baery’s run me. A machined aluminum head shields a nearly
indestrucble LED light array with an expected
lifecycle of 20,000 hours.
The Eos LED primary light has a voltage
protecon circuit to keep the baery voltage
from dropping to a level that may be harmful
to the baery pack. This circuit is acvated at
approximately 9.8 volts and will cause the light to
alternate between normal intensity and notably
reduced light output. This “icker” exists as a
warning to indicate the light is nearing its capacity. Because the reduced light
output decreases the draw on the baery, your light might connue in this
fashion for approximately 30 minutes (depending on the baery, light output,
temperature etc). The light will shut o completely as nears 9.4 volts. This
cuto will prevent damage to your baery.
The Eos LED primary light is also ed with a temperature protecon circuit
to prevent the diodes in the LED from overheang; this will help ensure
maximum LED longevity. The temperature protecon circuit will trigger a
reducon in light output similar to the low voltage cuto. In this case, the light
reduces output by 50%. It will alternate between normal and 50% output unl
the heat problem is resolved. Overheang can be most quickly resolved by
immersing the light in water. Ideally, the Eos, like all other dive lights, should
not be used at the surface for any extended period. It is unlikely that your Eos
LED should ever experience an overheang situaon while used underwater.
Halcyon has taken great strides to ensure your Eos LED will operate awlessly
without any addional adjustments. The LED module and the unique
aluminum light head work as a unit to provide the Eos with opmum heat-
syncing ability; this together with proper alignment help ensure maximum

10
light output. Please do not aempt to disassemble the light head. Do not
remove the glass lens or tamper with the LED module or electronics. Taking
apart your Eos will void the warranty and may damage the internal circuitry of
the LED module.
Eos LED Light Head
The Eos features two aachment locaons for bolt
snaps. One on the light head which is similar to the
21 and 50-wa HID light heads. The second e-o
point is cleverly designed as a Halcyon chevron and
is located on the Goodman handle.
Video Light heads
Halcyon's Apollo series are available with dual/single lamp HID and HMI
light heads. Dual head Apollo systems are ready for mounng on housing
arms with standard hardware. The HMI lamp is truly an underwater moon
picture studio lighng instrument, with output exceeding that of a 1,000 wa
halogen burning at a solid 5,600K.
Halcyon Bulb Replacement
21 watt HID Bulb Replacement
Should the bulb in your Halcyon 21 wa HID light become damaged, it can
be easily replaced by following these simple steps:
1. Remove the Goodman handle and reector assembly from the light head.
2. Carefully remove the bulb cover (test tube) from the slug assembly. Pull
the cover straight o; a twisng acon is more likely to break the glass tube.
It is advisable to use a protecve barrier such as a leather glove or heavy rag
to protect your hand from a possible break in the glass lamp cover. Be espe-
cially careful with the HID bulb as care needs to be used to prevent breaking
the bulb.
3. Visually inspect the bulb (HID) for damage. To remove the bulb from the
ballast assembly, unscrew the bulb retaining ring. Be careful not to drop the
bulb as the retaining ring is taken o. When the ring is removed grasp the
lamp base and remove the bulb from the socket.
4. Open the package containing the new bulb. Grasp the bulb base and
insert the bulb into the socket. Replace the bulb retaining ring, nger ght.
(See Figures 1-3) Do not overghten.
5. Wipe the bulb assembly O-rings clean with a cloth. Wipe out any moisture
Other manuals for Explorer
1
This manual suits for next models
2
Table of contents
Other Halcyon Diving Instrument manuals


