7
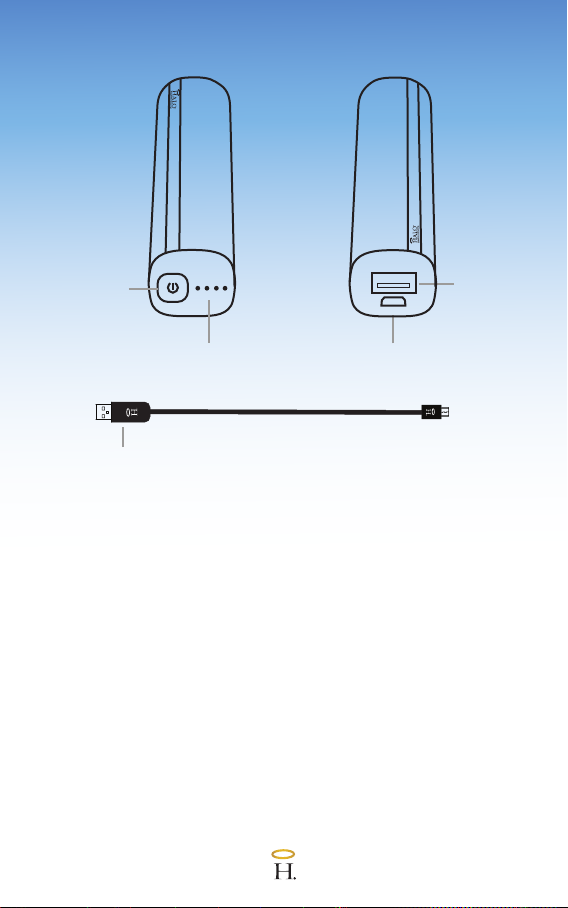
Turning your HALO Pocket Power 3000 ON/OFF
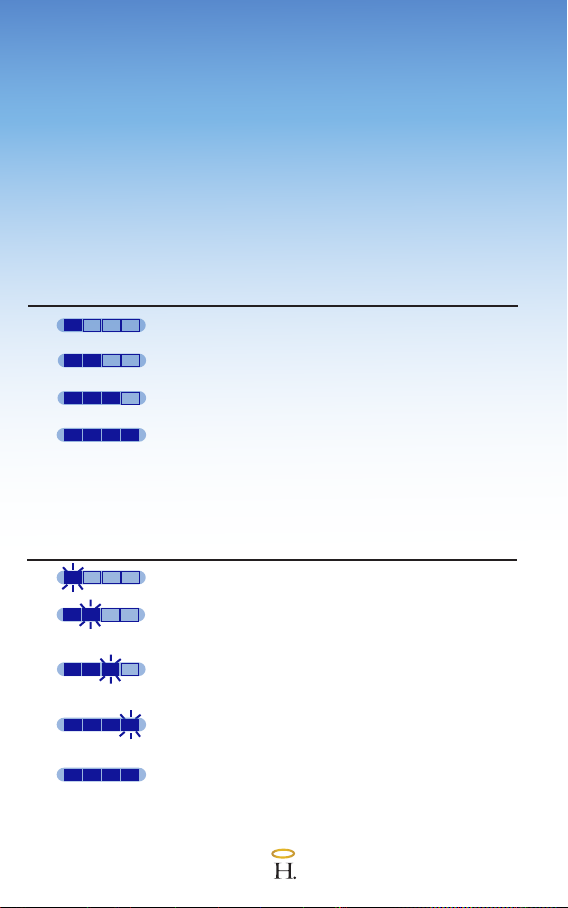
To turn on, press the power button, and the LED lights on
the side of your HALO charger will illuminate. Press and
hold the power button for three seconds to turn off. Your
HALO charger is also equipped with an auto on/off
feature. Your charger will automatically turn on and begin
charging when an electronic device is plugged in and will
automatically shut off after 30 seconds if not in use.
Charging your HALO Pocket Power 3000
To recharge your HALO charger, using the provided
Standard USB to Micro USB cable, plug the Micro USB
tip into the charger’s 5V/1A Micro Input port. Next,
connect the USB end of the Standard USB to Micro USB
cable into the Standard USB port on your computer or
into an AC wall adapter that accepts a Standard USB
connection. Your HALO charger will automatically begin
charging. Charge your HALO charger for a full six hours.
See Demonstration 1 on Page 5 for more information.
Charging An Electronic Device Using 5V/1A Output
Port
For personal electronic devices with a Micro USB port,
plug the Micro USB tip of the Standard USB to Micro
USB cable into your electronic device. Next, plug the
Standard USB end of the Standard USB to Micro USB
cable into your HALO charger’s 5V/1A Output port. Your
HALO charger is also compatible with the charging cable
provided with your personal electronic device. To use,
plug the Standard USB end of the cable into your HALO
charger’s 5V/1A USB output port.
Storing/Handling/Cleaning
- Do not get your HALO charger wet or store in extreme
temperature conditions.
- Do not disassemble or attempt to repair your HALO
charger yourself.
- Use a soft cloth with soap to clean the exterior of your
HALO charger. Do not use liquid detergent or chemicals
of any kind on your HALO charger.
Safety Precautions
- Your HALO charger has been designed and
manufactured to ensure personal safety. Please read the
following carefully before using. Incorrect operation or
incompatibility with your personal electronic device may
result in reduced battery performance or damage.
- Carefully read the operating instructions, and use your
HALO charger correctly.
- Caution: The lithium-ion rechargeable battery used in
this charging device may present a risk of fire or chemical
burn if mistreated. Do not disassemble, expose to heat
above 212°F (100°C) or incinerate.
- Misusing or incorrectly connecting your HALO charger
may cause electric shock to users and damage
equipment. Your HALO charger may become warm under
extended high power operation. During operation, keep
your HALO charger away from materials that may be
affected by these temperatures.
- When used correctly, lithium-ion rechargeable batteries
provide a safe and dependable source of portable power.
However, if they are misused or abused, this may result
in leakage, burns, fire or explosion, causing personal
injury or damage to other devices.
Intelligent Recognition
Your HALO charger is programmed with an intelligent
recognition system to achieve higher compatibility for
charging different mobile phones. If it does not charge
when connected to your mobile phone, please restart your
HALO charger.