H&B DNX-8620 User manual

1
TABLE OF CONTENT Page
Content 1
Warning & Importance 2
GeneralInformation 3
1.InformationofDisc 3
2.SelectaDVDdisc 4
3.SupportedFormats 5
4. Check the items in the package 6
5. Check the Operation Environment 6
6. Panel Description
1.FrontPanel 7
2.RearPanel 7
3. Remote Control 8-9
Preparation
1. Checking the Operating Environment 10
2. Preparing the Remote Controller 11
3. Connecting the Network DVD Player
3.1 Connecting to TV set 12
3.2 Connecting to TV with Component Out or DVi 12
3.3 Connecting to TV & Stereo Amplifier 13
3.4 Connecting to SCART 13
4. Local Area Network (LAN) Connection 14
5. Install Medialink Application Software 15
6. Checking the IP Address in the Computer 15
6.1 – 6.5 Setting Network DVD Player forfirsttime 16-20
Playing a File in from the computer 21-22
Reference on Network DVD player screen
HowtoaddPCstation 23
How to modify the PC connection settings 23
How to delete PC station 24
General setting
1. Options 25
2. IPConfiguration 26
3. WIFIPageSetup 26
4. TIMESetup 26
5. UpdateROM 27
6. DVDSetup 28
7. PlayaDisc 28
8. Playing and browsing Files over the Network 29-32
9. Playing and browsing files from USB device 32
10. PictureSetup 33
Troubleshooting 34-35
When Network DVD Player cannot connect to a Server (Computer) 36-37
Glossary 38-39
Warranty & Customer support 40
Remote control operations 41-42

WARNING
TO REDUCE THE RISK OF FIRES AND ELECTRIC SHOCKS, DO NOT EXPOSE THIS UNIT TO RAIN OR MOISTURE
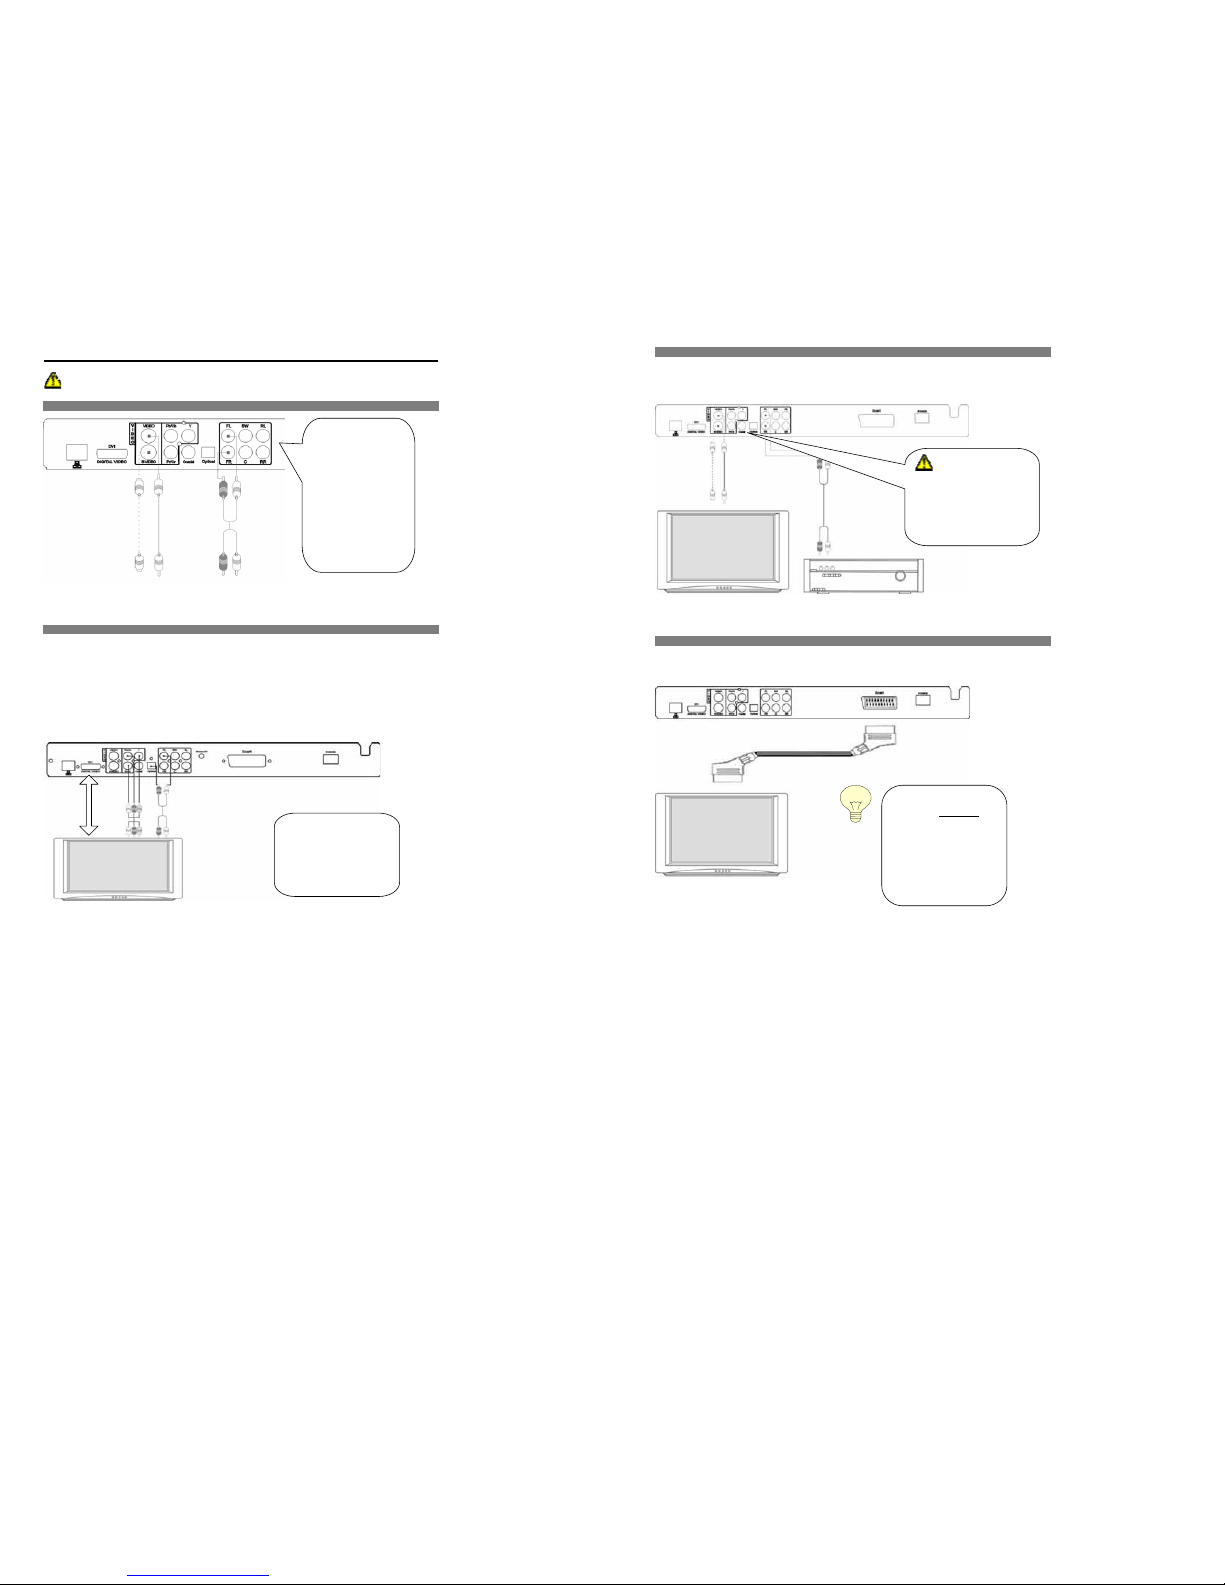
REFER SERVICING ONLY TO QUALIFIED SERVICE PERSON
IMPORTANT
•Read through this instruction manual before installation and use.
•Do not touch the power plug with wet hand.
•When disconnecting the power cord from the power outlet, hold the plug, do not pull the wire.
•Switch off the main power when the unit is not in use. (Disconnect the power plug from the power outlet when you do not intend
to use the unit for a prolonged period of time.)
•Before moving the unit, remove the disc from the unit’s tray first.
•Do not open the cover or touch any of the components inside the unit.
•Do not install or operate the unit direct exposed to sunlight or nearby objects radiating heat that may lead to overheat and
dangerous to the unit.
•Do not install or operate the unit to moisture or humidity that may affect the laser head.
•Install the unit on flat surface with good air circulation. Do not cover the ventilation holes on the unit by any kind. Otherwise, the
unit would possibly overheat and malfunction.
•Wipe the panel and case with soft dry cloth only. Do not apply any kind of thinner, alcohol or sprays when the cleaning of the
unit.
CAUTION:
To reduce the risk of fires and electric shock, do not remove the cover of the unit. Refer
servicing only to qualified person
This lighting flash arrow symbol in a triangle is intended to alert users to the presence of non-insulated high voltage within
the product’s enclosure that may be of sufficient magnitude to constitute a risk of electric shock to person
The exclamation point symbol in a triangle is intended to alert users to the presence of important operating and
maintenance instructions in the literature accompanying the unit
CLASS 1
LASER
PRODUCT
The marking of products using lasers. The marking will be shown at the rear panel of the unit, means the unit have been
classified as Class 1, and are utilizing laser beams that are of weaker class. There is no danger of hazardous radiation
outside the unit
This product incorporates copyright protection technology that is protected by method claims of certain U.S. patents and other
intellectual property rights owned by Macrovision® Corporation and other right owners. Use of this copyright protection
technology must be authorized by Macrovision® Corporation, and is intended for home and other limited viewing uses only
unless otherwise authorized by Macrovision® Corporation. Reverse engineering or disassembly is prohibited.
RISK OF ELECTRIC SHOCK
CAUTION
3
FCC Notice
This device complies with Part 15 of the FCC Rules. Operation is subject to the following two conditions:
・This device may not cause harmful interference.
・This device must accept any interference received, including interference that may cause undesired operation.
This device complies with Part 15 of the FCC Rules. Operation is subject to the following two conditions:
FCC WARNING
Changes or modifications not expressly approved by the party responsible for compliance could void the user's Authority to operate the
equipment.
NOTE: This equipment has been tested and found to comply with the limits for a Class B digital device, pursuant to Part 15 of the FCC
Rules. These limits are designed to provide reasonable protection against harmful interference in a residential installation.
This equipment generated uses and can radiate radio frequency energy and, if not installed and used in accordance with the manufacturer's
instruction manual, may cause interference with radio communications.
However, there is no guarantee that interference will not occur in a particular installation.
If this equipment does cause harmful interference to radio or television reception, which can be determined by turning the equipment off
and on, you are encouraged to try to correct the interference by one or more of the following measures:
- Reorient or relocate the receiving antenna.
- Increase the separation between the equipment and the receiver.
- Connect the equipment into an outlet on a circuit different from that to which the receiver is connected.
- Consult the dealer or an experienced radio/television technician for help.
FCC CAUTION
Properly shielded the grounded cables and connectors must be used for connection to host computer and / or peripherals in order to meet
FCC emission limits.
For Canadian model / Pour le modèleCanadien
This Class B digital apparatus complies with Canadian ICES-003.
Cet apareil numérique de la classe B est conforme à la norme NMB-003 du Canada.
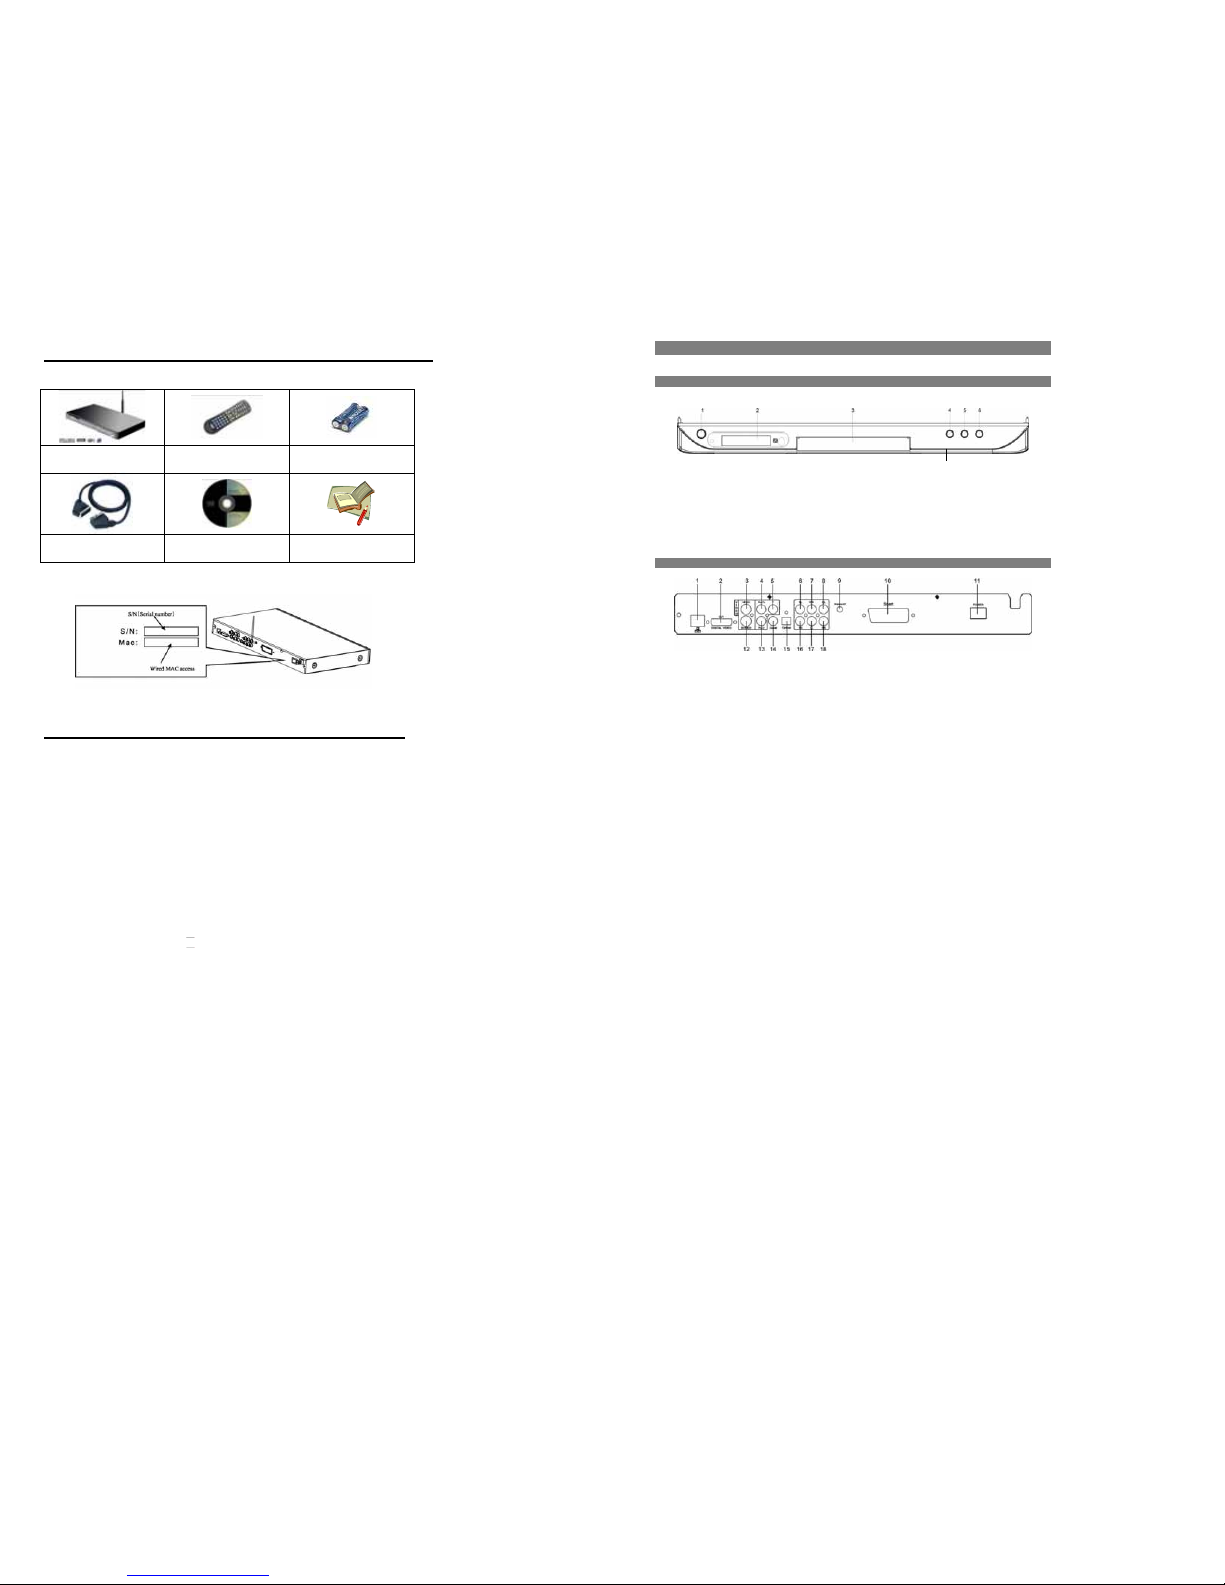
GENERAL INFORMATION
This unit can play the following types of disc and files:
DVD/DVD+-R/RW Single side / double sides/Single layer / double layers
CD-DA / CD+-R/RW
MPEG4 Version 3.XX / 4.02 or above without QPEL and GMC / Avi / ISO 9660 format
MP3 / OGG VBR/CBR
WMA version 7.0 / 8.0 / 9.0
Picture CD JPEG file
1. INFORMATION OF DISC
TYPE OF DISC DVD VCD SVCD CD
Recording method Digital / MPEG II Digital / MPEG I Digital / MPEG II Digital
Capacity
Single layer
Single side
4.7GB = 2 hr
Single layer
Double sides
8.5GB =4 hr
Double layers
Single side
9.4GB=4.5 hr
Double layers
Double sides
17GB =8 hr
650MB
74min
650MB
45min
650MB
74min
Disc size 12cm / 8cm 12cm 12cm 12cm / 8cm
Horizontal Resolution
500 lines up 240 lines up 350 lines up -
Sub titles 32 - 8 -
Sound tracks 8 2 4 -

4
2. SELECT A DVD DISC
DVD discs and DVD players are manufactured under the worldwide agreed DVD Regional Code System that the player will operate only
with corresponding disc of the same Regional Code.
DVD Regional Code:
Regional Code
Region
1
Canada, USA
2 Europe (incl. Poland, Romania, The Czech republic), Japan, Middle East (incl. Saudi Arabia, Egypt, Iran, South Africa)
3
East Asia (incl. Hong Kong, Taiwan, South Korea), Southeast Asia
4
Australia, Caribbean, Central & South America, Mexico, New Zealand
5
Africa, Former Soviet Union, India, North Korea, Pakistan, Turkmenistan
6
China
Features of a DVD disc:
Each DVD disc contains different combinations of features depending on the design and production of the disc. The following symbols
representing some DVD features:
Regional Code / Video Output System
Dolby Digital Surround
Number of audio Tracks
Number of Sub-titles
Screen modes
Child Lock
Number of Angles
REMARK
Some features of this unit are relating to the DVD disc’s software. Some features of this
unit cannot be performed if the disc does not support the features, or required special
settings. Check the features of the disc before playing it, or follow the instruction on
screen menu of the disc.
2
NTSC
DOLB
Y
D I G I T A L
2
2
16 : 9
L B
R E S T R I C T E D
2
5
3.SupportedFormats
Supported Video Formats (* The figures are peak values. As for the bit rate, both the CBR and VBR systems are supported.)
Format Wired LAN DVD CD USB 2.0 USB 1.1
MPEG-1,MPEG-2 12Mbps 10Mbps 4Mbps 10Mbps 3Mbps
MPEG4, XviD 1.5Mbps 1.5Mbps 1.5Mbps 1.5Mbps 1.5Mbps
WMV9 8Mbps 8Mbps 4Mbps 8Mbps 3Mbps
* AVI files can be played only when they are interleaved.
If a non-interleaved file is played, either video or audio will not be played properly. Make sure the file you want to play is interleaved. For
interleaving of a file during the file creation process, refer to the Help screens or manual of the encoding application you are using. * DivX
files encoded with GMC, Quarter Pixel or Adaptive Multiple Consecutive setting cannot be played.
Copyright-protected WMV9 files cannot be played.
Supported Audio Formats (* The figures are peak values. As for the bit rate, both the CBR and VBR systems are supported.)
Format Bit rate Sampling rate
MP3 64k~ 192kbps 32k/44. 1k/48kHz
WMA (excluding WMA9Pro) 64k~ 192kbps 44.1k/48kHz
PCM(WAVE) In conformance with the sampling rate shown to the right. 32k/44.1k/48kHz
Ogg Vorbis 64k~ 192kbps ~
AAC 64k~ 192kbps 32k/44. 1k/48kHz
Copyright-protected WMA files cannot be played.
Supported Image Formats
Format Resolution Display method
2048×1532 Network*JPEG
1600×1200 DVD/CD, USB
BMP 2048×1532 Network*
GIF 2048×1532 Network*
PNG 2048×1532 Network*
* Network refers to Wired/Wireless LAN connection.
Limitations on Video File Size
Format Maximum file size
AVI(MPEG-4, XviD) 2GB
MPEG Varies in accordance with the format specification of the disk in which the file is saved.
(Example: 4 GB if the disk format is FAT32, or 2 TB if the disk format is NTFS)
WMV9 Varies in accordance with the format specification of the disk in which the file is saved.
(Example: 4 GB if the disk format is FAT32, or 2 TB if the disk format is NTFS)

4. Checking the Items in the Package
Select the check boxes to confirm that all items are included in the package. Should you find any missing item, please contact your distributor.
DNX-8620 + WiFi antenna Remote control 2x 1.5V Batteries
SCART Cable CDROM PC User Manual
Make sure to write down the Serial number and the MAC address of your player at the last page of this manual for future reference.
5. Checking the Operating Environment
The types of computers that can be connected to the DNX-8620 Player and supported operating environments are specified below.
Check the model and operating environment of your computer once again.
Types of computers that can communicate with the DNX-8620
Supported models Supported operating systems
DOS/V machine Windows XP
Windows 2000
Windows Me
Windows 98 Second Edition
Other required equipment
Wired LAN RJ45 type connector on PC and 10/100 PCI Ethernet interface
(or) WLAN 802,11 Wireless WiFi adapter installed (B or G)
CD-ROM drive Required for installing the support software provided in the CD-ROM.
Devices connected to the USB port
USB mass storage devices formatted with FAT (16) or FAT32 File System
7
6. PANEL DESCRIPTION
1. FRONT PANEL
1. Power Standby
2. Display
3. DISC Tray .
4. Open / Close
5. Play / Pause
6. Stop
7. USB Port
2. REAR PANEL
1. LAN SOCKET
2. DIGITAL VIDEO INTERFACE - DVI OUTPUT (Optional)
3. VIDEO OUTPUT
4. YpbPr/YcbCr VIDEO OUTPUT – Pb/Cb
5. YPbPr / YcbCr VIDEO OUTPUT – Y
6. 5.1 CHANNELS /STEREO AUDIO OUTPUT – FRONT LEFT
7. 5.1 CHANNELS –SUBWOOFER AUDIO OUTPUT (optional)
8. 5.1 CHANNELS –REAR LEFT AUDIO OUTPUT (optional)
9. WIRELESS ANTENNA OUTPUT
10. SCART OUTPUT
11. POWER CORD
12. S-VIDEO OUTPUT
13. YPbPr / YCbCr VIDEO OUTPUT – Pr/Cr
14. DIGITAL COAXIAL AUDIO OUTPUT
15. DIGITAL OPTICAL AUDIO OUTPUT
16. 5.1 CHANNELS / STEREO AUDIO OUTPUT – FRONT RIGHT
17. 5.1 CHANNELS – CENTRAL AUDIO OUTPUT (optional)
18. 5.1 CHANNELS – REAR RIGHT AUDIO OUTPUT (optional)
7

8
3. REMOTE CONTROL
7. CURSOR
Press the buttons moving UP、DOWN、LEFT、RIGHT
in the Unit/Disc’s function Menu.
For Photo CD, press Right/Left Cursor to rotate the
photo.
8.RETURN
RETURN to previous page
Return to previous page of the unit/disc function menu or
Exit.
Return to Menu when PBC is on during VCD playback.
9.PREVIOUS
Skip to the previous chapter/track
10. REPEAT A-B
Repeat playing back a selected section A->B
A-> Start
Press the button at the beginning of the desired section
A
B-> End
Press the button at the end of the desired section,B
Cancel the setting
Press the button again to switch off the setting,back to
normal play
To clear the menu bar display,press DISPLAY button.
11. REV
Repeat pressing the SEARCH button on the remote or
turning the SEARCH switch on the unit to change the
SEARCH speed.
Press ►button to resume normal PLAY.
(This function is not applicable for XviD/MEPG4 discs.)
12.REPEAT
Repeat playing a selected CHAPTER/TITLE of DVD
disc, or TRACK/DISC of other disc types.
DVD Mode
Repeat pressing the button to select REPEAT mode,
CHATPER / TITLE;
Other disc types mode
Repeat pressing the button to select REPEAT mode,
TRACK / DISC;
13.SLOW REV
SLOW REV (1/2X、1/4X、1/8X)
Repeat pressing the button to change the SLOW motion
speeds and press PLAY button back to normal PLAY
mode.
14.INFO
Go to configuration page
15.TITLE
Go to DVD title menu(DVD only)
1. POWER
Press this switch to turn on/off this unit or set this unit in standby
mode.
2. ALPHANUMERIC KEYS
PROGRAM NUMBER ACCESS.
Select the item or settings
3. CLEAR
Clear the entries while entering the URL.
4. TV MODE
VIDEO SYSTEM AND OUTPUT SELECTION
(NTSC/PAL; S-VIDEO.YPBPR/RGB
5. SETUP
Go to setup/configuration page
6. PBC(VIEW DISPLAY)
PLAYBACK CONTROL(Karaoke VCD only)
Simply press PBC button to turn it on, the PBC menu will appear
on the TV screen.Press the Numeric keys and then ENTER
button to choose the Disc track you wish to play.
VIEW DISPLAY: ON SCREEN DISPLAY
Cureent status is shown such as
Title,Chapter,Time,Audio,Subtitle,Angle.etc.
9
16.EDIT/PROGRAM(URL)
Programming the play list files. (direct Webpage access)
17.ANGLE/ROTATE
VIEW ANGLE
Repeat pressing the button to select different VIEW ANGLES
available from DVD disc.
TO ROTATE THE PHOTO WHEN PLAYBACK JPEG FILES.
Press Forward/Rewind to turn directions.
18.SHUFFLE
Random playback of ISO/data CD
19.OPEN/CLOSE
Open/close the disc tray
20.SELECT
Browser — It acts as Num Lock on the Keyboard while entering
the URL.
21.VOLUME +
Press “ Vol + “ to turn on the audio volume.
22.MUTE
TURN OFF THE VOLUME
Stops the output of the AUDIO signal during playback.
23.VOLUME –
Press “VOL – “ to turn down the audio volume.
24.ENTER
CONFIRM AN ENTRY
Confirm a setting entry in the Unit/Disc’s function menu.
25.MENU
DISC MAIN MENU
Stop the unit, back to the disc Menu or beginning of disc.
26.PLAY
PLAY-- NORMAL
27.NEXT
Skip to the next chapter / track
28.STOP / PRE-STOP(ONLY FOR DVD PLAYBACK)
Press ■once to stop the unit, memorizing the stopping position.
Press ►to continue playing from the position that it stopped.
Press ■again to completely STOP the unit.
29.FORWARD
FORWARD: 8X for MP3/CD/VCD/and 8X,16X,32X,48X for DVD
Repeat pressing the SEARCH button on the remote or turning the
SEARCH switch on the unit to change the SEARCH speed.
Press ►button to resume normal PLAY.
(This function is not applicable for XviD or MEPG4 discs).
30.PAUSE / STEP (The unit will mute when PAUSE)
Pause the unit from playing temporarily
Press the button continuously to play forward frame by frame.
Press ►button to resume normal PLAY.
31.SLOW FWD
SLOW FORWARD(1/2X,1/4X,1/8X)
Repeat pressing the button to change the SLOW motion speeds
and press PLAY button back to normal play mode.
32.SUBTITLE
SUBTITLE LANGUAGE
To change the subtitle languages available from DVD disc.
33.AUDIO
DVD AUDIO TRACK
Repeat pressing the button to select up to 8 dialogues available
from DVD disc.
Repeat pressing the button to select STEREO, LEFT and RIGHT
channels on VCD disc.
NOTE: This function does not support other disc types.
34.SEARCH
GO TO SEARCH
> DVD MODE
Pressing the CURSOR and Numeric buttons to select search
mode, Title, Chapter and Time modes. Press ENTER to confirm.
> MPEG4 mode and VCD(PBC is OFF)mode
Pressing the CURSOR and Numeric buttons to select search
mode, Title, Chapter and Time modes. Press ENTER to confirm
The unit starts playing at the sectioned setting.
Not applicable in MP3/CD/Photo playback.
35.ZOOM
ZOOM PICTURE
VCD & DVD mode – press ZOOM to enlarge the picture and
position of zooming.
MPEG4 & Picture CD – press to adjust the size and position of
zooming
Special Function buttons used on the WEB
A-B
Go back to the Home Page.
REPEAT
Go back to the PLAYER USER PAGE while browsing the WEB or
computer files.
INFO
The information of the current website status will be shown.
URL
Open the URL bar allows to entering the website or hyper link.
SHUFFLE
Go back to the previous page on the WEB.

10
1. Checking the Operating Environment
The setup will vary depending on the environment in which you will be using your Network DVD Player. Select the applicable
environment from the options explained below.
1. Using the Network DVD Player as a standalone DVD/CD player
When you connect the Network DVD Player to a TV to view DVDs and CDs (without any kind of network connection)
2. Using the Network DVD Player to play the video, audio and image files stored in your computer via network
(with DHCP server)
When a DHCP server (broadband router, etc...) that automatically assigns the IP address on the network to which the Network
DVD Player is connected. Use Wireless or Straight Lan cables.
3. Using the Network DVD Player to play the video, audio and image files stored in your computer via network
(without DHCP server)
When a DHCP server (broadband router, etc.) that automatically assigns the IP address is not available on the network to which the
Network DVD Player is connected. Use Wireless or Crossover Lan cable.
11
2. Preparing the Remote Controller
Set the batteries in the remote controller.
LOADING BATTERIES INTO THE REMOTE CONTROL
•Remove the battery compartment cover.
•Load two AAA batteries into the battery compartment.
•Make sure that the batteries have been inserted in the right polarities matching to the symbols +, - as indicated in the
battery compartment.
•When replacing batteries, replace both batteries. Do not mix new and used batteries operating together; otherwise, the
operation lifetime will be much shorter than normal.
•Do not dispose batteries as normal rubbish. Be environment friendly, dispose batteries according to the Government’s
regulation.
•Remove the batteries if you do not intend to use the unit for a prolonged period of time.

3. Connecting the Network DVD Player to the TV
The DNX-8620 should be turned off and unplugged when making connections!
3.1 CONNECTING TO TV SET or FLAT PANEL MONITOR
If the TV set support S-Video or DVI, using S-video or DVI cable connects the unit’s S-Video or DVI output to the TV’s S-Video or DVI
terminal for the better picture quality.
OPTIONS PAGE ÆVideo Setting ÆHDTV ÆSAVE
3.2 CONNECTING TO TV with Components out or DVi
Connect the unit’s YUV (YCbCr/YpbPr) output to the TV’s YUV (YCbCr/YpbPr) input.
Or
Connect the unit’sDVi output to the TV’s DVi input.
Connect the unit’s Audio output (Front), Left and Right, to TVs Audio input terminals Left (white) and Right (Red).
Press the SETUP button on the remote control:
OPTIONS PAGE ÆVIDEO SETTING ÆComponent ÆSAVE (for YUV Component)
or
OPTIONS PAGE ÆVideo Setting ÆHDTV ÆSAVE (for DVI)
(1) Using A/V cables connect the
unit’s video output to the TV’s
video input terminal (yellow
coding of cable).
(2) Using supplied AV cable
connect the unit’s Audio output
(Front), Left and Right, to the
TV’s audio input terminals Left
(white) and Right (Red).
(3) Then use the remote to
update the Setup: OPTIONS
PAGE ÆVideo Setting
ÆCOMPONENT ÆSAVE
TIPS: Make sure to follow color
coding of cables.
For Video Interlaced connection
mode, you can chose between YUV
Component and DVI.
For best performance, prefer DVi
connection.
You can use HDMI and VGA
adapters to convert the plug type in
accordance to your TV
13
3.3 CONNECTING TO TV & AMPLIFIER OR AV RECEIVEER
Connect the unit’s S-Video or video output to the TV’s S-Video or Video input.
Connect the unit’s Audio output (Front), Left and Right, to stereo amplifier’s input terminals Left (white) and Right (Red).
3.4 CONNECTING TO SCART
Connect the unit’s SCART output to the TV’s SCART input.
If you have AC3 or DTS
capable receiver, connect Optical
Output of DNX-8620 to the Optical Input
of your Receiver/Amplifier for best
sound quality. (Cable not included) After
connection, Run Setup on DNX-8620
remote, select Options and select Digital
Output. Select Save and exit Setup
Once connected to your
TV, Press TV MODE on
the remote until you get
a clear image.
Then set your video
parameters in the setup
and save them
permanently.

14
4. LOCAL AREA NETWORK(LAN) CONNECTION
The DNX-8620 should be turned off and unplugged prior to new connections!
A: Wired Networks / Infrastructure / with Hub or Router
Connect to your already installed network using ‘Category 5’ straight cable (not included) with RJ45 connectors on
each end.
Connect the LAN Port of DNX-8620 nto the LAN Port of your Router or Hub o.
B: PC direct connection / Ad-Hoc / without Hub or Router
Use “cross-over” RJ45 cable (not included).
Connect the LAN Port of DNX-8620 nto the LAN Port of your PC/Laptop o.
C: Wireless Networks / Install Antenna
Plug and screw the wireless antenna (attached accessory in standard packing) on the unit’s back panel.
After making this connection refer to the Section: “Installing Medialink Application Software”.
DHCP is used for automatically assigning
temporary TCP/IP addresses to PC stations
(Network DVD player).
If you do not know if your Router/Network has
DHCP function, please refer to “[Checking the IP
Address in the Computer”.
STRAIGHT
RJ45 NETWORK CABLE
CROSSOVER
RJ45 NETWORK CABLE
5. Installing Medialink Application Software
INSTALL “Medialink” APPLICATION provided on the Software CDROM provided:
Turn on the power to the computer and start Windows®.
Set the support software CD-Rom in the CD-ROM Driver. Double click the icon of “Medialink” to starting install the
application software.
Choose the language for the software, follow the on-screen instructions and click “NEXT” to continue the installation.
Click the finish button.
NOTE : Under WinXP® SP2, your Firewall may ask you to “UNBLOCK” Medialink application : Accept “UNBLOCK”
This completes the installation: Go to "[6] Checking the IP Address of the Computer" (P.19).
6. Checking the IP Address in the Computer
A. Automatic assign IP address
The Network DVD Player needs to have his own IP Address for communication with other computer devices.
If your computer has DHCP server enabled, the IP address of your player will automatically be assigned by the computer
B. Manually assign IP address
If the DHCP server is not enabled, you
must manually set the IP address of the
Network DVD Player in the setup menu.
First, check to see if the DHCP server is or
is not enabled as follow:
(WinXP/2000/Me/98/SE only)
9Turn on your computer
9Click “Run” in the start menu.
9Input “cmd” in the text box and
press enter to open the MS-DOS invite
screen.
9Input “ipconfig/all” in the
MS-DOS window and press “Enter”.
9The following screen will appear.
9It shows the computer IP and LAN
settings.
Check the status of “DHCP Enabled” on the screen.
=> If the setting is “YES”,then go to Step “6.3 Setting Network DVD Player for first time”. (P.18 - 20) and
skip “6.4 Setting Network DVD Player for first time” (P.19)
=> If the setting is “NO”, then you next must copy down some of the settings:
IP Address
Subnet Mark
Primary DNS
Secondary DNS
Default Gateway
Now go to “Setting Network DVD Player for first time” and follow ALL instruction to set your Network DVD
Player. (P.16-20)

16
6.1 Setting the Network DVD Player for first time
You should have done the above section: “Checking the IP Address of the computer” and have the IP settings you wrote
down available.
After making the video and audio cable connections:
Turn on the power to the Network DVD Player and your TV or monitor. You should see the Logo name of the Network DVD
player. If not, then recheck the cables, or press TV MODE on the remote several times until you get an image on the screen.
*It will take several seconds for the Network DVD Player to display.
Press the SETUP button on the remote controller.
The option-setting screen is displayed.
Press “Right” 2 times to “WIFI Setup” and Press “Enter”
Check your Network connection type and refer to the follow pages:
DNX-8620 connected to PC direct connection without Hub or Router :
=> Read from Section 6.2 and 6.4 – 6.5
DNX-8620 connected to PC through a Wired or Wireless Network (Switch / Hub / Router):
=> Read from Section 6.4 – 6.5
For the problems in making the video and audio cable connection, Please read [3] Connecting to Network DVD player (P.17-18)
17
6.2 Setting Network DVD Player for first time
DNX-8620 connected directly to PC using crossover cable connection without Hub or Router
Note: Most PCs only have one LAN Port, your broadband internet modem connection may
have to be disconnected or plugged through PC USB mode.
Please follow these instructions:
1.Connect the Network DVD player to the PC using ‘cross-over’ RJ45 cable, then turn on the network DVD player.
2.Using the remote control, press Setup to get the following screen:
3. Select the connection type used on your Network “infrastructure” or “Ad-hoc”. (Ad-hoc for PC direct connection)
4. Now select Save and push Enter on Remote Control.
4. Change each setting as follows:
Preferred = Wired
Connection = Ad-hoc
3. Use the arrow keys to navigate to
the WiFi page and push Enter. The
screen at left appear
Press”OK” to reboot the Player

18
6.3 Setting Network DVD Player for first time
DNX-8620 connected to PC through a Wired or Wireless Network (Switch / Hub / Router):
1.Select your network type (wired or wireless) in the Preferred setting.
2.Select the connection type used on your Network “infrastructure” or “Ad-hoc”. (Infrastructure for Hub/Switch config)
3.Select Security “None” if the router has no password (WEP) encryption. Select “WEP-64 bit” or “WEP-128bit”
depending on the password encryption method in your router, and input the key (password) in the text box.
Select : “Infrastructure.”
TIPS: SSID (Wireless) is the name of your
Access Point. Your DNX-8620 can automatic
get the SSID if your router has SSID broadcast
enabled.
Please INPUT SSID manually using the remote if
the name of your access point is not listed.
TIPS:
If using Wired network simply press Save
and OK to reboot.
If using Wireless (WLAN) network select
Available, and choose the access point
network name your want to join.
If your WLAN access point is not listed,
press Refresh on the remote to actualize
the list of available WLAN Access Points.
NOTE! Choosing Wired or Wireless
depends on your network type!
Click “Save” to save the setting and
press “OK”
to Reboot the player.
19
6.4 Setting Network DVD Player for first time
Settings for the IP Network address of your DNX-8620
Select “IP Config” from the setup menu and press “Enter”
These values may be incorrect in “automatic mode”. To change them to the correct values, press ”Switch to Manual”
Description on each network parameter:
IP ADDRESS : This shows the IP address of your Network Player.
How to determine a IP value for my Network player ?
- First you have to remember that an IP address identifies each peripheral on the Network. Therefore, an IP Value mut be
uniquely set for each peripheral.
This value must remain in the range of your network values :
For example; if your network peripherals IP addresses are set between 192.168.0.100 and 192.168.0.254, your Network DVD
player must be set within these values.
- Second, you have to remember that the IP address set for your Network DVD Player cannot be the same as another
peripheral on the network. Conflicts will occur in this case.
To determine if an IP address is available on the network, simply check on a PC as follow (PC must be already
connected to the network)
Under Windows, click START => RUN => type “CMD” and the MS-DOS widow opens
Type “ping 192.168.0.1” (assuming you want to check the availability of this value on the network) and press ENTER.
If the display message shows 100% packet lost, this means the address is available and can be input in the text box of your
Network Player. If the message shows 0% packet lost, this means this address is already in se. Type another one to check
again availability.
SUBNET MASK: This value is set by your network and is identical on all peripherials using the same Network. Check the
values shown on your PC by opening the connection properties of your PC Lan connection and input the same value in the text
box of your player IP Config page. (commonly 255.255.0.0 or 255.255.255.0)
PRIMARY & SECONDARY DNS: These values are set by your Internet Service Provider (ISP). Copy these values from the
properties of your internet PC connection or refer to your ISP to obtain these values.
DEFAULT GATEWAY: This value corresponds to the Gateway of your Router (IP Address of your Router). Check the values
shown on your PC by opening the connection properties of your PC Lan connection and input the same value.
Enter manually with the remote control the assigned IP Address of the player, Subnet Mask, Primary DNS,
Secondary DNS and Default Gateway by referring to the values you have checked in paragraph 6.b.
Select “SAVE” and press “ENTER” to reboot the unit
Switch to manual
if the default
values are
in
co
rr
ec
t

20
6.5 Setting Network DVD Player for first time
After rebooted, The Network DVD will detect the PC in the network automatically and shows it in opening screen.
(PS: If your PC has Firewall protection, Network DVD player maybe cannot achieve the connection to your PC. Please
read “Playing Video/Audio” to solve this problem)
PC direct connection without Hub or Router (Wireless/ WiFi):
This icon will change to blue
when the connection is
estab
li
s
h
ed
!
You should add your PC station manually if the unit
cannot
connect to your computer while using the “Ad-hoc” connection.
(1) Press “add” button in the opening screen
(2) Enter the Name of PC Station you want in aMedialink
Name position.
(3) Enter the IP for both network player and PC in fixed IP.
(4) Next, you need to establish the SSID in the network
player, press SETUP and enter WIFI to set it. Your PC
have to set the WIFI/Wireless into Ad Hoc mode and
disable Firewall. Then your computer and network player
will search for each others.
Notice: Since the unit has to search for the current PC, it will
take sometimes on searching, and the screen will freeze for
while. For more information about how to add PC station,
please refer to page .23.
Indicating accessing Medialink
Inticates Medialink is inactive
Indicates that Medialink is active
Playing a File stored in the Computer
The Network DVD Player can play movies, pictures and music stored in the computer (PC-Station).
PRELIMINARY NOTE
If your computer is using firewalls set by security software, etc., you may need to reset the firewalls before
you can use the Network DVD Player.
* For the specific setting procedure, refer to the user's manual of your security software.
Windows:
Allow MEDIALINK-server.exe to communicate through the firewalls and use the ports.
Register the desired file into Medialink :
Specify the folder containing the data you want to play, or transfer the data to the specified folder.
For details refer to “User Guide for Medialink Application software “
Turn on the power to the Network DVD Player.
(It will take several seconds for the Network DVD Player to power up)
Ifnfo Medialink Server is recognized at first startup :
If upon startup after 30secs, this example page appears - it means no Medialink server is present on your local Network.
The DNX-8620 will offer you to access a Web based generic Server : “myiHome” under the condition that the
correct IP settings (including ISP DNS values) have already been entered in the Setup menu.
1. Click on myiHome Server will post you directly to our home services.
2. If your Medialink Server installed on your home network PC is not
automatically recognized, you can also manually add it by selecting the
add button.
TIPS: Do you know DNX-8620 supports Universal Plug-And-Play (UPnP)?
When DNX-8620 is plugged into the Network, it will configure itself, acquire a TCP/IP address and announce its presence on the network to
Medialink application.

Playing a File stored in the distantComputer
Select the PC storing the data you want to play.
Select the PC station storing the data you want to play, and then press the ENTER button on the remote controller.
The PC station icon will displayed in Blue when PC Server application is ready .
If No PC station is displayed : ⇒Refer to "When the Network DVD Player Cannot Connect to a Server (Computer)" (p.41-44).
Select the type of data you want to play.
Select the type of data you want to play, and then press the ENTER button on the remote controller. ⇒The stored data (folders) of the
specified data type will be displayed.
Select the type of
Media that you
want
to access
Select
Reference on Network DVD Player Screens
HOW TO ADD PC STATION
NOTE: Network DVD Player has the function allowing user adding the PC station manually. However, User can just
follow “Setting Network DVD Player for first time” (P.16-20) to add the PC station automatically which is more
convenient.
1. Switch on the unit,
2. “MEDIALINK” menu will appear– it will search for any PC station available.
3. You can add a PC station manually by selection the “add” button on the screen.
“Computer name” Enter the name of the server computer to be connected
(The computer name must be entered only in the screen displayed by clicking New).
“IP address” Enter the IP address of the server (PC) to be connected.
“Always connect The Network DVD Player will connect to the specified server upon startup.
to this Server” However, Medialink must already be running.
TIPS:How to check the computer name (Windows XP)
Click Control Panel, click Performance and Maintenance, click System, and then click the Computer Name tab to display Full
computer name.
HOW TO MODIFY THE PC CONNECTION SETTING
Select the PC station that you want to edit and enter to Edit menu.
Edit the IP address and click save when done.
The following setting would refer to Page 15 of this User Manual, showing the details of computer’s IP Address.
Click “add” button
from “MEDIALINK”
startup page -
Enter the
desired
computer
name and IP address
- Click save when done.

24
HOW TO DELETE PC STATION
Click delete button at main menu to enter Delete menu.
Select PC station and click delete button.
25
GeneralSettings
You can set the various options regarding the Network DVD Player. Display the Setup screen by pressing the SETUP button on
the remote controller
1. Options
You can set the options listed below in accordance with the operating environment of your Network DVD Player. When all the
necessary options are set, move the cursor to Save, and then press the ENTER button on the remote controller.
SCREEN SAVER
Power saving mode. Set the time turn off the screen:
SYSTEM LANGUAGE
Set the DEFAULT Language using in the menu:
ENCODING LANGUAGE
Set the encoding language while browsing the website:
SUBTITLE LANGUAGE
Set the subtitle language while browsing the website:
VIDEO SETTING
Selecting the Video output mode
If no image is displayed on the screen while the DNX-8620 is powered ON, press TV Mode slowly until the
image appears.
As soon as the image is displayed, choose the correct Video Settings and Save before leaving the Setup
Menu
VIDEO ZOOM
Adjust the viewable area
Fit to Screen – Fit to the size of your television.
All Screen
Actual Size – The actual resolution size of the file or web.
AUDIO SETTING
Audio output setting
PCM format
RAW format
AUDIO MODE
Stereo – 2 audio channels output (Stereo Downmix)
5.1 Surround – 5.1ch Digital sound output
WMAPRO SETTING
PCM Format
RAW Format
BROWSER OPTION
(HD Mode Browser) Web Site browsing Environment selection
Enables Compact Browser. This will compact the web page size.
SOUND OPTION
Typing Sound :Key pad sound while pressing the remote control or typing characters.
Navigating Sound : Alert Sound ON while selecting the icons.
System Alert Sound : Alert Sound ON when improper or invalid entry and the fault from system.

26
2. IP CONFIGURATION
Please Read the [6.3] Setting Network DVD Player for first time to know how to set the IP address.
1. In Automatic mode, ensure that the network is also set to obtain IP automatic.
2. When finished, press the Save button on the screen and the configuration will be set automatically.
3 .WIFI Page Setting
Please Read the [6.2] Setting Network DVD Player for first time to know the setting of WIFI page.
4 .TIME Setup
Select your time zone and locations.
27
5. UPDATE ROM
1. Navigate to Update ROM icon and press Enter to be in the Update ROM page.
2. Site 1: Check Firmware Update links to http://www.myboleh.com/firmware/update.jsp. Click this link to check for firmware
updates.
Hints to get the latest firmware:
In order to update the firmware of the unit, you can also add http://www.hb-direct.com/FW8620/update.htm in your
PC’s Internet Explorer favorite links and brows this link directly from your DN-8620 Favorite Links.
Choose this link from your Internet Favorite Links list shown with your MEDIALINK application on your TV, or simply select the
“Check for Firmware updates” from the Setup/Update Rom menu of DNX-8620.
Your DNX-8620 will show the H&B webpage with the description and details of the latest available upgrades.
Simply select the upgrade corresponding to the latest Firmware Version and wait until the firmware is completely installed in
your DNX-8620.
(For more information, please contact your service center for alternative Upgrade procedures, or refer to www.hb-direct.com for
support information)
If you are not sure about your current Firmware version, simply note the reference of the firmware ID from the
bottom screen of the Setup Menu and compare it with the latest Firmware Reference shown on the H&B
Update page. If they are the same, it will not be necessary to upgrade your player
IMPORTANT NOTE ABOUT FIRMWARE UPGRADE
During Update process,
NEVER INTERRUPT the Upgrade process once it has started
DO NOT POWER OFF the player during the Upgrade procedure
ONCE THE PLAYER IS UPDATED, it will re-boot itself automatically. (You may have to re-enter all
your settings once the Upgrade is installed)
Please note that after each Firmware Upgrade, all your settings will be lost.
In order to save your Network IP Settings, we recommend you write them down in the reference table
page at the end of this manual.
TIPS: What is firmware?
Firmware refers to a software program preinstalled in
your player to control the basic functions.
The firmware of the DNX-8620 Player is stored in the
internal flash memory. It can be upgraded online to
improve stability or add new functions.

28
6. DVD SETUP
1. Navigate to DVD Setup menu and press Enter to be in the DVD Setup page.
2. In this page, there are some DVD settings for you to choose
3. When finished, press the Save button on the screen.
7. PLAY A DISC
¾Load a disc
Press the “OPEN” button on the front panel or on the remote control, to open the disc tray. Load a disc into the tray and
press the “OPEN” button again to close the disc tray.
(Note: place the disc’s label side up)
VCD PBC menu will appear on the TV screen
once VCD reading. Press the Numeric keys
and ENTER button to confirm the Disc track
you
wi
s
h t
o
p
l
ay
.
Parental Lock (level 1-8)
TV TYPE
TV ASPECT - Select the appropriate aspect ratio.
16:9 WIDE SCREEN
4:3 LETTER BOX
4:3 PAN-SCAN
SET PARENTAL PASSWORD
To set password for Parental Lock.
(Default password: 0000)
Enable Auto Play When On is set, the
Network DVD Player will automatically play the
DVD-Video or other medium set in the tray.
29
Automatic Play
The unit will take several seconds to read the disc data, and start playing the DVD, VCD or CD automatically.
Video Disk
If you enter a Video disc (MPEG4 / MP3 / Photo JPEG…), all the files will be listed alphabetically on the screen:
Press the ►orEnter button to start playing, or
Press button on the remote control to select the desired item and then press ENTER button to confirm.
8. PLAYING AND BROWSING FILES OVER THE NETWORK
After selecting the MEDIALINK PC icon from the Start page, a new
interface will be displayed showing you 4 new items
Select the corresponding item to display the following options:
1.Playing Video Files
Entering to the Video Icon, all the video files under this folder are
listed in this category.
Select one to start playback or PLAY ALL to play all the files in the list
order

30
2.Playing Music Files
Select the MUSIC category and all the music files selected in the
MEDIALINK application will be displayed.
Select the desired track to playback or select PLAY ALL to play all
the files contained in a specific folder.
3.Playing Picture Files
Select the PHOTO category and all the picture files selected in the
MEDIALINK application will be displayed as thumbnail.
Select the desired picture to display or select PLAY ALL to display
all the files in slideshow mode.
9. PLAYING FILES AND BROWSING FROM THE NETWORK
Internet Services
By entering to the SERVICES Icon, you can select four categories.
Web Bookmark
You can find here all the favorite
links
saved from you Internet Explorer PC
application.
31
Web Directory
Music Radio
9. PLAYING AND BROWSING FROM NETWORK
Podcast
You can find here
many Internet Links
that are already pre-defined in the player
(e.g. Entertainment, Shopping, etc…).
Simply click either one of them, there are
many Related Web site inside each
categories for you to choose.
This item shows Internet Radio Links that
already exists and classified in the player
(e.g. Jazz, Pop and Rock music).
Simply select one of them, there are many
Related Web site inside each categories
for you to choose.
This item shows the Best Podcast
directory & Top 10 Podcast directory.

32
Internet Explorer
By pressing the “URL” button on remote control, the command bar will appear for the web site entering. Simply press
the numerical (Alphabet) icon and then press “Enter” to confirm. The corresponding Web page will show on screen.
By pressing the “i” (info) icon on remote control, the other command bar will appear while you are browsing on the
Web. The information of the current web status will be shown in there. Choose either of the command icon for the
relevant settings and changes.
9. PLAYING AND BROWSING FILES FROM USBDEVICE
The USB 2.0 Port on the DNX-8620 can be used for media playback. Several USB devices can be used for media
playback including the following:
USB HDD enclosure / Memory Stick/USB Keychain / Multi-Card Memory Reader / USB Digital Camera…
NOTE: Other USB devices may work as well.
If you have a USB storage device, insert it into the USB port on the front of the DNX-8620. USB Devices can be
inserted at any time, the DNX-8620 does not have to be turned off to insert or remove a USB Device. Once it has
been inserted, the USB device will become available from the Log-In page within seconds. Press the ‘HOME’ button
on the remote control to access the Log In page. The USB Device will be listed based off of its name.
NOTE: When using a Multi-Card Reader, multiple USB Devices may be available from the Log-In page, each entry
supports a different media format.
Once you have accessed the USB Device you will be able to browse through any available folders and subfolders
using the remote control’s directional pad. When you find an image, audio, or video file you would like to play, press
the ‘ENTER’ button on the remote control.
NOTE: The USB port only supports FAT file system format.
Input the Website in the textbox of URL to
surf internet.
Use the remote keys to type the address
and press enter to access the desired
Webpage.
33
10. PICTURE SETUP
If the above problem happened:
1. Set the TV set’s system to the proper setting, or
2. Change the DVD unit’s output system setting as following:
- Enter the Setup Menu by pressing SETUP button on remote control
- Select Video Setup and the appropriate system. Press ENTER to confirm.
If the above DO NOT fix the problem, see TROUBLESHOOTING
IMPORTANT
IF THE IMAGE ON THE SCREEN APPEARS WITH HORIZONTAL LINES PRESS THE “VIDEO MODE” BUTTON
REPEATEDLY UNTIL YOU SEE A CLEAR IMAGE.
The unit’s TV output color mode is selectable to PALor NTSC
IMPORTANT
If the TV set is NOT multi-system, and the following happens, it could be a result of
wrong color system matching with the TV set:
Picture is distorted
Picture is black and white, no color.
Picture is not full screen, or border part of picture bas been blocked.
CONSUMERS SHOULD NOTE THAT NOT ALL HIGH DEFINITION TELEVISION SETS ARE FULLY
COMPATIBLE WITH THIS PRODUCT AND MAY CAUSE ARTIFACTS TO BE DISPLAYED IN THE
PICTURE. IN CASE OF 525 PROGRESSIVE SCAN PICTURE PROBLEMS, IT IS RECOMMENDED
THAT THE USER SWITCH THE CONNECTION TO THE “STANDARD DEFINITION” OUTPUT. IF
THERE ARE QUESTIONS REGARDING TV SET COMPATIBILITY WITH THIS MODEL, PLEASE
CONTACT OUR CUSTOMER SERVICE CENTER.

34
Troubleshooting
Problem Cause/Point to check Action
Is the power cable connected to the
power socket?
Connect the power cable to the power socket.The Network DVD Player
does not power up.
Is the rear main switch on ON position
?
Confirm that the main rear switch is set to ON position
Aren't the batteries in the remote
controller low?
Replace them with new batteries.The remote controller does
not
work.
Are the batteries connected in the
correct polarities (positive, negative)?
Set the batteries correctly.
Is the remote controller facing the DVD
?
Operate the remote controller by orienting it toward the DVD
player IR receiver
No screen is displayed. Video Output is set to a mode not
matching to the TV or monitor.
1.Press the TV MODE button on the remote controller several
times until the screen is displayed.
2.Set Video Output to match the output of the connected TV or
Monitor by referring to "Options"
Medialink Server has not been started. Check if the computer is on and Medialink Server is running.
Network DVD player cannot connect to
PC and internet in Wireless LAN.
Check the router settings. If the router has a WEP key
password then you have to input the key in DVD menu.
The PC station is not
displayed in the Network
DVD player menu.
Isn't the hub or router hindering proper
Network connection?
Connect the Network DVD Player to the computer directly
using a
cross cable and then check if the problem persists.
(If the Network DVD Player is connected to the computer
directly,
the IP addresses of the Network DVD Pla
y
er and com
p
uter
The Network DVD Player
always logs in to the same
PC station when the power is
turned on.
The Network DVD Player is set to log
in to that PC station automatically.
1. Go to the login selection screen (showing a list of server
names), which is displayed when the Network DVD Player is
started.
If the message "Cannot connect to the specified server" is
displayed, press the SERVER button on the remote controller
to return to the login selection screen.
2. Select Edit.
3. Select the name of the computer you want to cancel the auto
Login to.
4. Clear the check box of Always connect to this PC station.
A still image written to a CD
or DVD is not displayed.
The still image file you are trying to
view is not created in JPEG.
The Network DVD Player only supports JPEG,Gif, as the
format of photo data stored in a DVD/CD or Hard disk.
It does not support files written in BMP or other format.
35
Troubleshooting (continued)
Problem Cause/Point to check Action
Do not play 1.no disc
2.Disc has been loaded upside down.
3.Disc’s region code is not matching to the unit
4.Disc is not correct type to be played
5.Disc is damaged or dirty
6.Moisture may be condensed inside the unit.
1.load a disc
2.Place the disc with the label side up
3.load the Disc in correct region code
4.load the disc in correct type
5.Disc is damaged or dirty
6.Remove the disc and leave the unit power on for one or two
hours
No Picture 1.The set have no power on
2.connection is not secure
3.connection cables are damaged
1.Check the TV set has been power on, and setting at the
correct AV mode
2.Check the system connection is secure
3.Check if the connection cables are damaged
4. Press TV MODE until the image appears
Picture noise /
distorted
1.Disc is dirty or damaged.
2.Wrong setting color system of the DVD unit
or the TV set
1.Disc is dirty or damaged. Clean the disc or try another disc
2.Reset the color system of the DVD unit or the TV set
3.Try to direct the DVD unit to the TV set instead of via the
components like VCR.
Picture not full screen 1.Wrong Setting in Network DVD player 1.Select the screen format. Enter SETUP MENU
Æ(TV ASPECT)
2.Select the screen format from DVD disc menu
Cannot SKIP or
SEARCH
1.Some disc are programmed that do not allow
users to SKIP or SEARCH forward at some
sections, especially at the beginning
WARNING section
2.Single Chapter disc cannot apply SKIP
function
No sound or Sound
output not complete
1.TV and amplifier has not been power on and
correctly setting
2.TV and amplifier system connections are not
secure
3.Audio tracks output problem
4.MUTE function of the DVD, TV or amplifier
has be activated
5.Amplifier decoder don’t support the audio
format of “WMAPRO”
There will be no sound output during
REVERSE PLAY / PAUSE / STEP / SLOW /
SEARCH
1.Check the TV and amplifier has been power on and correctly
setting
2.Check the TV and amplifier system connections are secure
3. Press AUDIO button (-- / 4) select other audio tracks output
of disc
4.Check if the MUTE function of the DVD, TV or amplifier has
be activated
5.Press “setup” in remote control, move to the item of
“WMAPRO”, and change the setting from “Raw Format” to
“PCM format”.
No surround sound 1.audio output has been changed to 5.1
channels
1.Check if the audio output has been changed to 5.1 channels
MP3 disc no sound or
noise
1. program files or other data files mixed with
MP3 files in the same disc
2. Check the disc, if all the files on disc are
MP3 files
3. When program files or other data files mixed with MP3 files
in the same disc, the unit may play the non-MP3 files with
noise or no sound
4. Skip the file, or try the other file

36
When the Network DVD Player Cannot Connect to a Server (Computer)
If no server is displayed in the Network DVD Player menu, or when selecting a displayed server with the ENTER button on the remote
controller will show the message "Cannot connect to the specified server" or "Log in later," check the items listed below.
First, check on the computer and Network DVD Player if the network connection is established properly.
[Check Procedure]
[1] With the Network DVD Player menu displayed, press the SETUP button on the remote controller. In the displayed screen, select IP
Settings, and then check the IP address set for the Network DVD Player.
[2] Check if the computer is connecting to the Network DVD Player via network.
Windows
(1) Log on to the computer
(2) Click the start button. Click “Run” in the start menu.
(3) Input “cmd” in the text box and press enter to open the screen of MS-DOS.
(4) Ping the the IP address as follow to se if you get any response back.
Example: When the IP address of the Network DVD Player is 192.168.0.5 Enter “ping 192.168.0.5”, and
then press the Enter key.
(5) Check the network status from the displayed message :
Packet sent=4 Received=0 Lost = 4 (100% lost) : The distant Network DVD Player is not reachable, check your
router settings and/or cable connections
Packet sent=4 Received=4 Lost = 0 (0% lost) : Your Network DVD player has been reached, you should check
the Port settings of your firewalls and verify that MEDIALINK.exe is running on the computer.
Possible causes:
- Incorrect Network Cable model : Check if crossover cables or straight cables are in use and verify your network configuration in accordance
- Poor cable contact : Disconnect the cables from the LAN jack, hub/router cable jack and computer cable jack located on the back of the
Network DVD Player, and then connect the cables again. Check pin appearance.
- Computer is in “sleep” Mode: Computer cannot be connected under sleep mode. You have to deactivate the sleep mode of your computer.
- Wrong IP settings (If the IP address was set manually): Confirm that the IP address and subnet mask entered in IP Settings for the
Network DVD Player are correct. ĺRefer to "checking the IP Address of the Network DVD Player in the computer" (p.19).
- Medialink has not been started/is not running: Check if the connected computer is on and the Medialink Server program has been
started/is running.
- Firewalls are set in the computer: If a virus detection program, firewall program or other security program is installed in the connected
computer, the firewall function of such software program may be disabling communication between the Network DVD Player and Medialink
Link Server in the computer.
If any of these software programs are installed in the computer, disable the firewall function of the program and then check if the problem
persists.
* With some resident applications, the firewall setting will not be disabled simply by disabling the program. Check how firewalls are set in your
application and disable the specific setting to allow Medialink port communication between the PC and the Network DVD.
- The Wireless Router has password protection (WEP/WPA encryption key) :
You can check your password protection in Wireless router follow the instruction:
Log on your router through the Internet explorer browser, typing the Router IP address : http://XXX.XXX.XXX.XXX
(the router address corresponds to the default gateway address)
Log on to the router intranet page and search for WEP, WLAN encryption settings.
This is the example of router setting page.
The setting page will be different
depending on different kinds of router.
37
If your router has WEP Data Encryption activated, then write down the key respecting lower/upper case and enter this exact same code into
the WIFI setup page of your Network DVD player.
For further help on Router encryption settings, please refer to your Router User Manual.
TIPS : Enter the WEP Key password using the remote control alphanumerical keypad :
Press successively each number to display the correct number or letter
Press SELECT once to switch from lower case to majuscule, press again to switch from majuscule to
numbers.
Example:
In my router, the WEP data
Encryption is 64 bit and the
key is “d8f1bd816b”!
Please check the value of
your router !
Press “Setup” in Remote
Control, go to the WIFI
setup page.
Change the setting in
security for “WEP 64-bit or
WEP 128-bit” depending on
your router setting.
Input your password in the
text box “key”.
Press SAVE and exit menu
TIPS: You can
f
name of SSID in
setting page as wel
your router Instruct

38
GLOSSARY
Networking
802.11b: A wireless networking standard that supports data encryption and up to 11Mbps bandwidth.
802.11g: A wireless networking standard that supports data encryption and up to 54Mbps bandwidth.
Ad-Hoc: This wireless networking mode means that two PC’s are communicating in a Peer-to-Peer network, without a router or an access
point.
Bandwidth: A measure of the rate at which data can be sent and received through the network. This value is usually given in bits per
second (bps) or Megabits per second (Mbps).
DHCP (Dynamic Host Configuration Protocol): A protocol that network devices use to obtain an IP address, subnet mask, gateway, and
DNS addresses automatically. A DHCP server can be a router, ISP server, or PC running Internet Connection Sharing software. If you are
using a DHCP-capable device in your network, you will not need to assign a static IP address to your DSM-320RD.
However, if you do not have a DHCP-capable device in your network, you will need to assign a static IP address to your DSM-320RD.
DNS (Domain Name System): A system used to translate computer names into IP addresses. Ethernet: The most commonly used wired
network technology. Standard Ethernet supports up to 10Mbps. Fast Ethernet supports up to 100Mbps.
Gateway: This is the IP address of the device that connects you to another network such as a router. A router would be the gateway
between your local area network and the Internet.
Infrastructure: This wireless networking mode is used by wireless networks with a router or an access point.
IP Address (Internet Protocol Address): An IP address consists of four groups of digits separated by periods. Each group of digits contain
an 8-bit value as a number ranging from 0 to 255. Each computer must have it’s own unique IP address. The IP addresses on your network
must be within the same range.
For example, if one PC or device has an IP address of 192.168.0.2, the other devices should have IP addresses that are sequential, like
192.168.0.3 and 192.168.0.4.
ISP (Internet Service Provider): A commercial organization that provides subscribers with access to the Internet.
Key: Encryption keys allow you to easily change wireless encryption settings to maintain a secure network. The DNX-8620 supports 64-bit
and 128-bit keys.
Net mask: Commonly referred to as subnet mask, this is used to determine what subnet an IP address belongs to.
RJ-45: RJ-45 is the standard connector for Ethernet cabling. It looks like a phone cable connector, but is slightly larger. RJ-45 connectors
have 8 pins, 4 of which are used for transmitting and receiving data.
SSID (Service Set Identifier): The name designated for a specific wireless local area network (WLAN). The SSID can be easily changed to
connect to an existing wireless network.
Static IP: A static IP address is configured manually on the device that will be using it. A static IP address remains the same constantly and
must be a unique address.
WEP (Wired Equivalent Privacy): A security protocol for wireless local area networks (WLAN) that is designed to provide the same level of
security as a wired network. WEP provides security by encrypting the data sent over the WLAN. The DNX-8620 supports 64-bit and 128-bit
encryption.
Wired: Devices networked via Ethernet cabling.
Wireless: Devices networked using radio frequencies instead of physical cabling.
WPA-PSK (Wi-Fi Protected Access with Pre-Shared Key): A security protocol for wireless local area networks that requires that the router
and DNX-8620 have the same pre-shared key in order to establish a wireless connection.
Music
AIFF is short for Audio Interchange File Format, an audio format that was developed by Apple Computer and is the standard audio format
for Macintosh computers. AIFF use a .AIF or .IEF extension.
M3U is a playlist format and is the default playlist format of WinAMP and most other media player software. It allows multiple files to be
queued in a program in a specific format.
MP3 is the file extension for MPEG-1, audio layer 3. Layer 3 is one of three coding schemes (layer 1, layer 2 and layer 3) for the
compression of audio signals. Layer 3 removes the redundant and irrelevant parts of a sound signal, which the human ear does not hear. It
uses Modified Discrete Cosine Transform to implement a filter bank, increasing the frequency resolution 18 times higher
than that of layer 2.
OGG or OGG Vorbis is an open source audio compression format. The name OGG is derived from term in a network game and Vorbis from
a character in a novel. OGG is used for mid to high quality (8kHz-48.0kHz, 16+ bit, polyphonic) audio and music at fixed and variable bitrates
from 16 to 128 kbps/channel.
PLS is a proprietary playlist format used for playing Shoutcast and other audio streams.
WAV is the file extension for PC sound files and was developed by Microsoft and IBM. WAV sound files end with a .wav extension and are
compatible with Windows applications supporting audio.
WMA is short for Windows Media Audio and is an audio format that was created by Microsoft. It is similar to MP3, although WMA can
compress at a higher rate than MP3.
39
Photo
BMP: The standard bit-mapped graphics format used in the Windows environment. By convention, graphics files in the BMP format end with
a .BMP extension.
GIF: Pronounced jiff or giff and stands for graphics interchange format, it is a bit-mapped graphics file format. GIF supports color and
various resolutions. It uses data compression, but it is limited to a 256-color palette.
JPG: Short for Joint Photographic Experts Group, and pronounced jay-peg. JPEG is a glossy compression technique for color images.
Although it can reduce files sizes to about 5% of their normal size, some detail is lost in the compression.
JP2: JP2 is the file extension for the new image format called JPEG2000 based on the latest image compression technology.
PNG: Short for Portable Network Graphics, is a bit-mapped graphics format similar to GIF. In fact, PNG was approved as a standard by the
World Wide Web consortium to replace GIF because GIF uses a patented data compression scheme. In contrast, PNG is patent and
license-free.
TIFF: Acronym for Tagged Image File Format, and is one of the most widely supported file formats for storing bit-mapped images on
personal computers. TIFF graphics can be any resolution, and they can be black and white, gray scaled, or color. Files in TIFF format often
end with a .tif extension.
Video
AVI: Short for Audio Video Interleave, the file format for Microsoft’s Video for Windows standard. See under Video for Windows.
DivX®: Is a video format that is MPEG-4 compliant and widely used on the Internet for encoding video files.
MPEG: Short for Moving Picture Experts Group.
MPEG generally produces better-quality video than competing formats. MPEG achieves high compression rate by storing only the changes
from one frame to another, instead of each entire frame. MPEG uses a type of lossy compression, since some data is removed. However,
the reduction in the resulting video quality is minimal. There are three major MPEG standards: MPEG-1, MPEG-2 and MPEG-4.
• The most common implementations of the MPEG-1 standard provide a video resolution of 352-by-240 at 30 frames per second (fps).
MPEG-1 is used with Video CDs (VCD) and results in video quality slightly below the quality of a VCR video.
• MPEG-2 offers higher resolution with CD-quality audio. This is sufficient for all major TV standards, including NTSC, and even HDTV.
MPEG-2 is used by DVDs. MPEG-2 compress a 2 hour video into a few gigabytes of data on a single disc.
• MPEG-4 is a video compression standard based on MPEG-1 and MPEG-2. Videos encoded with MPEG-4 technology are considerably
smaller than videos encoded with MPEG-1 or 2. MPEG-4 was standardized in October 1998.
QuickTime: An audio and video compression technology developed by Apple® Computer and is widely supported on Macintosh® and
Windows® PC computers. The latest QuickTime® implementation is MPEG-4 compliant.
XviD: XviD is an ISO MPEG-4 compliant video codec. It’s an open source project which is developed and maintained by many people from
all over the world.
NETWORK REFERENCE PARAMETERS
Write down below your DNX-8620 Network and IP settings for future reference:
Wired MAC Address
Wireless MAC Address
IP Address
Subnet Mask
Primary DNS
Secondary DNS
Default Gateway
WEP/WPA encryption
Table of contents
Other H&B DVD Player manuals