Page 8
My Secret Drawer for HQ Lile Foot Frame - Assembly Instrucons
Secon 4: Drawer Boom Brace Assembly
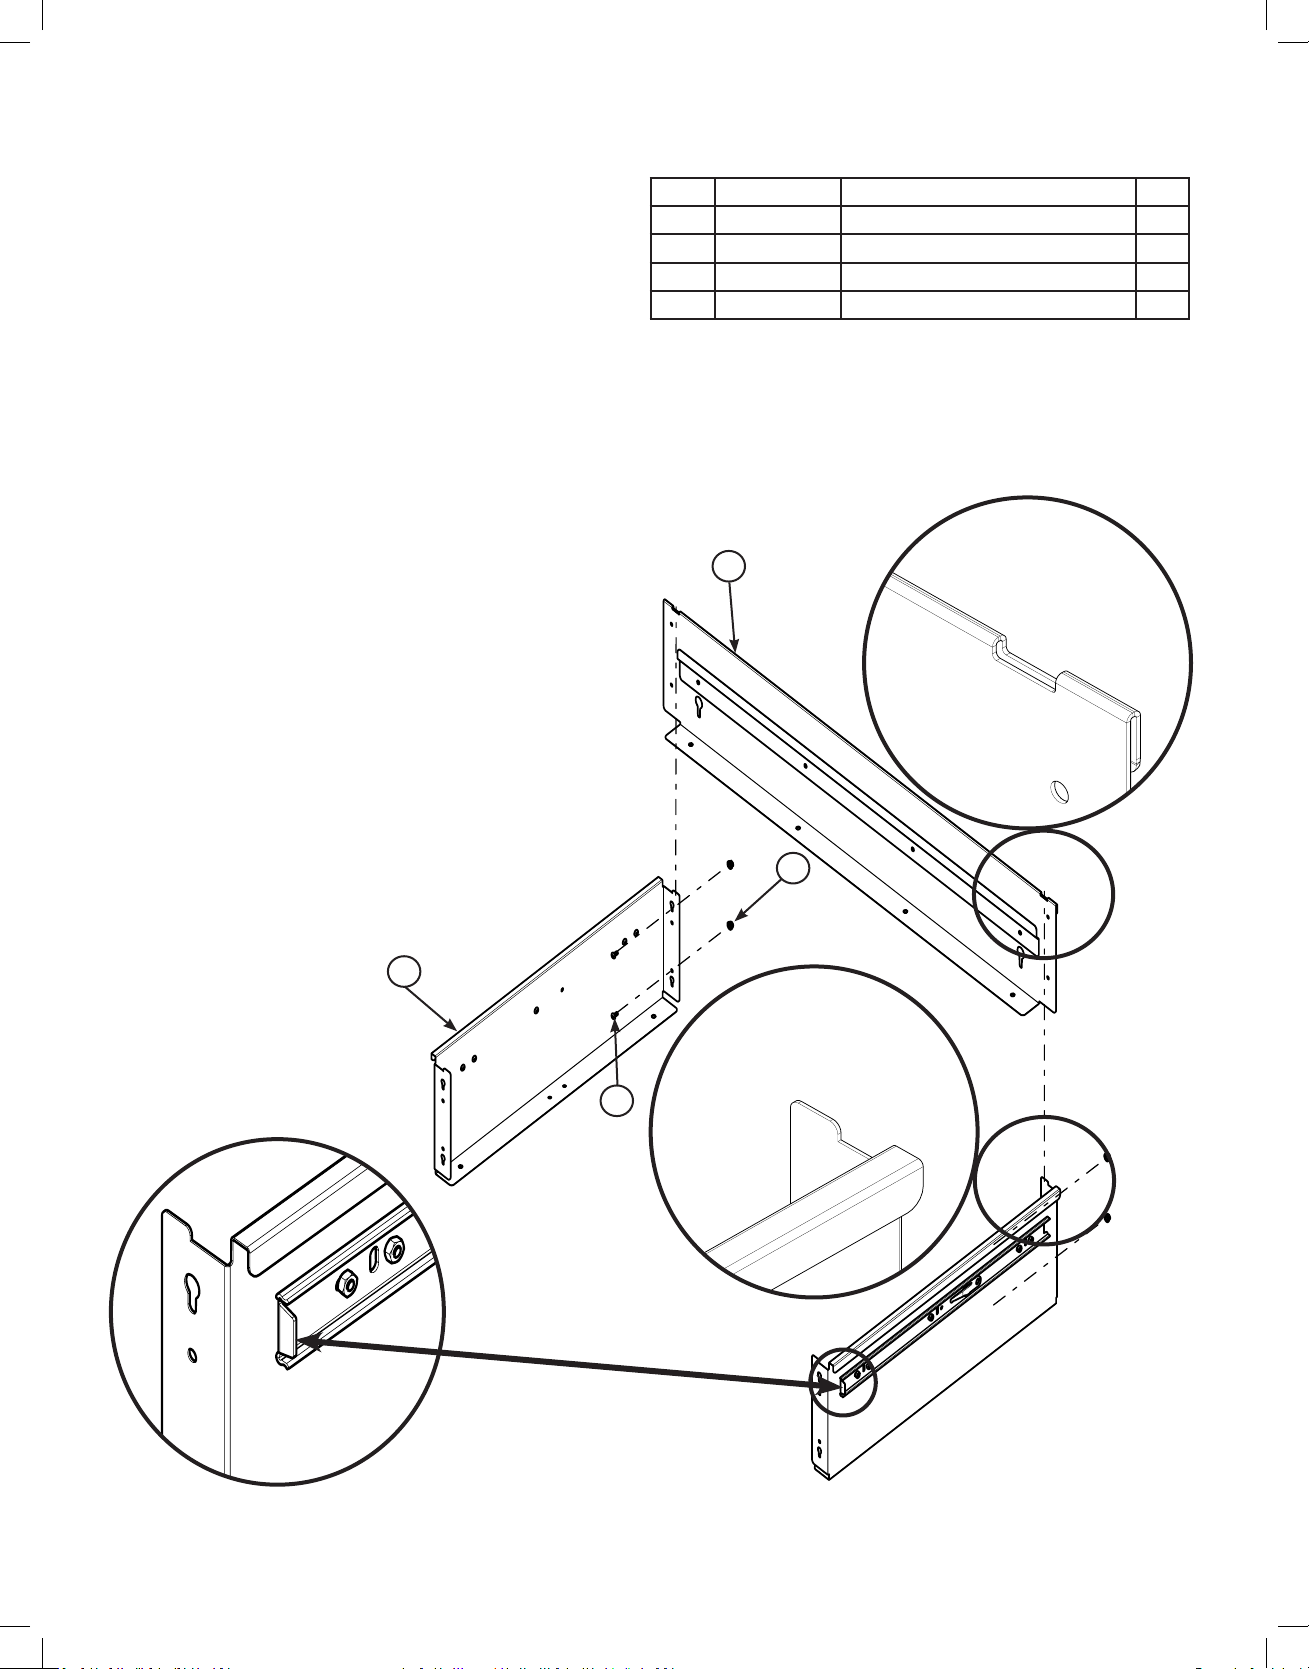
ITEM PART # DESCRIPTION QTY
1 HG01405-07 BRACE-DRAWER BOTTOM 1
2
HG01400-16 SCREW-M4 X 12MM SKB ZN 4
Step 1: Rotate the drawer 90° so the top and
boom of the drawer are accessible to you.
The rear of the drawer should be down on
the work surface.
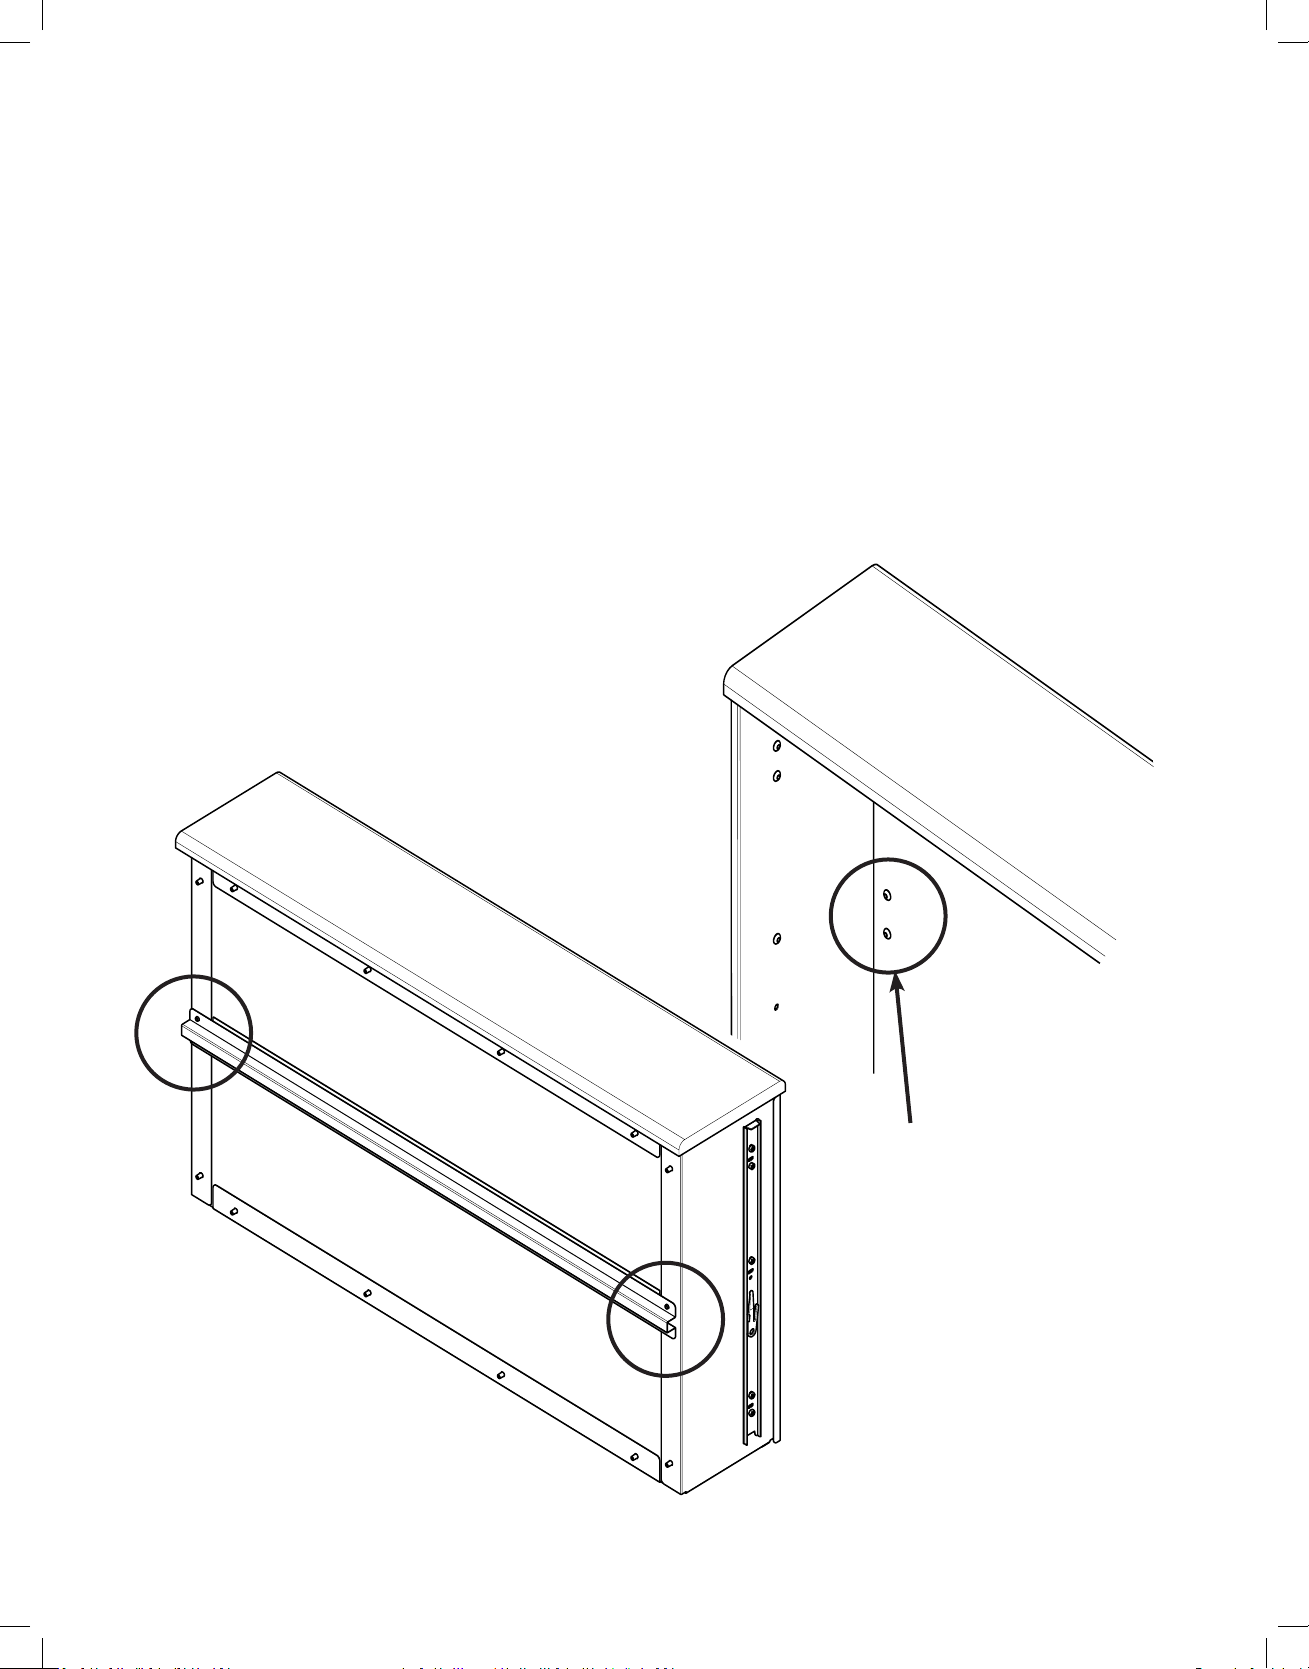
Step 2: Pull back about 1 inch of the red backing
on the scky tape on each end of the
boom drawer brace (item 1) and fold it at
45°. You should have four lile red tabs to
grab to remove the red backing later on.
ÂIMPORTANT: Do not pull the red backing o
unl instructed to do so.
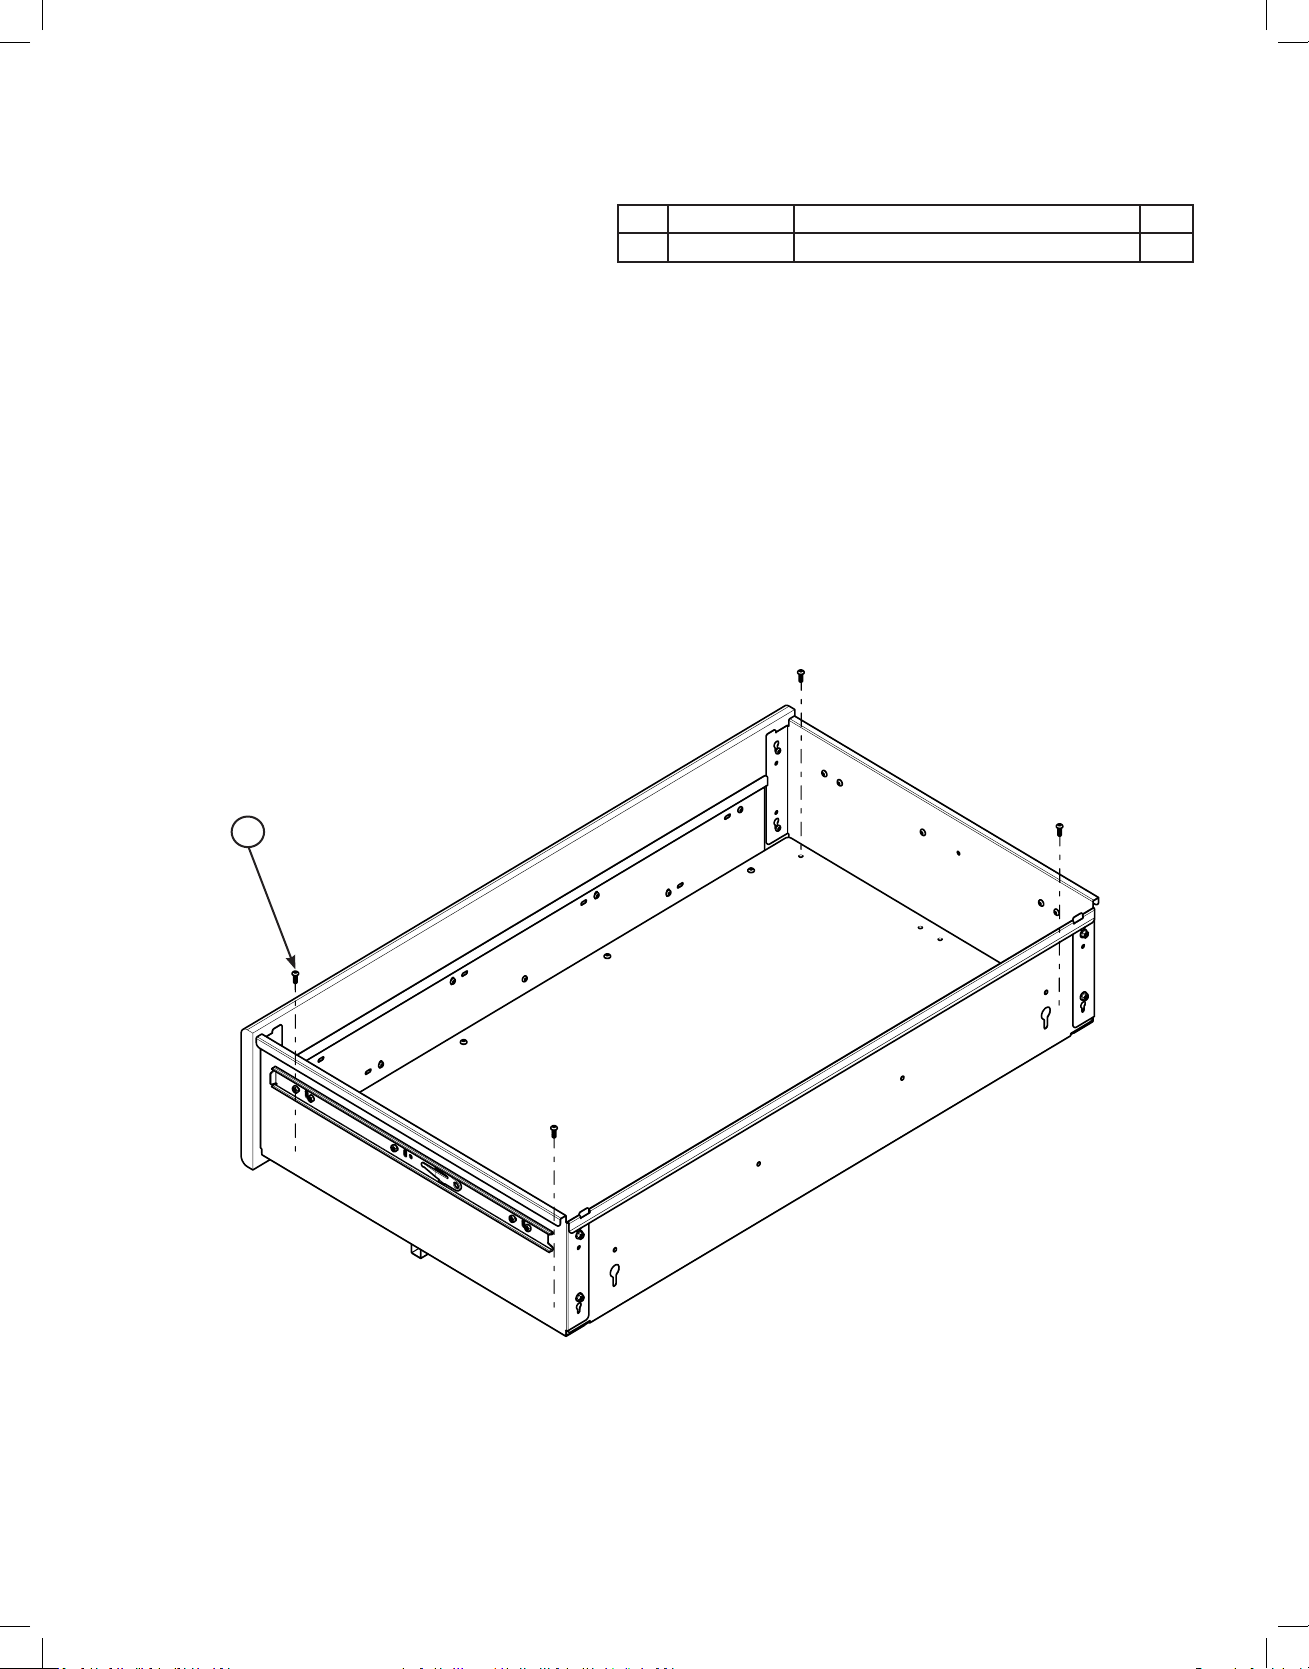
Step 3: From the inside of the drawer, insert two
screws (item 2) through the center 2 holes
in the drawer boom at one side.
Step 4: Place the brace on the boom of the
drawer with the red tape toward the
boom of the drawer.
Step 5: Align the two brace holes with the screws
coming through the drawer boom. Using
the 2.5 mm hex driver on the inside of the
drawer, start the screws into the brace.
ÂIMPORTANT: Just start the screws, do not
ghten them yet.
Step 6: Repeat Step 5 for the two screws on the
other end of the drawer.
NOTE: The red tape will be pulled o later
on, aer the sides, back, and front are
pushed in at the boom, minimizing gaps.
Fold each tape end out to the
side, about 1 inch at 45°.
1 2