Page 2 My Secret Drawer Assembly Instrucons
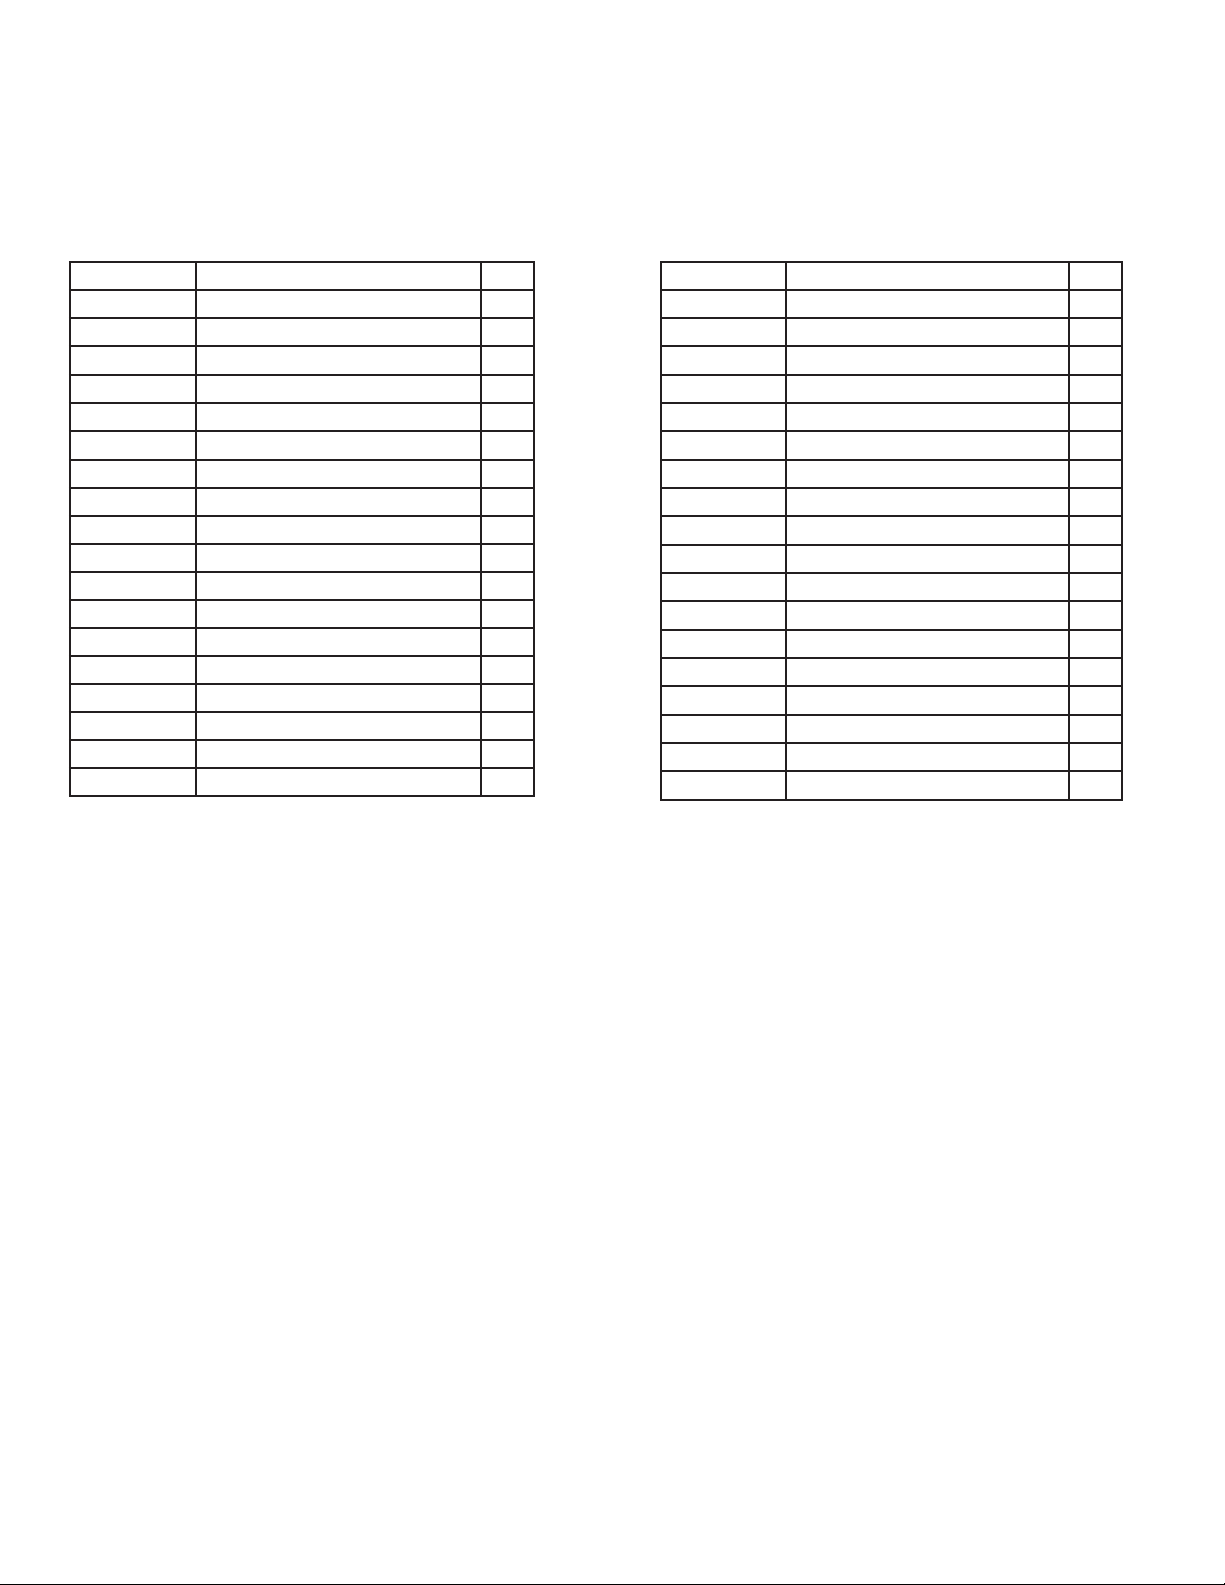
PART # DESCRIPTION QTY
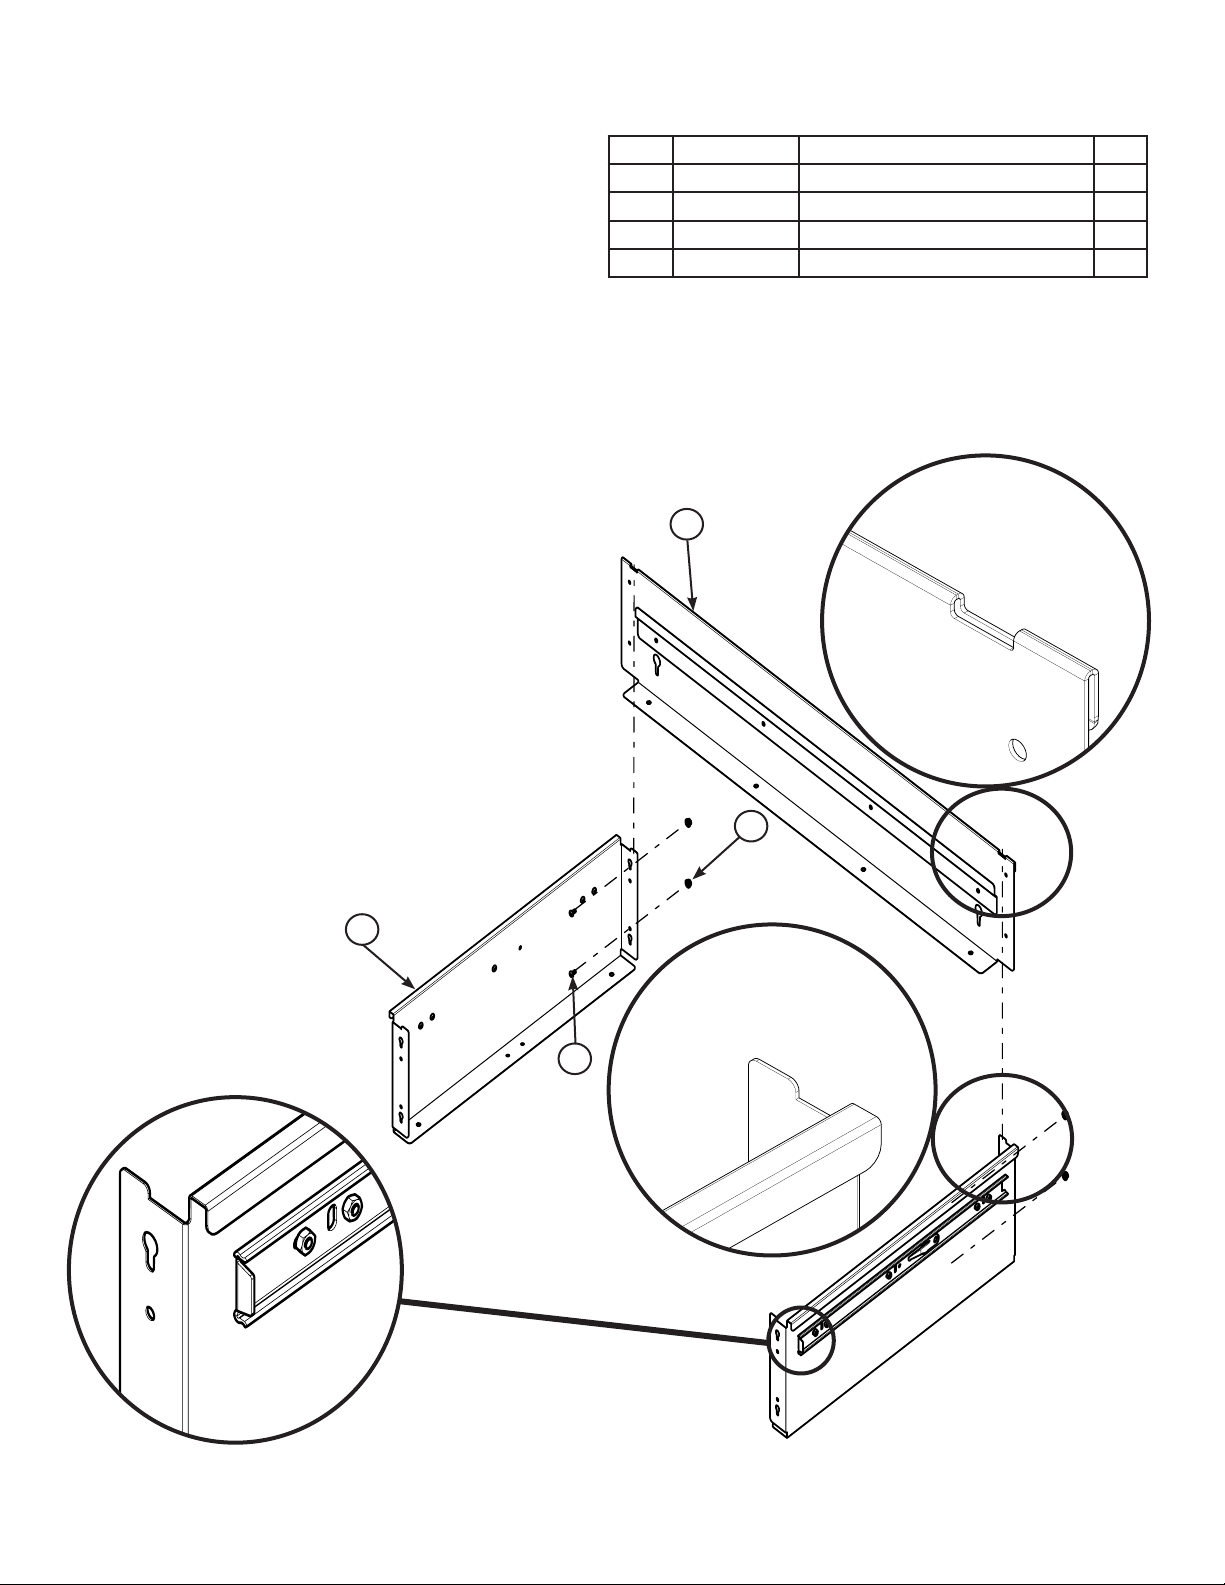
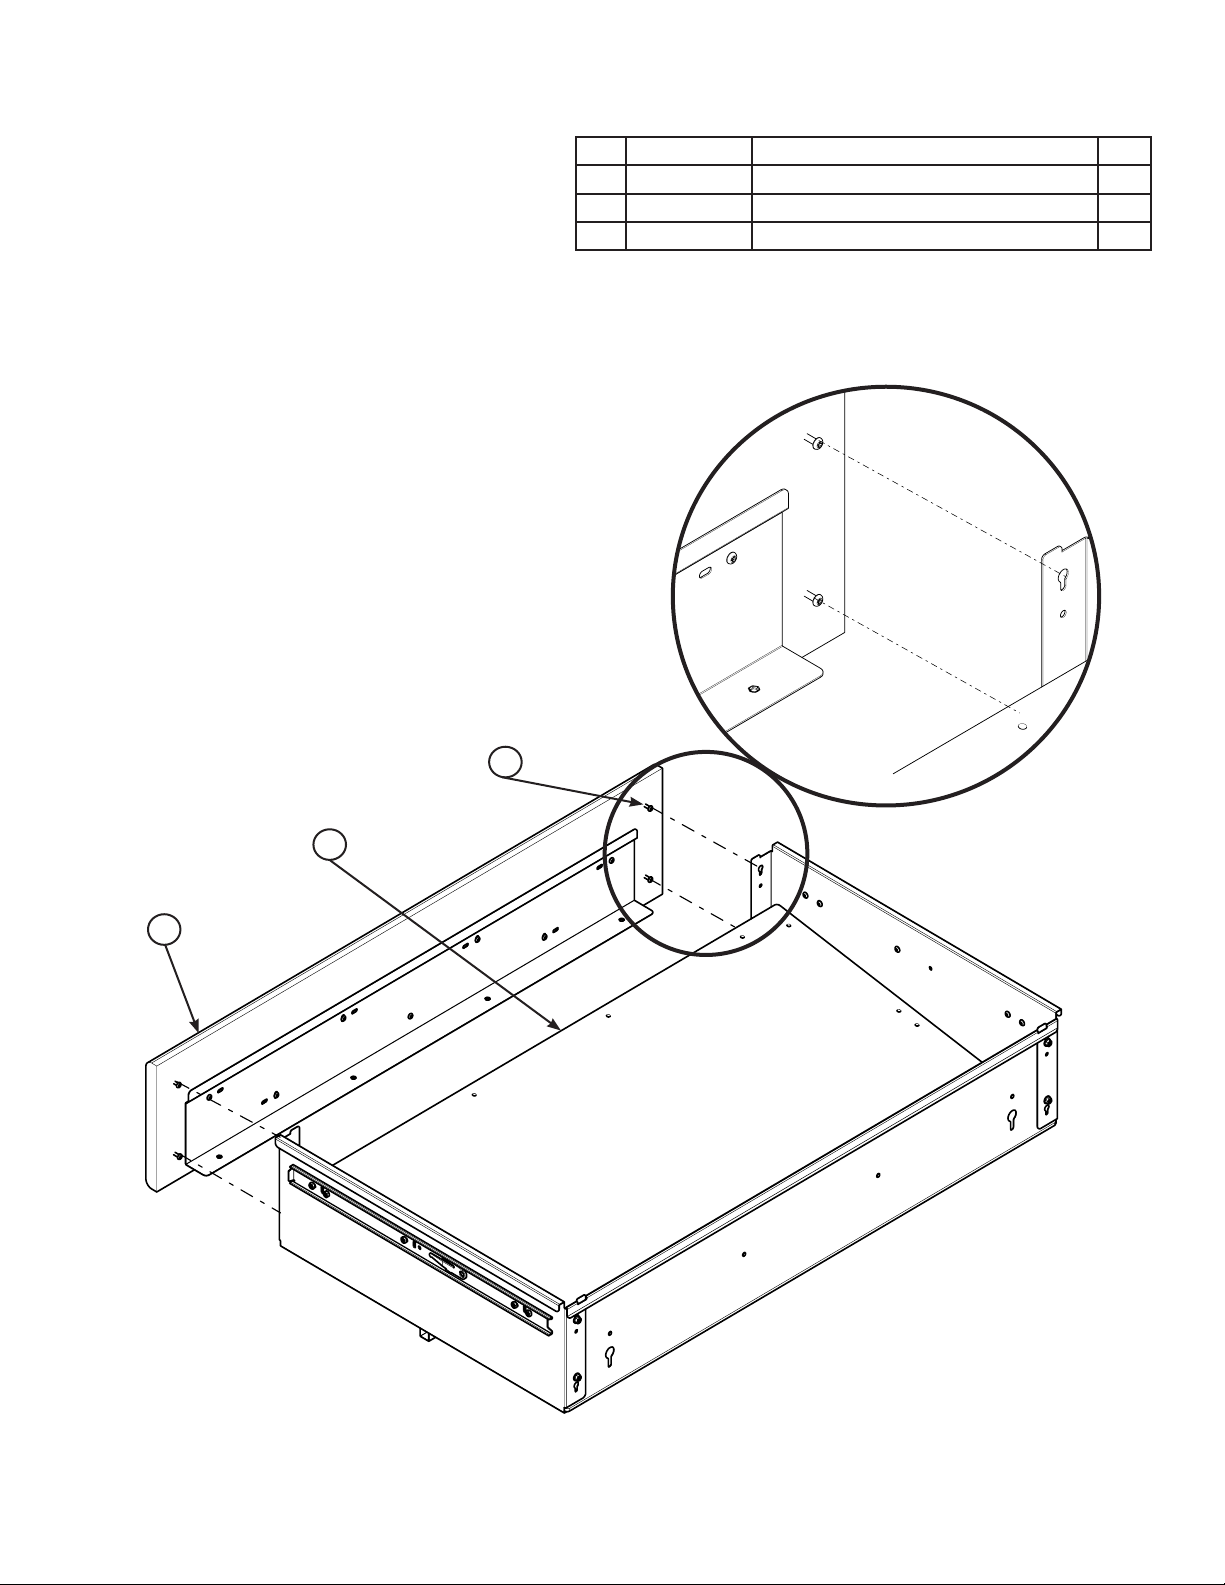
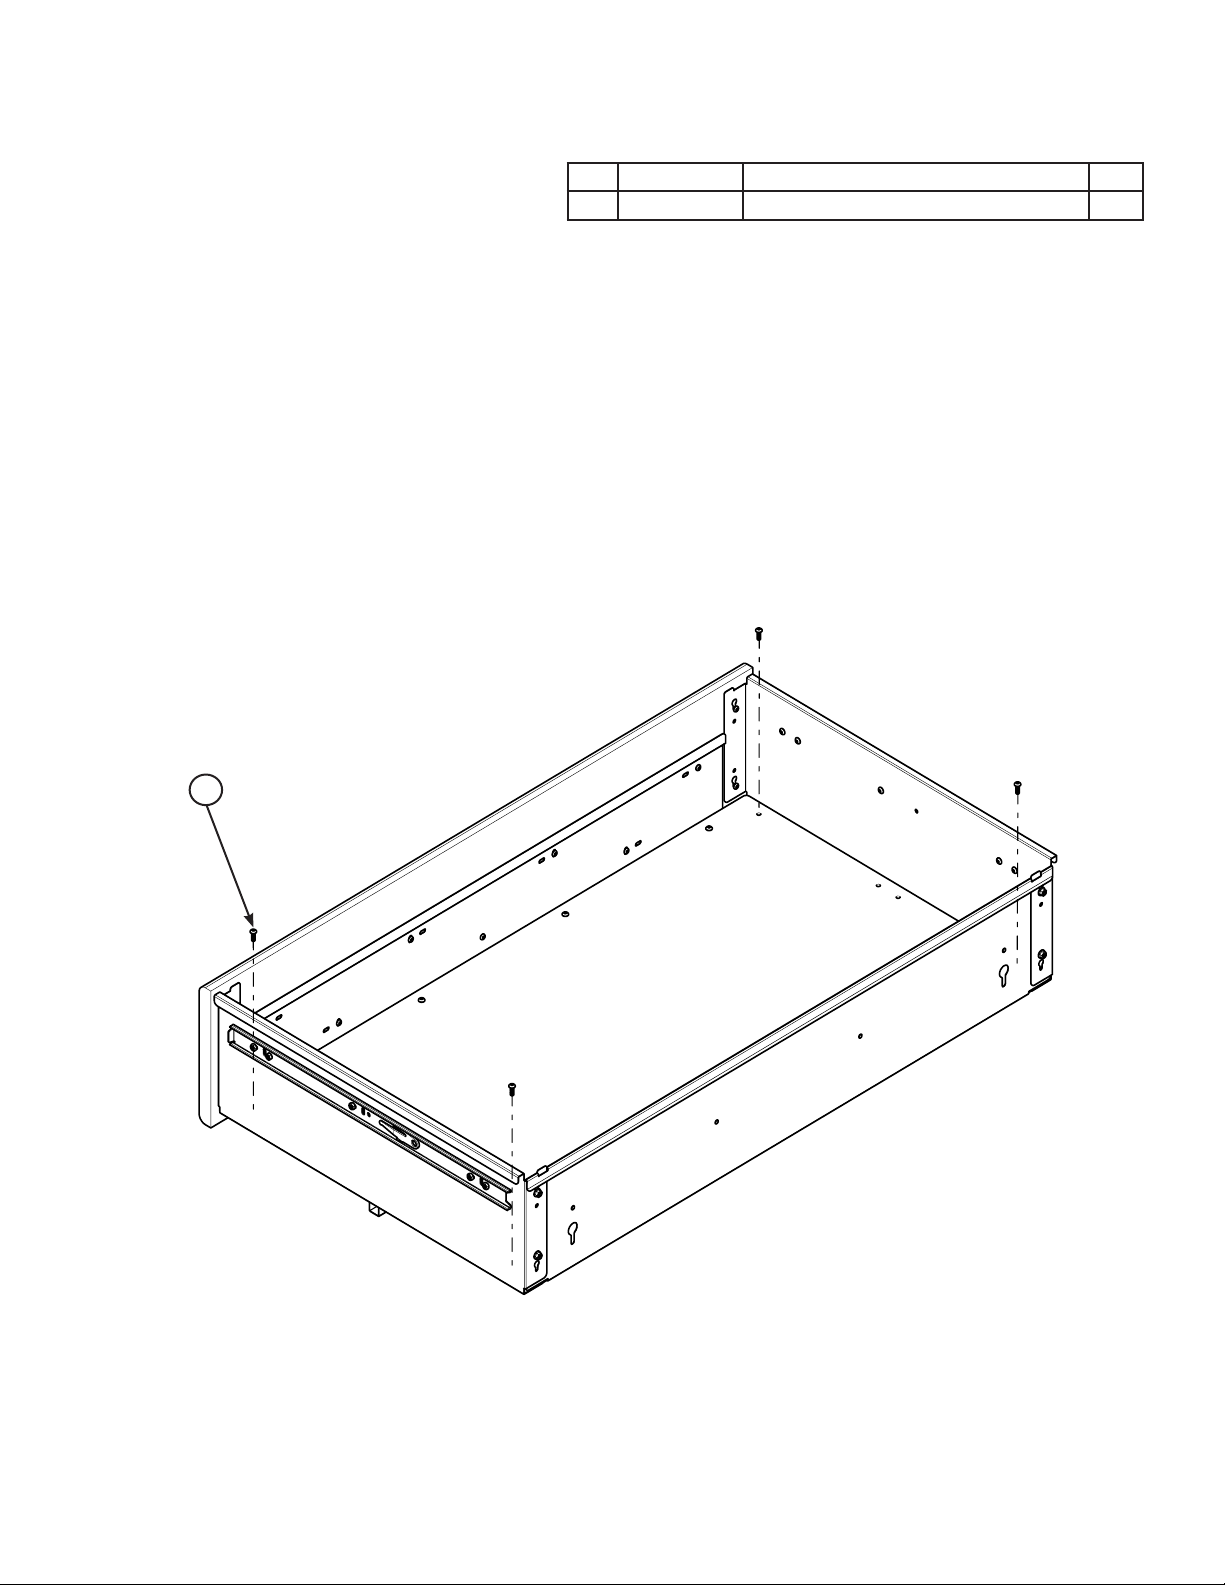
HG01400-02 DRAWER SIDE 2
HG01400-03 DRAWER REAR-4 FOOT 1
HG01400-05 DRAWER BOTTOM BOARD 4 FOOT 1
HG01400-06 DRAWER FRONT-4 FOOT 1
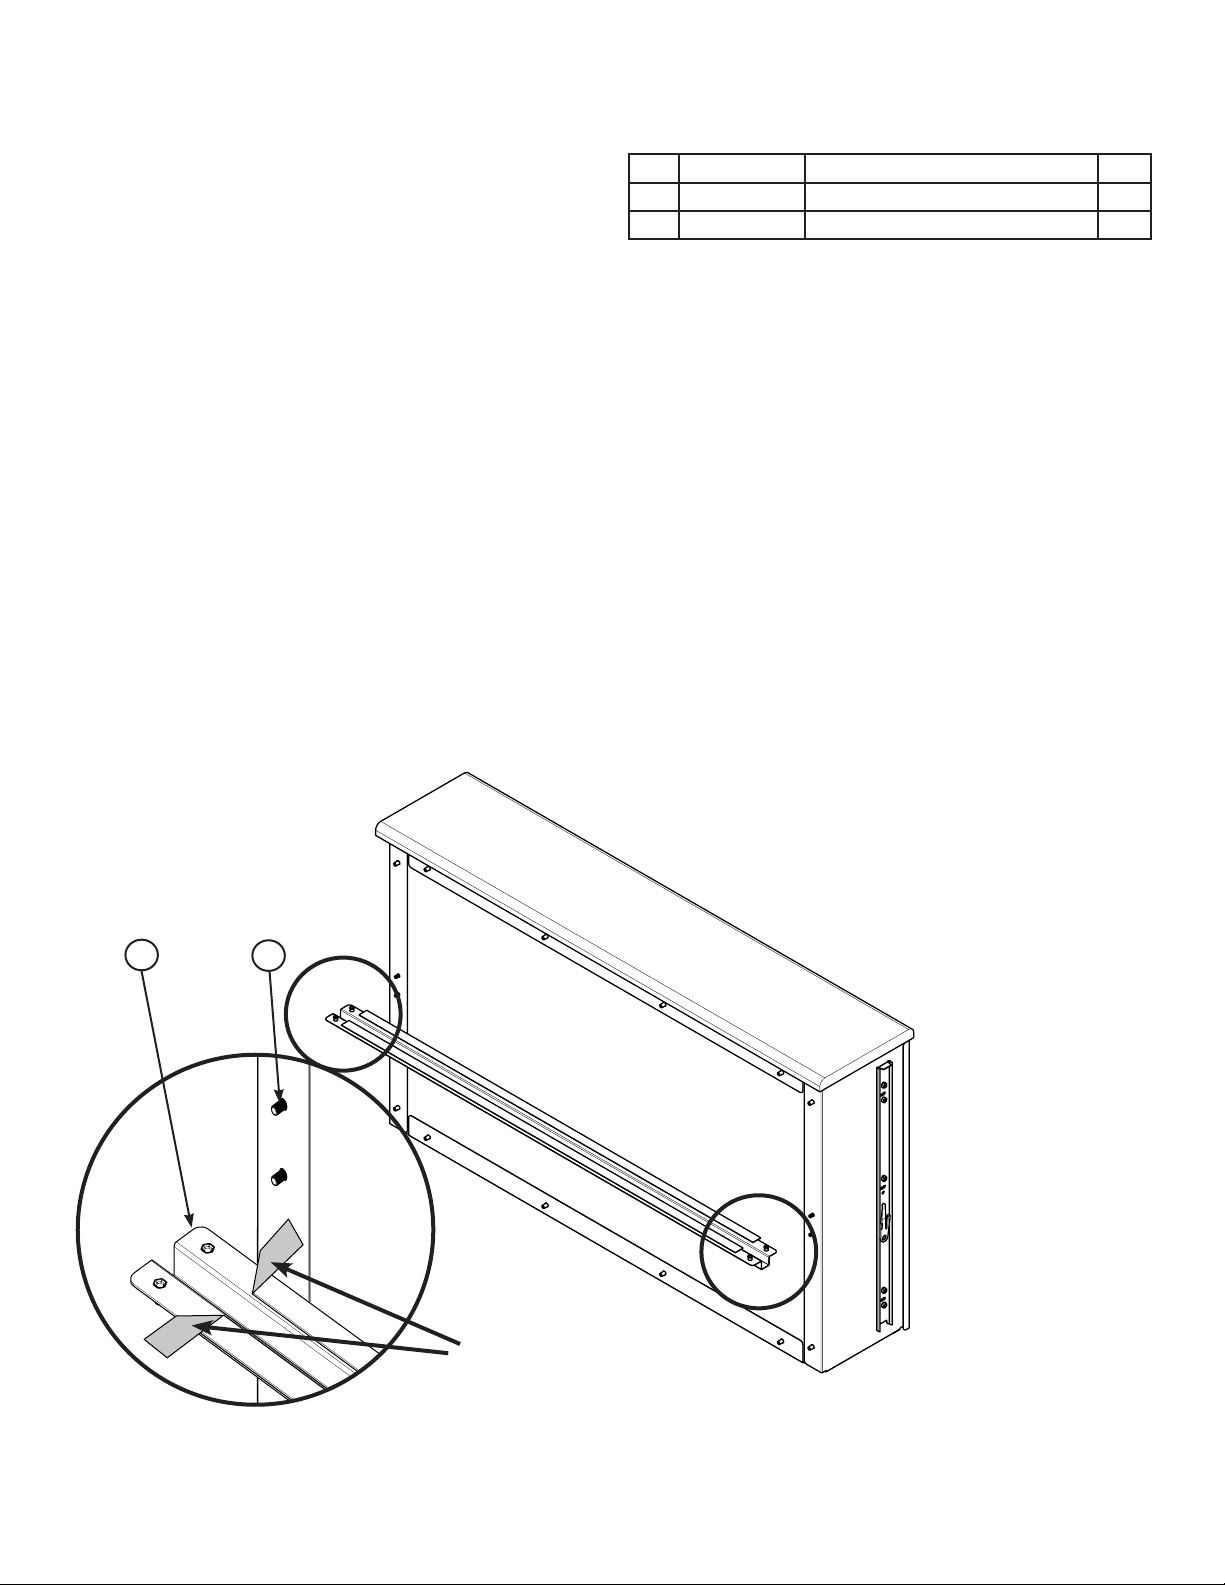
HG01400-07 BRACE DRAWER BOTTOM 1
HG01400-08 DRAWER SIDE FACE SMALL 2
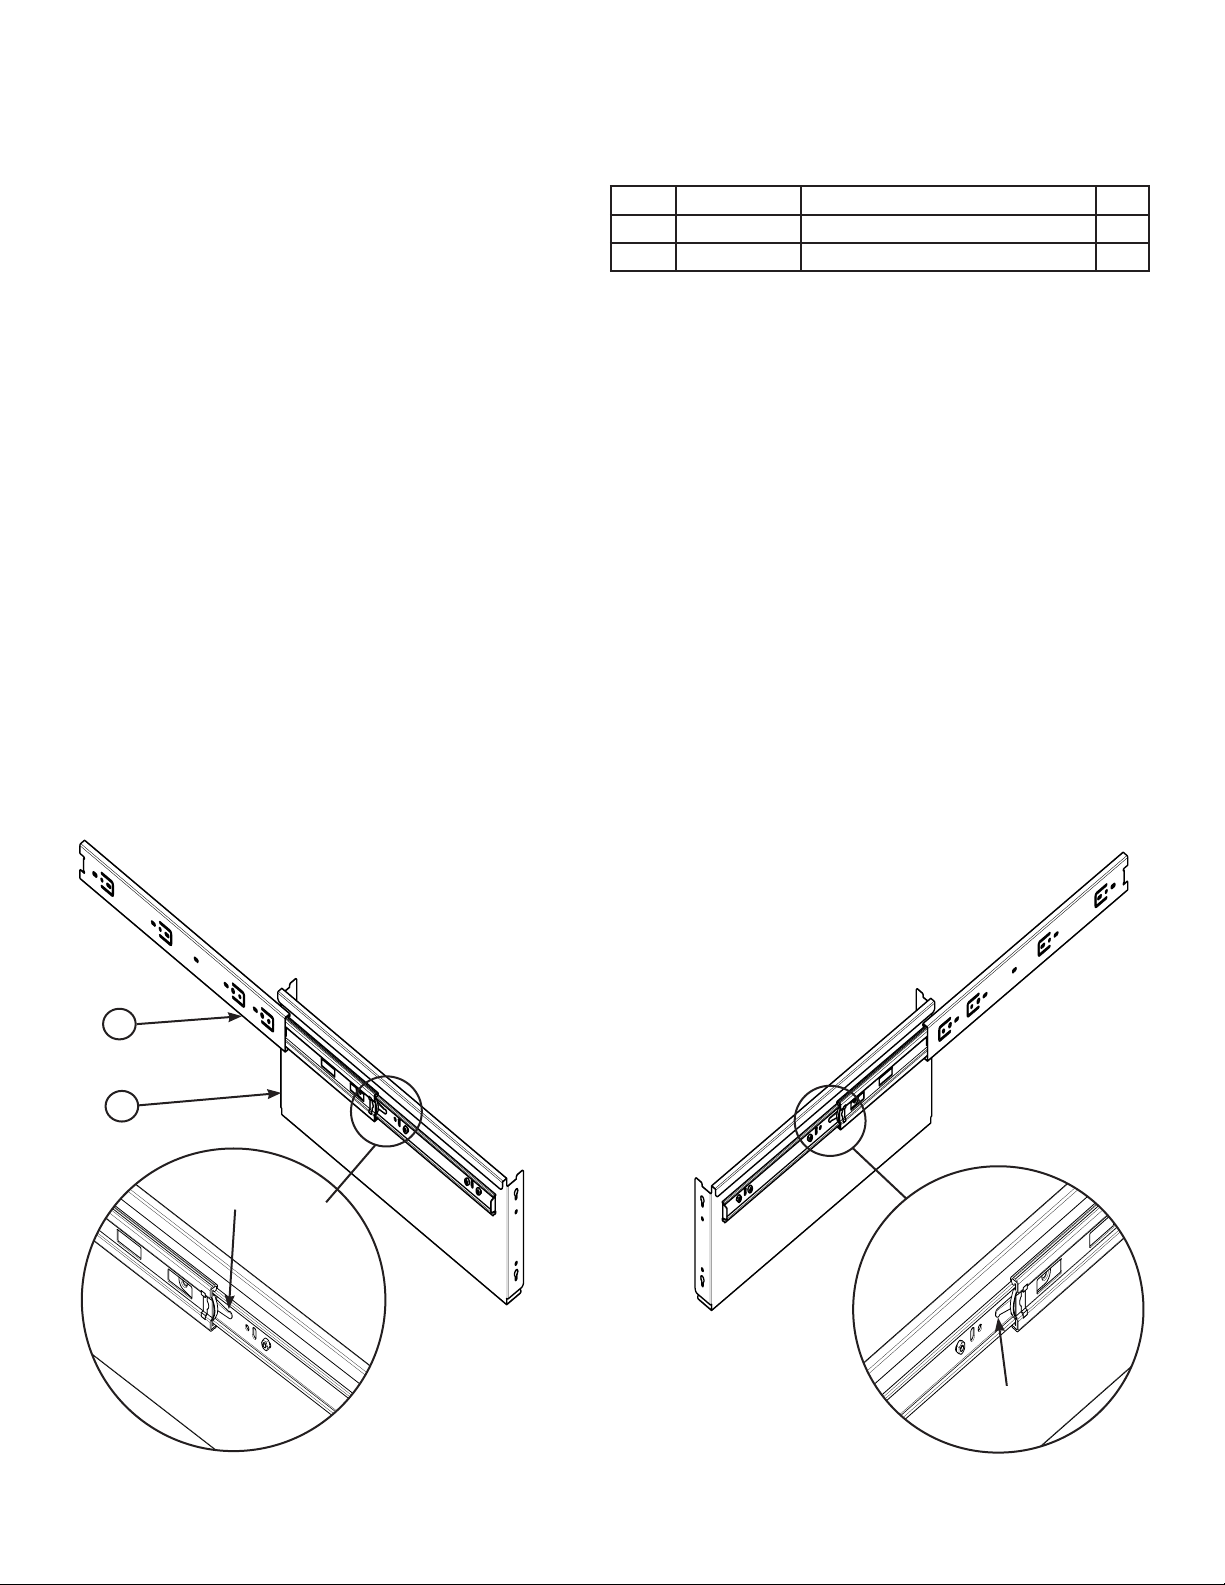
HG01400-10 DRAWER SLIDE-SINGLE ACTION 2
HG01400-12 DRAWER MOUNTING SPACER 2
HG01400-01 BRACKET SHORT-STUDIO FRAME 2
QM10959 SCREW-M8 X 20 FLGD SKB ZN 4
HG01400-16 SCREW-M4 X 12MM SKB ZN 16
HG01400-17 SCREW-M4 X 8MM SKB ZN 4
HG01400-18 SCREW-M4 X 6MM SKB ZN 8
HG01400-19 SCREW-PHP W 3.5 X 15MM ZN 17
QM10528 NUT-M4 SERRATED FLANGE ZN 4
HG01400-21 HEX DRIVER 2.5MM 1
HG01400-20 HEX WRENCH 7MM 1
QM10289 HEX KEY L 5MM 1
Parts Lists
My Secret Drawer, For HQ Studio an
HQ Studio 2 Frames
HG01400
PART # DESCRIPTION QTY
HG01400-02 DRAWER SIDE 2
HG01400-03 DRAWER REAR-4 FOOT 1
HG01400-05 DRAWER BOTTOM BOARD 4 FOOT 1
HG01400-06 DRAWER FRONT-4 FOOT 1
HG01400-07 BRACE DRAWER BOTTOM 1
HG01400-08 DRAWER SIDE FACE SMALL 2
HG01400-10 DRAWER SLIDE-SINGLE ACTION 2
HG01400-12 DRAWER MOUNTING SPACER 2
HG01400-14 BRACKET LONG-GALLERY FRAME 2
QM10959 SCREW-M 8 X 20 FLGD SKB ZN 4
HG01400-16 SCREW, M4 X 12MM SKB ZN 16
HG01400-17 SCREW-M4 X 8MM SKB ZN 4
HG01400-18 SCREW, M4 X 6MM SKB ZN 8
HG01400-19 SCREW-PHP W 3.5 X 15MM ZN 17
QM10528 NUT-M4 SERRATED FLANGE ZN 4
HG01400-21 HEX DRIVER 2.5MM 1
HG01400-20 HEX WRENCH 7MM 1
QM10289 HEX KEY L 5MM 1
My Secret Drawer, For HQ Gallery and
HQ Gallery 2 Frames
HG01410
Tools Needed:
• 2.5 mm hex driver (provided)
• #2 Phillips screwdriver (not provided)
• 7mm wrench (provided)
• 5mm L hex key (provided)
Assembly Suggesons:
• Use a table top as a work surface to assemble the drawer.
• Protect the work surface and drawer by covering the work surface with a protecve covering such as a
large thick towel.
• Do not ghten screws unl instructed to do so at the end of the drawer assembly process.