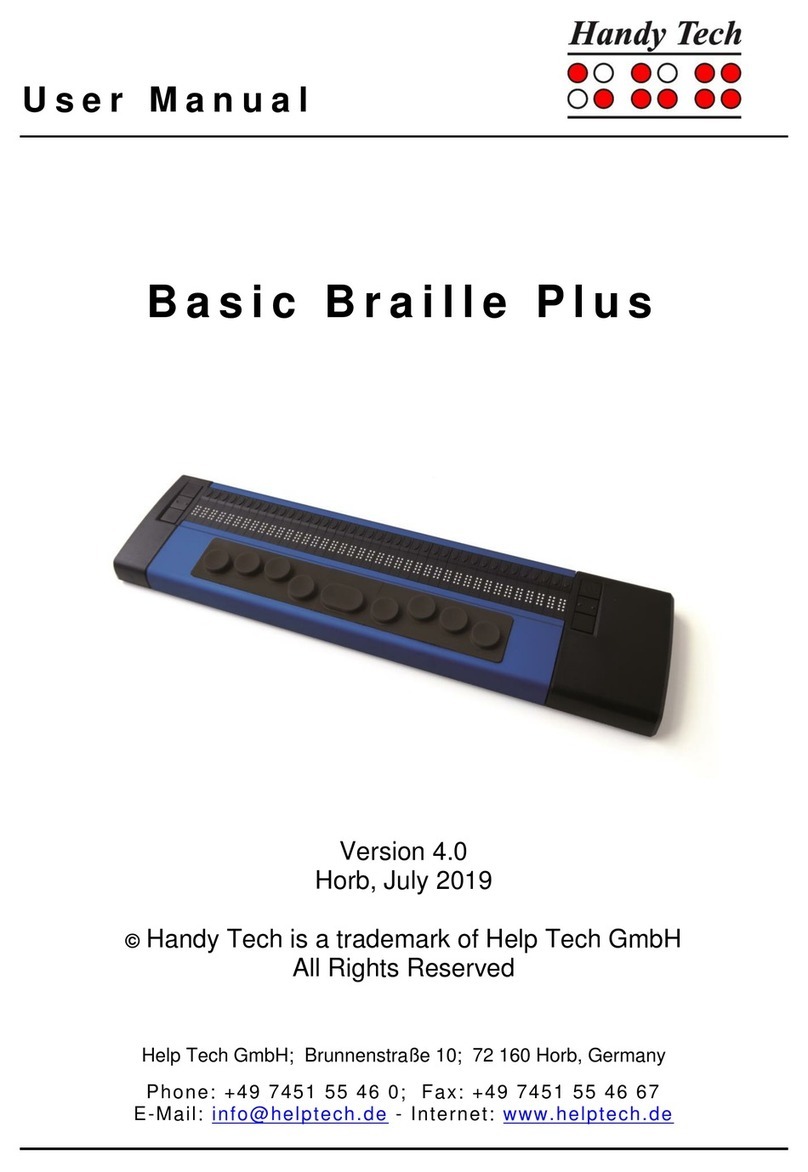
HandyTech Braille Wave User manual

Connect Braille
Table of Contents
Page 2
Table of Contents
1GENERAL 5
1.1 Preface 5
1.2 Connect Braille at a Glance 5
1.3 Conventions Used in This Manual 6
2INSTALLATION 7
2.1 Package Contents 7
2.2 Software Installation 7
2.3 Connecting the Power Supply 8
2.4 Connecting the Interface Cable 9
2.5 Connecting an external USB keyboard 9
2.6 The Carrying Case 10
2.7 Installation of the Bluetooth Tie-In 10
2.7.1 Bluetooth-PC Tie-In 10
2.7.2 Bluetooth Apple iOS Device Tie-In 11
2.7.3 Bluetooth-Android Device Tie-In 11
2.8 Technical Specifications 12
3START-UP 13
3.1 Version Information 13
3.2 Turning the Power On 13
3.3 Basic Operation 13
3.3.1 Chords 13
3.3.2 Signal Tones 13
3.3.3 System Messages 14
3.3.4 Check Boxes 14
3.3.5 Radio Buttons (1 of x) 15
3.3.6 Energy Saving Features 15
3.3.7 The SAVE Mode 15
4THE CONNECT BRAILLE AS BRAILLE DISPLAY 16
5OPERATION OF THE CONNECT BRAILLE 17
5.1 The Menu System 17
5.1.1 PC mode (P) 17
5.1.2 Braille character sets (B) 17
5.1.2.1 Creating a Braille Character Set 17
5.1.2.2 Loading Braille Character Sets 18
5.1.2.3 Selecting and Activating Braille Tables 18
5.1.2.4 Delete selected braille set (D) 19
5.1.3 Info (I) 19
5.1.3.1 Battery statistics (B) 19
5.1.3.2 Keyboard layout (K) 20
5.1.3.3 Serial number (S) 21
5.1.3.4 Versions (V) 21
5.1.4 Options (O) 21
5.1.4.1 6 dots braille (6) 21
5.1.4.2 Hotkeys Activate objects (A) 21
5.1.4.3 Highlight hotkeys (H) 22
5.1.4.4 Tone signals (T) 22

Connect Braille
Table of Contents
Page 3
5.1.4.5 dot firmness (F) 22
5.1.4.6 standby (N) 22
5.1.4.7 Language 23
5.1.4.8 Restore factory defaults (R) 23
5.2 Controlling the PC from the Connect Braille's Keyboard [SPC+1 2 7] (Chord
B) 24
5.2.1 Table of Key Commands for Controlling the PC 24
6EXTERNAL KEYBOARD 27
6.1 General 27
6.2 Keyboard Keys 27
6.2.1 Alphanumerical Character Inputs 28
6.2.2 Numerical Pad 28
6.2.3 Function Keys 28
6.2.4 Navigation Keys 28
6.2.5 Special Keys 28
6.2.6 Status Indicators 28
7OPERATION OF SCREEN READERS 29
7.1 Screen reader using Windows, Example Window-Eyes 29
7.1.1 Overview 29
7.2 Screen readers using Windows, Example JAWS 30
7.2.1 Overview 31
7.3 Screen reader using Windows, Example Hal/SuperNova 33
7.3.1 Overview 33
7.4 VoiceOver: Screen reader for Apple iOS Devices 35
8OPERATION SETTINGS FOR HANDY TECH BRAILLE DISPLAYS 37
8.1 Connection 37
8.2 ATC 38
8.3 Status Cells 38
8.4 Key Actions 39
8.4.1 Key Lock 39
8.4.2 Fast Keys 39
8.4.3 Repeat Keys 39
8.5 Miscellaneous 40
8.6 Info 40
9BATTERY MANAGEMENT 41
9.1 Types of Batteries 41
9.2 Battery Charging 41
9.3 Battery Capacity Display 42
9.4 Automatic Recognition of Low Voltage 42
9.5 Replacing the Batteries 42
10 IMPORTANT INFORMATION 44
10.1 Symbols 44
10.2 Safety Information under the Standards for Medical Devices 44
10.3 General Safety Information 44
10.4 Handling the Connect Braille 45
10.5 Warranty 46
10.6 Technical Support 46
11 LIST OF KEY COMBINATIONS 48
11.1 Navigating the Menu System 48
11.2 Keys in PC Mode 48

Connect Braille
General
Page 5
1 General
Thank you for choosing the Connect Braille. Connect Braille was designed with the focus
on easy and intuitive handling. Please take some time to read the Connect Braille user
manual. It will help you to get the most out of every feature provided.
1.1 Preface
Before starting Connect Braille for the first time it is important to carefully read the safety
instructions regarding the appropriate handling You will find the safety instructions at the
end of this manual.
The Connect Braille comes with wireless Bluetooth technology allowing you to control up
to three Bluetooth devices, like PC or mobile phone.
To use Connect Braille as a Braille display for a PC (Windows or Linux) an output program
called screen reader is needed. It is available from your supplier. The screen reader
program NVDA will be provided for free if needed.
If you have any ideas or suggestions to improve our product, please do not hesitate to
contact your Handy Tech customer service representative or write to ideas@helptech.de.
Your opinion is very important to us.
Enjoy using Connect Braille.
1.2 Connect Braille at a Glance
This chapter will help you familiarize yourself with your Connect Braille and its control
elements. We recommend keeping the Connect Braille handy, so that you can actively
follow the instructions in this chapter.
The two space bars are located at the centre front. In the following description the left
space bar is called [SPCL] and the right space bar is called [SPCR]. If either the left or
right space bar can be used, they will be called [SPC].
Above the Braille display you can find 8 ergonomic function keys. These function keys are
also used for Braille input. They correspond to the usual Braille keyboard layout and are,
from the left to the right as follows:
7 3 2 1 4 5 6 8
Located in the middle of the device are 40 ergonomic Braille display elements with
integrated cursor routing keys. The cursor routing (CR) keys which are integrated as part
of each Braille cell enable you to place the cursor directly at the text position of this Braille
cell.
The Triple Action Keys are to the left and right of and flush with the Braille cells You can
activate the Triple Action keys at the top, in the centre, and at the bottom.
The Triple Action Key functions are:

Connect Braille
General
Page 6
The left or right Triple Action Key's (Up) position also serves as a reading key to move
backward within the text and will be referred to as [TLU] or [TRU] in the list below. The left
or right Triple Action Key's (Down) position also serves as a reading key to move forward
through the text and are referred to as [TLD] or [TRD] in the list below. In the event of the
right as well as the left Triple Action Key (Up) can be pressed, it is called [TU]. If
alternatively, the Triple Action Key left or right (Down) can be used, this is called [TD].
The centre position of either the left or right Triple Action Key [TLC] and [TRC] can be
used for additional functions.
In the list below, you will find an overview of the symbols used in this manual to represent
the Triple Action Key settings:
Left Triple Action Key, up: [TLU]
Left Triple Action Key, centre: [TLC]
Left Triple Action Key, down: [TLD]
Right Triple Action Key, up: [TRU]
Right Triple Action Key, centre: [TRC]
Right Triple Action Key, down: [TRD]
If you move along the right side of the housing towards the back, you will first feel the main
power button. Located behind the power button is a USB type A port to connect a USB
keyboard. Behind the USB type A port is the outlet for the power supply.
On the left side of the device are from the front to the back –another USB type A port to
connect a USB keyboard, a slot with a microSD card and a USB type B port to connect a
PC. The microSD card is used exclusively for the internal software, this means the internal
menu and the Bluetooth functionality. Please do not remove the microSD card at any time
from the device while it is on. Data on the card can be damaged. Please turn the Connect
Braille off, before you insert or remove the microSD card.
Left on the back side you find a round headphone plug (2.5 mm) to connect a headphone
or an external loudspeaker. This headphone jack is for internal tones only, that means it
cannot be used for screen reader sounds.
1.3 Conventions Used in This Manual
In this manual, the following conventions are used for inputs and outputs on the Connect
Braille and on the PC:
Single keystrokes on Connect Braille: [Key1] e.g. [TLU]
Key/dot combination on Connect Braille: [SPC + 1 2]
Display on the Connect Braille modules: 'Display Text' such as 'File'
Single keystrokes on PC: {Key}, e.g., {ENTER}
Text input on PC: {input text}, e.g., {HTCOM}
Text output on PC: "output text" such as "Done"

Connect Braille
Installation
Page 7
2 Installation
This section contains helpful information about how to install your Connect Braille. Please
read it carefully to prevent difficulties while setting up.
2.1 Package Contents
Please verify that your package contains all of the parts listed below. If one of the
components is missing or damaged, please contact us in order to request the missing part
or a replacement.
You should find enclosed the following:
•Connect Braille
•Carrying case
•2 USB cables (one short, one long)
•Power supply with power cable to be connected to Connect Braille (100 to 240 Volt
AC; 9 Volt DC / 1,5 A; FW 7555M/09)
•Set of 4 NiMH batteries (already inserted)
•Software Package with drivers for screen readers (USB StartStick)
•User manual (USB StartStick)
•Quick Reference in Braille
2.2 Software Installation
In order to use the Connect Braille as a Braille display for your computer, you need the
corresponding Braille display driver for your screen reader.
To install the required software, plug the included USB memory stick with the inscription
StartStick into a free USB port on your PC. The StartStick with the HTStart program
contains all the relevant drivers and documents that you need to operate your Handy Tech
Braille display. In addition, it contains the free NVDA screen reader, so that you can
operate the PC immediately, even if no screen reader (Window-Eyes, JAWS or
Supernova) is installed.
After plugging the StartStick into your PC, run the start.exe program from the root
directory. If a screen reader is already installed, it is available for use. Otherwise, the
supplied screen reader NVDA provides access via speech output and Braille support.
HTStart recognizes which Handy Tech display is connected to your PC and automatically
makes the pre-selection for the installation of all the necessary drivers and software
components. Depending on the security settings of your operating system, you may be
prompted to allow the execution of the program HTStart. To enable HTStart to determine
and display the installed screen reader, your consent is required. Please allow the
execution of HTStart because otherwise the use of the program is not possible.
Once you have selected a screen reader, the HTStart window appears in which all
supported Handy Tech products are listed. The national language is pre-selected based

Connect Braille
Installation
Page 8
on your Windows settings. However, in the selection list, you can select another language.
In the product list you find the manuals in the selected language. If the manual in the
selected language is not available, the English manual appears instead. In order to install
drivers, choose “Software installation”.
You can choose the following components of the software, to be installed:
•Connect Braille Firmware: for updating the internal functions of your Connect
Braille.
•Connect Braille user manual: this user manual.
•Window-Eyes driver: latest Braille display driver for Window-Eyes
•JAWS driver: latest Braille display driver for JAWS for Windows
•HAL/Supernova driver: latest Braille display driver for HAL/Supernova
We recommend that you use the default setting for the installation. All required software
components will be installed. After completion of the installation program you will find a
group named "Handy Tech" in programs in the start menu. Here you find the following
subfolders:
•BrailleDriver: here you find the key settings of your Connect Braille for your screen
reader and you can change the driver’s settings.
•Connect Braille: Here you find this user manual and one or more folders for
firmware updates. These folders are named by the software version of the included
firmware.
After installing successfully, you can hook on your Connect Braille on to your computer. In
the installation folder of your Connect Braille firmware you will find the following subfolders
(when installed completely):
•Braille tables: contains the various Braille character sets for different Country
versions.
•Firmware: contains four files for the internal programming of your Connect Braille as
well as system files.
•Manuals: includes this user manual and important information
•KeyboardLayouts: contains different keyboard files for different countries.
•Uninstall: contains the uninstall program for this software.
2.3 Connecting the Power Supply
The power supply included in your package is used to recharge the batteries and for
providing power to the Connect Braille. The Connect Braille can be used without
restrictions even while the batteries are recharging.
When connecting the power supply, please plug the round, thin plug into the power supply
port behind the USB Type A port on the right side of the housing first. You can feel the
plug snapping into place. Now you can connect the power supply to an easily accessible
wall outlet. When disconnecting the power supply cable, please reverse the order of steps
above. When connecting the power supply cable while the device is off, you get the
message ’Battery quick charging’ and the Connect Braille turns off again.
If you plug in the power supply while the Connect Braille is switched on, a signal tone
indicates that the device runs no longer on Batteries.

Connect Braille
Installation
Page 9
WARNING:
Should you decide to use non-rechargeable batteries in the Connect Braille for any
reason, you must remove these from the device before connecting the Connect Braille to a
power outlet via the power supply cable. The integrated charging circuitry cannot
recognize whether the batteries are rechargeable or not and will try to recharge the
batteries. This can result in the batteries bursting, which may not only damage the device,
but could also be hazardous to your health.
If you are not sure whether the batteries you are using are rechargeable or not, you can
recognize rechargeable batteries by an indentation in the casing near the top button (plus
pole).
2.4 Connecting the Interface Cable
Your Connect Braille can communicate with the PC via USB interface, or through the
wireless Bluetooth interface. If the Connect Braille is used as a medical device, the
connected PC needs to comply with the medical device directive or needed to be
additional grounded or needs to be connected via a separating transformation.
Please make sure, that you have installed the enclosed software package, as described in
chapter 2.2 before you connect the USB cable.
To connect the Braille display to the PC via the USB interface, please identify the enclosed
USB interface cable first. The USB interface cable features a small, almost square plug on
one end. The other end features a small, flat plug. Now plug the square plug into the
leftmost port on the left side of your Connect Braille. The flat plug is then plugged into the
PC's USB port.
When both the Braille display and the PC have been turned on, the Braille display will
automatically be recognized by USB enabled operating systems. The Connect Braille
displays “USB connection selected” which informs the user that it is ready for USB
operation. When connecting the USB cable while the device is off, you get the message
’Battery charging’ and the Connect Braille turns off again.
WARNING:
Should you decide to use non-rechargeable batteries in the Connect Braille for any
reason, you must remove these from the device before connecting the Connect Braille to a
PC via the USB cable. The integrated charging circuitry cannot recognize whether the
batteries are rechargeable or not and will try to recharge the batteries. This can result in
the batteries bursting, which may not only damage the device, but could also be
hazardous to your health.
If you are not sure whether the batteries you are using are rechargeable or not, you can
recognize rechargeable batteries by an indentation in the casing near the top button (plus
pole).
2.5 Connecting an external USB keyboard
You can also connect a standard USB keyboard to your Connect Braille. Therefore, plug in
the USB cable of the USB keyboard in the right or left USB Type A port of the Connect
Braille. For more information please refer to chapter 6 External Keyboard.

Connect Braille
Installation
Page 10
2.6 The Carrying Case
On the right and left side of the case are openings for the power cable, the USB interfaces
and the main power button, so that the Connect Braille can be operated inside its case.
These outlets are protected by a Velcro fastened cover, which can be flipped upwards. To
completely open the carrying case, also open the Velcro fastener on the bottom.
All of the control elements are now accessible. If you open the two Velcro fasteners at the
right and left back side, the Connect Braille can be pulled out backwards of the case.
When you replace the Connect Braille in the carrying case, please make sure that the
sides of the case fully enclose the Connect Braille, and that the Velcro fasteners are
proper closed, because otherwise the Connect Braille could fall out when the case is
opened.
2.7 Installation of the Bluetooth Tie-In
Because your Connect Braille features a Bluetooth transmission module, you can also
establish a wireless connection between the Connect Braille and three different devices at
the same time (e.g. computer, smart phone, tablet), if they are equipped with wireless
Bluetooth technology. The Connect Braille automatically switches to the currently active
data source, i.e. to one of the up to three Bluetooth connections that was last active, or to
the USB connection to the PC. When switching, the Bluetooth device name is displayed, if
available. Otherwise "Bluetooth device" will be displayed, followed by a number from 1 to
3.
You can manually circle between the USB port and the three Bluetooth ports by pressing
[SPC + 4 5 8]. If there is no or only one active connection, you cannot switch. When plug-
in an USB cable into a PC, it switches automatically to the USB connection.
Bluetooth is automatically active when you turn on the Connect Braille. If you do not set up
a Bluetooth connection within 15 minutes, the Bluetooth interface automatically turns off.
When the Connect Braille wakes up from sleep mode, Bluetooth will be on again for 15
minutes. The wireless transmission radius is approximately 10 meters (10 yards or 33
feet).
2.7.1 Bluetooth-PC Tie-In
1. Please make sure, that the Connect Braille is switched on and Bluetooth is enabled.
For this purpose, it may be necessary to switch the device off and on again.
2. Select "Bluetooth Devices" from the control panel or from your system tray and
press the context menu key.
3. Select the “new device/connection” item.
4. "Add Bluetooth Device Wizard" will appear.
5. All detected Bluetooth devices will be listed. Select the Connect Braille named
“Active Braille AB4xxx” from the list and press "Next".
6. Normally the PC will create a pairing code which you accept by pressing “Next”.
7. Now the pairing will be done, and the needed drivers will be installed. Please wait a
moment. Please confirm by pressing "Finish". The Connect Braille is ready to use
when all the needed drivers have been successfully installed.

Connect Braille
Installation
Page 11
Your Connect Braille now has a wireless connection to the PC, and you can utilize all of its
functions, as if it were connected via the USB cable.
Note: If you move the Connect Braille beyond the Bluetooth connection's communications
radius (10 meters/yards), the connection to the PC will be interrupted. The connection will
automatically be re-established by Handy Tech's Braille device driver once you move back
within range. For this you need to have installed the latest Braille display driver (see
chapter 2.2).
2.7.2 Bluetooth Apple iOS Device Tie-In
Mobile Apple devices, such as the iPhone or iPad, include a screen reader by default,
which enables blind people to operate the devices by speech and Braille output. In order to
connect the Connect Braille via Bluetooth with an Apple device, you have to activate
VoiceOver first. Please follow these steps:
1. Please make sure that the Connect Braille is turned on and Bluetooth is enabled.
For this purpose, it may be necessary to switch the device off and on again.
2. Open “Settings” on the home screen of your iOS device.
3. Choose „Accessibility from the „General“ page.
4. Turn VoiceOver on.
5. Choose “Braille” on the Accessibility page.
6. If Bluetooth is off, the iOS device will remind you and you should turn it on now.
7. The iOS device is now searching for Bluetooth Braille displays. Please choose the
Connect Braille named “Active Braille AB4xxx” from the list.
8. The iOS device will show a 6-digit pairing code, which must be confirmed.
9. The Bluetooth connection will be established, and you can read the text from the
iOS device on the Braille display.
Note: if the Bluetooth connection was interrupted because the Connect Braille or the Apple
device was turned off or in sleep mode, please activate the Connect Braille first. The
connection will be re-established automatically, when turning on the Apple device.
We recommend setting the Accessibility Shortcut (3 time pressing the home key) to
VoiceOver. To define the Accessibility Shortcut, go to settings / general / Accessibility all
the way down to Accessibility Shortcut.
2.7.3 Bluetooth-Android Device Tie-In
Android devices, such as the Samsung Galaxy Sx, include the screen reader TalkBack by
default, which enables blind people to operate the devices by speech. This is pre-installed
on most Android devices and can be activated under Settings>Accessibility. For Braille
support an additional App, called BrailleBack, is needed which you can download and
install via Play Store. In order to connect the Connect Braille via Bluetooth with an Android
device, please follow these steps:
1. Please make sure that the Connect Braille is turned on and Bluetooth is enabled.
For this purpose, it may be necessary to switch the device off and on again.
2. Activate Bluetooth on the Android device and search for new devices.
3. After some seconds, the Connect Braille will be found and listed in the device list,
named as “Active Braille AB4xxx”.
4. Start the pairing process by double click on the Connect Braille.
5. The Android device will show a 6-digit pairing code, which must be confirmed.

Connect Braille
Installation
Page 12
6. If the paring was successful, you’ll hear the message “device connected”.
7. Open BrailleBack on the Android device. You can find it under
Settings>Accessibility.
8. The Bluetooth connection will be established and you can read the text from the
Android device on the Braille display.
9. In the settings of the BrailleBack menu you can find the keyboard help.
Note: if the connection was interrupted because you have turned off or put to sleep mode
the Connect Braille and/or the Android device, please turn on/wake up the Connect Braille
first.
2.8 Technical Specifications
•40 concave piezoelectric Braille cells
•40 cursor routing keys
•2 Triple Action Keys
•8 function keys
•2 space keys
•2 USB Type A port
•1 USB Type B port
•1 plug for loudspeaker 2.5 mm
•Battery duration ca. 20 hours; ca. 14 hours for Bluetooth operation
•Quick charge circuitry (less than 3 hours)
•Power: 9 V / 1.3 A
•Measurements: 31.9 cm width, 12.4 cm depth, 2.9 cm high (12.56" width, 4.88"
depth, 1.14" high)
•Weight 930 g (2.05 lbs.)

Connect Braille
Start-Up
Page 13
3 Start-Up
3.1 Version Information
As of this Section, all common characteristics of the Connect Braille will be described. This
information applies to firmware Version 1.0 of your Connect Braille.
3.2 Turning the Power On
Press the on/off button to turn the Connect Braille on. You can now work independent of a
power source, because the batteries are fully charged. You will hear a short, high-pitched
beep, and the following start-up message will be displayed on the Braille display:
'Handy Tech CONNECT BRAILLE 1.0'
At the end of this string is the version number of the firmware that you are currently
working with.
The high-pitched beep, followed by a second lower beep at start-up, indicates that you are
now in work mode. As soon as you hear the lower beep, also called start-up sound, you
can begin working. Once the screen reader transmits information to the Connect Braille,
the power-on message disappears, and the current data is displayed.
Now, before you can finally get started, we would like to familiarize you with some of the
basic concepts pertaining to your Connect Braille.
3.3 Basic Operation
3.3.1 Chords
The Connect Braille's keyboard is very easy to use. The keystroke functions are not
activated until the key is released. If a character is composed by several keys, it will be
created after releasing all keys.
In order to make functions available to you which require their own function keys on
standard keyboards, while also providing efficiency of operation, we have introduced the
so-called chord functions. Chords are letters or Braille dots that are used in combination
with the space bar. For example, you can use Chord m [SPC+1 3 4] to open the menu and
Chord p [SPC + 1 2 3 4] to go back into PC mode.
With Chord Commands it is enough to release one key in order to activate the function.
When entering characters all keys need to be released.
You will find a list of all available key combinations in chapter 11.
3.3.2 Signal Tones
The Connect Braille utilizes various signal tones to indicate its status or to alert you to
prompts or possible errors.

Connect Braille
Start-Up
Page 14
1. Start-up sound: This is a low tone which sounds during start-up. If the start-up
sound is preceded by a very short, high tone, followed by a pause, then the
Connect Braille is in work mode.
2. Warning signal: This consists of two rapid, consecutive tones and may sound, for
example, when you have reached the bottom of the menu and try to go down.
3. Error signal: This is a series of warning signals, which may be emitted, for example,
if no microSD card is inserted.
Note: You can specify which types of acoustic signals you want the Connect Braille to emit
(see chapter 5.1.4 and 5.1.4.4). In this manual, the assumption is that this setting is set to
'action Confirmations'. This is also the factory default.
3.3.3 System Messages
The Connect Braille will display messages to indicate the successful completion of an
operation or to alert you to possible operating errors. If the message is an error message
or if it is an important message, a beep will also sound. We recommend carefully reviewing
these messages before continuing with your work. They frequently contain instructions on
how to proceed.
Most error messages will be in your local language however, there are some system
messages that are only provided in English. In regard to these messages, all messages
beginning with 'fatal', 'fer:', 'error' or 'wrn:' should be attended to.
After you have read the message, you can exit by pressing [TLC], which in most cases will
return you to the place from which the message was initiated. If the message text does not
fit on the Braille display, you can scroll through it by means of the [TD] and [TU] keys.
In chapter 12 you will find a list of the most important messages with explanations.
3.3.4 Check Boxes
Check boxes are switches that can be in either an "on" or "off" state. A check box consists
of a symbol indicating its state, and a designation. The symbol "[X]" indicates that the
check box is "on", or active, whereas "[ ]" is an inactive, or "off" check box.
Toggling the state of the check box between on and off is accomplished by pressing [SPC]
or [TRC]: the state is toggled upon each keystroke. Alternatively, you can also press the
cursor routing key above the check box to toggle it. As soon as you move on to a new
menu item, the last state indicated by the check box remains in force. However, the
settings are not permanently saved until the 'Options' menu is closed.
Check boxes are used for controlling your Connect Braille's functions and are found in the
Options menu. For example, you can choose either 6 dot or 8 dot Braille this way.
Note:
If the Connect Braille is turned off without having closed the Options menu, the last
changes to be entered will be lost. The new settings are saved only upon exiting the
Options menu!

Connect Braille
Start-Up
Page 15
3.3.5 Radio Buttons (1 of x)
Radio buttons are similar to incremental dials, e.g., from 0 to 10. They are groups of
buttons that can be set to either an on or off state, of which only one can be selected at
any given time.
A radio button consists of a symbol indicating its state, and a designation. The symbol
"(X)" indicates that the button is active, whereas "( )" represents an inactive, or "off"
button. A radio button is selected by pressing [SPC] or [TRC]. Alternatively, you can also
press the cursor routing key above the radio button to toggle it. An example is the
frequency setting for acoustic alerts, which can be set to one of several levels.
Note:
As noted above, any new settings are saved only upon exiting the Options menu!
3.3.6 Energy Saving Features
Since the Connect Braille is battery operated, it is designed specifically for efficiency in
energy consumption. Whenever possible, various components of the Connect Braille are
deactivated in order to conserve energy.
If no key is pressed on the Connect Braille or the Braille display doesn’t change for several
minutes, it will enter sleep mode. In sleep mode, the Braille display is turned off and some
of the electronic modules are also deactivated. As soon as any key is pressed, the
Connect Braille "wakes up" within a fraction of a second and will be fully operational. You
will recognize this because the tactile pins will be pushed backup.
Further explanations concerning the set-up of the energy saving features are contained in
chapter 5.1.4.6 standby (N)
3.3.7 The SAVE Mode
In SAVE Mode, the Connect Braille can only be operated via USB. The SAVE Mode is
comparable to the save mode in Windows. To get into SAVE Mode, press the on/off
Button for more than 5 seconds or take out the microSD card before turning the unit on.
Instead of the start-up sound you will hear a different sound, and on the Braille display you
can read:
’Handy Tech CONNECT BRAILLE Save Mode 1.3’
The number at the end of the string is the version of the Save Mode. To get back into work
mode, just switch the Connect Braille off/on again.

Connect Braille
The Connect Braille as Braille Display
Page 16
4 The Connect Braille as Braille Display
In order to operate the Connect Braille as a Braille display under Windows, you need a
special program called a screen reader to control the display, which is not included with
the Connect Braille itself. To use the Connect Braille as a Braille display, connect the USB
cable to the USB port on your PC or use the wireless Bluetooth connection.
Please make sure that your Connect Braille is properly connected and switched on before
starting up the screen reader program, because otherwise the screen reader will not be
able to detect it. As a rule, the screen reader will display the selected position within the
active window on the Braille display. For example, if you are moving through a menu, the
selected menu item is displayed. The reading keys [TD] and [TU] allow you to move
through text. In word processing programs such as Microsoft Word, you can also position
the cursor with the cursor routing keys. In addition, the [CR] keys will also allow you to
activate menu items or functions directly (e.g. when you are prompted for a yes or no
answer with 'Y/N', pressing the [CR] key above the "y" has the same effect as entering
"y").
The screen reader program converts the text and graphic contents of the Windows screen
into speech and Braille. Generally, the computer's built-in sound card is employed for the
speech output function. The display of Braille is achieved with the help of your Connect
Braille, after the screen display information has been forwarded from the screen reader to
the Braille display. All standard screen readers are compatible with Handy Tech's Connect
Braille. During the installation of the screen reader software, all you need to do is to select
Handy Tech. The Braille display then automatically adjusts correctly to your Connect
Braille.
When starting your screen reader the first time, a small start-up window appears which
displays the name of the Braille system detected by the program, the interface used for
communication, and the country currently selected. The various screen reader program
functions are assigned to specific keys on your Connect Braille. How to operate your
Connect Braille as a Braille display using Window-Eyes for Windows is described in
Section7.1. A summary of the essential functions of JAWS can be found in Section 7.2 and
for Hal/SuperNova in Section 7.3.

Connect Braille
Operation of the Connect Braille
Page 17
5 Operation of the Connect Braille
5.1 The Menu System
The menu system is structured hierarchically, containing submenus and functions. You
can open the menu by pressing [SPC + 1 3 4] (Chord m).
In addition to the keys described in chapter 11, there are also shortcut keys, known as
"hotkeys." These permit direct access to menu items within a menu level, without having to
navigate clumsily through the entire menu with [TD] and [TU]. A hotkey is one letter of the
menu item. It is spelled as a capital letter, but it may also have additional emphasis added.
Not only submenus, but functions and check boxes as well may be activated using
hotkeys. Furthermore, you can configure your Connect Braille such that these objects are
not only selected, but also activated by pressing the hotkey.
In the following sections, the menu items as well as their sub-items are described in detail,
with the hotkeys enclosed in round brackets. If there is no letter indicated within brackets,
then there is currently no hotkey available for that menu item.
Please note:
The hotkeys permit instant access to items within the same menu level; they do not let you
move from one menu level to another. Therefore, you cannot access, e.g., the battery
voltage indicator from inside the File menu, instead, you have to return to the main menu
first then navigate via hotkeys through the menu levels until you have reached the menu
item Voltage.
5.1.1 PC mode (P)
This menu command activates Braille display mode. During the start-up of the screen
reader program, the PC mode is activated automatically. Activating PC Mode via the menu
is necessary only if you have previously switched from PC Mode into menu mode with
[SPC+1 3 4] (Chord m).
Please note that you must press the (SPC+1 3 4) keys for about one half second in order
to return to menu mode from PC mode. A quiet clicking sound will indicate that you have
returned to menu mode.
5.1.2 Braille character sets (B)
This section discusses the creation, loading and activation of Braille character sets. In
addition to the default character set of the current system language, nine other character
sets may be loaded into the Connect Braille.
5.1.2.1 Creating a Braille Character Set
The easiest way to create a custom Braille character set is to modify an existing character
set. You will find several Braille character sets on the media delivered with the Connect
Braille. For easier orientation, a subdirectory called "Brailletables" is created during
installation, which contains the character sets.

Connect Braille
Operation of the Connect Braille
Page 18
For example, if you wanted to edit the ibm437 character set and store it as a new,
customized character set, you would open the text editor supplied with Windows by
selecting "Execute" from the Start menu, and then entering "Notepad" followed by {Enter}.
Once the text editor is open, you can open an editable version of the ibm437.asc file by
activating the menu item "Open" from the File menu. More detailed information is
contained in your Operating System Manual.
The file ibm437.asc will open and can be edited. Please do not modify the file structure,
but you may change the Braille characters as desired. The Braille dot combinations are
given as their number equivalents on each line, along with the designation of the
character. However, the first line in the file contains a description of the character set in
that file. The characters are in ASCII character order. You can modify the dot combinations
for any character by changing the numbers. For example, if you want to represent the digit
4 with dots 2 3 5 instead of dots 1 4 5 6, you would change the numbers 1 4 5 6 to 2 3 5.
Please note that at least one space must be entered between the dot combinations and
any comments, because otherwise the conversion of the Braille table while transferring it
to the Connect Braille may fail.
When you have finished changing characters, you can save the modifications under a new
name.
5.1.2.2 Loading Braille Character Sets
As mentioned above, nine additional Braille tables can be loaded into the Connect Braille
in addition to the default character set. For example, if you have created a table under the
designation Mytable.asc, you can load it into the Connect Braille with the HTCom program
(StartStick). Start-up HTCom and activate "Load Braille Table." A dialog enables you to
specify the character set to be transferred by selecting or entering the name. After
pressing the {Enter} key you can specify the Braille table slot where you want the table to
be saved. Pressing the {Enter} key again will initiate the file transfer.
5.1.2.3 Selecting and Activating Braille Tables
Once you have activated the menu item 'Braille character sets' on the Connect Braille,
you can select a character set and activate it by pressing [TRC]. The Connect Braille
contains only the standard character set of the current system language as shipped.
Foreign language versions of the Connect Braille (e.g., Swedish, French etc.) also provide
character sets for those languages. An X enclosed by square brackets indicates which
character set is active. The menu consists of the following items:
[X] Standard character set: The default character set, which is always available.
Character set (1): [empty]
to
Character set (9): [empty]: Positions for the nine additional loadable character sets.
The designation [empty] shows that there is currently no character set stored at this
position. If a character set has been downloaded, a name appears instead of [empty],
listing the file name under which the character set was loaded into the Connect Braille.
If you attempt to activate an empty slot, the Connect Braille will respond with the message:
'Braille set n is empty', where n is the number of the currently selected character set.

Connect Braille
Operation of the Connect Braille
Page 19
If the selected character set exists, it will be activated immediately, and you will be
returned to the main menu, menu item 'Braille character sets'. The character set has
already been switched.
Note:
When using a custom character set, it is possible that messages or menu items suddenly
become partially or entirely unreadable. This may be due to one of the following causes:
•The Braille character assignments in the custom character set do not correspond to
the assignments in the character set used for generating messages.
•A custom character set contains errors. For example, if you have deleted a line in a
character table, the table no longer consists of 256 definitions. This causes all
character definitions following the deleted line to be moved up by one character.
This could cause the word "info," for example, to turn into "jmen".
If you cannot read the Connect Braille's messages at all, you have the following options:
1. Use the communications program HTCom's Monitor Mode. Under Monitor Mode,
the output is not affected by the Braille character set selected on the Connect
Braille. With the assistance of a sighted person or your screen reader's speech
output, you can monitor the output from the Connect Braille on the PC screen and
restore the standard character set. Switching into Monitor Mode is possible only if
the screen reader's access to the Braille display has been deactivated.
2. Create a situation where you are back in the main menu, so that you can navigate
from there to the menu item 'Braille character sets' by using the [TD] key. If you
are sure that you are somewhere in the menu system, you can simply press the
[TLC] key several times, and then [TD] exactly five times. Then press [TRC], which
opens the submenu. Pressing [TRC] again will activate the default character set.
5.1.2.4 Delete selected braille set (D)
If the loadable character set feature is used extensively, all slots will eventually be filled. In
order to delete a given Braille character set, please proceed as described below:
1. Activate the character set to be deleted in the menu item 'Braille character sets'.
2. Open 'Braille character sets' again and move through it to the end.
You will arrive at the menu item 'Delete selected braille set'. Once you have activated
this command, you will be asked whether you really want to delete the character set. If you
answer "Yes" the character set selected in the previous step will be deleted, and the
default character set will be activated.
5.1.3 Info (I)
You can check the remaining charge and status of the batteries in the 'Info' menu. You
can also check the firmware version and serial number and determine the configuration of
the external keyboard.
5.1.3.1 Battery statistics (B)
This menu provides various data regarding the batteries contained in your Connect Braille.
It consists of the three functions described below.

Connect Braille
Operation of the Connect Braille
Page 20
Please note that the values displayed by these functions are not updated dynamically. You
should close them by pressing [TLC] and reactivate them with [TRC] in order to display
updated information.
5.1.3.1.1 Capacity (C)
Here you can check the charging state of the batteries indicated by one of the fife following
values:
•Fully charged: The batteries are 100% charged.
•High: Much more than 50% battery charge remaining.
•Medium: About 50% battery charge remaining.
•Low: The battery charge is low but still sufficient. We recommend plugging in the
charger.
•Empty: The battery charge is almost empty, a warning sound appears. Please plug in
the charger immediately.
5.1.3.1.2 Voltage (V)
This menu item provides information on the voltage remaining in the batteries. The voltage
of fully charged batteries is approximately 5.6 V. If battery voltage falls below ca. 4.0 V, the
Connect Braille turns itself off. You can thus use Voltage to estimate your batteries' status.
We recommend replacing the rechargeable batteries if you notice the voltage decreasing
unusually rapidly after having used them for some time.
5.1.3.1.3 Status (S)
This function displays the battery status. This can be one of the following values:
’Running on battery’: The Connect Braille receives its power from the batteries, which
are being discharged.
’Fast charging’: the batteries are receiving a high recharge voltage for fast charging from
the power supply.
’charging’: the batteries are only receiving a maintenance charge.
’On USB power’: Connect Braille is connected via USB with the PC. There is no charging
or discharging of the batteries. The power is provided by the USB interface.
’On power supply’: The power supply is plugged in and connected. There is no charging
or discharging of the batteries. The power is provided by the power outlet.
In order to recharge the batteries, simply connect the included power supply to a power
outlet. The batteries will recharge in two to three hours. Recharging occurs entirely
automatically —it is not possible to overcharge the batteries. The Connect Braille
automatically switches from initially high recharging voltage to a very low charge just to
maintain a full charge.
5.1.3.2 Keyboard layout (K)
This function displays the language currently implemented on the Connect Braille via the
keyboard layout table. Keyboard tables are available for several languages, and the
included Keyboard Layout Compiler (BKC) can be used to create custom key
assignments.
Other manuals for Braille Wave
3
Table of contents
Other HandyTech Monitor manuals


