Hankel DKE 146 User manual

Model No.: DKE 146 DKE 149
DKE 376 DKE 379

-
-
-
-
-
-
-
-
-
-
-
-
-
-
-
-
-
-
-
-
-
-

RU
1
-
-
-
-
-
-
-
-
-
-
-
-
-
-
-
-
-
-
-
-
-
-
-
-
-
01234

2
-
-
-
-
-
-
-
-
-
-
-
-
-
-
-
-
-
-
-
-
-
-
-
-

RU
3
-
-
-
-
-
-
-
-
-
-
-
-
-
-
-
-
-
-
-
-
-
-
-
-
4
-
-
-
-
-
-
-
-
-
-
-
-
-
-
-

RU
5
-

6
1. Carefully read the following important
information regarding installation safety
and maintenance. Keep this information
booklet accessible for further consulta-
tions.
-
-
-
place or burner that depends on the air in
the environment and is supplied by other
removes the air from the environment
-
bustion.
2. Provide adequate ventilation in the envi-
ronment for a safe operation of the cook-
hood.
room when the range hood is used at the
same time as appliance burning gas or
other fuels.
4. Follow the local laws applicable for exter-
nal air evacuation.
5. Appliance shall only be used with rated
risk if cleaning is not carried out in accord-
be cleaned once per month.
In certain circumstances electrical
appliances may be a danger hazard.
the cooker hood is operating.
2. Do not touch the light bulbs after appli-
ance use.
3. Do not disconnect the appliance with wet
hands and without to force the supply
cord.
5. Constantly check food frying to avoid that
hazard.
6. Disconnect the electrical plug prior to any
maintenance.
7. Children don’t recognize the risks of elec-
the appliance only under supervision of
adults and out of the reach from children.
UK
7
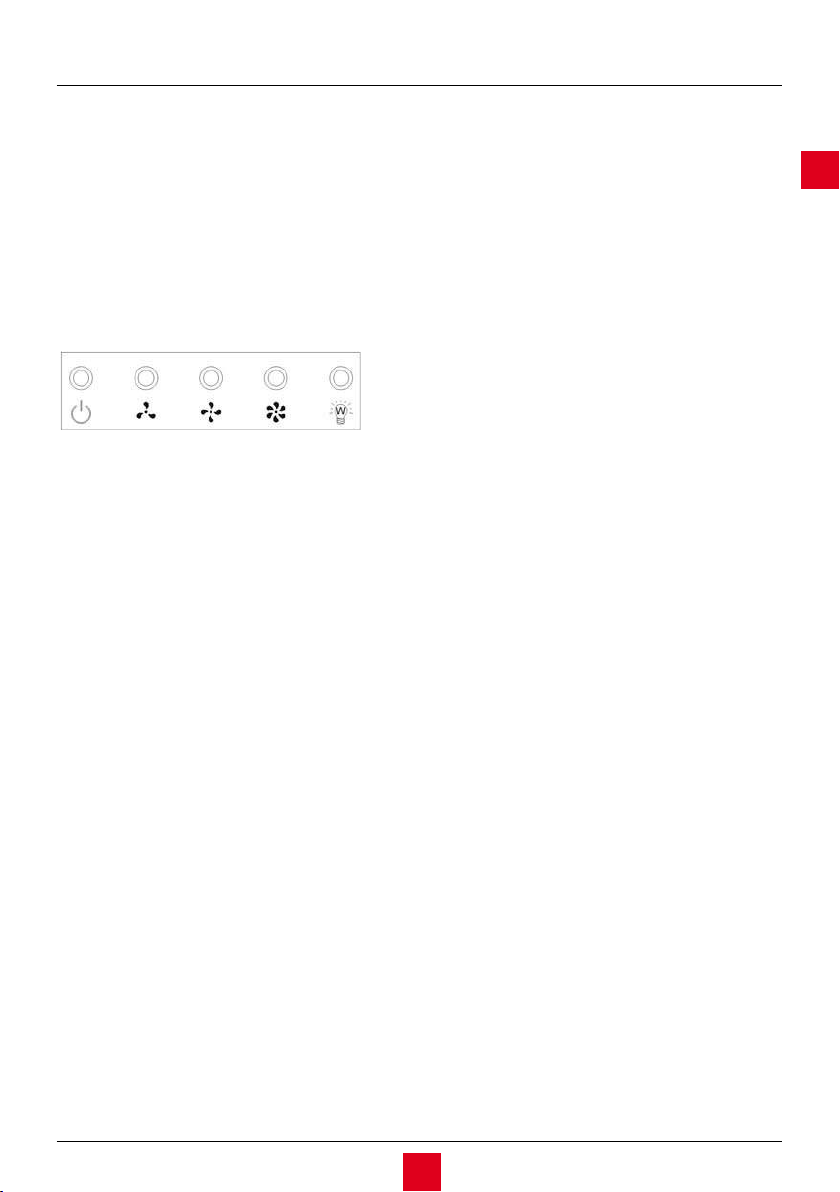
the blower on to three speed settings:
0 – OFF
Proper maintenance of the Range Hood
will assure proper performance of the unit.
frequently. Use a warm detergent solution.
instructions.
installation instructions.
materials to keep clean. Occasional care will
tips:
1. Hot water with soap or detergent is all that
is usually needed.
2. Follow all cleaning by rinsing with clear
avoid water marks.
use a non-scratching household cleanser
or stainless steel polishing powder with a
little water and a soft cloth.
4. For stubborn cases use a plastic scour-
ing pad or soft bristle brush together with
cleanser and water. Rub lightly in direc-
pressure that may mar the surface.
5. Do not allow deposits to remain for long
periods of time.
6. Do not use ordinary steel wool or steel
to the surface causing rust.
-
main in contact with stainless steel for
extended periods. Many of these com-
pounds contain chemicals that may be
harmful. Rinse with water after exposure
and wipe dry with a clean cloth.
8. Painted surfaces should be cleaned with
warm water and mild detergent only.
01234
8
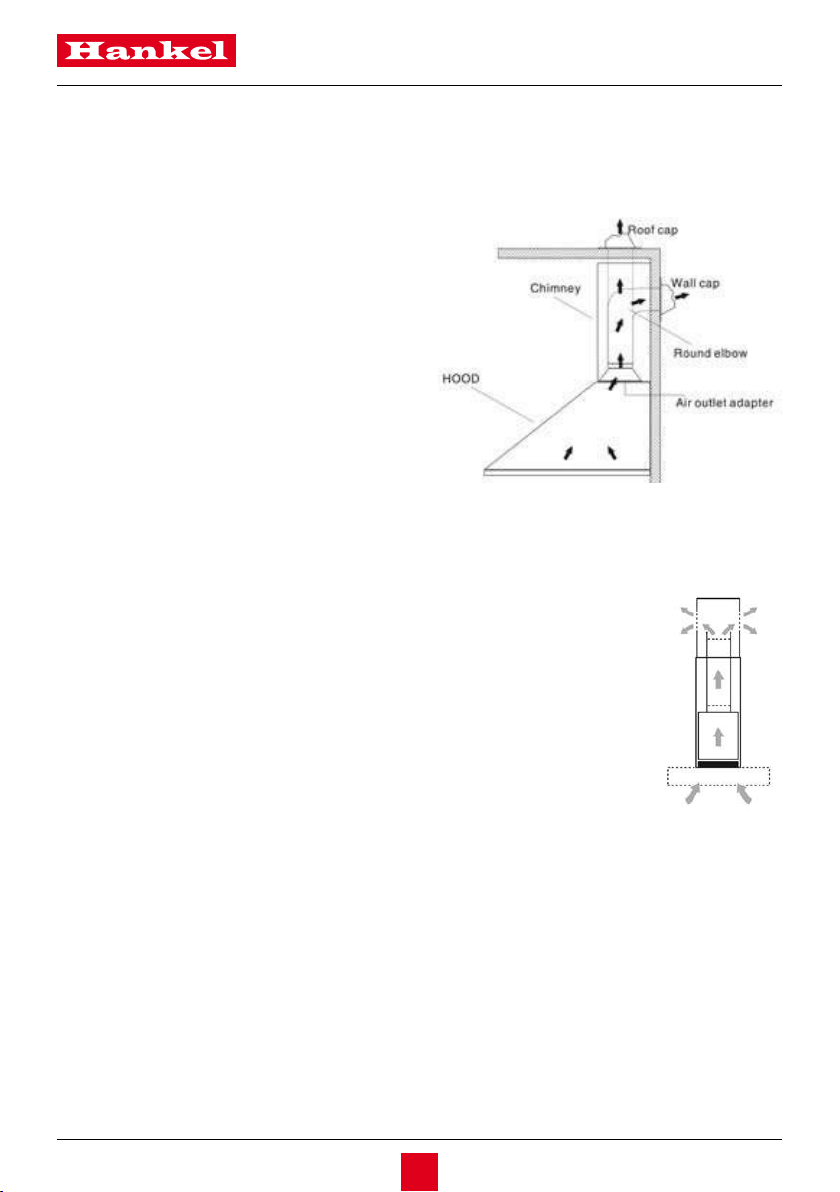
5. Install a roof/wall cap. Connect round met-
al ductwork to cap and work back towards
hood location. Use duct tape to seal the
joints between ductwork sections.
Do not use plastic
1. Determine the length of
aluminium ducting.
on.
Electrical wiring must be done by a quali-
-
-
trical power at service entrance before wir-
to avoid a hazard.
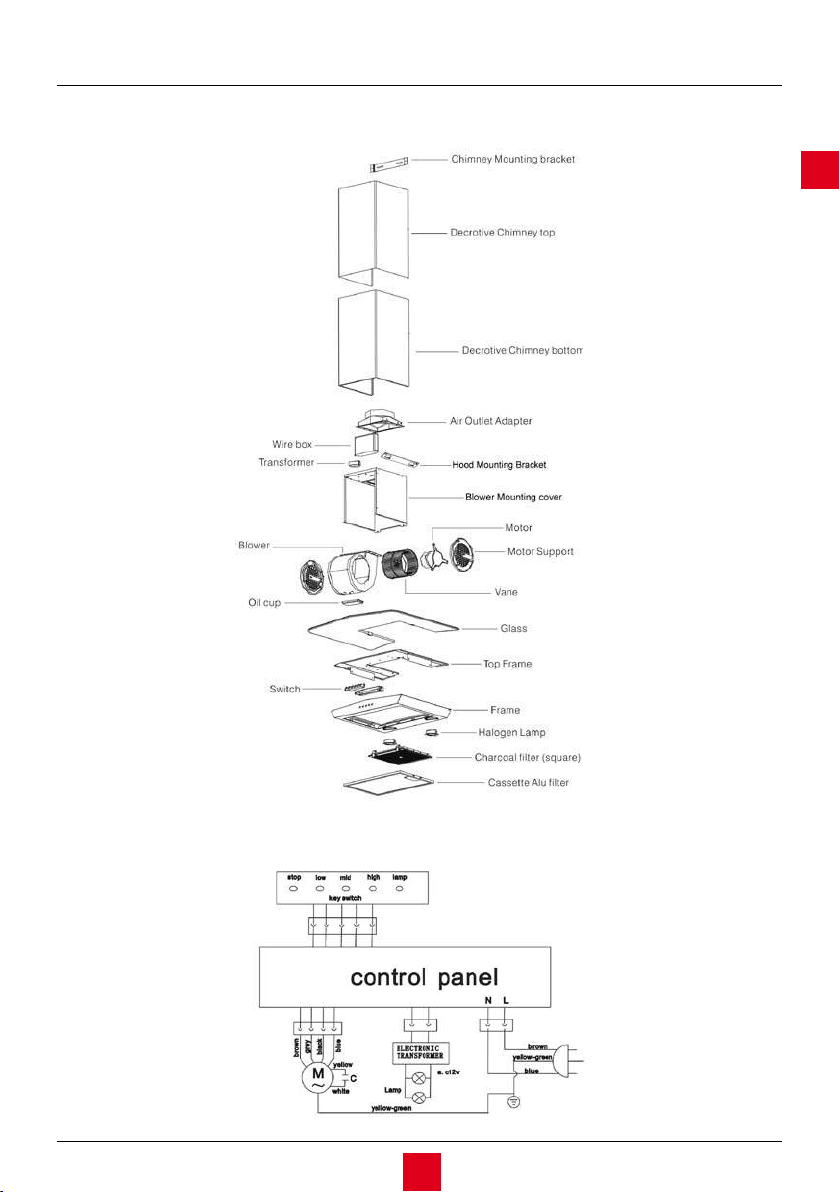
Unpack hood and check contents. You
should receive:
1 – Hood
1 – Decorative Chimney Bottom
1 – Parts Bag:
1 – Hood Mounting Bracket
1 – Chimney Mounting Bracket
1 – Discharge Collar
1 – Oil Cup
5 – Drywall Anchors
1 – Installation Manual
1. Decide where the ductwork will run be-
tween the hood and the outside.
will reduce the performance of the hood.
Use as few of them as possible. Larger
ducting may be required for best perform-
ance with longer duct runs.
that is used for exhausting fumes from
UK
9
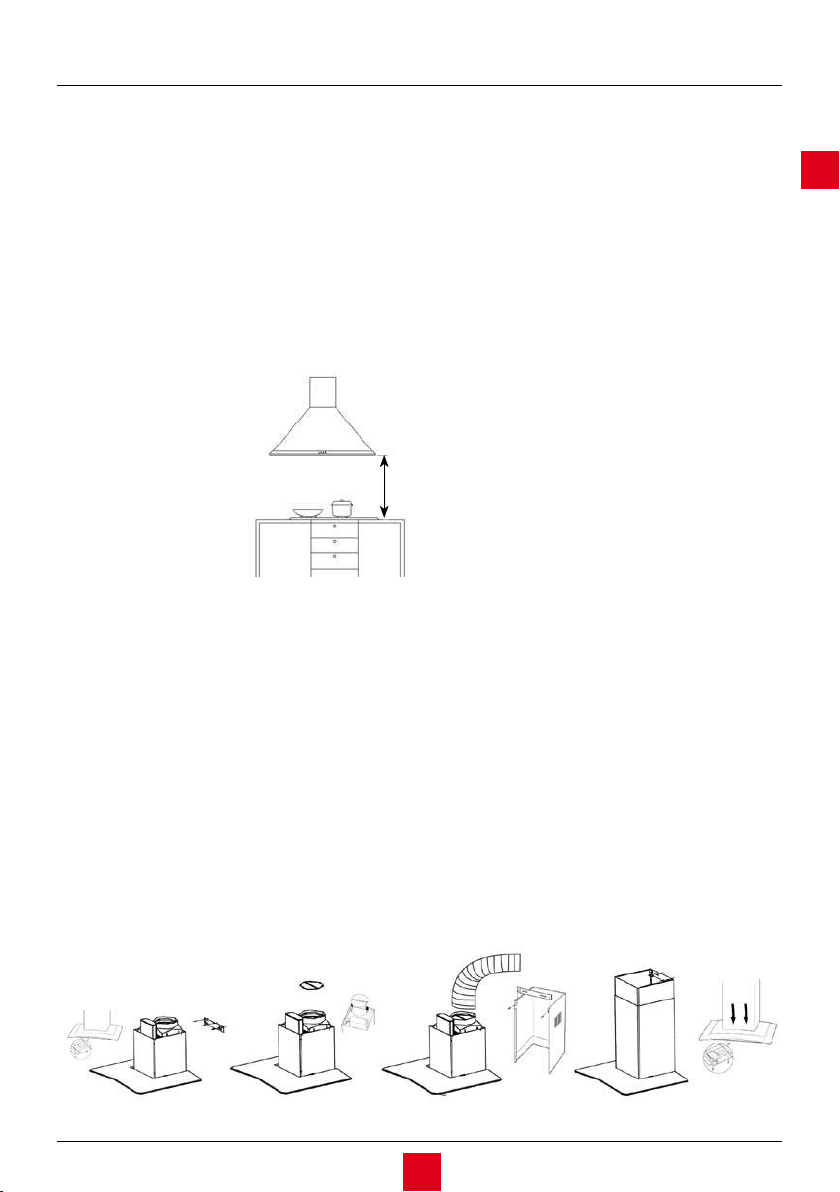
At least two people will be required
Minimum hood dis-
tance above cooktop
must not be less than
650mm. A maximum
of 750mm above the
cooktop is highly rec-
ommended for best
capture of cooking
impurities. Distance
over 750mm above
the cooktop are at the
installer’s and user’s discretion – providing
of body.
screws and dry wall anchors. Align the
hood body with the hood mounting brack-
engages the bracket.
3. Fix the discharge collar into the air outlet
adapter.
4. Attach an adequate length of 150mm
round duct to the air outlet adapter.
5. Fix the chimney mounting bracket to the
decorative chimney top with chimney
bracket screws.
6. Carefully slide the decorative chimney bot-
tom down outside the decorative chimney
top. Carefully place the decorative chim-
ney bottom into the recessed area of the
hood body top.
7. Raise the decorative chimney top up in-
-
cure the chimney mounting bracket to the
screws and dry wall anchors.
8. Fix the Decorative Chimney Bottom with 3
decorative Chimney Bottom screws from
inside of the hood body.
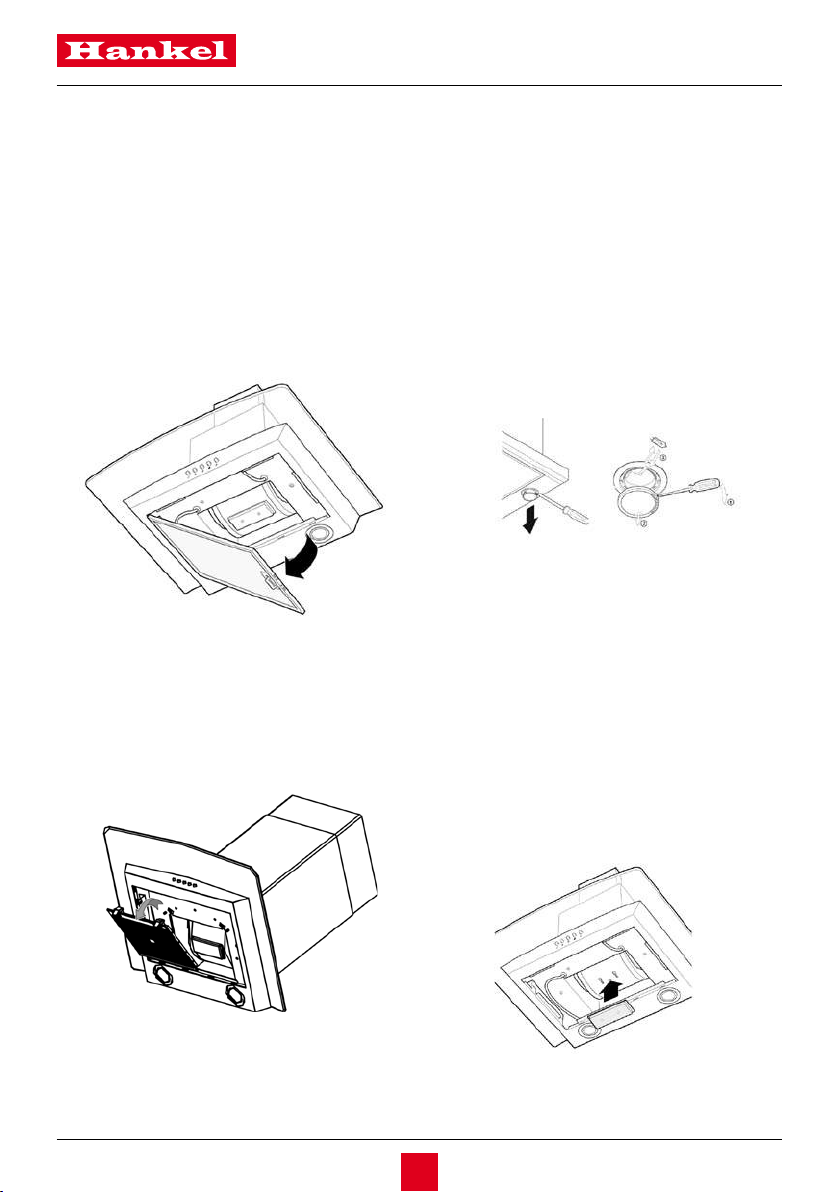
10
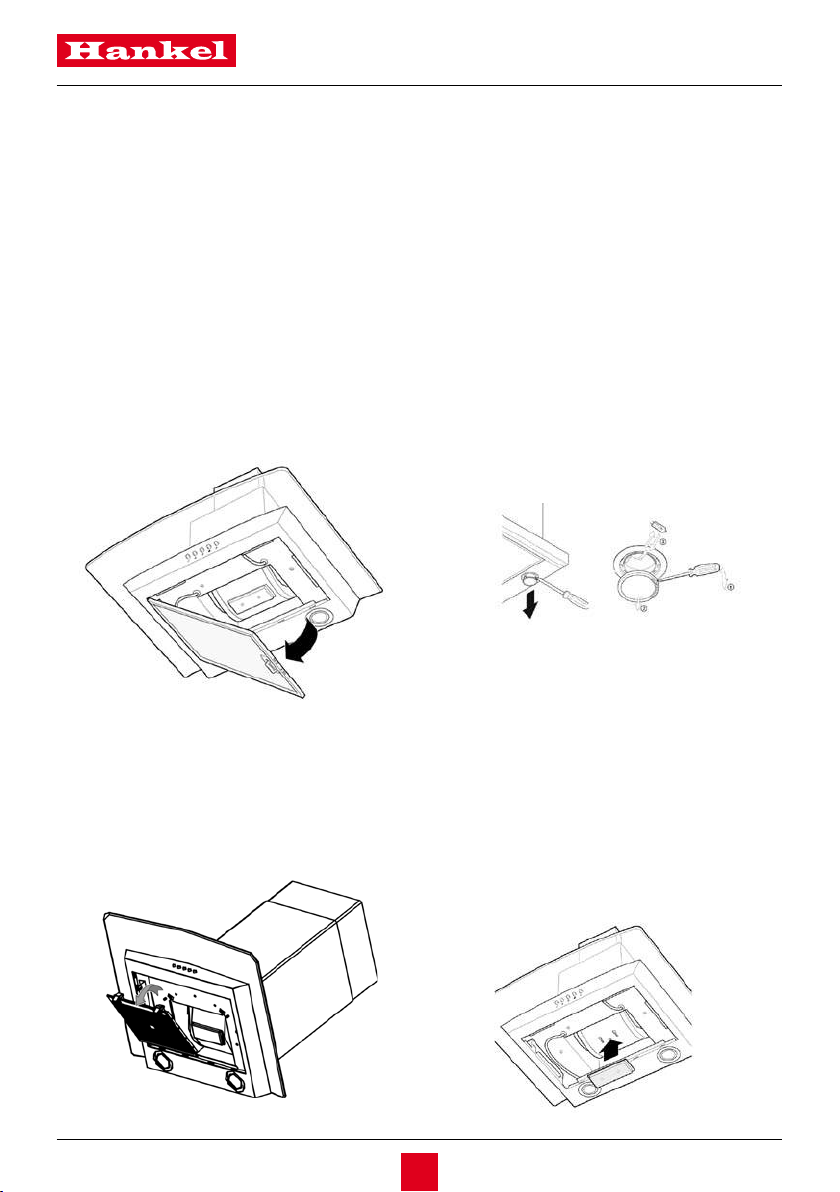
-
move.
tabs with slots in the hood. Pull out the
after assembly.
-
til the stop click is heard.
installed.
Always switch off the electrical supply before
carrying out any operation on the appliance.
1. Kick off the halogen bulb cover by using
halogen bulb. Do not touch replacement
-
motor blower.
UK
11

12
This manual suits for next models
3
Other Hankel Ventilation Hood manuals


Popular Ventilation Hood manuals by other brands


Vox
Vox TRD 600IX user manual
 RANGE HOOD Installation Instructions and Use & Care Guide")
KitchenAid
KitchenAid 30" (76.2 CM) RANGE HOOD Installation Instructions and Use & Care Guide

Whirlpool
Whirlpool RH7630XL installation instructions

Maico
Maico ER 100 D Mounting and operating instructions

Prima
Prima PRDE0004 Manual for installation, use and maintenance

Franke
Franke FDL 9165 XS installation manual