HANLIM HL-616 User manual
HANLIM
USER'S
MANUAL
To
assure
the product to work
in
best
status
Please
read
the
user'.s
manual
carefully
before
operation
and
keep
it
well
for
future
use

English
...............................................................
.
Franc;;ais
..............................................................
.
Deutsch
..............................................................
.
Italiano
Espanol
Contents
Welcome
.............................................................
.
Safety
information
....................................................
.
Features
..............................................................
.
Setting
up
your
.......................................
07
Using
your
............................................
08
Troubleshooting
.......................................................
12
Maintaining
your
......................................
13
Legal
notices
..........................................................
14
WARRANTY
CARD
......................................................
15
Welcome
Congratulations on your purchase
of
a high-quality product.
Your
is
designed for reliable and trouble free performance, we
wish you great satisfaction
in
using it.
Safety information
To
preventfire orshock hazard, do not plug the power cord into
an
extension
cord, receptacle, orotheroutlet unless the blades
can
be fullyinserted
to
prevent
blade exposure.
To
preventfire orshock hazard, do notexpose this
to rain or moisture.
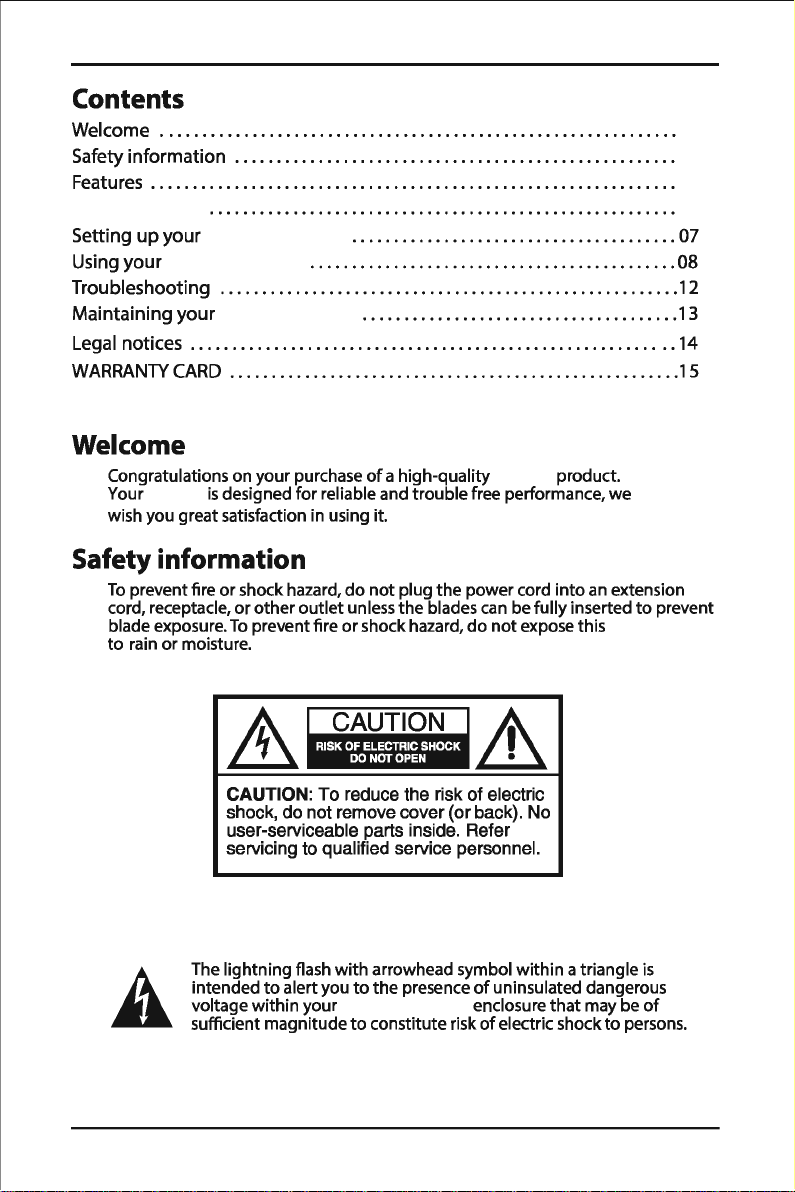
CAUTION: To reduce the risk of electric
shock, do not remove cover (or back). No
user-serviceable parts inside. Refer
servicing to qualified service personnel.
The
lightning flash with arrowhead symbol within atriangle
is
intended
to
alertyou
to
the presence
of
uninsulated dangerous
voltage within your enclosure that may
be
of
sufficient magnitude
to
constitute risk
of
electric shock to persons.

AThe exclamation
point
within
atriangle
is
intended
to
alert you
to
the
presence
of
important
operating and maintenance (servicing)
instructions in the literatureaccompanying your
Your
uses
a
Class
1laser
to
read
Compact
Discs.
Your
is
equipped
with
safety switches
to
avoid exposure when
the
CD
door
is
open and thesafety interlocks
are defeated. Invisible laser radiation
is
present when the
CD
door
is
open and the
system's interlock
has
failed
or
been
defeated.
You
should avoid direct exposure
to
the laser beam atall times. Do
not
attempt
to
defeat
or
bypass the safety switches.
WARNING:
To
reduce the risk
of
fire
or
electric shock,
do
not
expose your
to
rain
or
moisture.
WARNING:
Any use
of
the controls
or
an
adjustment
to
the procedures other
than those specified herein mayresult in hazardous radiation.
CAUTION:
Your should
not
be exposed
to
water (dripping
or
splashing) and
no
objects filled
with
liquids, such
as
vases,
should be placed on
it.
Read instructions
Read
all
of
the
safety and operating instructions beforeyou
use
your
Retain instructions
Retain the safetyand operating instructions forfuture reference.
Followwarnings and instructions
Follow all warnings on your
Followall operating and
use
instructions.
Placement
and in theoperating instructions.
When placing your on a lacquered
or
natural finish,
protectyourfurniture
with
a cloth
or
other protective material.
Avoid exposure
to
direct sunlight, temperature extremes, and moisture.
( ) ()
"
"
Ω
/
/ ( ) ( )
/
≤
Ventilation
Slots and openings in thecabinet and the back
or
bottom
are provided for
ventilation, reliable operation, and protection from overheating.These openings
must
not
be blocked
or
covered. Do
not
blockthe openings byplacing your
on a bed, sofa, rug,
or
othersimilar surface.
Water
and moisture
Do
not
use
your nearwater.For example
,do
not
use
it
near a
bath tub, wash bowl, kitchen sink, or laundrytub, in a
wet
basement, or near
aswimming pool.
Do
not
letwater splash
or
drip
onto
your Do
not
place objects
containing liquids, such
as
a
vase,
on
top
of
your
Disconnecting power
Unplug this apparatus during lightning storms orwhen unused for long periods
oftime.
The rating label
of
the
is
located on the
Features
• Bluetooth,
FM
radio,
CD
player,
USB
player, and
3.5
mm
auxiliary
input
forthe ultimate playbackflexibility
backlit displayfor
input
and status
• Powerful stereo speakers, along
with
a headphonejackfor
private listening
• 20 preset stations for
FM
radio
•
CD
player plays
CD-R/RW
media
Package contents:
• ACCord
•
User's
Manual
• Quick Start Guide

/
+/- /
(
)
1 2 3
456
7 8 9
0EQ
MODE
SCAN
CH-
CH+
TUN-
TU N+
VO L- VOL+
REPEAT
PR OG
/
/
/ +
/
I 0
(!)
,¢
rn
■
►
II
,..
L
~
~
..,
I ! w
u
~
ooo
~
I
00
1
I I
1
000
1
L-,
r-.J
10 1
L - 0
HANLIM
I--.
__,
~
7
# Item Description
1
i¢
2
<!)
Standby/ON
button
3
■
4
~
5
..
6
Press
to
cycle
through
the
sound sources
(CD>USB> >BT>RADIO).
~
7
8
In
CD
or
USB
mode, press once
to
repeat
the
9
REPEAT
current song, press
twice
to
repeat all tracks,
press a
third
time
to
play all tracks in random
order.

MO DE
EQ
STANDBY
CH+
CH -
RE PEAT
OP EN
STOP SCAN
US B AU X IN
( )
10
11
12
13
14
15
/ +
+
.....
-
Press
to
begin
CD,
USB,
or
Bluetooth playback.
._I/SCAN
Press
again
to
pause playback.
(play/pause/scan)
button
.....
Press
to
select a specific sound field (equalization)
Selections include
Classic,
Rock,
Pop,
Jazz,
and Flat.
Front panel
~
8 o
---
oa
O
---

/ +
.
/
.
(
)
# ITEM DESCRIPTION
1 Standby/ON
button
Press
to
turn
on
your
. Press again
to
return
your
to
standby
mode.
2
■
3 !+ii
In CD
or
USB
mode,
press
once
to
repeat
the
4
REPEAT
current
song, press
twice
to
repeat
all tracks,
press a
third
time
to
play
all tracks
in
random
order.
5
USB
port
Connect
a
USB
fash
drive
to
this
port
to
play
files
on
the
device.
.....
....
-
6 -
7
button
Press
to
cycle
through
the
sound
sources
(CD>USB> >BT>RADIO).
8
Press
to
begin
CD,
USB,
or
Bluetooth
playback.
Ml/SCAN Press again
to
pause playback.
9 (play/pause/scan)
button
~
Press
to
select a specific
sound
field
(equalization).
Selections
include
Classic, Rock, Pop, Jazz,
and
Flat.
AUX
IN
jack
Connect
an external
audio
device
to
this
jack.

/
R
L
SP EAKE RS OUT PUT
AC INPUT
110 -240 V~
50/60Hz
RI SK OF EL ECTR IC SHO CK,
DO NOT OPE N!
CL ASS 1 L ASE R PRODUCT
FM AN T
Backpanel
0
# ITEM
1
2
FM
antenna
3
AC
INjack
4 Headphonejack
Setting
up
your
Connecting
the
AC
cord
0
DESCRIPTION
Provides an improved
FM
signal.
Connect
the
AC
cord (included)
to
thisjack
to
operate
your
on
AC
power.
Connect headphones
to
thisjack
to
listen
to
radio/playback
through
your headphones.
1 Make sure
that
your local
AC
powersource matches
the
voltage shown on
the
plate located on
the
bottom
of
the
2 Insert
the
small connector at
the
end
of
the
AC
cord
into
the
AC
INjack
on
the
back
of
your
3 Plug
the
AC
cord
into
awall
power
outlet.
Notes:
Unplug
the
AC
cord when
not
in
use.
-Power Electrical
Specs:
100-240V~50/60
Hz
Connecting headphones
• Plug
the
headphones
into
the
headphonejackin your
CAUTION: Listening
to
music
with
the
volume
too
loud
can
damageyour
hearing. Before you connect headphones,
turn
the
volume down.Afteryou
put
on
the
headphones, graduallyincrease
the
volume
to
acomfortable level.

VOLUME+/-
( )
+/ /
+/
+/ /
Using your
Playing
the
radio
1
Press
Standby
to
turn
on
the
2
Press
MODE
button
repeatedly
to
select RADIO
mode
.
3
4
5 lUN+ffiJN-
Adjust
the
volume
to
a
comfortable
level
by
VOLUMlc+/-
Press
Standby
to
turn
off
the
Improving reception
• Fullyextend
the
FM
antenna.You may have
to
reposition
the
antenna
for
best
reception.
Playing
CDs
You can playstandard and 3"audio
CDs,
CD-Rs,
and
CD-RWs.
CAUTION:
Do
not
try
to
play
DVDs,
VCDs,
or
data
CDs.
You maydamage
your
unit.
1
Press
Standby
to
turn
on
the
2
Press
MODE button repeatedly
to
select
CD
mode.
3
~
4 Inserta
CD,
label side up.
s
~
Playback beginsautomaticallyand stops
when
finished.
6
Press
■
(stop)
to
stop
the
CD
before
it
is
finished.The total
number
of
tracks appears on
the
display.
Notes:
•
If
a
CD
is
inserted incorrectly,
is
dirty,
or
is
damaged,
or
is
not
present
at
all,
NO
appears on
the
display.
•
To
prevent damage
to
the
CD,
neveropen
the
CD
door
while
the
CD
is
rotating and never
touch
the
lens.

OFF
Pausing CD playback
1
Press
~ I (play/pause). Playback stops
but
the
CD
continues
to
spin and
the
elapsed
time
of
the
current track on
the
display.
2
Press
~ I (play/pause) again
to
resume normal
CD
playback.
Skipping
or
searching a CD track
1 During playback, press
►~
(next)
or
..,.
◄
(previous)
to
skip
to
the
next
or
previous track, respectively.
2
Press
►►
( )
or
◄◄
( )
to
quicklysearch
the
currenttrackforward
or
backward, respectively.
Using repeat
mode
1
Press
REPEAT
while in playback mode
to
cycle
through
the
repeat
Repeatcurrenttrack, Repeat all, Random).The following appears on
the
display:
-ONE-Repeatcurrenttrack
-ALL-Repeat all tracks
-
RAN
-Random
playback
2
To
cancel repeat mode, press
REPEAT
until
the
OFf
icon appears
on
the
display.
Playing
USB
flash drives
1
Press
Standby
to
turn
on
the
2
Press
MODE
button
repeatedly
to
select
USB
modetill
"tJ58cc
"appears on
the
display.
3 Connectthe
USB
flash drive
to
the
USB
port.
Note: Make sure
that
you insert your
USB
drive all
the
way
into
the
USB
port.
4
Press
Ml/SCAN
to
begin/pause playback.
5
Press
■
to
stopplayback, and the number
of
thetotal tracks will appearon
the display.
Listening
to
an
external audio device
1 Make sure
that
the
is
turned off.
2 Plug one end
of
the
3.5
mm
AUX
cable ( )
into
the
AUX INjackin
the
front
of
your
3 Plug
the
other
end
of
the
cable
into
the
Line-outjack
on
the
audio device,
such
as
an iPod, smartphone,
or
other
MP3
player.
4
Press
Standby
to
turn
on
the
s
Press
MODE
button
one
or
moretimes
until"
"appears
on
the
display.
6
Use
the
controls
on
the
audio device
to
control playback.

HL-616
HL-616
.
Listening
to
a Bluetooth sound source
Before you
can
use
your
with
aBluetooth device, you
need
to
pairyourdevice
to
the Afteryour
is
plugged in and turned on,
do
the following:
Notes:
• Your must be turned on
to
make aBluetooth connection.
•
Place
the Bluetooth device within
33
ft.
(10
m)
of
your
• Bluetooth
is
used
as
aconvenient connection
to
your sound source.
Pairing your devices
1 Select Bluetooth
as
the inputsource by pressing the MODE
button one
or
more times until
"bt"
appears on thedisplay.
2 Navigate
to
yourdevice's Bluetooth settings, turn on Bluetooth, then
search for available devices.
For
additional information on pairing
yourdevice,
see
your device's documentation.
3
On
your Bluetooth device, select"
IHIL-616
"from
the device list.
Repeat steps 1-2
if
"Hl-616"
is
notdisplayed.
4
If
a
PIN
code
is
requested, enter"0000".
s When the Bluetooth connection
has
been established, atone will
sound.
Notes:
• Your
can
only be connected and playcontentfrom
one device at atime.
• When you turn on your ,
it
automatically connects
to
the
last connected device
if
thatdevice
is
in range.
To
connect
to
adifferent
paired device,turn
off
Bluetooth orunpairfrom the currently paired device
and manuallyconnect
to
the other paired device.
Important: Make sure thatthedeviceyou connect and select
as
your sound
source
is
outputting sound
to
the
See
your device s'user
manual for more information.
Disconnecting
your
devices
Turn
off
the Bluetooth function on your device.

HL-616
HL-616
Reconnecting
to a paired device
When you select "bt''mode, your automaticallyconnects
to
a
previouslypaired device.
If
it
fails
to
connect, please checkthefollowing:
Your
loses
the
To
reconnect...
Bluetooth connection if
you
.••
Turn
it
off. Turn onyour Your
searches forthe last connected
Bluetooth device and reconnects.
Move the Bluetooth device
out
of
Moveyour Bluetooth device
within
33
ft.
(10
range. m)
of
your
Turn
off
your Bluetooth device. Turn onyour Bluetooth device, then make
sure that Bluetooth
is
on.
Turn
off
Bluetooth on your Bluetooth Turn on Bluetooth on your Bluetooth device.
device.
Connectyour Bluetooth device
to
Disconnect your Bluetooth device from the
another Bluetooth device. other Bluetooth device, then set yourdevice
to
pairing mode. Select"Hl-616
"on
your
Bluetooth device.
Change your Change the
input
source
input
source back
to
Bluetooth.
Note:
If
adevice does
not
automaticallyreconnect, you may need
to
reselect
"IHl-616" onyour Bluetooth device.
Connecting to a different device
1
On
your Bluetooth device, turn
off
the Bluetooth function orunpair
the
in your Bluetooth device list.The
can
now
be connected
to
another Bluetooth device.
2 Follow
the
section Pairing your devices on page
10
to
connect a new
device.
Receiving
a phone
call
while playing
music
When you receive acall while playing music through your phone, the
music stops automatically.
When you hang up, depending on the setting
of
your phone, the
current track may resume playback.

Troubleshooting
CAUTION: Do
not
try
to
repair
the
invalidate
your
warranty. yourself. Doing so will
Problem Solution
Your • Unplug
your
for
a
few
moments,
then
will
not
turn
on.
plug
it
backin.
• Make sure
that
the
AC
outlet
is
working
by
plugging
another
device
into
it.
The
CD
player will
not
• Make sure thatyou have
put
a
CD
in the
CD
compartment
play. • Make sure
that
the
CD
is
inserted label side up.
• Try a different
CD.
• Make sure
that
the
CD
player
is
not
paused.
• Make sure
that
the
CD
mode
is
selected.
• Make sure
that
you are using a
compatible
CD.
Your
can playstandard and 3"
audio
CDs,
CD-Rs,
and
CD-RWs.
A
CD
skips
while
• Wipe
the
CD
with
a cloth
to
clean it.
See
Cleaning discs
playing.
on
page 15.
• Try a different
CD.
• Make sure
that
the
CD
is
not
warped, scratched,
or
damaged.
• Make sure
that
your
is
not
being
affected
by
vibration
or
shock. Move
the
if
necessary.
• Make sure
that
you are using a
compatible
CD.
Your
can playstandard and 3" audio
CDs,
CD-Rs,
and
CD-RWs.
I hear noise
or
• Extend
the
FM
antenna.
distorted sound
on
• Rotate
your
until
the
best reception
is
FM
radio broadcasts. obtained.
• Try
turning
off
electrical appliances near
your
, such
as
hairdryers, vacuum cleaners,
or
fluorescent lights.
I
don't
hear any • Increase
the
volume.
sound. • Plug in
the
AC
power
cord and pressStandby
to
turn
on
your
• Make sure
that
you have selected
the
correct source.
•
If
you
are in AUX mode, make sure
the
volume
has
not
been
muted
on
your
playbackdevice.
Thesound seems
very
•
If
you
are using AUX mode, make sure
that
the
volume
is
low.
turned
up
on
both
your
audio source and
your
A
USB
drive
will • Disconnect
the
USB
drive and insert
it
back
to
the
USB
not
play.
port
all
the
way
in.
• Make sure
your
USB
drive
is
not
formatted
in
NTFS.

HL-616
HL-616
Problem Solution
My • Shorten
the
distance between your
won't
connect
to
my
and your Bluetooth device.
Bluetooth device. • Turn yourdevices off, then on. Re-pair your
and your Bluetooth device.
• Make sure
that
your
to
another Bluetooth device.
is
not
paired
• Make sure
that
your and Bluetooth
device are
both
in pairing mode.
• Make sure
that
your Bluetooth device
is
not
paired
to
any
other
device.
• Make sure
that
you have selected
"IHL-616
"on
your
Bluetooth device.
My
Bluetooth device • Shorten
the
distance between your
keeps unpairing. and yourBluetooth device.
"HIL-616
"does
not
• Shorten
the
distance between your
appear on
my
and your Bluetooth device.
Bluetooth device. • Put your
into
pairing mode, then
refresh your list
of
Bluetooth devices.
For
more
information,
see
the
documentation
that
came
with
your Bluetooth device
• Make sure
that
your Bluetooth device
is
visible
to
other
devices. For more information,
see
the
documentation
that
came
with
your Bluetooth device.
Maintaining your
Care
and handling of
discs
Handling
discs
Do
not
touch
the
playbackside
of
the
disc. Hold
the
disc
by
the
edges
so
that
fingerprints
do
not
get
on
the
surface. Never stickpaper
or
tape
on
the
disc.
Storing
discs
After playing, store the disc in its
case.
Do
not
expose
the
disc
to
directsunlight
or
sources
of
heatand never leave
it
in a parked car exposed
to
direct sunlight.

Cleaning
discs
Fingerprints and dust on
the
disc
can
cause poorsound qualityand distortion.
Before playing, clean the disc
with
aclean cloth.Wipe thediscfrom thecenter out.
Do
not
use strong solvents such
as
alcohol, benzine, thinner, commercially
available cleaners,
or
anti-static spray intended for oldervinyl records.
Cleaning
the
CD
lens
If
your
CD
lens gets
dirty
it
can cause poorsound quality.
To
clean the lens you will
need
to
purchase a
CD
lens cleaner which
can
maintain the
output
sound quality
of
yoursystem.
For
instructions on cleaning the
CD
lens, refer
to
the literature
accompanying the lens cleaner.
Cleaning
your
To
preventfire
or
shock hazard, disconnectyour from the
AC
power source when cleaning.
The finish on your maybe cleaned
with
adustcloth and cared
for
as
otherfurniture.
Use
caution when cleaning and
wiping
the plastic parts.
Mild soap and adampcloth may be used on thefront panel.
Legal notices
FCC
Statement
This devicecomplies
with
Part 15
of
the
FCC
Rules.
Operation
is
subject
to
the
following
two
conditions:
(1)
this device may
not
cause harmful interference, and
(2)
this device must
accept any interference received, including interference
that
maycause undesired
operation.
FCC
Caution
Changes
or
modifications
not
expressly approved
by
the
party
responsible
for
compliance
could void
the
user's
authority
to
operate this equipment.
This
equipment
has
been tested and found
to
comply
with
the
limitsfor a
Class
Bdigital
device, pursuant
to
Part
15
of
the
FCC
Rules.
These limitsare designed
to
provide reasonable
protection against harmful interference in a residential installation.This
equipment
generates,
uses,
and can radiate radio frequencyenergyand,
if
not
installed and used in
accordance
with
the
instructions, maybe cause harmful interference
to
radio
communications.
However, there
is
no
guarantee
that
interference will
not
occur in a particularinstallation.
If
this
equipment
does cause harmful interference
to
radio
or
television reception,which can
be determined
by
turning
the
equipment
off
and on,
the
user
is
encouraged
to
try
to
correct
the
interference
by
one
or
more
of
the
following
measures:
Reorient
or
relocate
the
receiving antenna.
Increase
the
separation between
the
equipment
and receiver.
Connect
the
equipment
into
an
outlet
on acircuit different from
that
to
which
the
receiver
is
connected.
Consult
the
dealer
or
an experienced radio/TVtechnician
for
help.

HANLIM
WARRANTY CARD
12 MonthsWarranty
Thankyou for choosing
Electronics warrants your new product
to
be free
from defects in materials and workmanship for a period
of
twelve
(12)
months, from the date
of
receiving.This warranty
is
in addition
to
your rights underAmazon's return and refund
policies which apply
to
your purchase.
provide you
with
yourchoice
of
afull refund
or
exchange (where possible) for this product
if
it
becomes
defective within the warranty period. will bear the
reasonable expense
of
claiming thewarranty This warranty
willno longerapply where the defect
is
a result
of
alteration,
accident, misuse, abuse,
or
neglect.
Please
contact ourCustomer Service
with
your order
ID
and
description
of
the problem, for warranty claim
or
any
difficulties
with
your product:
Email:
Amazon Buyer-Seller :
Go
to
Your Orders then find
your order in the list, click Electronics linkbelowthe
producttitle, clickthe Ask aQuestion button.
Phone:
Table of contents


 Service manual")


 operating instructions")


