4_ SHD-3000F
INSTALLATION INSTRUCTIONS
1. Select an installation position or place that can endure more than 4 times of the total weight
of the installation structure.
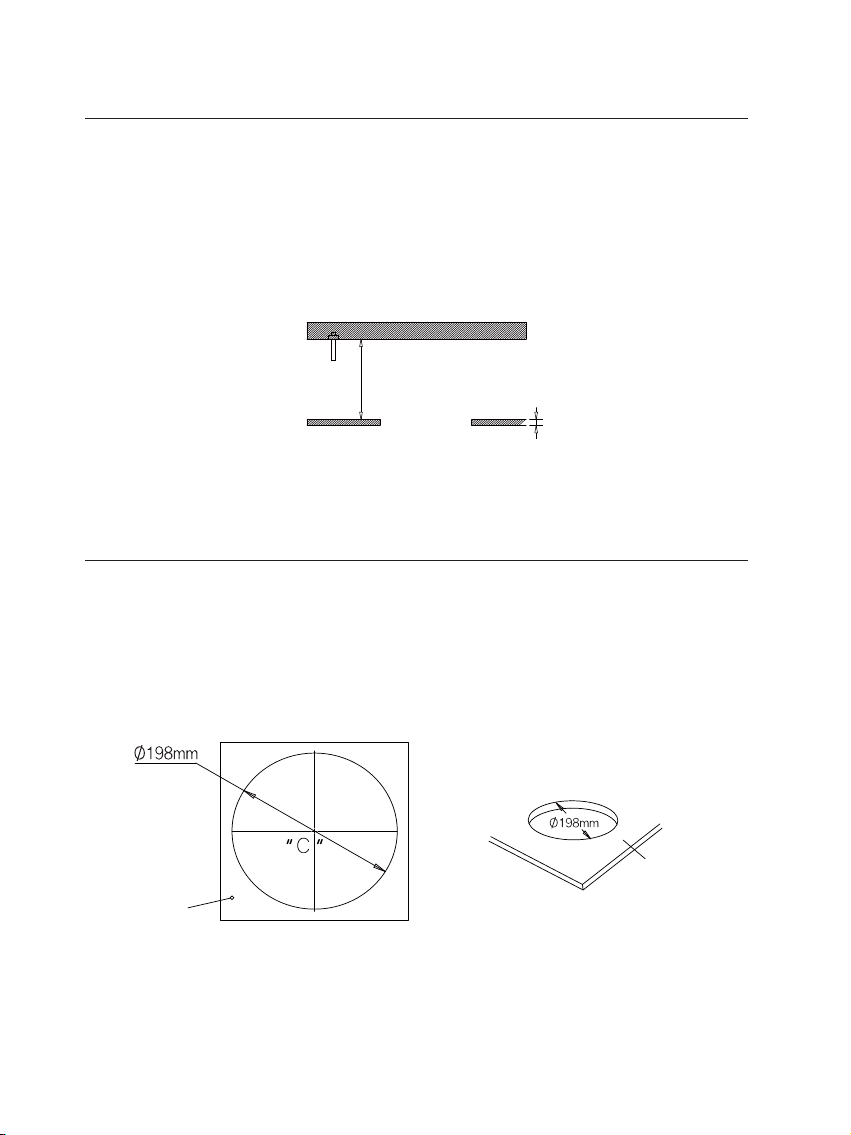
2. At least 250mm or more of spare height is required above the CEILING BOARD.
3. CEILING BOARD’s thickness should be less than 40mm.
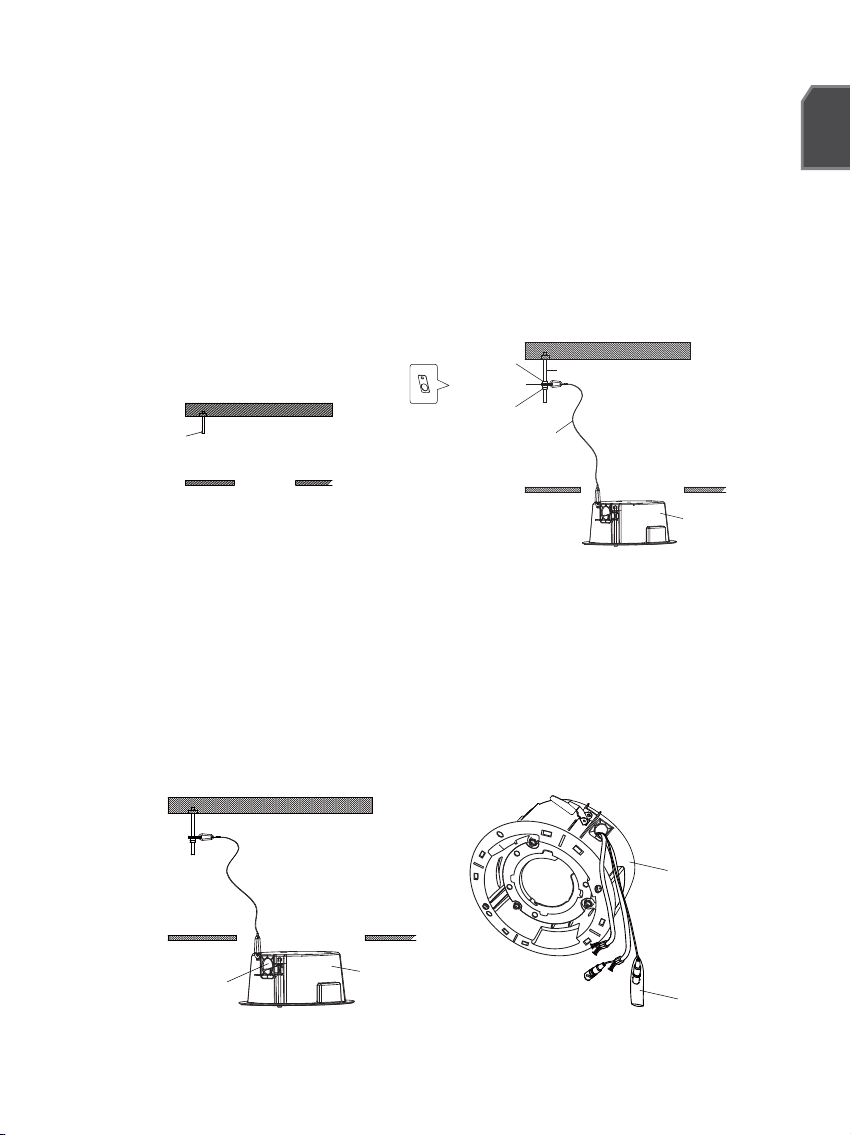
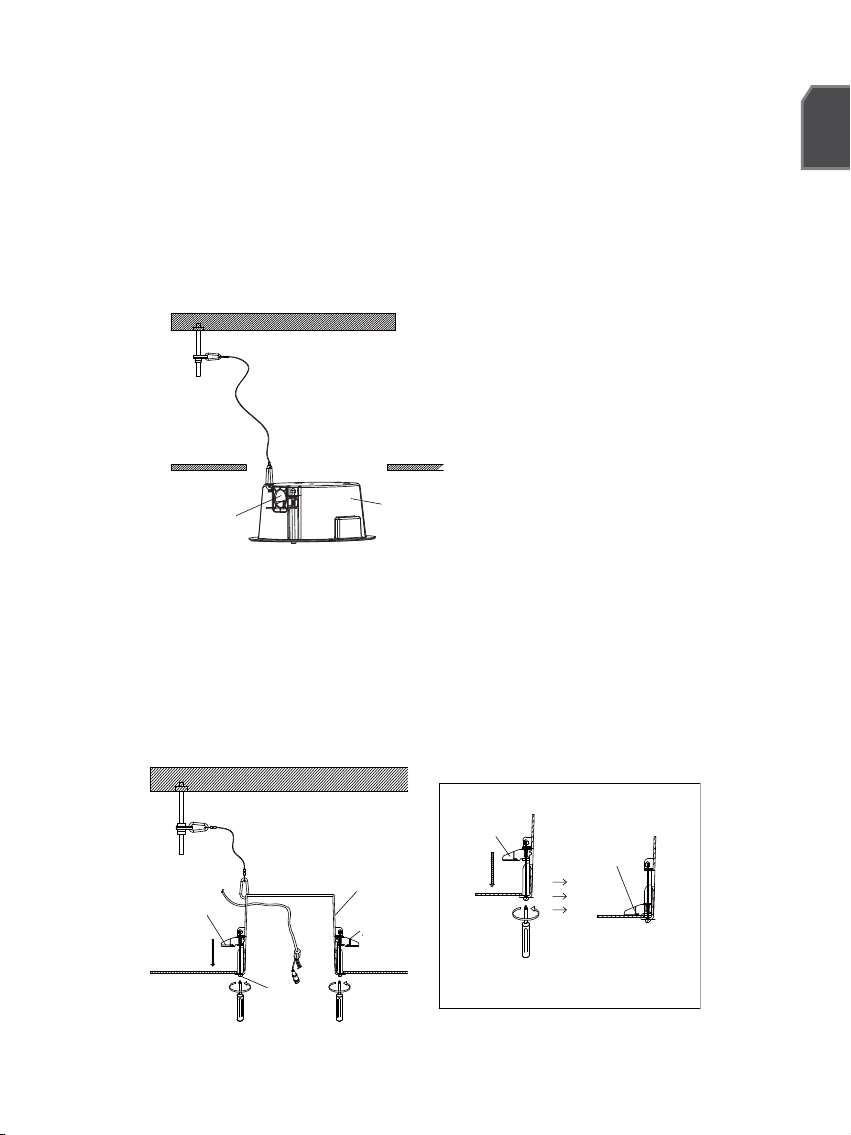
4. Be sure to secure the SAFETY WIRE to avoid a product fall.
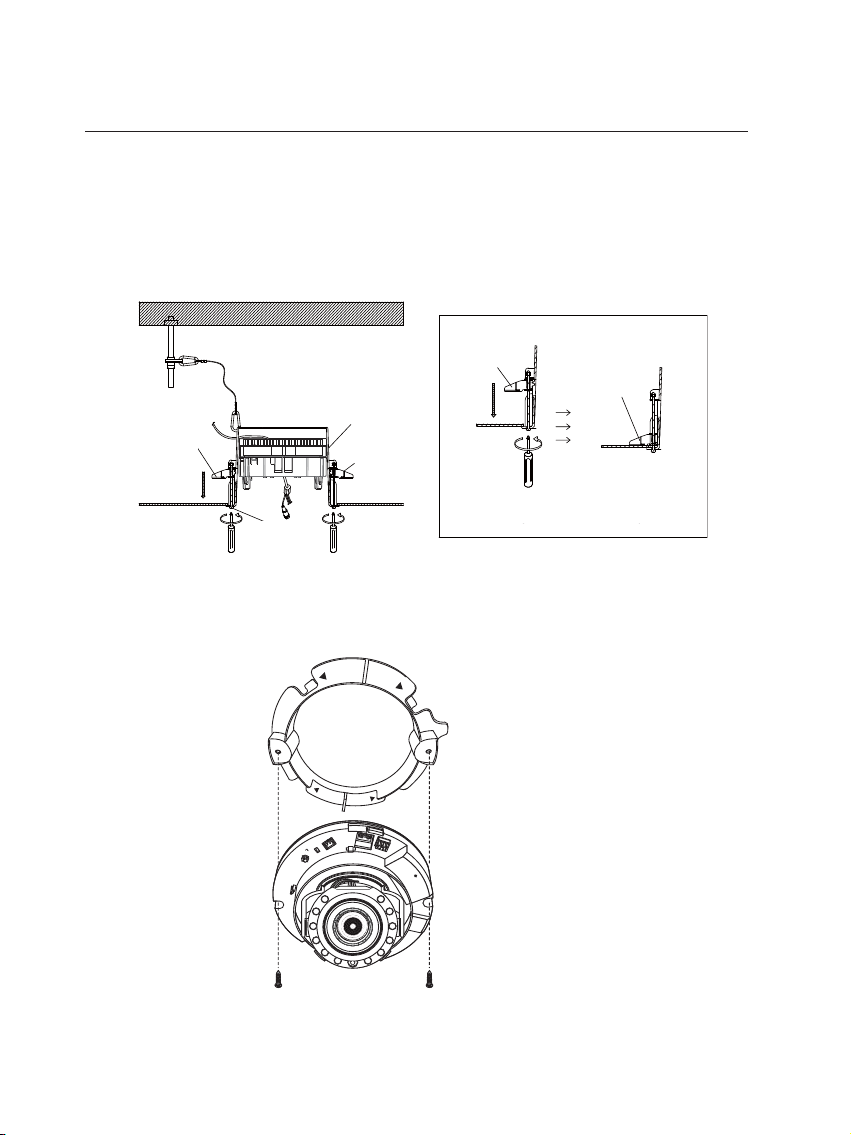
5. If you want to attach the camera to the ADAPTOR, use the only provided SCREWS.
INSTALLATION
(INDOOR TYPE)
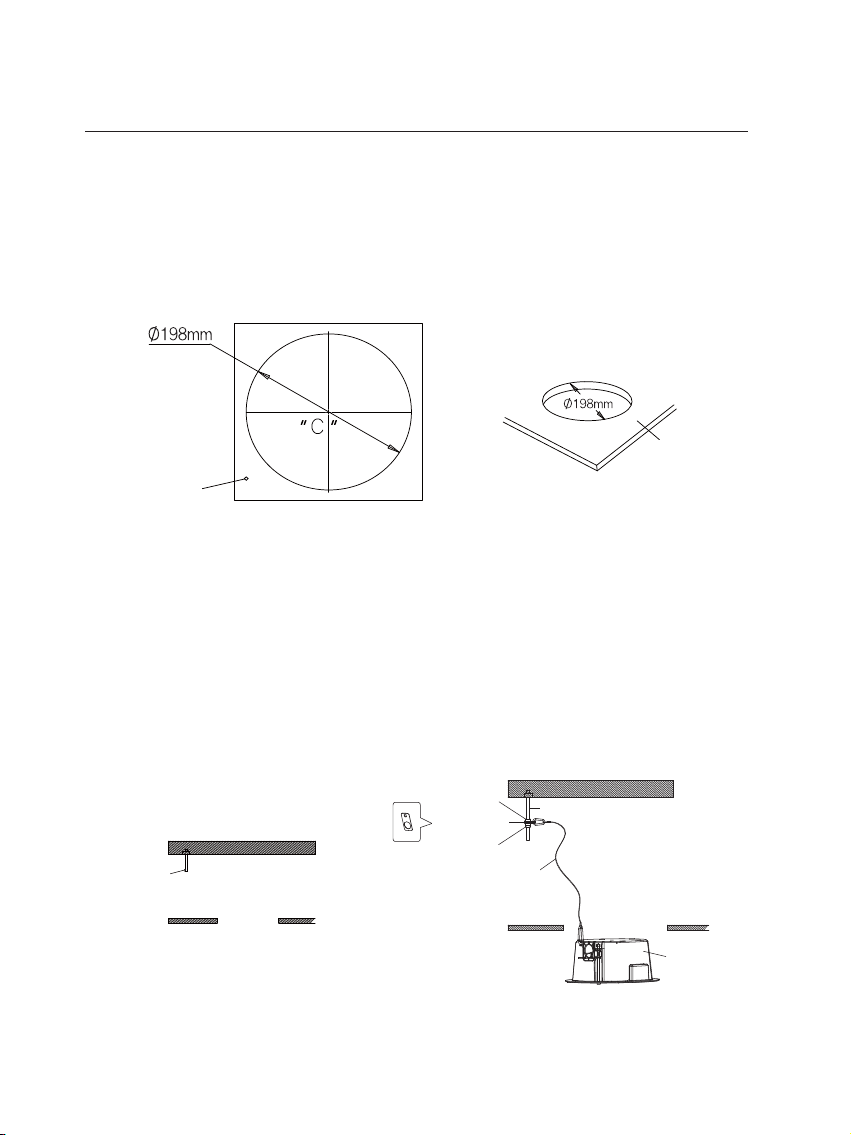
1. Place the TEMPLATE on the CEILING BOARD and drill a guided hole.
❶ Remove the round filling (“C”) from the TEMPLATE.
➋ Place TEMPLATE A onto the CEILING BOARD to which you will attach the ceiling
mount ADAPTOR and drill a hole of Ø198mm in diameter.
See the figure below for the hole shape.
250mm 이상일 것
천장보드 40mm 이하일 것
More than 250mm
CEILING BOARD Less than 40mm
TEMPLATE
CEILING BOARD