Harbor Desire User manual

OPERATION MANUAL
Desire
Welcome Aboard!
We are happy that you have chosen Ship Harbor Yacht Charters and
the vessel “Desire” for your vacation. We hope you enjoy your
cruising experience in the lovely islands of the Pacific Northwest.
This manual will help you become more familiar with your boat. If you
have any further questions, about the boat or your itinerary, please do
not hesitate to ask the SHYC staff.
Remember our vessels are non-smoking boats.
Bon Voyage!
The Ship Harbor Yacht Charters Staff

2
A Note from the Owners of “Desire”:
Welcome aboard and thank you for choosing !Desire"for your cruising vacation. !Desire"is a
2003 Meridian 490 Pilothouse. It is basically a newer version of the very popular Bayliner
4788. The design has been around for many years due to its perfect suitability for Pacific
Northwest boating. If you are already familiar with the 4788, you will feel very comfortable on
the 490 and welcome the over 50 significant quality upgrades that come with the Meridian
name.
We have been a boating family for many years. We have owned as well as chartered boats..
!Desire"is fairly new to charter service and we have strived to equip her to maximize your
cruising experience. Boating should be relaxing and enjoyable, not stressful. We have made
every attempt to facilitate that, from equipping the boat to trying to make this operator#s
manual as user-friendly and informative as possible. PLEASE USE THIS MANUAL. To
charter a boat this size, you are obviously an experience boater. Thus, this manual is meant to
supplement, not replace your knowledge of boating, seamanship, and vessel handling.
When you and your guests come aboard, a representative of Ship Harbor Yacht Charters will
conduct a checkout and systems review including a briefing on safety and operating
considerations. Please be certain to ask any questions necessary to clarify your understanding.
Reviewing this manual prior to arriving will be very helpful. It is important that everyone
aboard be familiar with the yacht, her systems, safety on the water, and radio usage.
We don#t think you will find a better maintained or equipped boat in charter, but there is
always room for improvement. While on your cruise, please write down anything you notice
that we could improve or change to make your next time more enjoyable. At the end of your
cruise, you can pass these suggestions and recommendations to the SHYC staff or e-mail us
changes and improvements. We thank you in advance for taking the time to gives us your
inputs.
Finally, we invite you to treat !Desire"as your own while you are on your cruise. Please care
for her as you would your own and not as a !rental."Enjoy and we hope to see you back next
year.
The Vogt Family

3
TABLE OF CONTENTS
Page
Boat Operation 5
Engine Inspection 5
Start-Up 5
Getting Underway 6
Cruising 6
Docking 7
Shutdown 7
Fueling 7
Boat Electrical 8
General 8
A.C. Power 9
Shore 9
Inverter 9
Generator 10
D.C. Power 11
Sanitation System 12
Vacuflush Toilets 12
Holding Tank 12
Water Systems 13
Fresh Water Tanks/Pump 13
Watermaker 14
Water Heater 15
Shower 15
Fresh Water Washdowns 15
Galley 15
Stove/ Oven 15
Microwave/Convection Oven 16
Refrigeration 16
Ice Maker 16
Washer/Dryer 16
Heating Systems 16
Electronics 17
VHF Radios 17
Depth Sounders 17
GPS/Chart Plotters/Radar 17

4
Anchoring 17
Mooring Buoys 18
Stern Tie 18
Entertainment 18
AM/FM/CD Stereos 18
DVD/Home Theater Stereos 18
Satellite TV 19
Internet Access 19
BarbeQue 20
Dingy and Motor 20
Lowering 20
Operating 21
Lifting 21
Other Notes 22
Troubleshooting/Tips 23
Notes/Comments 24
Specifications/Important Numbers 25
Appendix A – Electrical Schematic 26

5
BOAT OPERATION
Engine Inspection
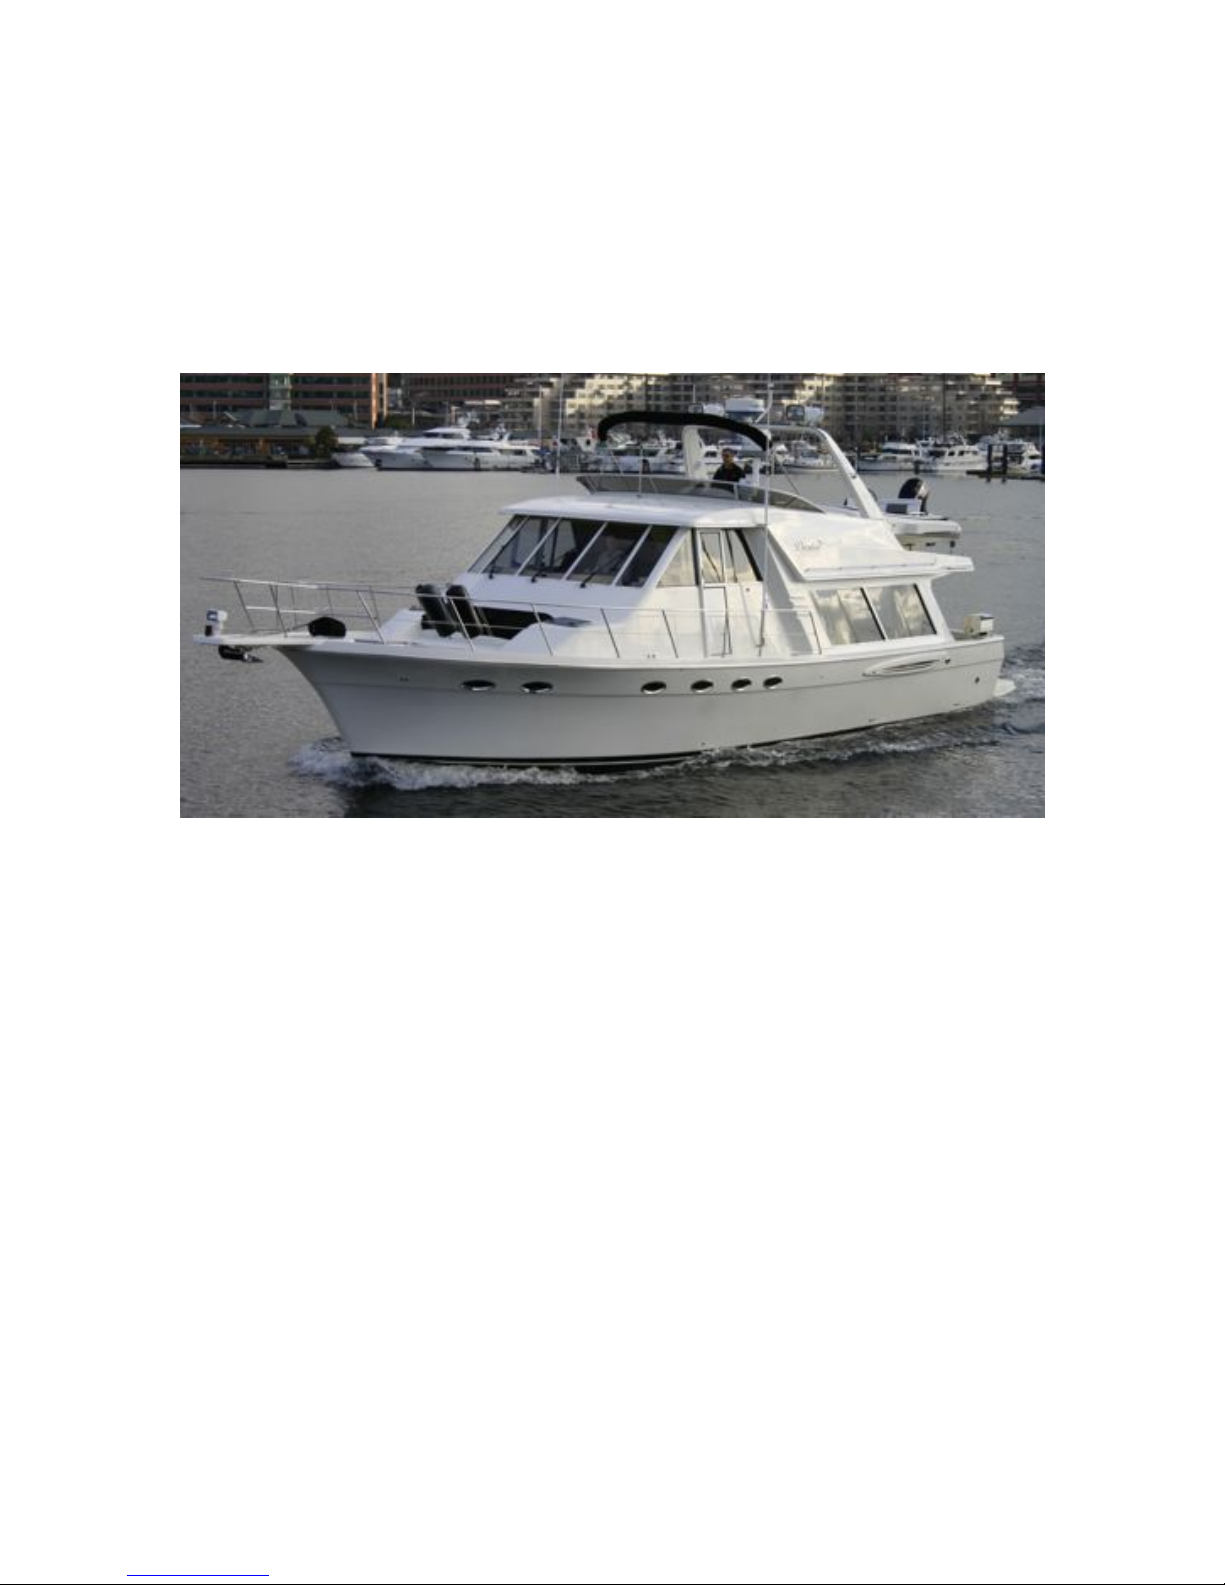
The main engines on “Desire” are very reliable Cummins diesels, producing 330
horsepower each. If treated correctly, they can be expected to give trouble-free,
economic cruising. The engine room is accessed through panels in the floor of the
salon. Another often used entrance to the mechanical systems is through a hatch at
the top of the companionway stairs next to the refrigerator.
Remember your “WOBBS” prior to each cruising day: Water (Coolant), Oil, Bilge,
Belts, and Sea Strainer. The inspection is best done in the morning while engines
and engine room are cool.
WATER: Check the level of COOLANT in the expansion tanks. If coolant is needed,
determine if there is any sign of a coolant leak under the engine. If there is, do not
run the engine. If there is no leak, add coolant. Coolant is a 50/50% mixture of
antifreeze and water.
OIL: Check the level of each engine’s oil with the dipsticks located on the inboard
side of each engine. The handles are marked in yellow and lock/unlock with a slight
turn (be certain to lock caps after checking so they don’t inadvertently come loose).
The oil level should be between the two marks on the dipstick. Use a paper towel to
wipe the stick, reinsert, and check the level. The distance between the two marks is
about 1.5 quarts. Only fill if oil levels are below the add mark. Do not overfill! The oil
fill on each engine is atop its valve cover. After refilling, be sure to retighten the cap.
Do not over tighten.
BILGE: Visually inspect the engine room. Check under and around the engines.
During your inspection, ask yourself if everything looks (and smells) right.
BELTS: Check the general condition of the hoses and belts.
SEA STRAINER: Ensure the valves on each RAW WATER THRU-HULL are OPEN!
(lever in-line with valve). Raw Water Thru-hulls are normally left in the open
position. However, if they are closed you will not note any water flow from the stern
(port/starboard) exhaust when the engines are running. This will lead to a serious
overheat condition and engine damage. Observe through the glass of each RAW
WATER SEA STRAINER for debris. A clogged strainer will cause the engine to run hot
or overheat. If necessary, close the thru-hull, open the strainer cover, clean out
debris, and reassemble. Remember to REOPEN the Thru-hull!
Start Up
Having finished your inspection, it is probably best to start your engines from the
Pilot House. Ensure that Gearshifts are in neutral or the engines will not start
(neutral lockout). Ensure the Throttles have freedom of movement and are in the
idle position. Inset both keys into the ignition and turn the keys clockwise one click.
The engine alarm sounds and the green pre-heat lights will illuminate. After 10-15
seconds, the pre-heat lights will go out signaling it is OK to turn the key fully to
engage the engine. If the engine does not turn over, move the gearshift slightly
while turning the key until the engine engages (neutral lockout may be engaged). If
the engine cranks slowly, check the condition of your batteries at the electrical panel.
If the battery is low, engage the Battery Parallel Switch located at either the
pilothouse or bridge helm to connect other batteries. The Parallel Switch must be
held in position while starting. Releasing the switch will return the electrical system

6
to the normal (isolated) mode. It is not normally necessary to have to use the
Parallel Switch so be sure to inform SHYC upon your return.
On engine start, no long warm-up is required! Three to five minutes is sufficient,
then load the engine by putting the transmission in gear. Do not run over 1400 RPM
until temperature gauge reads at least 140 degrees. Observe your gauge readings.
Oil pressure and temperature should rise slightly while engine temperature may rise
very slowly. Engine oil pressure must be indicated on the gauge within 15 seconds.
Note: If engine alarm sounds (after start), water temperature is high or oil pressure
is low. Shut down the engine and look for the problem. Was there a lack of water
exiting with exhaust? Are thru-hulls open and debris cleared from sea-strainer? If
problem keeps occurring, call SHYC Service.
Caution: Continuous operation with low coolant temperature (below 140 degrees) or
high coolant temperature (above 205 degrees) can damage engine.
Getting Underway
Disconnect the shore power cord (see Shore Power on page 9). Close portholes and
hatches. Turn on electronics – VHF, Chart Plotters, Autopilot (powers your Rudder
Indicators), and Depth Sounder (switch is on bridge helm). Prior to leaving, ensure
the Bow Thruster is turned on by simultaneously pushing both on switches from the
helm position you will be driving from. The Bow Thruster should only be used in 3-5
second bursts. It will overheat and/or drain it’s battery quickly if used continuously
and then not be available when you need it. You might want to give the Thruster a
quick tap toward the dock to make sure it is functioning. REMEMBER to turn the
Thruster OFF after it is no longer needed.
Have a plan on how you want to leave the dock prior to untying the lines. Make
sure everyone knows the plan and don’t be shy about asking for, or accepting, help
from fellow boaters. Don’t ever assume others will do what you expect – tell them
what you want them to do. Be sure you can communicate with your crew.
Typically, all close quarter maneuvering should take place from the bridge helm. This
will afford maximum visibility. If operating from the pilothouse, ensure both doors
are open to allow quick access to both sides. Make certain the throttles are in idle
and engage the gearshifts. Once outside marina, have crew members bring in
fenders and put lines away. Remember to turn the Bow Thruster OFF once it is no
longer needed.
Cruising
Slowly come up to your desired cruising rpm. (Again, do not exceed 1400 RPM until
temperature gauge reads at least 140 degrees) The Meridian 490 has the advantage
of being able to cruise nicely at approx 16-17 knots. However, the realities of vessel
hull design and power plant engineering dictate that higher RPM operation can be
less efficient on semi-displacement hulls. Thus, you will notice from the following
table that every knot above “displacement speed” can get expensive.
RPM Gallons /Hour * Speed (Knots)* Nautical Miles/Gallon*
1000 2.6 7 2.7
1500 6.0
2000 15
2400 (fast cruise) 22 17 0.77

7
* Gal/Hour, Speed, and NM/Gal were extracted from Nor’Westing magazine’s 2007
Sea Trial, but will obviously vary with vessel load as well as weather and sea
conditions.
The Trim Tabs can be effective at bringing the bow to the ideal cruising attitude.
Once established at cruise, make minor adjustments and then watch your speed on
the GPS to see if it improves.
Do not exceed 2400 rpm except for very brief intervals**. “Desire” will cruise very
nicely for extended periods at 2400 rpm. However, as you can see from the above
table, it may be more sensible to operate the yacht in the 1900-2200 range (or
1200-1400 for the most economical cruising). You will enjoy pleasant, quieter
cruising and economy as well.
**Avoid high engine speeds as it causes the engine to overheat (over 205 degrees)
causing damage as well as high fuel consumption.
Docking
Just as with leaving the dock, have a plan when coming back. During docking, as
with any close quarters maneuvering, it is best to use the bridge helm for the
maximum visibility. If using the pilothouse, make sure you open both doors so that
you can quickly assess your clearance. Since it is difficult to see the stern from either
driving position, it is wise to have an experienced person handling the stern line so
that they can also advise you of your position. Give clear instructions to the crew on
what you will expect of them (i.e. lines and fenders). Communicate with your crew!
Ensure trim tabs are all the way back up (bow up position) before backing. While
moving slowly towards the dock, center the wheel (reference the rudder indicator)
and use the gears to maneuver the vessel. Throttles should only be used in
moderate to windy conditions. Otherwise, the use of the transmission should be
sufficient. Prior to docking, ensure the Bow Thruster is turned on by simultaneously
pushing both on switches from the helm position you will be docking from. The Bow
Thruster should only be used in 3-5 second bursts. It will overheat and/or drain it’s
battery quickly if used continuously and then not be available when you need it.
REMEMBER to turn the Thruster OFF after you’ve docked.
Note: If extreme wind conditions are expected, the thruster battery bank can be
paralleled to the house battery bank by a labeled switch to the left (port) of the
thruster batteries. Important: Return the switch to the OFF position after use.
Shut Down
Before shutting down, the engines should idle for about 5 minutes to let them cool.
This is usually not an issue as engines will be at idle for a sufficient period of time
during docking maneuvers. Ensure each gearshift is in the neutral position and each
throttle is in idle. Turn off the engines using the ignition keys.
Fueling
Open filler caps located on both sides just aft of the pilothouse doors with the deck-
fitting key kept in the pilothouse drawer. MAKE SURE YOU USE DIESEL and be sure
it is going into the correct deck fill! DOUBLE-CHECK (the WASTE pump-out cap is
close to the starboard fuel fill cap)! Before pumping, have your oil/fuel sorb ready to
soak up any spilled fuel. You should have a rough idea of how many galleons you will
need, but you may have someone check the fuel gauge periodically by turning on the

8
key. Put the Diesel nozzle into the deck fitting and pump slowly listening to the
sound of the flow. Pumping too fast may not allow excess air to escape, which can
lead to spillage out the vent. As the tank fills, the sound will rise in pitch or gurgle.
Pay attention to the vent that it does not spill fuel into the water. Top off carefully,
catching any spillage with your sorb.
Check your gauges. Replace the deck fill caps and turn on the engine room blowers
for a few minutes while you pay, etc. Clean up any spatter and wash hands
thoroughly.
BOAT ELECTRICAL
General
Many people are confused by the operation of electrical systems on yachts. This is
compounded by the fact that even similar boats may be “wired” differently from one
another. Don’t feel discouraged if something isn’t clear, you have company in your
confusion. “Desire” is well equipped and will give you all the comforts you’d expect
from a modern luxury yacht if you take a little time to understand her.
Most of the basic equipment on any boat is run by 12 volt DC electricity. This is true
because DC power should always be available from the boat’s batteries regardless of
whether you are at the dock, cruising, or anchored out in a quiet cove. Since we rely
on batteries so much, it is important to know how to monitor them, how they are
depleted, and how to replenish (recharge) them.
Because we all like the conveniences of home, most larger boats also have 110 volt
AC electrical power. This allows us to have nice things like microwave ovens, coffee
makers, TV, blow dryers, etc. AC power is available through shore power, an
onboard inverter (changes battery’s 12 volt DC to 110 volt AC), or the onboard
generator.
When not connected to shore power, your batteries provide most of your electrical
power. Therefore the use of onboard electricity needs to be monitored very carefully.
Turn off electrical devices when they are not being used.
AC (Alternating Current) or 110 Volt Power

9
Shore Power
Shore Power supports all AC equipment and receptacles on board as well as the
battery charger. There are three shore power connections just aft of the starboard
pilothouse door, typically only the first (line 1) is used. Line 2 is usually powered
through Line 1 using a Parallel Switch on the electrical panel. You can also plug a
separate cable to line 2 (helpful if using the oven/stove along with other items). No
equipment is presently powered through Line 3.
To connect to shore power, plug the power cord into “Line 1” on the starboard side of
the boat (locking with a slight turn to the right) and then into the dock receptacle.
Check your power rating/plug size of the dock receptacle (i.e. 30amp, 20 amp etc.)
The boat is 30 amp so, if necessary, add an adaptor (i.e. 15 to 30 amp, 20 to 30
amp, or 50 to 30 amp) located under the pilothouse seating. There are also extra 50’
shore power cables if more are needed. Secure the cord around the shore power
electrical receptacle and to the boat (i.e. wrap around cleat near receptacles). There
may be a breaker on the dock receptacle. If so, ensure it is ON.
On the boat, turn the Dockside Master circuit breaker on at the electrical panel. Turn
on appropriate breakers for battery charger, refrigeration, etc. Watch your amp
meter for load! If the load exceeds the supplied amps, it will pop the breaker. If
this occurs, wait to turn on one of your high draw systems (i.e. water heater) until
the use of power decreases (the Battery Charger/Inverter Charger may initially pull a
heavy load depending on the battery state). The microwave pulls a lot of amps.
If your outlets fail to work, check your GFIs to make sure that they have not been
tripped. One GFI (like the one behind the coffee pot or in pilot house) often control
more than one outlet (e.g. kitchen GFI controls the salon TV outlets).
Reverse the above procedure when disconnecting from shore power. If desired,
having the inverter on/armed (green light on/slowly blinking) will allow it to pick up
most of the AC load without interruption.
Inverter
Inverter Control Panel
The inverter provides AC power to the 110 receptacle plugs and other AC equipment
when the boat is disconnected from shore power. All equipment that can be supplied
AC power by the inverter is marked by a white zip tie on it’s respective breaker (e.g.
the ice-maker can be powered by the inverter, but the water heater can not). Your
inverter control panel is located left of the electrical panel. The green light below the
INVERT button indicates that it is on and inverting. A slow blinking green light
indicates that it is armed to come on if your primary AC source (Shore or Generator)
is lost. The actual inverter itself is located below the companionway access stairs on

10
the port wall. The Inverter draws power from the house battery bank located in the
starboard lazarette. The amount of DC/Inverter power is limited to the capacity of
these batteries so use it sparingly!
When connected to shore power or operating the generator, the inverter acts as
battery charger for the 12-volt house battery bank (indicated by a solid green light
under the CHARGE button on the inverter control panel). Should you detect the
inverter failing to charge the house batteries, check the inverter control panel to
make certain that it is on. When not charging, the green light should be blinking
slowly to indicate the charger is armed to come on automatically when a primary AC
source is established.
Note: Spiking electrical loads can cause a fault in the system (as indicated on the
inverter panel). Faults may be reset by turning the inverter/charger off and then
back on.
Generator
The Generator can supply all the AC power that you can get from Shore Power. It
can be run while under way or stopped. This gives you tremendous flexibility,
especially when at anchor. To start your generator, ensure that the fluids have been
checked and the raw water thru-hull is open. (Note: The generator dipstick is on the
port side near the bottom of the generator. You must remove the access panel first.)
The generator controls are located on the bottom of the AC electrical panel in the
pilothouse. To start, hold the switch in the Start/Preheat position until the engine
catches (10-20 seconds). You should hear the generator engine start as well as see
the generator instruments light up on the electrical panel next to the switch. Make
sure your cooling water and exhaust is exiting at the stern.
After the generator is running, turn on your Generator Main Breaker and check for
good voltage. Then turn on the Generator Master Breaker (Dockside Master must be
off and slide guard down). Turn on your AC systems as you would if hooking up to
shore power. If you have the Inverter on or armed, the transfer of power should be
seamless (no loss of AC power). If you have been anchored for some time, the
Battery Charger/ Inverter Charger may take up a large load so you may want to
keep other high draw items off initially. The generator can carry a large load, but too
much load such as water heater, stove top etc. may overload the system.
To turn the generator off, first take off the load by turning the AC breakers off. Turn
off the main AC distribution switch. Turn off the Generator Main Breaker. Last, shut
down the generator by holding switch in the Stop position until it dies.
Note: It is fine to run the generator as much as you see fit. However, it is not good
for the generator to be running without a load on it. That means you should have a
reason for it to be running (water heater, watermaker, oven/stove, recharge the
batteries, etc.). It is usually not necessary underway, as you have the inverter.

11
D.C. (Direct Current) or 12 Volt Power
Technically, there are four battery banks in your 12 volt system: Port
Engine/Generator Start Batteries (1), Starboard Engine Start Batteries (2),
House/Inverter Batteries (3) and the Bow Thruster Battery (4).
Your battery master switches are located aft next to the salon sliding door on the
port side. Normally you will leave the switches in the on position. Note: Changing
the position of the battery switches with the engine running will cause damage! Only
change positions with the engine off and only if necessary!
Your DC Electrical Panel (right side of the electrical panel in Pilothouse) shows all the
systems supported by your batteries. Primarily you will be turning on these breakers
for lights, water pressure, electronics, etc. This will allow you to manage your power
usage. Certain breakers should be turned off after each use (engine light, washdown
pump, etc.). Bilge pumps should always be left on.
DC Electrical Panel
When disconnected from shore power (and without the generator running), all
12–volt systems will draw from the battery. Monitor your batteries very carefully,
especially when at anchor. Turning off high draw items (icemaker, bridge
refrigerator, etc) will extend battery time between charges. The DC voltmeter and
monitor on the DC panel can be switched between your battery banks to measure
battery voltage. Typically the bank should read from about 13.0 to 14.5 volts when
being charged. While at rest, your voltage will drop as indicated in the figures below.
Voltage Battery State of Charge
12.65 volts 100%
12.47 volts 75 %
12.25 volts 50 %
11.95 volts 25 %
11.70 volts 0 %
Note: Voltage will tend to read less than actual if the batteries are under load (being
used). The only true voltage measurement comes from a battery that is not under
load nor has been for a period of time. Therefore, you will probably have a little more
battery power remaining than indicated, particularly if a high draw item is in use.

12
All your batteries are charged while underway by the alternators. Caution: Alternator
may not be able to keep up during times of heavy draw on house bank. This can be
checked on the digital monitor on the upper right of the DC panel.
Digital Monitor: pressing the V button displays voltage of the House, Port Start,
and Starboard Start Banks respectively; the A button shows your Amp draw (-) or
charge (+) of the House bank; the C button shows capacity remaining of the House
bank in Amp Hours (660 max) or pressing twice displays capacity in percent. Note, A
and C display information for the House Battery Bank only.
SANITATION SYSTEM
Vacuflush Toilets
“Desire” is equipped with Vacuflush heads. They are easy to use, odor free, and
reliable. They use fresh water for flushing. To keep them operating properly, use a
minimum of toilet paper. You flush the heads by depressing the foot pedal and
holding down for a full 3 seconds. If you wish to add more water to the bowl, you
can do so by pulling up on the foot pedal.
This system can make or break your vacation. Therefore, it is imperative that every
member of the crew be informed on the proper use of the toilet. The valves,
openings, and pumps are small and can clog easily. If the head gets clogged, it is
your responsibility! Always flush the head for small children so you can be certain of
what is being flushed. Note: Never put in paper towels, napkins, sanitary
products, household T.P., or food into marine heads. Use only marine T.P.
Note: If the bowl doesn’t seal completely after use, try flushing again and making
sure nothing is stuck in the seal. Hint: release pedal quickly.
Holding Tank
Your sanitation holding tanks holds approximately 50 gallons. Be aware of the rate
of waste production. If you overfill your tank, you will break a hose, clog a vent, or
burst the tank. The result will be an indescribable catastrophe and an expensive fix
to you! Empty the tank at least every other day to avoid any problems.
The holding tank is located on the starboard side under the sofa in the salon. A tank
monitor has been installed and can be used. Don’t rely solely on the monitor (the
probe can get stuck) – empty frequently! A visual check of the tank with a flashlight
can also be made.
The holding tank can be emptied in one of two ways:
#1. At a pump-out station, remove the deck waste cap located starboard side near
next to the fuel fill. Be very careful removing the waste cap, it is the only cap that is
NOT CONNECTED TO THE BOAT. Insert the pump-out nozzle into the waste opening
(double-check that you have the right deck opening). Turn on the pump on the dock
and open the valve on the handle of the hose. When pumping is finished, close lever
on handle and turn off pump. Ask the attendants if you need help. If there is a fresh
water hose on the dock, rinse the tank by adding water for 1-2 minutes. Then re-
pump to leave the tank rinsed and clean. This also helps eliminates any head odors.
#2. The tank’s contents can also be discharged at sea by using the macerator pump.
This is absolutely not permitted in US Waters and is subject to very sever fines. To

13
operate the macerator, after making sure the macerator seacock is open, depress
both of the Macerator Rocker Switches (located on the DC electrical panel). Watch
the tank monitor to determine when the tank is empty. As a back up, you can listen
to the macerator’s sound. When the pitch becomes higher, the tank is empty. The
only way to hear the pitch is to bring the boat to idle and lift up the companionway
stairs. It should only take a few minutes to empty the tank.
Macerator Switches
WATER SYSTEM
Fresh Water Tanks and Pump
“Desire” holds 200 gallons of fresh water located in two separate tanks. To fill the
tanks, remove the deck water fill caps located on the port side of the bow. A
manifold to switch tanks is located under the companionway stairs on the port side.
You will see two hoses feeding in to the water pump. Each line has a shut off valve.
Turn clockwise to close and counterclockwise to open. Only open one tank at a time
since the upper/forward tank (130 gallons) will empty first and then allow air to flow
along with the lower/midship tank’s water (70 gallons) in to the pump. The 70 gallon
midship tank can also be filled via the on board Watermaker.
Important: DO NOT fill the tank with poor quality water (this is usually not an issue
unless you are north of the San Juan/Gulf Islands). If unsure, use the watermaker to
fill the tank.
Water Manifold Shutoffs
The water pressure pump is located under the companionway stairs on the port side.
Activate the pump by turning on the “water pressure” breaker at the DC panel. The
pump is a demand pump and will only come on when pressure is needed. If the
pump continues to run, you are either out of water or have an air lock
(which can be corrected by opening a faucet). If you run out of water,
immediately shut off the pump and turn off water heater by turning off their
respective breakers on the AC panel. Switch to the full tank as directed in the
preceding paragraph. You can cause serious damage to the heating element if the
water heater is on without water.

14
Ensure the Water Pressure breaker is off if you are leaving the boat for an extended
period of time to prevent loss of water (and running of the pump) through a faucet
being accidentally left on.
Note: “Gray water” from the sinks and showers drains overboard through various
above water thru-hulls.
Watermaker
“Desire” is equipped with a modern, high quality watermaker capable of producing
up to 35-40 gallons/hr of excellent quality drinking water by reverse osmosis. You
can use it anytime, but particularly when water is unavailable or it’s quality is in
question. It is simple to use, but instructions must be following exactly to
prevent damage. The watermaker is plumbed directly in to the smaller/midship (70
gal) tank. Standard configuration does not allow it to fill the forward tank. The
watermaker control panel is located in the starboard cockpit area behind the black
storage compartment door.
To Operate the Watermaker:
1. Start the generator (pumps are powered directly from the genset). If you
are anchored out, this is a good time to charge your house batteries.
2. Turn on the Feed Pump (low pressure) breaker on the control panel. You
should see some pressure indication on the gauge.
3. Turn on both R/O Pump (high pressure) breakers on the control panel.
4. SLOWLY close the pressure valve by turning the knob clockwise. You will
eventually see the pressure begin to increase on the Membrane Pressure
Gauge. It is important that you increase pressure SLOWLY. You want the
pressure to come up to 800-850 psi (840 works great). You will see the
flow rate (of fresh water) increase as pressure increases.
5. You are now making fresh water!
6. When you are finished, shut off the watermaker by reversing your steps.
7. SLOWLY open the pressure valve by turning the knob counterclockwise
until all the way open.
8. Turn off the R/O Pump (high pressure) breakers.
9. Turn off the Feed Pump (low pressure) breaker.
10. Turn off the Generator if no longer needed.
*If you will not be using the watermaker each day, you need to flush the system
with fresh water. This is extremely simple, yet very important to do.
To Flush the Watermaker:
1. Switch the “Wash Down/Watermaker Flush Pump” breaker to On (DC
Electrical Panel).
2. Open the small flush valve (blue) to the right of the Watermaker Control
Panel. This valve is connected to a filter housing also to the right of the
panel (It is OK to move or pull the filter housing out in order to access the
valve). Fresh water will begin to flow through the system (notice pressure
indicated on the feed pump gauge).

15
3. FLUSH FOR 5 MINUTES.
4. Close the flush valve.
5. Switch the “Wash Down/Watermaker Flush Pump” breaker to OFF.
Important: Never use the watermaker if oil is present in the surrounding water! It
will coat the membranes and render the maker unusable.
Water Heater
The water heater has a 20 gallon capacity. It is located under the companionway
stairs on the forward wall. It is heated when the AC breaker is on while connected to
shore power or running the generator (will not run off of the inverter). It is also
heated anytime the diesel furnace is running. Do not use the water heater if the
water level is almost empty.
Shower
Before taking a shower, make sure the water pressure and shower sump pump
breakers are on. The Master stateroom shower drains automatically by a float switch
in the sump pump. If it is not operating properly, it may be clogged and need to be
cleaned by carefully removing the lid (It is located behind the glass doors in the
hallway). The Guest shower drains via activation of the RED switch near the head.
You will know the guest sump pump is operating because it is quite loud. Please wipe
down the shower stall when finished to keep shower presentable. Pick up any
accumulation of hair in the drains as it clogs the hoses. Ensure that the faucets are
tightly turned off after each shower.
Fresh Water Washdowns
There are fresh water washdowns located on the bow (in the locker near the anchor)
and aft (in the port compartment in the cockpit). Be sure they are completely turned
off after use to prevent loss of water (especially the aft washdown which can end up
in the bilge). The system uses its own pump (breaker on DC Panel) located under the
center lazarette.
Note: The flush system for the Watermaker utilizes this pump also. The Breaker
should be turned off if not needed.
GALLEY
The galley is equipped with a number of appliances for your convenience. Most of
these are easy to operate. Nevertheless, there are some features that are different
than a home model.
Stove/Oven
The stove and oven are electric. You must be hooked up to shore power or have the
generator running to operate them because of the high electrical draw. Turn the
“ELECTRIC RANGE” breaker on (AC Electrical Panel) and operate as a standard
kitchen electric stove/oven. Use care when raising/lowering stove cover.
Note: If you are using the oven, you are limited to only two of the three top burners.

16
Note: If the AC Master breaker trips while operating the stove/oven, turn off another
high draw item (like the water heater) until finished cooking or plug additional shore
power in to Line 2.
Microwave/Convection Oven
This unit is operated just like a home model. DO NOT leave the oven rack or any
medal object in it while operating as a microwave! These can only be used when
operating as a convection oven.
Refrigerator
The refrigerator is dual voltage (110 volt AC and 12 volt DC). Normally leave both
refrigerator breakers in the ON position. It will automatically use the 110 volt power
when shore power/generator is on and DC power when AC is not available. Carefully
monitor the use of the refrigerator when on 12-volt system such as when you are at
anchor. Use a cooler when available to keep the refrigerator door closed as much as
possible.
The power switch is located below the front door of the refrigerator. BE CAREFUL
NOT TO TURN TOO HIGH AS ITEMS WILL FREEZE AND POSSIBLY RUPTURE.
There is also a small refrigerator on the bridge deck. This refrigerator will run off of
any AC source (i.e. will need the inverter to be powered by the batteries).
Ice-Maker
The Ice-Maker works great, but uses lots of energy. It operates just like most home
ice-makers and will run off of any AC source including the inverter. It is important to
make sure that the door is closed all the way and latched except when you are
getting ice.
Washer/Dryer
The washer/dryer is located in the hallway between the stateroom doors. It is
powered by 110 volt making it less powerful than a home dryer operating off of 220
volts. Therefore, please use smaller loads in order for the machine to operate
properly. IMPORTANT: The washer uses much less soap than a home machine,
approximately 1/3 the amount. Use liquid soap only! There should be some liquid
soap located in the guest head lower cabinet. Pour the soap and softener, if desired,
and set the timer. The dryer operates slowly so please be patient or finish drying
outside.
HEATING SYSTEM
The Webasto heater is a diesel-fired boiler-type heater with hot water delivery, and a
thermostat and fan switches for control. The furnace itself is located in the port
lazarette. The thermostat, as well as the on/off switch, is located on the starboard
side of the salon next to the wine cabinet. Be sure to check the furnace exhaust port
on the aft/port side to make certain that no obstruction such as a fender or line
exists. The Webasto provides heat much like your household furnace. Turn on the
toggle switch (red light should go on) in the main salon and set the temperature at
the desired temperature. There is an internal control to keep the fans from coming

17
on until the furnace comes up to temperature. This may take up to 20 minutes. The
exception is the fan in the pilothouse. It will work anytime and can be used to
defrost the windows if necessary. Temperature is fine tuned by selecting the fan
speed to high/low/off on the controls located throughout the boat. The furnace is
very reliable and can be run for extended periods while cruising or at rest. To turn
off, just place the switch to the off position (red light should go out). The furnace will
automatically go through a cool down cycle before shutting down completely.
Note: There are no breakers for the Webasto Furnace. It is hardwired to the batteries
to keep power from being interrupted during its cool down cycle.
Note: If you turn the furnace on and get a red light, but it doesn’t seem to be
coming on, check that the thermostat has not been turned down to low.
ELECTRONICS
VHF Radios
There are two mounted VHF radios plus a handheld. The primary one is located in
the pilothouse with another (remote) behind the glass doors on the bridge.Make
sure the breaker is on at the DC Panel. Always monitor Channel 16 while underway.
Depth Sounders
There are individual depth sounders located on the upper and lower helm. The switch
for both is located on the upper helm. These sounders are typically reliable in waters
less then 200 feet and at slower speeds. If your reading is blinking, it might be a
false reading due to excessive depths or strong currents! Watch your depth carefully
in cruising unknown waters that might have rocks or obstacles. Color sounders are
also available on the all of the Furuno displays. In addition, there is a color depth
sounder unit in the master stateroom. This unit shares a transducer with the bridge
helm and can only be used for one or the other. The switch is typically left in the
position to give information to the bridge helm, but can be switched to the master
stateroom (switch is located in the cabinet above the refrigerator).
GPS/Chart Plotters/Radar
The GPS/Chart Plotter and Radar are all integrated in to the Furuno displays. You
must have a C-MAP card inserted to get Chart information. In the pilothouse, the
port 10.5” Display can repeat information from the starboard Display. This means
that you only need to have a C-MAP card in the starboard unit (and have it turned
on) for both to display information. The port Display must be on for the starboard
Display to receive GPS signal. The Upper Helm has an independent system from the
pilothouse. This is useful just in case of a malfunction in one system. Thus, the 7.5”
bridge unit requires it’s own C-MAP card (there is an additional card in the pilothouse
drawer so that you do not have to keep swapping cards as you move from helm to
helm). Instruction manuals are located under the port pilothouse seat.
ANCHORING
Your primary working anchor, a Delta, is attached to over 400 feet of chain passed
through the deck from the anchor locker. The locker can be accessed through the
master stateroom (behind the mirror).

18
Always have the engines running when raising or lowering the anchor. The Windlass
(Winch) power breaker is located on the Master Battery Control Panel in the cabinet
just to the port of the salon door. The Windlass can be operated in two ways. It can
be raised and lowered using the foot switches on the foredeck or the remote control
from the pilothouse. The remote from the pilothouse facilitates single person
operation and has the advantage of giving you a digital read out of your rode (the
chain is also marked as a back up). Even when using the remote, it is a good idea to
have someone on the bow to monitor operation. When finished raising or lowering
the anchor, there is a line snubber and cleat at the top of the windlass to secure the
chain to take the load off of the windlass while at anchor.
Note: There is a Chapman’s aboard with discussions on anchoring.
A spare anchor, chain, and line are located in the port lazarette. This anchor is for
emergencies and is not typically adequate to hold the vessel by itself.
Mooring Buoys
There are many marine park mooring buoys in the Puget Sound, San Juan Islands
and Canada. They eliminate your need for anchoring and are recommended in
crowded bays, etc. They are maintained and thus eliminate concerns of dragging,
scope, and swing. It can be a bit of a task to hook the metal rings on these buoys in
order to tie up. The key is having good communication with the skipper as to where
the buoy is as you approach and a strong person with the boat hook. You may also
launch the dinghy and have someone feed a line through the mooring ring and back
to the boat from there. The best way to tie to the buoy is to secure a line to one of
the bow cleats, run the line through the metal ring on top of the mooring buoy and
then back up to the bow cleat on the opposite side (port/starboard). Using separate
lines from each cleat will add safely and reduce wear on the lines with less rubbing
on the ring. There is typically a nominal fee to support the parks and buoys.
*Remember your requirement to have your anchor light on during hours of darkness.
Stern Tie
There is a 200’ stern line located in the lazarette. There is a PVC attachment that can
be mounted in the BBQ mounting holes in the cockpit to ease retrieval.
Entertainment Systems
AM/FM/CD Stereos
There are AM/FM/CD stereos in the pilothouse and the bridge. Ensure the
appropriate breaker is on. They operate like a typical car stereo.
DVD/Home Theater Stereos
There are CD/DVD Home Theater stereos with surround sound in the salon and
master stateroom. These operate similar to most home stereo units.
There are also DVD players in both the guest and bunk staterooms.

19
Satellite TV
“Desire” is equipped with a KVH TracVision automatic satellite tracking system. This
allows you to access DirectTV programming. This unit typically works well, but has
its limitations. To activate the system, turn on the switch behind the TV (accessed by
the cabinet to the left of the sink area). Do not use the breaker on the DC Panel.
You may hear it (almost a grinding sound) as it searches. It can take up to 10 to 15
minutes to lock on to the appropriate satellite depending on conditions, etc. It is
critical that during the initial warm-up and alignment phase (first few minutes), the
boat is not turning. If you are at the dock, once the TracVision locks on, you can turn
off the TracVision breaker (this is recommended so that it does not “wake up” and
try to find the satellite again when it already has it). If you are motoring or swinging
on anchor, you will want to leave it on to continue to adjust as the boat moves.
TracVision power switch
Note: If you are having problems with the TracVision system or the DirectTV unit, try
removing power for several minutes to reset. This can be done by tripping the GFI
breaker behind the coffee pot. This usually fixes most issues. Even with the most
current software/firmware updates, it is a good but not perfect system. If you have
problems with the DirectTV access card, do not call DirectTV customer service. They
will not be able to help you. If there is a problem that you unable to remedy, you can
call me directly at (253) 376-4265.
Internet Access
“Desire” has an internet network and account through Broadband Xpress. You must
be in range of one of Broadband Xpress’ locations to use it. They are located in many
of the popular marinas throughout Washington and Canada. With the powered bridge
and antenna, you may be able to receive signal up to 2-3 miles away. The router will
constantly broadcast anytime it is powered whether or not it is receiving an internet
signal. If you do not have a wireless card, you can plug directly in to the back of the
router with an Ethernet cable located in the pilot house drawer. To use, you must
first log on to the network (Desire) and then log in on Broadband Xpress (page
automatically launches). After that, anyone can log on the the network using the
password. By using, you are agreeing to BBX’s terms and conditions.
NETWORK ID: Desire NETWORK PASSWORD: ___________
BBXPRESS USERNAME: Desire490 BBXPRESS PASSWORD: ___________
If you have any technical problems, you can call Broadband Xpress customer service
at 206-407-3818 using the username Desire490. Also, refer to the Troubleshooting
and Tips section on page 23. Please add anything that might help the next user.

20
BARBEQUE
The Barbeque is stored in the starboard lazarette. It can be mounted in the holes on
either the port or stern of the cockpit. There is a serving/cutting board located in the
center lazarette (on the generator) that can be used in the same mounting holes.
Attach the propane bottle and regulator (galley drawer or on existing bottle). The
regulator should lock in to place as you rotate down, be very careful not to drop this
overboard.
It can be lit manually if you have trouble lighting with the igniter (the igniter works,
but doesn’t always light the propane). If needed, there are butane lighters located in
the galley drawer. This Barbeque cooks fairly hot and fast so keep a good eye on
your food. Cover and store the barbeque back in the lazarette when it has cooled.
Please clean and wipe down with a rag or paper towel before storing. Note: For
safety reasons, do not store an opened propane bottle within the salon or engine
compartment. Ensure that there are no flammables near barbeque.
DINGHY AND MOTOR
The Tender is a 10.5’ RIB made by Rendova and powered by a 25 hp Mercury
outboard. Rendova makes a very stable boat, but you must exercise sound judgment
at all times when operating. PFDs should be worn by everyone aboard.
Lowering
To deploy the dinghy, make sure the tie-down is removed and that there is enough
of room on the port side of the boat to lower it down. Have someone below (with a
boat hook) to help guide the dinghy as it lowers and to secure it once it gets to the
water. The davit control is located under the bridge seating. Insert the controller’s 3-
prong plug in to the receptacle just forward of the davit arm on the port side of the
radar arch. The davit (crane) arm must be raised to the upper position if it is not
already. Do this by removing the large pin and reinserting after raising the arm. It is
easier to do this if you swing the arm out over the water to give yourself more room.
Hook the stabilizer bar to the dinghy and the davit hook. Carefully raise the dinghy
up and guide it as it swings out over the water. Be very careful, the dinghy and
motor are very heavy and will have a tendency to swing out on its own.
Table of contents
Popular Boat manuals by other brands

AquaPlanet
AquaPlanet KAYAK Quick setup guide

Lifetime
Lifetime Freestyle Paddleboard owner's manual

RS SAILING
RS SAILING RS 200 owner's manual

Pro-Line Boats
Pro-Line Boats 29 Express owner's manual

Bavaria Yachts
Bavaria Yachts 34 Cruiser Manual for owners and skippers

Lund
Lund WT200 Owner's/operator's manual