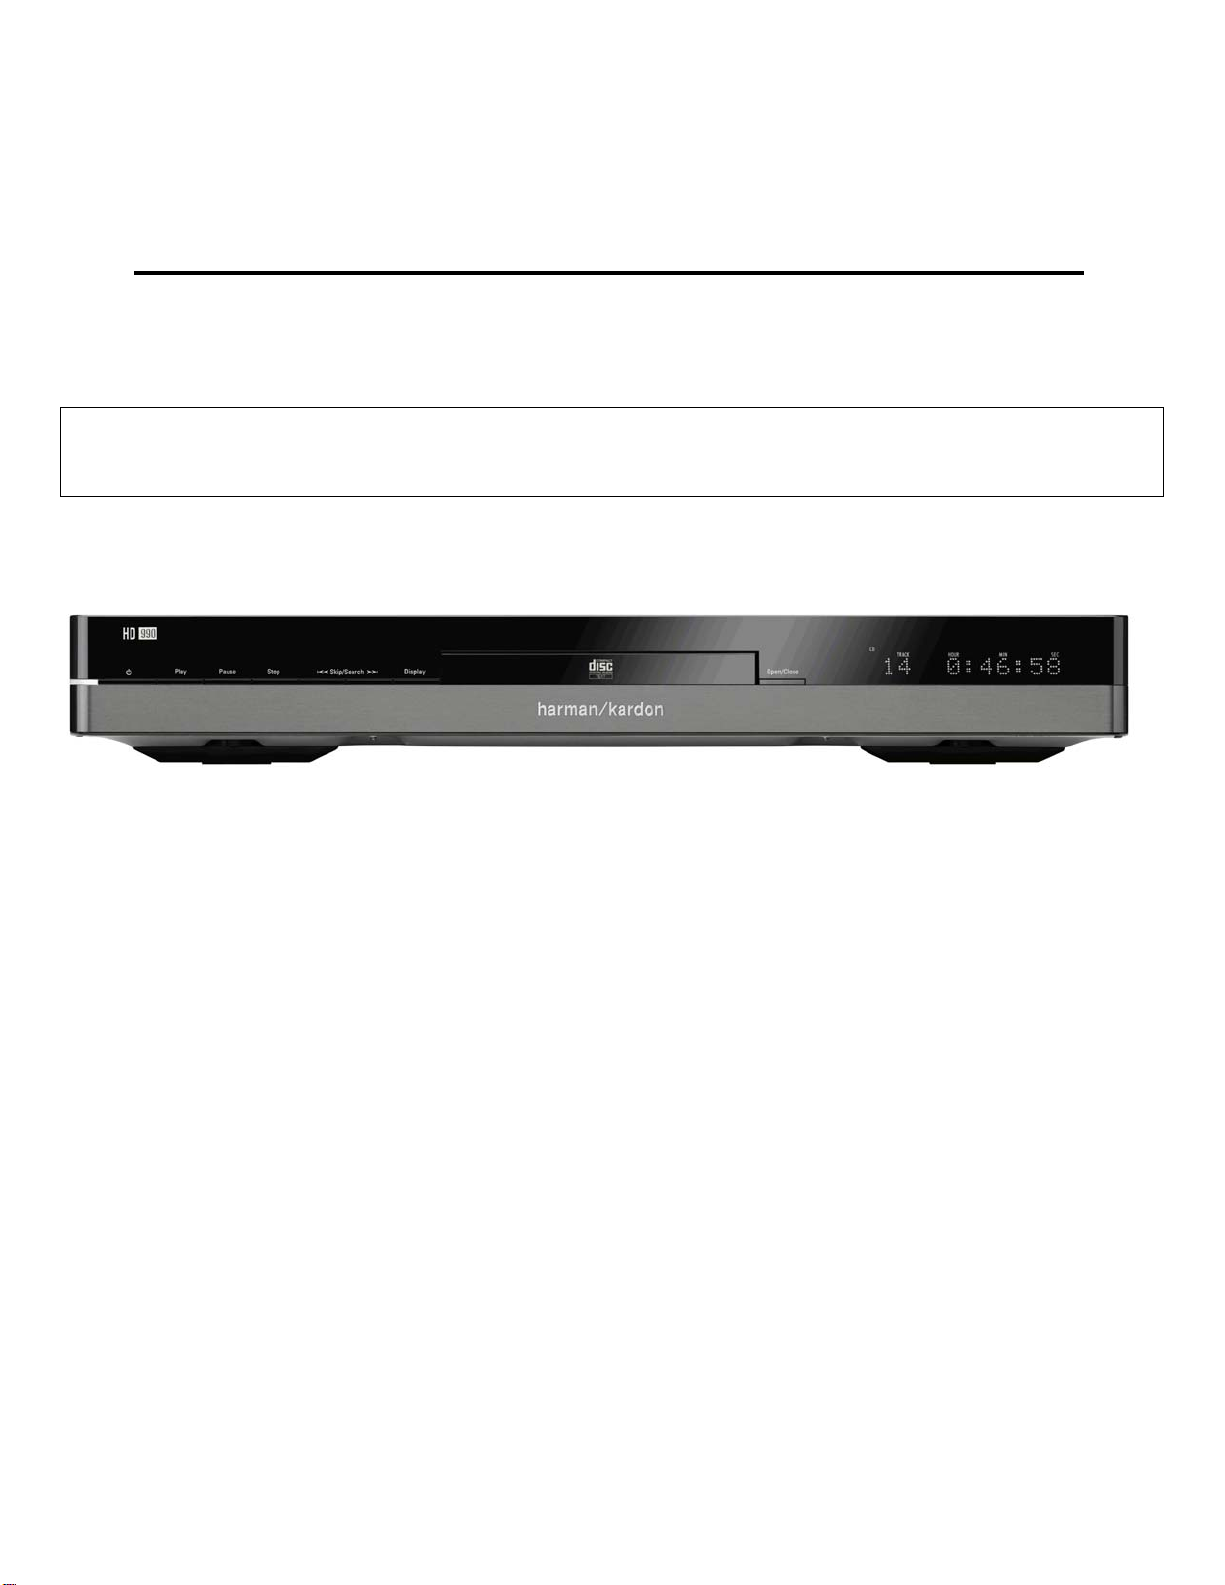
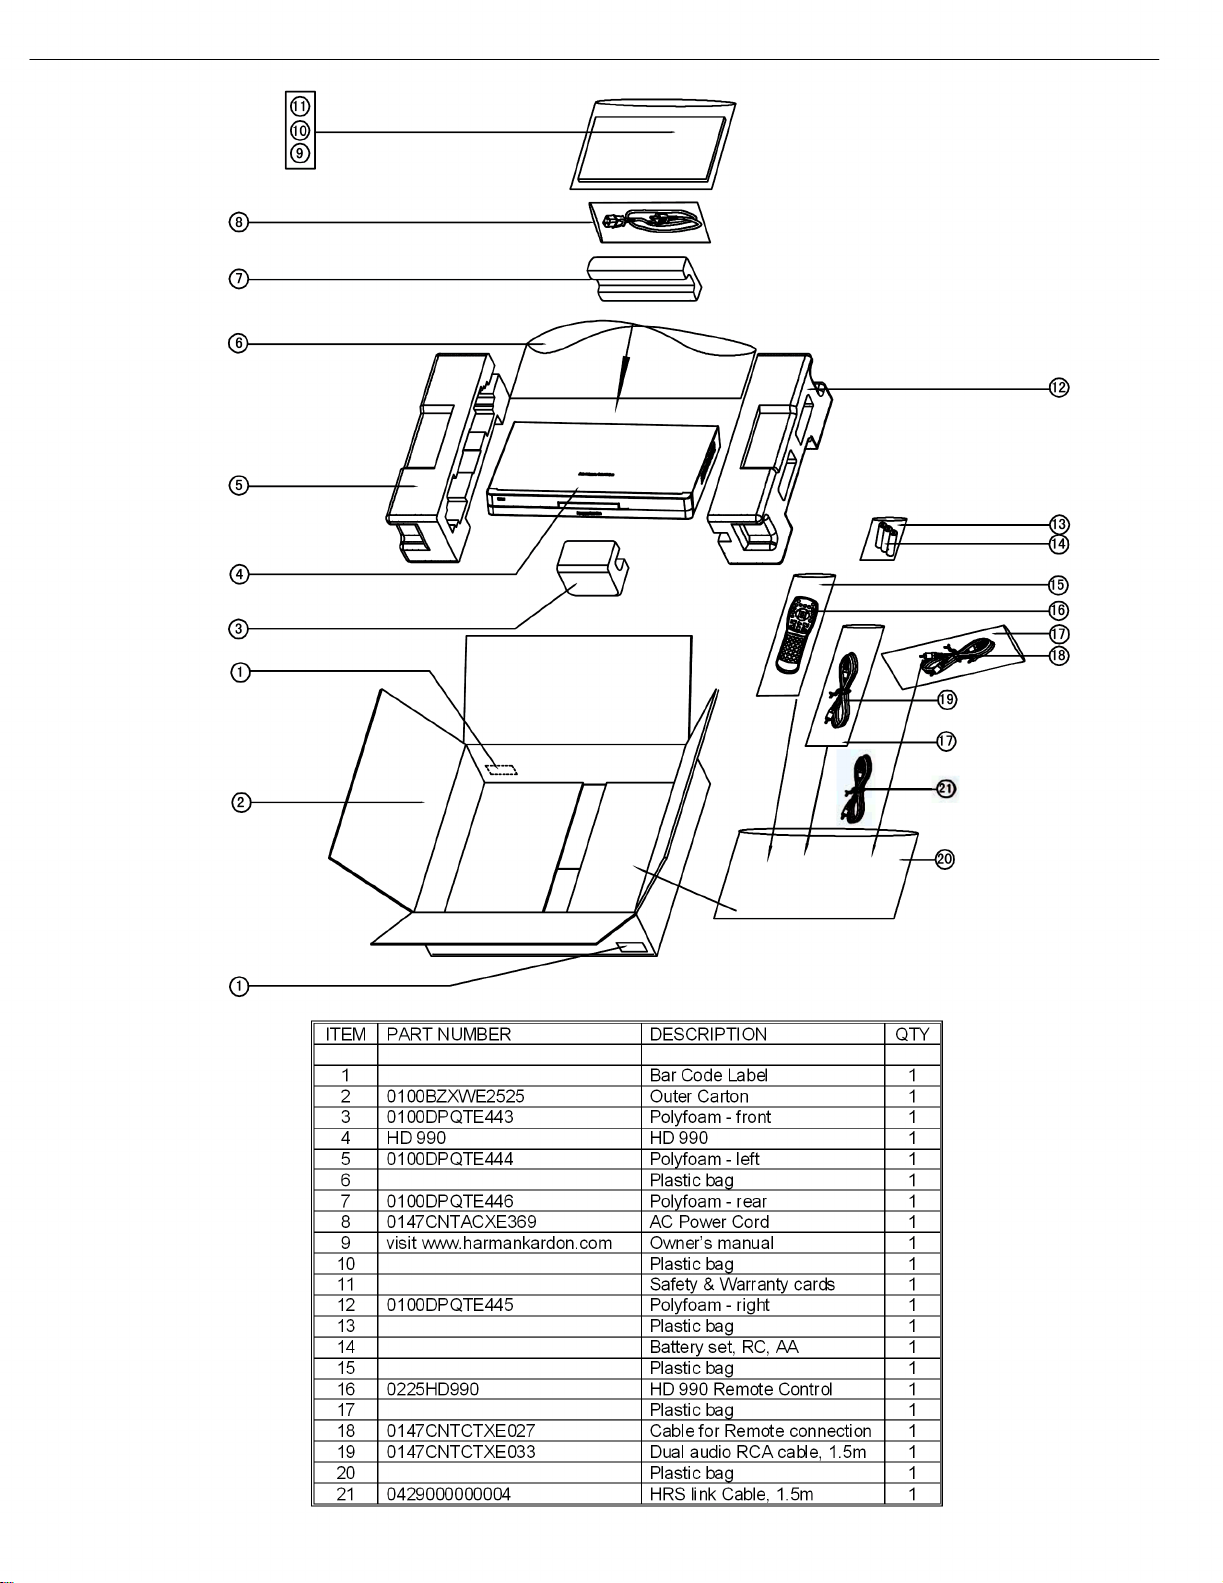
Harman Kardon HD 990 User manual

harman kardon
Model HD 990
CD/ MP3 Player
Service Manual
- Contents -
SERVICE PRECAUTIONS………….……….……2
BASIC SPECIFICATIONS………………………...5
DETAILED SPECIFICATIONS………………......6
PACKAGE (120V)..…………….…....……..………7
FRONT PANEL CONTROLS………..…………….8
REAR PANEL CONNECTIONS…………………..9
REMOTE CONTROL……………………………..10
OPERATION…………..……..……………...........11
BASIC TROUBLESHOOTING GUIDE…………15
EXPLODED VIEW (120v)….……………………16
BLOCK DIAGRAM.……………..………………..17
ELECTRICAL PARTS LIST (120v)……… …….18
PCB DRAWINGS……………………..................24
SEMICONDUCTOR PINOUTS…………………29
SCHEMATICS………………………………....…49
WIRING DIAGRAM………………………………61
harman/kardon, Inc.
8500 Balboa Blvd.
Released 2010 Northridge, CA. 91329 Rev0 10/2010
Discontinued XXXX

SERVICING PRECAUTIONS
NOTES REGARDING HANDLING OF THE PICK-UP
1. Notes for transport and storage
1) The pick-up should always be left in its conductive bag until immediately prior to use.
2) The pick-up should never be subjected to external pressure or impact.
2. Repair notes
1) The pick-up incorporates a strong magnet, and so should never be brought close to magnetic materials.
2) The pick-up should always be handled correctly and carefully, taking care to avoid external pressure and
impact. If it is subjected to strong pressure or impact, the result may be an operational malfunction
and/or damage to the printed-circuit board.
3) Each and every pick-up is already individually adjusted to a high degree of precision, and for that reason
the adjustment point and installation
screws should absolutely never be touched.
4) Laser beams may damage the eyes!
Absolutely never permit laser beams to enter the eyes!
Also NEVER switch ON the power to the laser output part (lens, etc.) of the pick-up if it is damaged.
5) Cleaning the lens surface
If there is dust on the lens surface, the dust should be cleaned away by using an air bush (such as used
for camera lens). The lens is held by a delicate spring. When cleaning the lens surface, therefore, a cot-
ton swab should be used, taking care not to distort this.
6) Never attempt to disassemble the pick-up.
Spring by excess pressure. If the lens is extremely dirty, apply isopropyl alcohol to the cotton swab. (Do
not use any other liquid cleaners, because they will damage the lens.) Take care not to use too much of
this alcohol on the swab, and do not allow the alcohol to get inside the pick-up.
Storage in conductive bag
NEVER look directly at the laser beam, and don’t let contact
fingers or other exposed skin.
Magnet
How to hold the pick-up
Conductive Sheet
Cotton swab
Pressure
Pressure
Drop impact
2
HD 990
harman/kardon

NOTES REGARDING COMPACT DISC PLAYER REPAIRS
1. Preparations
1) Compact disc players incorporate a great many ICs as well as the pick-up (laser diode). These compo-
nents are sensitive to, and easily affected by, static electricity. If such static electricity is high voltage,
components can be damaged, and for that reason components should be handled with care.
2) The pick-up is composed of many optical components and other high-precision components. Care must
be taken, therefore, to avoid repair or storage where the temperature of humidity is high, where strong
magnetism is present, or where there is excessive dust.
2. Notes for repair
1) Before replacing a component part, first disconnect the power supply lead wire from the unit
2) All equipment, measuring instruments and tools must be grounded.
3) The workbench should be covered with a conductive sheet and grounded.
When removing the laser pick-up from its conductive bag, do not place the pick-up on the bag. (This is
because there is the possibility of damage by static electricity.)
4) To prevent AC leakage, the metal part of the soldering iron should be grounded.
5) Workers should be grounded by an armband (1MΩ)
6) Care should be taken not to permit the laser pick-up to come in contact with clothing, in order to prevent
static electricity changes in the clothing to escape from the armband.
7) The laser beam from the pick-up should NEVER be directly facing the eyes or bare skin.
Resistor
(1 Mohm) Conductive
Sheet
Resistor
(1 Mohm)
Armband
3
HD 990
harman/kardon

ESD PRECAUTIONS
Electrostatically Sensitive Devices (ESD)
Some semiconductor (solid state) devices can be damaged easily by static electricity. Such components com-
monly are called Electrostatically Sensitive Devices (ESD). Examples of typical ESD devices are integrated cir-
cuits and some field-effect transistors and semiconductor chip components. The following techniques should
be used to help reduce the incidence of component damage caused by static electricity.
1. Immediately before handling any semiconductor component or semiconductor-equipped assembly, drain off
any electrostatic charge on your body by touching a known earth ground. Alternatively, obtain and wear a
commercially available discharging wrist strap device, which should be removed for potential shock reasons
prior to applying power to the unit under test.
2. After removing an electrical assembly equipped with ESD devices, place the assembly on a conductive sur-
face such as aluminum foil, to prevent electrostatic charge buildup or exposure of the assembly.
3. Use only a grounded-tip soldering iron to solder or unsolder ESD devices.
4. Use only an anti-static solder removal device. Some solder removal devices not classified as "anti-static"
can generate electrical charges sufficient to damage ESD devices.
5. Do not use freon-propelled chemicals. These can generate electrical charges sufficient to damage ESD
devices.
6. Do not remove a replacement ESD device from its protective package until immediately before you are
ready to install it. (Most replacement ESD devices are packaged with leads electrically shorted together by
conductive foam, aluminum foil or comparable conductive materials).
7. Immediately before removing the protective material from the leads of a replacement ESD device, touch the
protective material to the chassis or circuit assembly into which the device will by installed.
CAUTION : BE SURE NO POWER IS APPLIED TO THE CHASSIS OR CIRCUIT, AND OBSERVE ALL
OTHER SAFETY PRECAUTIONS.
8. Minimize bodily motions when handing unpackaged replacement ESD devices. (Otherwise harmless motion
such as the brushing together of your clothes fabric or the lifting of your foot from a carpeted floor can gen-
erate static electricity sufficient to damage an ESD device).
4
HD 990
harman/kardon

14
HD 990 Basic Specifications
Signal Format
Sampling Frequency: 32kHz to 96kHz
D/A Conversion: Multilevel delta-sigma, dual DAC configuration
Oversampling: 24-bit/384kHz asynchronous sample rate converter
Discrete Analog Output Section
Error Correction: Error correction
Frequency Response: 20Hz – 20kHz +0/
-
0.5dB
Total Harmonic Distortion (THD): <0.0006% @ 1kHz
Dynamic Range: >120dB
Signal-to-Noise Ratio: 116dB
Channel Separation: >115dB
Line-Output Level: 2.0V RMS (unbalanced)
4.0V RMS (balanced)
General
Power Requirement: 100V – 240V 50Hz/60Hz
Power Consumption: <20 watts (on)
<2 watts (standby)
Dimensions (width x height x depth): 17-5/16" x 2-1/2" x 13-1/16"
(440mm x 64mm x 332mm)
Depth measurement includes knobs, buttons and connection jacks.
Height measurement includes feet and chassis.
Specifications
Weight 8.4 lbs (3.8kg)
HD990 harman/kardon

HD990 Detailed Technical Specifications
ITEM SPECIFICATIONS Measured at TEST CONDITIONS OUTPUT
LEVEL
Audio
Frequency Response < +0.1dB, -0,5 dB, 20 kHz
<-3dB, 48 kHz
<-6dB, 96 kHz
Line Output Ref.:1KHz, 0dB, CD:4Hz~20KHz
Other frequency response result
tested for the analog output stage
only, using digital input.
De-emphasis response <+0,1, -0,5 dB, 20-20 kHz Line Output Ref.:1KHz, 0dB, CD:4Hz~20KHz
with Emphasis
DNR 16 bits <-96dB unweighted (WB 20-20kHz) Line Output Use CD-DA
DNR 16 bits <-100dB A-Weighted (WB 20-20kHz) Line Output Use CD-DA
DNR 24bits unbalanced output <-115db A-weighted Line Output Use Digital Input
DNR 24bits unbalanced output <-118db A-weighted Line Output XLR Use Digital Input
Distortion (THD+n)
16 bits, unbalanced
20-20kHz
<0.0025% unweighted Line Output 0 dB fs
Distortion (THD+n)
24 bits, unbalanced
20-20kHz
<0.001% unweighted Line Output 0 dB fs
Distortion (THD+n)
24 bits, balanced
20-20kHz
<0.0008% unweighted Line Output 0 dB fs
CH. Separation > 100 dB Line Output L->R / R->L 1kHz
Channel Balance +/-0.2dB Line Output
IMD <0,0015% Line Output SMPTE, (10K + 11K), 80 KHz BW
L to R Phase Shift <0,7 deg Line Output 10 - 20kHz
Linearity 0 dB +/- 0.1 dB Line Output 1kHz, 0dBfs
Low Linearity Level <±0,5 dB Line Output 1 kHz, -110 dBfs 24 bits
Output Level 2Vrms +/-5% Line Output 1kHz, 0dB, 10 kohms load
Digital Output
Output Level 500mV(p-p) +/-20% Coax output
Output Impedance 75 ohms Coax output
Output jitter level <1mUI
Digital Input
Input Level 500mV(p-p) +/-20% Coax output
Output jitter level <1mUI
Loader
CD SPEC TEST CONDITIONS
ECCENTRICITY 140 µm TCD 714
VERTICAL DEVIATION 0.92 mm MCD-151, TCD-731RA
DEFECT(INTERRUPTION) 900 µm MCD-131
DEFECT(BLACK DOT) 1000 µm TCD 725B
DEFECT(FINGER PRINT) 75um TCD 725B
DEFECT(SCRATCH) 2mm TCD 725B
SEARCH TIME 2.5sec
ITEM SPECIFICATION TEST CONDITIONS
LOADING TIME 30 sec or less OFF-Play
UN-LOADING TIME 5 sec or less Play-OFF
START UP TIME 3 sec or less Stop-Play
ACCESS TIME 3 sec or less (CD)
HD990 harman/kardon

HD990 harman/kardon
PACKAGING

5
HD 990 Front Panel Controls
1
Main Information Display: This display delivers messages and status indications
to help you operate the CD player.
2
Power On/Off (Standby): Press the button once to turn the CD player on, press
it again to put the unit in the Standby mode.
3
Open/Close: Press this button to open or close the disc tray.
4
Play: Press to initiate playback or to resume playback after Pause has been
pressed.
5
Pause: Press this button to momentarily pause playback. To resume playback,
press the button again. If a CD is playing, the sound will be muted.
6
Stop: Press this button to stop the disc currently being played or to exit program
mode (see page 11 for complete information).
7
Skip/Search (Previous): Press this button to move backward through the music
tracks on a CD disc. Keep the button pressed to search backward at one of the
available speeds.
8
Skip/Search (Next): Press to move forward through the music tracks on a CD.
Keep the button pressed to search forward at one of the available speeds.
9
Display Dimmer
:
Press this button to reduce the brightness of the Information
Display by 50% or to turn the display off completely in the following order: FULL
BRIGHTNESS HALF BRIGHTNESS OFF FULL BRIGHTNESS.
Important Note
:When the unit is turned off (to Standby), pressing the
Play
button
4 j on the front or on the remote will automatically turn on the player and start
playback.
1Main Information Display
2Power On/Off (Standby) and Status Mode Indicator
3Open/Close
4Play
5Pause
6Stop
7Skip/Search (Previous)
8Skip/Search (Next)
9Display Dimmer
HD990 harman/kardon

6
HD 990 Rear Panel Connections
Digital Output: Connect this jack to the coaxial or optical digital input of an external
digital-to-analog converter for direct access to the digital signals of the CD player or the
external digital audio source. DO NOT connect this jack to the standard audio inputs of
any device.
1Audio Outputs: Connect these jacks to the CD audio inputs of your receiver, surround
processor or preamplifier. If your amplifier features balanced XLR inputs, you may use
the XLR outputs instead. Sound quality via balanced connection is usually more dynamic,
with even better signal-to-noise ratio. Pin configuration for the XLR Outputs: Pin 1 is
Ground, Pin 2 is Plus/Hot, Pin 3 is Minus/Cold.
2Remote Control Input: Connect the output of a remote infrared sensor or the remote
control output of another compatible Harman Kardon product. This will enable the remote
control system to operate even when the front panel remote sensor is blocked. It will also
allow use of the CD player with optional, external control systems.
3Remote Control Output: Connect this jack to the input of another compatible
Harman Kardon remote-controlled device to have the remote sensor on the CD player
provide signals to other products.
4AC Power Cord: Connect this plug to an AC outlet. If the outlet is switch-controlled,
make certain that the switch is in the On position.
5Coaxial and Optical Digital Inputs: Connect these jacks to the coaxial or optical
digital output of an external audio source. This will enable you to have the digital-to-
analog conversion of that source done by the highgrade audiophile digital-to-analog
convertors in the HD 990 rather than the (older ones) in the external source, for better
audio quality.
6HRS-Link Output: The special High-Resolution Synchronization Link cable (optional)
connects to the HRS jack on the matching HK 990 amplifier (or other compatible HK
amplifiers) to attain an even higher quality of sound. You need only connect the HRS-Link
cable for complete synchronization and audio. No further cable is necessary.
Digital Output
1Audio Outputs
2Remote Control Input
3Remote Control Output
4AC Power Cord
5Coaxial and Optical Digital Inputs
6HRS-Link Output
HD990 harman/kardon

7
HD 990
HD 990 Remote Control Functions
aPower Off
bPower On
cNumeric Controls
dProgram Button
eClear Button
fRepeat Button
gRepeat A ›B Button
hSkip Buttons
iSearch Buttons
jPlay/Pause Button
kStop Button
l+10/–10 Buttons
mRandom Button
nTime Button
oCheck Button
pOpen/Close Button
qDisplay Button
rFolder Buttons
sSource Button
tInfo Button
a
Power Off
:Press this button to put the unit in the Standby mode.
b
Power On:
Press this button to turn on the CD player. Note that in order for the
Power On button to operate, AC power must be applied to the unit, and the
Status Mode
Indicator
2should glow orange (see page 9 for more information). The unit will also
turn on when the Play 4jor Open/Close 3pbutton is pressed.
cNumeric Controls: Press these buttons to select a specific track on a disc. The unit
will immediately search for the track and begin to play it. For tracks 1 through 9 on a disc,
you need only press the desired number. For tracks 10 and above, the second and third
digit of the number must be entered within two seconds of the first digit. (See page 9 for
more information.) These buttons are also used to enter track numbers into the memory
for pre-programmed play lists. (See page 11 for complete information on programming
the CD player.)
dProgram Button: Press this button to begin the process of programming the CD
player to play the tracks on a disc in a specific order. Once the button is pressed, enter
each of the desired track numbers in quick succession using the Numeric Controls button
c. When you have entered the tracks to be played, press the Play button jto begin
the programmed sequence. (See page 11 for complete information on programming the
CD player.)
e
Clear Button
:Press this button to remove selected or all tracks from the
programmed sequence. (See page 11 for complete information on programming the CD
player.)
fRepeat Button: Press this button once to repeat only the track that is currently being
played, and note that the Repeat and One indicators will light in the Information Display.
Press the button a second time so that the Repeat and All indicators are illuminated to
repeat all tracks on the disc. (See page 12 for more information on Repeat Play.)
g
Repeat A
-
B Button
:Press this button to repeat a segment of the disc. Press the
button once to mark the start of the portion to be repeated. Press it again at the end of
the desired sequence. The marked passage will play continuously until the Stop button
kis pressed. (See page 12 for more information on Repeat Play.)
hSkip Buttons: Press one of these buttons to move to the next track ·, or to
move back to the previous track ‡fi (see page 10).
iSearch Buttons: Press one of these buttons to search forward —or
backward‚through a disc to locate a particular portion of the selection being
played. Holding the buttons pressed for some seconds will increase the search speed
(see page 10).
j
Play/Pause Button
:Press this button to start the playback of a CD. If the CD
drawer is open, pressing this button will automatically close the drawer. Press this button
once during playback to momentarily stop a disc. When the button is pressed again, the
disc will resume play at the point it was stopped.
kStop Button: Press this button to stop the disc currently being played or to escape
from the program mode (see page 11 for complete information).
l
+10/–10
Buttons: Press the +10 button to move to the 10th track after the current
track playing. Press the –10 button to move to the 10th track before the track currently
playing.
mRandom Button: Press this button to have all of the tracks played in a random order.
(See page 9 for more information.)
nTime Button: Press this button to select the time display. In normal operation, the
display will show the running time of a track being played. Press the button once to check
the time remaining for the track in play. Press the button a third time to view the elapsed
time for the CD being played, and a last time for the total play time remaining for the disc
in play (see page 10).
oCheck Button: Press this button to check the order of tracks programmed into the
CD player’s memory. (See page 11 for complete information on programming the CD
player.)
p
Open/Close Button
:Press this button to open or close the disc drawer. The drawer
may also be closed by pressing the Play button 4jor by gently pressing the edge
of the drawer. However, we do not recommend pushing the drawer, as damage to the
transport mechanism may result.
qDisplay Button: Press this button once to dim the front panel display to half
brightness. Press it again to turn the display lights off completely. Another press will
return the display to normal brightness.
r
Folder Buttons
:Press the Folder + button to move to the next folder with MP3
data, and the Folder – button to move to the previous folder with MP3 data.
sSource Button: Press this button to switch between the CD player’s output and the
output of other sources connected to one of the digital inputs 5(see page 10 for more
information).
tInfo Button: Pressing this button consecutive times shows the different CD text
information available on a CD, or ID3 and other information available on a disc with MP3
data. To return to normal Track number/Time indication, press the Time button n. (See
page 10 for more information.)
Remote Control Functions
a
t
qb
n
r
k
i
g
e
s
p
l
h
m
o
j
f
d
c
HD990 harman/kardon

HD 990
9
Operation
Operation
Loading and Unloading Discs
To load a disc, first turn the unit on (if it is not already) by pressing the
Power Switch
2on the front panel or the
Power On
button bon the remote, then press the
Open/
Close
button 3p, taking care to make certain that the space in front of the drawer is
not obstructed. When the unit is turned off (to Standby), pressing the
Play
button 4 j
on the front or on the remote will automatically turn on the CD player and start playback.
Also, pressing the
Open/Close
button from Standby switches on the player directly and
opens the drawer.
Load the disc in the tray with the printed (label) side facing up. Make certain that the
disc is centered in the tray. Either 12cm (5") or 8cm (3") discs may be used. When an
8cm disc is played, it should be carefully centered within the smaller ridges inside the
cassette drawer.
To retract the drawer back into the player after loading a disc, press the
Open/Close
button 3p. When the drawer is closed the display will indicate the total number of
tracks on the disc and the total running time of the disc.
The drawer will also close when the
Play
button 4j is pressed. The drawer will
close and the disc will start playing the first track.
To remove a disc from the player, press the
Open/Close
button 3p. The drawer will
open, allowing the disc to be removed.
Disc Handling Notes: When loading or unloading discs, it is best to hold them by
the edges. While compact discs are very reliable, rough handling may damage them.
Avoid scratching the bottom (non-printed) side of discs, or any handling that will leave
fingerprints.
To avoid damage to the disc and player, always seat discs so that they are centered in
the tray. Do not lift the player while the disc tray is opening or closing, as this may cause
the disc to unseat from the tray and possibly jam.
Normal Play
To play a disc, first turn the HD 990 on using the
Power Switch
2on the front panel or
the
Power On
button bon the remote control. When the unit is turned off (to Standby),
pressing the
Play
button 4jon the front or on the remote will automatically turn on
the CD player and start playback.
To load or change a disc, open the disc drawer by pressing the
Open/Close
button 3
p. Place a disc in the tray following the instructions shown above.
Pressing the Open/Close button once a disc has been carefully seated will close the
disc drawer while the message “Closing” will appear in the information display. As soon
as the tray is closed the display will show the message “Reading” while the table of
contents (TOC) of the disc is read. Note that particularly with CD-RW discs this tracking
may take some time due to the reflectibility and data structure being different from
normal discs. Afterward, the information display will show the total number of tracks
and the total running time of the disc. Note that with MP3 CDs, the total running time
will not be shown.
The drawer will also close when the
Play
button 4jis pressed. The drawer will
close and the disc will start playing the first track.
To play all of the tracks on the disc in order, press the
Play
button 4j . A play symbol
›will appear in the Main
Information Display
1, as well as indication of track number
and time elapsed.
To play all of the tracks in random order, press the
Random
button C. The Random
indicator will light when that mode is in use. Random can be activated also while a track
is playing. When Random is activated while programmed play is in use (see page 11), all
programmed tracks will be played in random order.
You may also select a specific track by pressing the
Skip
buttons 7huntil the
desired track number is displayed (see page 10). The track may also be selected directly
by entering the track number via the
Numeric Controls
c, simply enter the track
number by pressing the buttons that correspond to the desired track. Note that when
a two- or three-digit track number is being entered, the second and third digit of the
number must be pressed within two seconds of the first digit. After the track is selected,
press the
Play
button 4j.
While the disc is playing, the track being played will show as a number in the middle of
the display just below the word “Track.” The elapsed time of the track being played will
also appear in the display. As a disc plays, the track numbers will change, and the time
will reset to 00:00 at the start of each new track.
To momentarily pause the play of a disc, press the
Pause
button 5j. Note that a red
pause indication
||
will appear in the display to remind you that the disc is paused. Press
either the
Play
button 4jor the
Pause
button 5jto resume normal play.
To stop the disc, press the
Stop
button 6k. When the Stop button is pressed the
display again will show the total number of tracks and total running time of the disc.
To remove a disc from the player, press the
Open/Close
button 3p. To prevent dirt
and dust from entering the unit, do not leave the disc tray open.
To place the unit in a Standby mode, press the P
ower Switch
2on the front panel or
the
Power Off
button aon the remote. The display will show a “Standby” message
for a moment and the
Status Mode Indicator
will glow orange, indicating that the unit
is off, but ready to accept a Power On command from the remote. If the disc drawer
is open, it will automatically close when the unit is placed in the Standby mode. This
ensures that the unit will not be harmed by dust, dirt or inadvertent damage to the
drawer mechanism.
Note that the unit is not removed from AC main power when it is in the Standby mode but
its power consumption is reduced to a low value. To remove the AC power completely
from the unit its AC
Power
Cord 4must be plugged into a switch-controlled AC outlet
that is turned off. We recommend using the switched AC outlet on the rear side of a
receiver or amplifier. When that AC outlet will be turned on, the HD 990 will always turn
to the Standby mode even if it was on before the AC power was removed.
Display Dim
In some situations, it may be desirable to reduce the brightness of the display or to turn
it off completely. To do this, press the
Display
button qon the remote or the Display
Dimmer button 9on the main unit to dim the display to half brightness. Press it again
to turn the display off. A third press will return the display to normal level.
Labeled
Surface
A
_
BAUTO
MINSEC
TRACK HOUR
HD990 harman/kardon

HD 990
10
Operation
Time Display
The CD player’s time display is capable of showing a wide range of information about
a CD.
In normal operation the display will show the total running time of a CD after the disc is
first put in the unit. When the disc is played, the display will show the running time of a
track in play. Each time the track changes, the time display will reset to 00:00 and
begin to increase again as the new track plays.
To view the time remaining on an individual track, press the
Time
button non the
remote once. The display will now show the time left in the track in play, and a “–” will
light in front of the time display as a reminder of the display’s status.
To view the elapsed time of the disc currently playing, press the
Time
button n
again.
To view the total time remaining to play on the disc, press the
Time
button nagain, a
number greater than the formerly shown track remaining time (except the last track of
the disc is played) will appear in the display, again with a “–” in front.
When the Time button is pressed again the display will return to show the running time
of the track in play.
Note
: When a program is played (see page 11), all time modes are selectable, too, except
the total time remaining on the disc.
The Time mode is not available when playing back discs containing compressed MP3
data.
Disc Info
The HD 990 is able to show CD-text information from CD discs, as well as ID3 tag and
other information from discs containing MP3 data. Please note that not all CDs contain
CD-text. In that case, the Main Information Display will show “No CD-Text” and will
return to the Time mode previously selected. If you play back a CD that contains CD-text
information the Text indicator will light in the
Information display
1. During play, the
artist name, track name and album name can be made visible on the
Main Information
Display
1by pressing the
Info
button tseveral consecutive times. Each press of
the
Info
button twill show the next line of information. If the text is longer than 12
characters, the text will scroll continuously from right to left on the
Main Information
Display
1.
If you play a disc with MP3 data, the file name, the data rate (constant bit rate CBR and
variable bit rate VBR) and folder/root name can be made visible on the
Main Information
Display
1by pressing the
Info
button tseveral consecutive times. If ID3 tag
information is included in the MP3 data, the artist name, track name and album name
can also be made visible. Each press of the
Info
button twill show the next line of
information. If the text is longer than 12 characters, the text will scroll continuously from
right to left on the
Main Information Display
1. To return to the normal track/time
indication press the
Time
button n.
Search
If you wish to quickly scan through a disc to locate a particular passage or track, press
and hold the
Search
buttons. The
Forward Search
button — 8 iplays the
disc forward in high speed, while the
Reverse Search
button fifi7iplays
the disc backward in high speed. Holding the buttons pressed will triple the search speed
after 3 seconds. When the desired part of the disc is heard, release the
Search
button to
resume normal play speed.
Skip
To move from one track on the disc to another during play mode, press one of the Skip
buttons. Pressing the
Forward Skip
button · 8 h will move you forward
through the disc, one track at a time, while pressing the
Reverse Skip
button ‡fi
7honce will move you back to the start of the actual track (as long as >3 seconds
of the track have elapsed), and pressing it multiple times will move you back one track at
a time. Holding any Skip button pressed enables scanning quickly through all tracks on
the disc, as described previously.
The
Skip
buttons may be used when the CD player is either playing or stopped. If the unit
is stopped, the Skip buttons may be used to locate the first track to be played. The
Play
button 4jmust be pressed to begin play. If the Skip buttons are used while the unit
is already playing (as described above), the audio output will stop while the new track is
located, and play will automatically resume with the new track.
If the
Skip
buttons are pressed when program play is in use (see page 11), the unit will
move from one programmed track to another.
Folder
Discs containing compressed MP3 data often contain several directories and folders with
data. To show the name of the current directory or folder playing, press one of the
Folder
+/–
buttons once. To change to the next directory or folder, press the
Folder +
button
ragain within three seconds after the first press. For the previous directory or folder,
press the
Folder –
button r.
The CD player counts each directory and folder as one folder. The player starts to count
in the main directory, and pressing the
Folder +
button rwill start playback of the first
folder in this directory. Pressing the
Folder +
button ragain will start playback of the
second folder in the directory. Continue pressing the
Folder +
button runtil the last
folder in the directory has been played. At this time, pressing the
Folder +
button r
will start playing the next directory.
Note that the
Folder +/–
buttons do not function when the CD player is playing the tracks
of a disc containing MP3 data in random order.
+10/–10
Due to the compressed format of MP3 data, discs can contain several hundred audio
tracks. In order to find the right track within these hundreds of tracks, the CD player lets
you skip through the contents of your disc in steps of 10 tracks. Press the
+10
button
lto change to the 10th track after the track currently playing. If there are less then
10 tracks remaining on the disc, the last track will be played. Press the
–10
button l
to change to the 10th track before the track currently playing. If there are less then 10
tracks since the beginning of the disc, the first track will be played.
Input/Source Selection
A unique feature of the HD 990 is that it allows other source components to be played
back using the high-grade audiophile digital-to-analog convertors inside the CD player.
Especially source components using older and less powerful convertors will benefit from
this feature.
Connect the coaxial or optical digital output of the external source component to the
C
oaxial or Optical Digital Inputs 5
on the rear panel of the CD player.
In order to select the external source component for playback, press the
Source Button
s. The first press of this button will show the input currently played, indicated by
“Player” for the CD player, “Coaxial In” (Digital in 1) or “Optical In” (Digital in 2). Within
2 seconds, press the
Source Button
sagain until the requested source has been
selected.
Note that in order to hear the sound from the external source when connected via the
HD 990, the input of your amplifier or receiver should be the one to which the HD 990
is connected.
Important Note
: The player will only output 2-channel PCM signals. Neither multi-
channel Dolby Digital or DTS nor their 2-channel downmix signals will be.
HD990 harman/kardon

11
HD 990 Programmed Play Operation
Programmed Play
The HD 990’s advanced programming capability enables you to select certain tracks, to
preset the order in which these tracks play, and to clear specific programmed tracks after
the program was made.
Programmed play allows you to program up to 32 tracks into the HD 990’s memory. To
begin programming the CD player, make sure that the unit is in Stop mode, then press
the
Program
button d. The
Program
indicator will light in the
Information Display
1, the number 001 will blink below the Program indicator, showing the track number
selected, and PROG-01: 001 will appear in the Information Display, replacing the
track time. This indicates that you are about to program the first track.
You may now begin to enter the tracks in the order in which you wish to have them
play. To select a track on the disc, press the
Numeric
buttons ccorresponding to the
desired track. Be certain to enter the second and/or third number of two- or three-digit
numbers within two seconds after the first number was entered. You may also use the
Skip
buttons 78hto select a track. When the track is selected, press the
Program
button d. Note that the program-step indication on the right side of the
Information
Display
will change to PROG-02: 001.
You may now select another track for the next program step, following the instructions
shown above. When the track is selected, press the
Program
button dagain. Repeat
this procedure for each program step until you have completed the desired programming.
Press the
Stop
button 6konce to complete a program sequence, or press
Play
4jto begin immediate play of a program sequence. If the maximum of 99 program
steps is reached, the program-step indication at the right side of the Information Display
will go out, and the disc and track that have been programmed as the first program step
will be shown.
Once a program list has been entered, press the
Play
button 4jto begin listening
to the sequence. After the entire program has been played, the CD player will stop. As
long as the
Stop
button 6khas not been pressed twice and the
Program
indicator
remains lit, you may repeat the programmed-play sequence again by pressing the
Play
button 4j.
Editing a Program
A program can be edited even after it was completed by pressing the
Stop
button 6 k
once: Each time you press the
Program
button dthe track number and program step
number will be displayed in the programmed order, but with steady track numbers (not
blinking) in contrast to the programming mode. As soon as the track number starts
blinking (this will take 1 second), the appropriate program step number shown at the left
side is not programmed yet; now you can change the track number with the
Skip
buttons
78hor the
Numeric
buttons cas described above and add it to the program
list by pressing the Program button d.
Pressing the
Stop
button 6ktwice will return to normal mode and the
Program
indicator will go out, but the program will stay in memory and can be recalled easily by
pressing the
Program
button. But pressing the
Clear
button e(see below) or opening
the disc drawer by pressing
Open/Close
3p, will erase the program information
from the unit’s memory.
Checking Program Contents
To check the contents of a program while the unit is stopped at first note that the
Program
indicator is lit (otherwise press
Program
) and the program step indication PROG-01:
is not lit (otherwise press
Stop
once). Each time the
Check
button ois pressed now,
the Information Display will step through each of the programmed tracks. To cancel the
check mode press the
Stop
button twice.
Clearing Programs
To clear a single track from the program list, press the
Program
button duntil the
track to be deleted from the program sequence appears in the
Information Display
1.
When the track number appears, press the
Clear button
eonce, the track selected
will be deleted and the track number will be replaced by the next programmed one. Now
you can delete that track too with the Clear button or press the
Stop
button 6kand
again the
Program
dbutton to select lower track numbers to be deleted.
When the unit is stopped and the program step indication PROG-01: 001 is not
lit (otherwise press
Stop
once), but the
Program
indicator is still lit (otherwise press
Program
d) you may clear the entire contents of a program by pressing the
Clear
button e.
Important Note
:When you’ve pressed the
Program
button d(once or several times)
and the track number on the right starts blinking, the appropriate program step number
(e.g. PROG-02:008) shown at the left display side is not programmed yet. Do
not continue to press the Program button now, otherwise the track selected will be
memorized too. If you´re in doubt, press
Stop
button 6kand start the procedure
again with
Program
d.
Important Note
:Tracks programmed as described above can be played repeatedly too.
When you press
Repeat
fonce after a program is created (the
Program
indicator must
be lit, otherwise press
Program
) and the program is played, the Repeat 1 indicator will
light and the track currently playing will be repeated continuously. If
Repeat
is pressed
twice, “Repeat All” will be displayed, all programmed tracks will be played subsequently
and the sequence will be repeated continuously until the Stop button is pressed.
HD990 harman/kardon

12
HD 990 Repeat Play Operation
Repeat Play
The HD 990’s programming system enables you to repeat either a single track, the entire
disc (respectively all programmed tracks) or a specially programmed passage that you
select.
Repeat One Track
To repeat the track in play, press the
Repeat
button fonce. The
Repeat
and 1
indicators will light and the track will continue to play over and over again continuously. If
the track is changed by pressing the
Skip
buttons 78hwhile the Repeat function
is in use, the newly selected track will be played normally. To stop the repeat play, press
the
Stop
button 6kor press the
Repeat
button funtil the
Repeat
indicator goes
out.
Repeat All Tracks
To repeat all of the tracks on a disc during play mode, press the
Repeat
button funtil
the
Repeat
and All indicators light up. When you see these indicators, the entire disc or all
programmed tracks will play through to the end, and then start again from the beginning.
The disc will play continually until the
Stop
button 6kis pressed.
Repeat A-B
The CD player may be programmed to repeat any section within a track, or a complete
passage or program that includes material in a series of tracks.
To program the unit for A-B play, first locate the point on the disc where you wish to
begin the repeated section. At that point, press the
Repeat
A-B
button g. The
Repeat
indicators will light in the
Information Display
and an A- indicator to show that the
program process has started. Let the disc continue to play or press the
Search
—
button 78hor
Skip
· button 78hon the front or remote until
you have reached the end of the section to be repeated. When the end point is reached,
press the
Repeat
A-B
button gagain. Note that the
Repeat
and
A-B
indicators will
now be illuminated.
Once the
Repeat
A-B
button gis pressed for the second time to complete the
programming, the CD player will automatically go to the beginning of the selected
passage and continue to play the section over and over.
To resume normal play press the
Repeat
A-B
button gagain. The
Repeat
and
A-B
indicators will go out, and the rest of the disc will play normally.
Important Note
: Tracks programmed as described in “Programmed Play” on page
11 can be repeated too. When you press
Repeat
fonce after a program is created
(the
Program
indicator must be lit, otherwise press
Program
d) and the program is
played, the Repeat 1 indicator will light and the track currently playing will be repeated
continuously. If
Repeat
is pressed twice, Repeat All will be displayed, all programmed
tracks will be played subsequently and the sequence will be repeated continuously until
Stop
6kis pressed.
HD990 harman/kardon

13
HD 990 Troubleshooting
Symptom Cause Solution
No lights on front panel No AC Power• Make certain that AC power cord is plugged into a live outlet.•
Remote does not appear to operate Power switch turned off•
Weak batteries•
Blocked sensor•
Turn on Power switch.•
Install fresh batteries, observing polarity indications.•
Remove obstructions from the front panel sensor or connect a remote•
sensor to the
Remote In
jack on the rear panel.
Front panel lights, but CD does not play Disc is upside down• Reload disc with label side facing up.•
Play indicator lights, but no sound is heard Poor connections•
Wrong source connections•
Make certain that connections are secure and made to the correct•
(e.g., CD) input.
Select CD source on receiver or preamp.•
Sound skips or stutters during play Disc may be damaged•
Surface vibrations•
Try another disc.•
Isolate the unit from vibration by placing it on a firm surface or move•
it further away from the speakers.
Sound is continually distorted Incorrect input• Make certain that the analog•
Audio Outputs
1of the CD player
are connected to a line-level audio input, NOT to a digital audio or
phono input.
“Error” lights up continuously in the display Various• Turn the unit off and on again. If the problem persists, turn the AC•
power to the CD player off and on.
Troubleshooting
HD990 harman/kardon

HD990 harman/kardon

5
5
4
4
3
3
2
2
1
1
E E
D D
C C
B B
A A
22.5792MHz
TIMER0
GPIO
GPIO
SPORT1 TX
SPORT0 TX
SPI Master
TIMER1
FLASH
512*8Kb
SDRAM
4*16Mb
HRS-LINK
BLOCK DECODE
MP3
SRC 24/176.4
ADSP-BF532SBSTZ400
HD990 Block Diagram Architecture
Receiver CS8416 DIGITAL IN
Loader
Supply power
for all boards
FLASH
512*8Kb
DVD22
SMPS
Board
33.8688MHz
VIA Servo
Chipset
VT7208
Motor
Driver
BA5888FP
SDRAM
4*16Mb
SF-HD850G
ATAPI
BUS
DACs
2*AD1955
Transparent
latch
OUT L
OUT R
DATA
BCLK
LRCLK
MCLK
Analog
Stage
BLCK
I2S BUS
DATA1
LRCLK
SPORT0 RX
DIGITAL OUT
Analog
Stage
XLR
OUTPUT
Analog
Stage
Analog
Stage XLR
OUTPUT
FRONT PANEL BOARD
Micro Controler
EM78P156ELM
Key Pad
VFD +
LC75711NE
(Driver)
Remote IR
IR In
IR Out
IR In/Out Block
DATA2
NET "OUTTRAY", "INTRAY"--17mA;
NET "A+5V"--100mA;
NET "+5VSTBY"--100mA;
NET "A+14.5V", "A-14.5V"--100mA;
NET "D+5V", "M+5V"--600~700mA;
NET "D+3.3V"--200~300mA;
NET "LDOCD",
"LDODVD"--30-40mA.
HD990 1.1
HD990 Block Diagram Architecture
A3
11Friday, June 25, 2010
Title
Size Document Number Rev
Date: Sheet of
AC Power cord
HD990 harman/kardon

HD990 Electrical Parts List
Part Number Qty Ref. Designator
MAIN PCB
Resistors
0157R3E000J Resistor, chip 0805-0Ω±5% 16
R149 R154 R167 (R170) R175 (R191) R194 R197
R201 R235 R236 R241 R253 R272
R273 R274
0157R3E1R0J Resistor, chip 0805-1Ω±5% 4 R204 R205 R206 R207
0157R3E220J Resistor, chip 0805-22Ω±5% 3 R148 R254 R256
0157R3E330J Resistor, chip 0805-33Ω±5% 2 R141 R247
0157R3E470J Resistor, chip 0805-47Ω±5% 17
R90 R91 R92 R95 R97 R102 R110 R125
R126 R127 R128 R130 R131 R136 R137
R268 R275
0157R3E750J Resistor, chip 0805-75Ω±5% 1 R85
0157R3E101J Resistor, chip 0805-100Ω±5% 14 R88 R94 R96 R99 R150 R153 R162 R163 R164 R183
R184 R215 R216 R225
0157R3E151J Resistor, chip 0805-150Ω±5% 1 R265
0157R3E241J Resistor, chip 0805-240Ω±5% 5 R83 R165 R180 R181 R220
0157R3E271F Resistor, chip 0805-270Ω±1% 1 R109
0157R3E391F Resistor, chip 0805-390Ω±1% 3 R117 R166 R214
0157R3E511F Resistor, chip 0805-510Ω±1% 2 R219 (R224)
0157R3E561J Resistor, chip 0805-560Ω±5% 5 R186 R187 R210 R259 R260
0157R3E102J Resistor, chip 0805-1KΩ±5% 6 R115 R138 R139 R140 R208 R239
0157R3E152J Resistor, chip 0805-1.5KΩ±5% 2 R178 R189
0157R3E202J Resistor, chip 0805-2KΩ±5% 2 R246 R248
0157R3E222J Resistor, chip 0805-2.2KΩ±5% 4 R157 R193 R195 R199
0157R3E272J Resistor, chip 0805-2.7KΩ±5% 7 R84 R211 R213 R226 R263 R212 (R227)
0157R3E272J Resistor, chip 0805-2.7KΩ±5% 1 R264
0157R3E332J Resistor, chip 0805-3.3KΩ±5% 1 R93
0157R3E472J Resistor, chip 0805-4.7KΩ±5% 8 R112 R118 R142 R179 R190 R222 R244 R267
0157R3E512J Resistor, chip 0805-5.1KΩ±5% 1 R202
0157R3E622F Resistor, chip 0805-6.2KΩ±1% 1 R249
0157R3E822F Resistor, chip 0805-8.2KΩ±1% 3 R200 R203 R266
0157R3E103J Resistor, chip 0805-10KΩ±5% 35
(R86) R87 R89 R114 R120 R122 R123 R132 R133
(R134) R135 R143 R144 R145 R146 R147 R152 R155
R156 (R161) R168 R171 R173 R176 R185 R217 R218
R221 R223
R232 R238 R242 R243 R245 R276
0157R3E1182F Resistor, chip 0805-11.8KΩ±1% 2 R255 R257
0157R3E223J Resistor, chip 0805-22KΩ±5% 2 R182 R192
0157R3E333J Resistor, chip 0805-33KΩ±5% 2 R250 R251
0157R3E473J Resistor, chip 0805-47KΩ±5% 2 R196 R198
0157R3E104J Resistor, chip 0805-100KΩ±5% 4 R151 R169 R172 R174
0157R3E105J Resistor, chip 0805-1MΩ±5% 2 R177 R188
0157R4E560J Resistor, chip 1206-56Ω±5% 4 R10 R31 R51 R72
0157R4E101F Resistor, chip 1206-100Ω±1% 4 R9 R30 R50 R71
0157R4E331F Resistor, chip 1206-330Ω±1% 24
R1 R2 R7 R13 R18 R19 R22 R23 R28 R34
R39 R40 R42 R43 R48 R54 R59 R60 R63
R64 R69 R75 R80 R81
0157R4E511F Resistor, chip 1206-510Ω±1% 4 R12 R33 R53 R74
0157R4E681F Resistor, chip 1206-680Ω±1% 8 R4 R16 R25 R37 R45 R57 R66 R78
0157R4E821F Resistor, chip 1206-820Ω±1% 4 R5 R26 R46 R67
0157R4E222F Resistor, chip 1206-2.2KΩ±1% 8 R6 R15 R27 R36 R47 R56 R68 R77
0157R4E272F Resistor, chip 1206-2.7KΩ±1% 10 R8 R11 R21 R29 R32 R49 R52 R62 R70 R73
0157R4E153F Resistor, chip 1206-15KΩ±1% 7 R3 R24 R44 R65 R158 R159 R160
0157R4E473F Resistor, chip 1206-47KΩ±1% 12 R14 R17 R20 R35 R38 R41 R55 R58 R61
R76 R79 R82
0157R4E475J Resistor, chip 1206-4.7MΩ±5% 1 R116
0157R8EP3304 Resistor, thick film chip network 0603-33Ω*4 ±5% 7 RN2 RN3 RN4 RN5 RN6 RN7 RN8
Capacitors
0154CS3E4P7N50V Capacitor, multilayer cer, chip 0805-4.7P NPO±5%/50V 1 C61
0154CS3E100N50V Capacitor, multilayer cer, chip 0805-10P NPO±5%/50V 6 (C62) C63 (C75) (C76) (C77) (C79)
0154CS3E150N50V Capacitor, multilayer cer, chip 0805-15P NPO±5%/50V 2 (C152) (C160)
0154CS3E470N50V Capacitor, multilayer cer, chip 0805-47P NPO±5%/50V 2 C146 C187
0154CS3E101N50V Capacitor, multilayer cer, chip 0805-100P NPO±5%/50V 5 C94 C96 C121 C122 C126
0154CS3E121N50V Capacitor, multilayer cer, chip 0805-120P NPO±5%/50V 1 C141
0154CS3E201N50V Capacitor, multilayer cer, chip 0805-200P NPO±5%/50V 1 C147
0154CS3E391N50V Capacitor, multilayer cer, chip 0805-390P NPO±5%/50V 2 C89 C90
0154CS3E471N50V Capacitor, multilayer cer, chip 0805-470P NPO±5%/50V 2 C92 C93
0154CS3E681N50V Capacitor, multilayer cer, chip 0805-680P NPO±5%/50V 1 C98
Description
HD990 harman/kardon

Part Number Qty Ref. Designator
Description
MAIN PCB
0154CS3E102X50V Capacitor, multilayer cer, chip 0805-102 X7R ±10%/50V 3 C56 C139 C149
0154CS3E332X50V Capacitor, multilayer cer, chip 0805-332 X7R±10%/50V 3 C142 C143 C150
0154CS3E392X50V Capacitor, multilayer cer, chip 0805-392 X7R±10%/50V 1 C148
0154CS3E472X50V Capacitor, multilayer cer, chip 0805-472 X7R±10%/50V 1 (C157)
0154CS3E103X50V Capacitor, multilayer cer, chip 0805-103 X7R±10%/50V 5 C70 C82 C100 C101 C140
0154CS3E223X50V Capacitor, multilayer cer, chip 0805-223 X7R±10%/50V 1 C57
0154CS3E273Y50V Capacitor, multilayer cer, chip 0805-273 Y5V-20+80%/50V 1 C145
0154CS3E473X50V Capacitor, multilayer cer, chip 0805-473 X7R±10%/50V 1 C95
0154CS3E104Y50V Capacitor, multilayer cer, chip 0805-104 Y5V+80-20%/50V 103
(C45) C46 C47 (C48) (C49) C50 C51 C52
(C53) C54 (C55) (C58) C59 C60 C68 (C72)
(C73) (C74) C81 (C83) (C84) (C85) C86 (C87) C88
(C91) C97 (C99) (C103) (C104) (C105) (C106) (C107)
C108 (C109) (C110) (C111) (C112) (C113) (C114)
(C115) (C116) (C117) (C118) (C119) (C120) C123
C124 C125
(C127) (C128) (C129) C130 (C131) (C132) (C133)
(C134) (C135) (C136) (C137) C138
C144 C151 C153 C154 (C156) C161 C164 C165 C166
C188 C189 C65 C66 C67 C71
C190 C191 C192 C193 C194 C195 C196
C197 C198 C199 C200 C201 C202 C203
C204 C205 C206 C207 C208 C209 C210
C211 C212 C213 C214 C215 C216
0154CS3E105Y16V Capacitor, multilayer cer, chip 0805-105 Y5V-20+80%/16V 6 (C69) C80 C158 C159 C162 C163
0154CS3E475Y16V Capacitor, multilayer cer, chip 0805-475 Y5V+80-20%/16V 1 C155
0154CS4E104X50V Capacitor, multilayer cer, chip 1206-104 X7R±10%/50V 24
C1 C2 C6 C8 C9 C10 C11 C13 C14 C15 C16 C21 C23
C24 C28 C30 C31 C32 C33 C35
C36 C37 C38 C43
0134CLDE10U16VC Capacitor, AL.electrolytic CD110-10UF/16V 5*11 1 CE53
0134CLDE47U25VC1 Capacitor, AL.electrolytic CD110-47UF/25V 5*11 20
CE1 CE2 CE3 CE4 CE5 CE6 CE7 CE8 CE9 CE10
CE11 CE12 CE13 CE14 CE15 CE16 CE17 CE18 CE48
CE50
0134CLDE47U50VCD Capacitor, AL.electrolytic CD110-47UF/50V 6.3*12 11 CE19 CE21 CE22 CE23 CE24 CE25 CE26 CE27
CE28 CE29 CE30
0134CLDE220U10VD Capacitor, AL.electrolytic CD110-220UF/10V 5*12 25
CE33 CE41 CE43 CE46 CE49 CE20 CE31 CE32 CE34
CE35 CE36 CE37 CE38 CE39 CE40 CE42 CE44 CE45
CE57 CE58 CE59 CE60 CE61 CE62 CE52
0134CLDEH470U35VG Capacitor, AL.electrolytic 105℃(M) CD288H-470UF/35V 10*20 2 CE47 CE51
0100CDDLE33263V Metallized Polyester Film Capacitor 332/63V 4 C183 C184 C185 C186
0100CDDLE10463V Metallized Polyester Film Capacitor 104/63V 4 C167 C173 C176 C181
0100CDDLE68163V Metallized Polyester Film Capacitor 681/63V 8 C168 C169 C171 C174 C178 C179 C180
C182
0100CDDLE22250V Metallized Polyester Film Capacitor 222/50V 4 C170 C172 C175 C177
Semiconductors
0141DPSE5819 Schottky Rectifier, Rohm 5819 1A SCHOTTKY, SS14 1 D22
0141DPSELL4148 Diode LL4148, DO-213AA 14 D1 D2 D3 D4 D5 D6 D7 D8 D9 D10 D11 D12 D13 D21
0141DPSE30BQ040 Schottky Rectifier, IR 30BQ040 3A, SMC 4 D14 D15 D16 D20
0141DFSE019 LED, BRIGHTEK 1SA1206V31C0CAE1(Red), SMD 3 D17 D18 D19
0141DWSE6V2 Zener diode 6.2V 0.4W, SMD 1 DZ1
0142QSE123 MOSFET, DIODES BSS123, SOT-23 1 MQ1
0142QSE1035 Transistor,Panasonic 2SA1035, SOT-23 17 Q1 Q2 Q4 Q6 Q9 Q10 Q12 Q14 Q17 Q18
Q20 Q22 Q25 Q26 Q28 Q30 Q33
0142QSE2406 Transistor,Panasonic 2SC2406, SOT-23 16 Q3 Q5 Q7 Q8 Q11 Q13 Q15 Q16 Q19 Q21 Q23 Q24
Q27 Q29 Q31 Q32
0142QSE1132 Transistor, ROHM 2SB1132, MPT3 2 Q43 Q44
0142QSE1664T Transistor, ROHM 2SD1664T100R, MPT3 2 Q34 Q35
0142QSE3018 MOSFET,ROHM 2SK3018T106, MPT3 2 MQ2 MQ3
0142QDE8050 Transistor KTC8050-C/P, TO-92 2 Q38 Q39
0142QDE8550 Transistor KTC8550-C/P, TO-92 2 Q36 Q37
0142QSEBCP5616 Transistor, NXP BCP56-16, SOT223 2 Q40 Q41
0142QSEBCP5316 Transistor, NXP BCP53-16, SOT223 1 Q42
0144ICSEBF532S IC, ADI, Blackin DSP ADSP-BF532SBSTZ400,LQFP176 1 U22
0146ICE7208G IC, Via, Servo chip VT7208G, LQFP216 1 U36
0146ICEKH29LV040 IC, KH,Flash Memory KH29LV040CQC-70G, PLCC32 1 U23
0146ICE290011 IC, AMIC, Flash memory A290011TL-70, PLCC32 1 U37
ICHY57V641620ETP7 IC, Hynix, SDRAM HY57V641620ETP-7,TSOP54 1 U24
ICEM11B416256A25 IC, EliteMT, DRAM M11B416256A-25J,SOJ40 1 U38
0144ICSE5888 IC, Rohm, Actuator driver BA5888FP, HSOP-28 1 U28
HD990 harman/kardon

Part Number Qty Ref. Designator
Description
MAIN PCB
0144ICSE1955 IC,ADI, DAC AD1955, SSOP28 2 U11 U3
0146ICE7414 IC, Philips, Hex inverting Schmitt
trigger 74HCT14D,SOIC14 1 U39
0144ICSE74LVC125 IC, TI, quadruple Bus Buffer Gate SN74LVC125ADR, SOIC14 1 U12
0146ICESN74LV74DR IC, TI, D-Type Trigger SN74LV74ADR, SOIC8 1 U40
0146ICE74HCT245 IC,TI,TTL input buffer SN74HCT245PWR,TSSOP20 1 U26
ICESN74LVC244APWR IC, TI, Octal Buffers/Drives SN74LVC244APWR, TSSOP20 1 U41
0144ICDEPC817C IC, Sharp, Photoelectric Coupler PC817C,DIP4 1 U20
0144ICSE1117 IC, AAC, LDO AZ1117H-ADJ, SOT-223 2 U30 U32
0144ICSEA11173V3 IC, AAC, LDO AZ1117H-3.3, SOT-223 1 U29
0144ICSELM393 IC, ST, Comparator LM393, SOP8 1 U27
0144ICSETL072CD IC, TI, opamp TL072CD, SOIC8 2 U8 U4
ICSETPS73033DBVR IC, TI, LDO TPS73033DBVR, DBV5 1 U17
0144ICSE9022 IC, NS, Vacuum Fluorescent Display
Filament Driver LM9022, SO8 1 U25
0144ICSE3522 IC, AAT, Reset monitor AAT3522, SOT_23 1 U31
0146ICECS8416CZZ IC, Cirrus Logic, Digital Audio Interface
Receiver CS8416-CZZ, TSSOP28 1 U10
0146ICEAD8663ARZ IC, ADI, opamp AD8663ARZ, SOIC8 3 U33 U34 U35
0146ICEICS83905AGT IC, ICS, Crystal Interface-TO-
LVCMOS/LVTTL Fanout Buffer ICS83905AGT, TSSOP16 1 U14
0144ICSE2134 IC, TI, opamp OPA2134UA, SOIC8 2 U2 U6
0144ICSE275 IC, ADI, opamp OP275GS, SOIC8 2 U1 U5
ICESN65LVDS2DBVR IC, TI, Differential Receiver SN65LVDS2DBVR, DBV5 1 U15
Miscellaneous
0113LZESB100 Bead, chip 0805-100Ω±5% 3 R98 R100 R101
0113LLSE007 Inductor, multilayer cer, chip 0805-10UH, SMD 2 L5 L6
0113LLSE362 Inductor,Weifengda WBR453232-220K-R, SMD1812 2 L2 L1
0113LLDE081 Inductor, Coilcraft WB1010-1, DIP6 3 T1 T2 T3
0113LLDE081 Inductor, Coilcraft WB1010-1, DIP6 2 T4 T5
0113LLSE382 Inductor, TDK 1812-47UH, SMD1812 2 L4 L3
0113LZESC100 Bead, chip, 1206-100Ω, SMD 14 FB1 FB2 FB3 FB4 FB5 FB6 FB7 FB8 FB9 FB10 FB11
FB12 FB13 FB14
0100ZJBHQE008 Relay, HongFa HFD27/005-S(555), DIP 2 K2 K1
0100JZE33868 Quartyz Crystal Unit 33.8688MHZ-49S-20P 1 Y2
0100JZE225792A Quartyz Crystal Unit 22.5792MHz-49S-10PF ±10PPM DIP 1 Y1
0140CONDCZE121 Jack, IR in/out jack SCJ351P00XS0B00 (BLACK), In-line
Package 1 JP7
0140CONDCZE046 Jack, Audio output jack AV2-8.4-1G Antiflaming 1 JP1
0140CONDPHE000 Connector PH-2A Antiflaming 1 CN7
0140CONDPHE024 Connector PH-5A Antiflaming 1 CN3
0140CONDPHE028 Connector PH-6A Antiflaming 1 CN4
0140CONDPHE047 Connector PH-13A Antiflaming 1 CN5
0140CONS05E007 FPC connector FPC-0.5-24P with upward touch 1 CN2
0140CONS13FPC2E002 FPC connector 1.25-14P 1 CN1
0140CONDCZE808 HRS-Link Jack PCB-109 DIP 1 JP6
0140CONDDZEHDY9M4 XLR Jack HDY-9M-4 DIP 2 JP2 JP3
0502231000001 AV&Optical Jack Combined with
Toshiba optical jack TORX177PL. H-GQ+RCA1,DIP 1 JP4
0502230900001 Fiber optic Receiving Jack TORX177PL(F,T),5.0V,15Mb/s,DIP 1 JP4
0140CONDCZE800 AV/Optical Output Jack TC58-655-02G DIP 1 JP5
VFD Board
0157R3E103J Resistor, chip 0805-10KΩ±5% 1 (R415)
0157R3E203J Resistor, chip 0805-20KΩ±5% 1 (R414)
0154CS3E300N50V Capacitor, multilayer cer, chip 0805-30P NPO±5%/50V 1 (C411)
0154CS3E473X50V Capacitor, multilayer cer, chip 0805-473 X7R±10%/50V 2 (C407) ( C415)
0154CS3E104Y50V Capacitor, multilayer cer, chip 0805-104 Y5V+80-20%/50V 2 (C408 ) (C409)
0154CS3E225Y16V Capacitor, multilayer cer, chip 0805-225 Y5V-20+80%/16V 1 (C410)
0134CLDE47U16VB Capacitor, AL.electrolytic CD11X-47UF/16V 5*7 1 (CE403)
0141DPSELL4148 Diode LL4148 SMD 1 (D402)
0144ICSE75711 IC, SANYO, VFD Driver LC75711NE,QFP64E 1 (U402)
0116E1302FA VFD VFD22-1302FA 1 VFD401
0139SWQCED665A Touch switch 6*6*5(80g) 1 K408
0140CONS13AY1E011 Connector 1.25-6A(Horizontal Type) 1 (CN403)
CONS13FPC2E002 FPC connector 1.25-14P(Vertical Type and Single Contact) 1 (CN401)
HD990 harman/kardon
Other manuals for HD 990
3
Table of contents
Other Harman Kardon MP3 Player manuals